• Welcome to the new NAXJA Forum! If your password does not work, please use "Forgot your password?" link on the log-in page. Please feel free to reach out to [email protected] if we can provide any assistance.

Im too poor to lift...

Nernballs

NAXJA Forum User
Location
New Jersey
Im 18 and 90% of my cash is going to cellege funds, but i have a 2.5L xj and my paretns dont want me to spend the money on a lift... I wanted to know what everyone thinks is the next best alternative to go wheelin with out telling me im hopeless. I have a friend who wants to sell me 29 or 30 inch (i forget which size) mud terrains, and i was considering buying those as well as getting new tow points, buying a come-along or hi-lift jack, and finding or making a snorkel... any opinons or suggestions would be great... Also does anyone know where to get a snorkel kit thats not ARB and costs like $400?
 
DO like I am right now.

Gettin Married in oct so all my money is tied up till then.
But after that watch out!!!!!

2" BB for like 100bux if you search
30x9.5 at's
armor up and have fun on the little trails till you grow up!!! *L* J/K!
 
Skip the snorkel and avoid the water, you'll save a ton of money that way. $100 can get you a 2" budget boost to fit 30" tires and you'll be good to go with some basic recovery equipment. Tow points are a must. Look into swaybar disconnects as well, and you can ditch the rear one entirely. XJ's wheel well right outta the box, so with a limited mod list you will be fine.
 
you can probably skip the snorkle for a while.. i mean, how often are you planning on taking your jeep swimming?
you can go through quite a bit of water/mud without much trouble anyway, so why bother...

you can do the BB for cheap as already said.
that and a high lift jack will get you pretty far.

i wheeled stock for years and had a great time. it's amazing what these jeeps can do.
just avoid the real chunky stuff. that's where things break and if you don't have money to lift, you probably dont have money to fix.
 
i just picked up a set of RE coils for $90 shipped adn for under $250 (im doing s-10 bastard leaf packs) ill have 4 inches of lift....thats like one step above the budget lift....happy wheeling
 
FORGET WHEELING and learn how to spell College!! :laugh3:

Just kidding... Wheel it stock with the bigger MT's for now and save your $$$ for "repairs and maintenance." You'll need it. Keep it running well, otherwise all the armor and lifts in the world are worthless!!
 
get yourself some xj catalogs, i.e. quadratec and 4wd hardware. you'll fine plenty of budget boosters in those two catalogs. you can also try rocky road outfitters, i've heard they have a few good kits. 29's should fit fine, stock. they're equivalent to 235's i believe. 30's shouldn't be much more of a problem. if you have a receiver in the back, you're fine. if not look towards tow hooks. i can't recommend anything for the front, as my xj was fitted with a winch bumper when i bought it. skip the snorkel, water causes more damage than you think. hi-lift jacks are indispensible, the 48" should be fine. if you're going to use a hi-lift take a treestrap with you, chains, gloves, shovel, axe, and a shackle. stock xj's wheel good with good "shoes". Get some good tires, and the hi-lift, that will be your best cheapest route.
 
I will echo what they have all said, but I would add a few things.
I had an 89 Cherokee that I wheeled a lot. I never had 2 dimes to rub together and still lifted it. It takes creativity. For the front I used the guts from some old spa pump motors to make spacers. The cost was nothing. You could use large washers, or anything you can find for free or cheap from hardware stores. For the rear, I bought some used shackels for $20. You can use leaves from Dakotas, S-10s or other trucks/SUVs with the same width springs. I also made sway bar disco's from the stock ones by using wing nuts and a hitch pin(look at MADXJs site). Also remember that bigger tires can be fit if you dont mind some trimming back the flares and bumper ends. This mod is also free.
I enjoy being creative and finding good deals on used stuff or making my own parts out of junk or others discards. Then, when you are on the trail with those high dollar rigs and you wheel just as good as they you, you can pride yourself that YOU BUILT your Jeep.
Most of all, have fun, start small and spend the money on maintanence and recovery equiptment. No matter how big your truck, you can always find a spot that gets you stuck.

Good luck and keep reading and learning.
 
graVes14 said:
i just picked up a set of RE coils for $90 shipped adn for under $250 (im doing s-10 bastard leaf packs) ill have 4 inches of lift....thats like one step above the budget lift....happy wheeling

good luck
4" on stock control arms?
4" on stock drivetrain?
4" on stock brake lines?
4" on stock shackles?

there is a ton to look at for a complete lift... - not just the springs them selves...

what tires are you going to run with your 4" lift?
33's?
time for a new rear end
time for a steering box brace (or 4)
time for upgraded steering
time for gears
time for lockers

it all ads up buddy...

to the poster:
throw a 2" spacer and shackle lift on there, slap the used Mud Terrains on there, make some swaybar disco's and get out and have fun learning to drive...
Recovery points and armor are next.

take it from me - on 6" of lift with a ford 9 in the rear end and a hp44 sitting under the jeep waiting for welds with over 2000 into the jeep over purchase price and i have never run tires bigger than 30"
the 33's are going on with the new axles -

once you start down the "ill lift it and throw 35's on there" road - its expensive to keep your shit running....
all my work is prep work to minimise the breakage....
 
uh yeah...watch out for death wobble when you start lifting...you'll have to be sure to adjust the track bar and the LCA's

i'm looking into the Rubi X-press Budjet booster (add-a-leafs, coil spacers, shocks, and hardware.) 2 inches of lift. enough to get 31's crammed in there. (with some "minor" rubbing. you may want to unbolt the factory flares. - it'll look sortof like a chevy s-10 blazer then - with a seven slot grille)

and if you have some time, ingenuity, and a steady hand. find yourslef a dremel tool and a cut off wheel. A set of TJ flares not only look good, but they cost less, and create the same cut out clearance as a set of 400 dollar bushwackers.
 
i got a pair of 2" coil spacers brand spankin new sitting here ill let go for 25 bucks.
 
Remember: Trimming is the the cheapest way to fit bigger tires.

2" BB w/ AAL and 31's.

jeepflex1.jpg


jeepflex2.jpg
 
Ranger hit the nail squarely on the head....well defined and accurate....2" is easy and cheap....4" is a whole different game....and with a 2.5....if you put much tire on it...you are gonna need deeper gearing....
 
Bolognablake said:
Remember: Trimming is the the cheapest way to fit bigger tires.
No, NOT buying aftermarket rims is the cheapest way to run bigger tires, because on stock rims you can run 31x10.50s without trimming. However, a budget boost would make it a nicer package all around, on either 30s or 31s.

Personally, for a capable budget rig I prefer a lift in the 2" range with 30s. You can buy a set of front coil spacers for around $30 or $35 (less if you get 3/4" instead of 1-3/4"), and if you scrounge around you can probably find a discarded pair of XJ leaf springs for next to nothing. Take 'em apart, cut the bushing eyes off the end of the main leaves, and use those as add-a-leaves. That'll give you about 1-1/2" in the rear and you're good to go.

Where are you in NJ? The North Atlantic Chapter has a lot of active members around NJ and eastern PA.
 
Save some loot amd plan ahead... National Tire and Wheel had a Heckethorn 3" AAL kit, including shocks for $239 on sale. That's CHEAP! Tires are what kills ya! Start shopping for used rubber and you'll save huge! I found 4 Mickey Thompson 33" Baja Claws with 40% tread for $80. Shop around! I built a budget XJ for $1400 including the price of the vehicle - 5" lift, shocks, brake lines, tires, wheels, front driveshaft, radiator, plugs, wires, coil, front bumper, tow hooks, exhaust, paint, CB, filters, TC low kit, calipers, belt, not to mention fluids and time.... all for $1400 by shopping around for good used stuff. Sh*t, if it's a woods beater, $100 Budget Boost, whack the fenders to hell and back, fit 31" swampers! Remove sway bars, trim LCA contact points for mega-droop lower brake line mounts a few inches. Good to go!
xj_flex.jpg
 
Last edited:
Eagle said:
No, NOT buying aftermarket rims is the cheapest way to run bigger tires, because on stock rims you can run 31x10.50s without trimming. However, a budget boost would make it a nicer package all around, on either 30s or 31s.

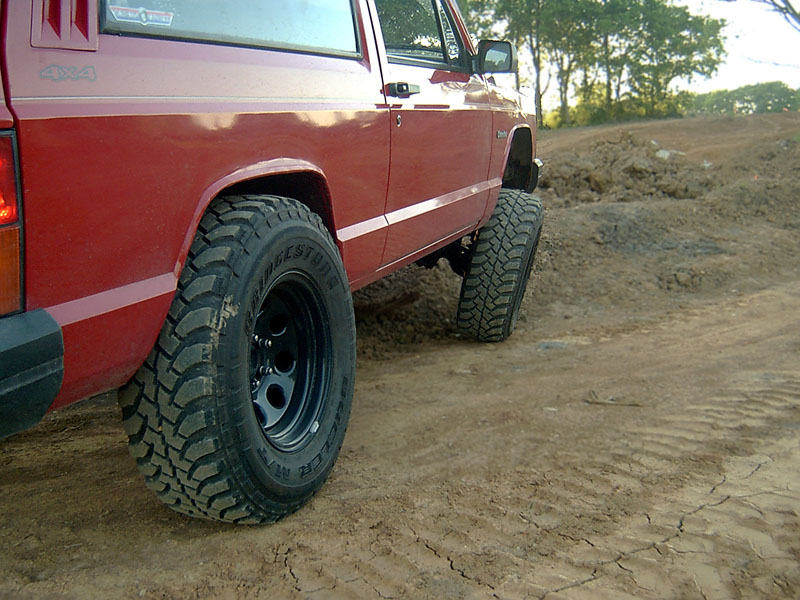
Concur - the only problem I normally have with my 88 (stock w/31's) is a little lug rub on the swaybar at full lock - apart from that, no trouble.

Of course, my Peugeot transmission is shot, and I haven't put the replacement in yet - another Peugeot, but it was free for the picking up and will give me a little more time to find something decent...

30's are no trouble on a stocker at all - I've got two 89's sitting out front on 30's at stock height. Some mild trails and dirt roads - never had a problem stuffing the tyres. I've just about got my wife talked into taking about an inch and a half of BB when I restomod her 89 later this year...

Remember, if you do more than a couple inches of lift, you'll probably need longer brake hoses up front and in back, a slip-yoke eliminator to cut driveline vibes, and larger tyres are going to want a brake upgrade (at least a late-model dual diaphragm booster) and while the 2.5 is a grunty little four-popper, deeper gears will be a good idea. Going over 31 will probably want a change of axle - Ford 8.8" or 9" or Dana 44 at least.

Keep an eye on the sale flyers - with a little luck, I can usually score 30's or 31's (BFG AT/KO) for down around $80 each. I keep a couple extra sets of wheels around now to allow me to take advantage of sales - I can get the tyres mounted and balanced loose, and just install them as needed (store in the garage or shed, off the ground, out of sunlight, and fairly dry.)

As far as fording, the key is to keep the left headlamp dry - the air inlet is right behind there. You can fake up a snorkel with hardware store parts if you're creative - I think you can find examples that have been made from ABS dryer vent plumbing with a little looking (wasn't it BillAVista that did that?)

While you're in college, take a couple basic automotive courses (if they're available, and if you haven't been wrenching for years already...) Most community colleges have lecture/lab courses you can take - the lecture course will let you learn all the theory, and the lab part has you out in the shop working on your very own junk! Kinda nice to have all the lifts and stuff available - even though I don't use impact tools if I can avoid it...

The more you know about how things work, the more you can do to make them work correctly with less. That's a large part of saving bux here!

Meanwhile, I also concur with advice previously given - if you can't afford to lift, you probably can't afford major repairs. Take it easy at first, and get your feet wet. Start with Forest Service Roads if you have access - they are usually unmaintained and will give you a chance to play in the dirt and some mud before you go out and play with anything big. Work your way up from there.

DON'T GO OUT ALONE! We all hope nothing breaks, but it sucks to be out somewhere and have it happen - and no-one to help you.

If you go to any of the events we put on out there, you might want to "right-seat" the first couple times or so - watch what people do, and don't be afraid to ask why afterwards. How else are you going to learn?

A little searching might yield a "how-to" off-road driving course - probably a wise investment. The extra driving training can't hurt, and it's another good chance to ask that favourite question - "Why?" Don't be afraid to use it - but know there are times you should wait to ask (finding a woman who understands that before you get married will make your marriage easier...)

Get a Chilton's now (don't bother with Haynes - I use them to even up my workbench) and start thinking about getting a Factory manual if you turn serious. The Chilton's will explain quite a lot - they're mainly targetted toward people like yerself. The FSM doesn't explain anywhere near as much as the Chilton's in terms of theory, but will tell you EVERYTHING you need to know for major repairs once you understand why things work the way they do. Even though they typicall run in the $80-100 range, they're money well spent - I have several.

Take your time, learn as you go (not after you break something!) and you'll have a lot more fun that way. We were all young once...

5-90
 
If you're really hellbent on throwing a snorkel on, here's a cheap and effective solution and having done it myself, it's tough to tell it's a home job, it looks sharp, and if you follow the directions, it's effective as well.
Taken from:
http://www.4wheeler.ca/index.php?showtopic=5713

My snorkel was really easy and cheap to build ($110 CAN or about $70 US ). You DO NOT need to remove the fender.

I'll post some pics and info here. My setup is almost exactly the same as ARB's. Here is a Pic of the ARB routing.

http://www.members.shaw.ca/samdog/Snorkle%...RB Design.jpg

First you decide where you want everything to line up. Go to you local hardware store (I got mine at Home Depot)and buy the abs parts you will need. Here is what I used:

Parts:
1 - 4' length of 2" ABS tube
2 - 45 degree elbows (both with female ends)
2 - 90 degree elbows (both with 1 male and 1 female end)
1 - 2" coupler
1 - 2" to 1 1/2" reducer
1 - 2" shop vac hose (I used Rigid from Home Depot)
2 - 2" hose clamps
silcone
1 strip of door edge guard
2 90 degree brackets to hold pipe to body(I used Stanley chair leg braces from Home Depot)

Tools:
Drill
2" hole saw
various drill bits
Dremmel Tool

Decide where you're going to cut your hole (look behind the fender to make sure it's clear on the other side) and cut away! This is the scariest part. Use a dremmel to clean up the hole and make it larger if nessiccary. Take your door edge guard and install it on the edge of the hole (use some paint on the bare metal first to prevent rusting) Once you've cut the fender move to the airbox, remove the cover and filter and drill a 2" between the bolts that hold it in place. (check below to make sure you don't hit anything else).
http://www.members.shaw.ca/samdog/Snorkle Pics/Holesaw.JPG
http://www.members.shaw.ca/samdog/Snorkle Pics/Dremmel.JPG
http://www.members.shaw.ca/samdog/Snorkle%...e Drilled.JPG
http://www.members.shaw.ca/samdog/Snorkle%...s/Edgeguard.JPG
http://www.members.shaw.ca/samdog/Snorkle%...ltter Box.JPG
http://www.members.shaw.ca/samdog/Snorkle%...0Hole Cut.JPG


This is what it will look like under the airbox(the original hole is where to drill for an ARB snorlkle, it's not from my jeep).You'll want the hole where the red line is.

http://www.members.shaw.ca/samdog/Snorkle%.../2nd Hole.jpg

Once you have your hole drilled in the airbox (thru the plastic and the metal) you need to remove the air box. Cut off the factory inlet and seal it (I used some plastic from the side of the old intake and siliconed it to the airbox). Then take your reducer and silicone it in the hole. Let that dry over night.

http://www.members.shaw.ca/samdog/Snorkle%...Cut Inlet.JPG
http://www.members.shaw.ca/samdog/Snorkle%...20Inlet 2.JPG
http://www.members.shaw.ca/samdog/Snorkle%...let Cover.JPG
http://www.members.shaw.ca/samdog/Snorkle%...20Cover 2.JPG
http://www.members.shaw.ca/samdog/Snorkle%...ucer Here.JPG
http://www.members.shaw.ca/samdog/Snorkle Pics/Reducer.JPG
http://www.members.shaw.ca/samdog/Snorkle%... Inserted.JPG
http://www.members.shaw.ca/samdog/Snorkle%...nserted 2.JPG


Now you can start to cut your ABS pipe to fit (it's not rocket science here kiddies). Paint it and let it dry over night. Take your 90's and join them thru the fender.

http://www.members.shaw.ca/samdog/Snorkle%...e Routing.jpg

Join all your pipe and elbows until you have it where you want it and attatch it to the body using your 90 degree brackets. This is what I used:

http://www.members.shaw.ca/samdog/Snorkle%...le Mounts.JPG
http://www.members.shaw.ca/samdog/Snorkle%...0Mounts 2.JPG

As for the top (intake) you could use an 90 degree elbow. (this will keep the cost down to 20 bucks) I bought an ARB intake for $90 CAN to give it that "finished look". If you do the same, you'll use a 45 at the top of the pipe and a 2" coupler because the ARB intake is designed for a 3" pipe.

http://www.members.shaw.ca/samdog/Snorkle%...kle Close.jpg

Back to the airbox, reinstall the airbox and attach the shop vac hose using your hose clamp. If it doesn't quite fit, you can heat up the hose and stretch it slightly to fit. Now just route it thru the fender up to your 90 and attach it with your hose clamp. You may have to use some zip ties to hold the hose in place.

http://www.members.shaw.ca/samdog/Snorkle%...Routing 3.jpg
http://www.members.shaw.ca/samdog/Snorkle%...Routing 2.jpg


Once everything is in place you should take the ABS pipe apart and glue it with ABS glue for a nice waterproof seal. Here is what the finished product should look like. Good luck! By the way, I have build 3 of these now and they have all turned out exactly the same. It's very easy to do.
 
Back
Top