Lore5
NAXJA Forum User
- Location
- Walnut Creek, California
Well today I set out to install my LeBaron hood vents that I got from Troy(BigRed). When I got them they were a dark blue and on Friday I sanded them down and painted them red. It really wasn't to hard to do, it was just a real pain trying to cut the hood decently with a sawsall. (Yes Matt I could have used your help/tools). I have tried to include a semi writeup here. I got most of my info from searching and from www.ericsxj.com.
Here they are:
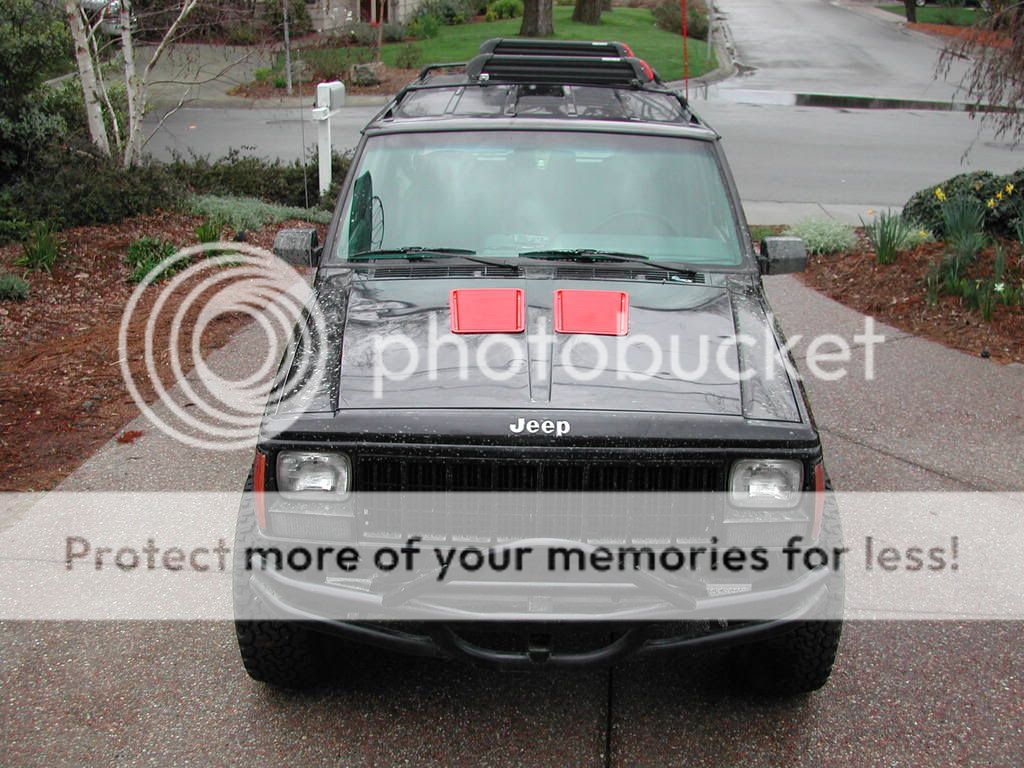
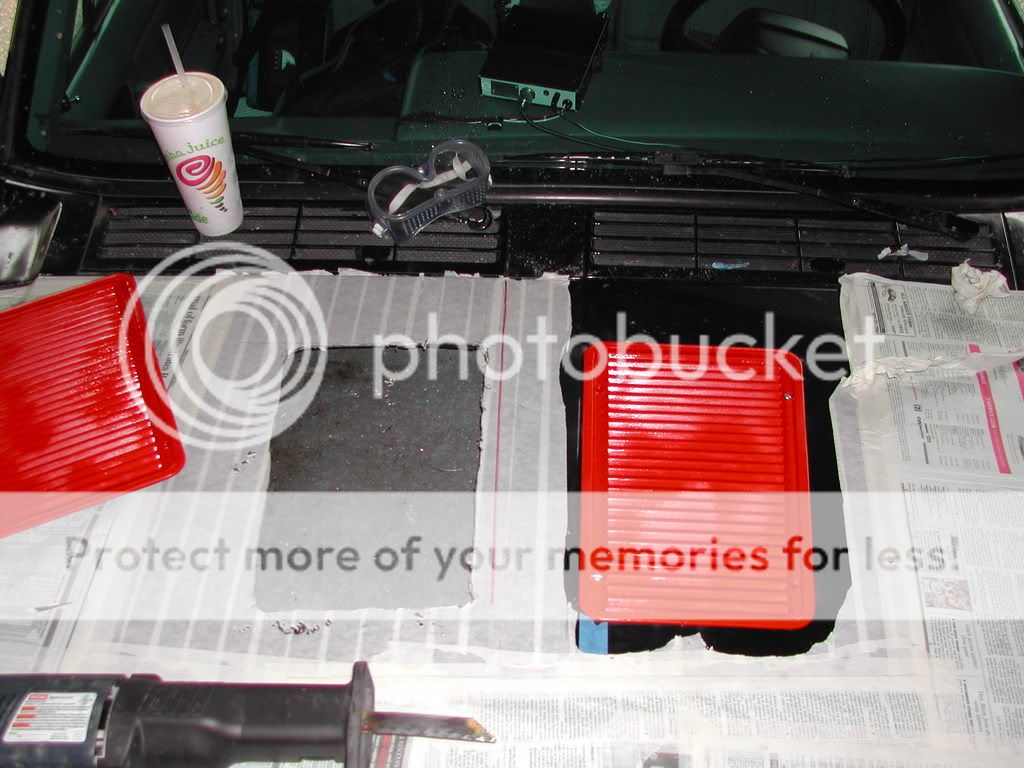
I started out by taping down the area I was going to cut and covered the rest of the hood with newspaper. I then traced the inside of the vents and measured and measured and measured until I felt confident that everything was OK and ready for cutting.

Before cutting I put some wood blocks under the hood to raise it up and to make sure I didn't hit anything underneath. I also put one of those oil drip pans under the hood to catch any little pieces (That is what you see in the pic) To start the cutting I drilled a large hole in the center of where each vent was going. This gave me a starting point for where I could start cutting with the sawsall. I then just cut along my lines very slowly making sure I didn't screw up. I would have to say that the hardest part was fitting the vents in place. After cutting there would always bee some little piece of metal preventing the vents from sitting flush with the hood.
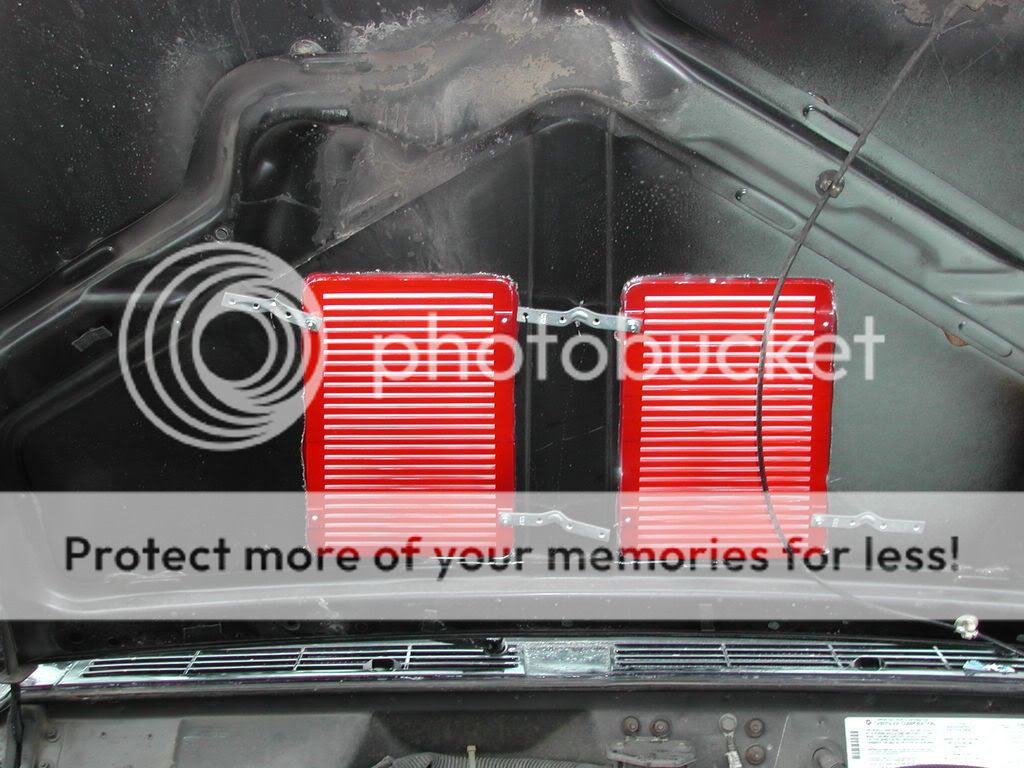
After getting the vents to sit in the hood it was time to figure out a way to hold them in. My original plan was to make little tabs out of the excess metal I cut off the hood but I quickly realized that this was not an option. I chose to bend some L-brackets so that they would push up against the hood and hold the vents in place. Unfortunately I only had four brackets so right now there are two holding each vent in place. I will pick up some more tomorrow. Having only two brackets prevents the hood from sitting totally flush so that is why some of the corners may look like they are sticking up.
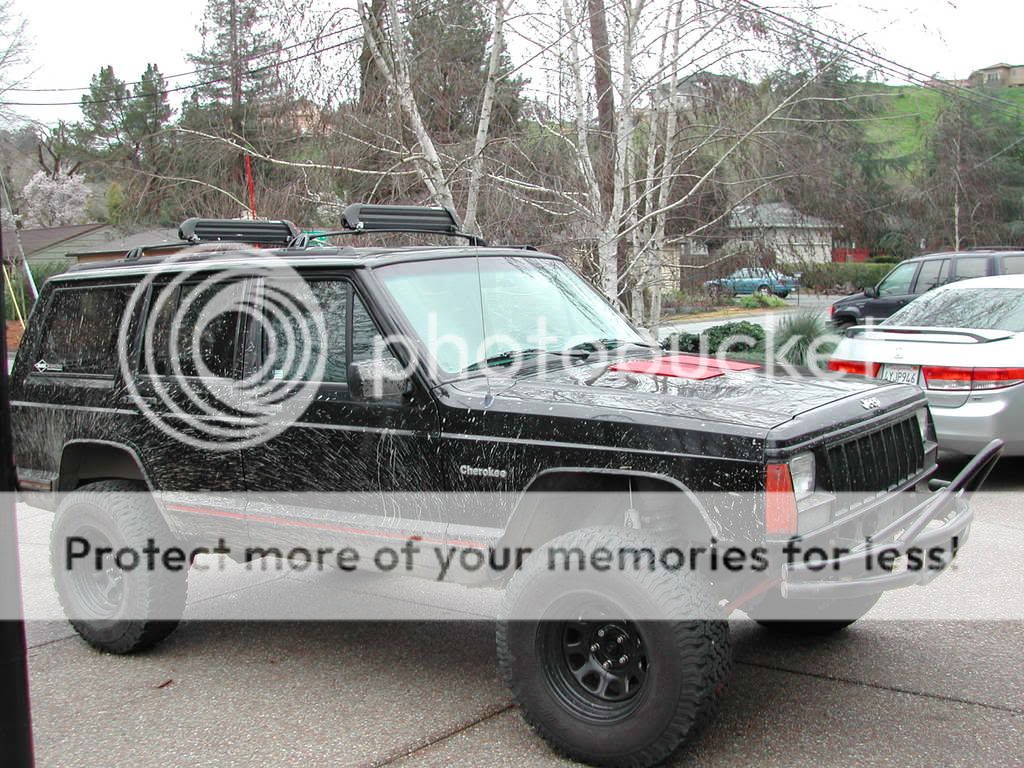
Here are some more shots of the finished product:

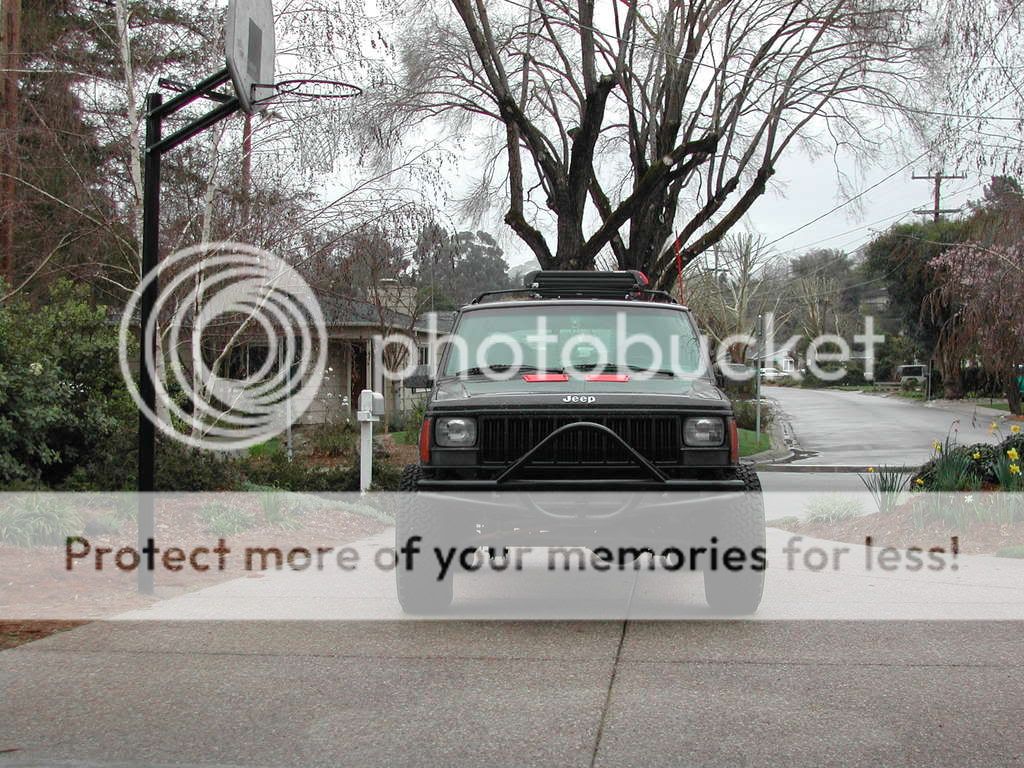
What cars see heading down the road towards them
I did a lot of reading and everything I read said that I don't need drip pans, So I didn't put them on. And what do you know it just started raining pretty hard. I guess I will find out tomorrow if I really do need them or not.
I know that they didn't turn out to be perfectly straight due to the use of a sawsall but it is barely noticeable. I'm still not convinced that I like the red. I might just end up painting them black when I do the whole Jeep in flat black.
So what do you think?
Here they are:
I started out by taping down the area I was going to cut and covered the rest of the hood with newspaper. I then traced the inside of the vents and measured and measured and measured until I felt confident that everything was OK and ready for cutting.
Before cutting I put some wood blocks under the hood to raise it up and to make sure I didn't hit anything underneath. I also put one of those oil drip pans under the hood to catch any little pieces (That is what you see in the pic) To start the cutting I drilled a large hole in the center of where each vent was going. This gave me a starting point for where I could start cutting with the sawsall. I then just cut along my lines very slowly making sure I didn't screw up. I would have to say that the hardest part was fitting the vents in place. After cutting there would always bee some little piece of metal preventing the vents from sitting flush with the hood.
After getting the vents to sit in the hood it was time to figure out a way to hold them in. My original plan was to make little tabs out of the excess metal I cut off the hood but I quickly realized that this was not an option. I chose to bend some L-brackets so that they would push up against the hood and hold the vents in place. Unfortunately I only had four brackets so right now there are two holding each vent in place. I will pick up some more tomorrow. Having only two brackets prevents the hood from sitting totally flush so that is why some of the corners may look like they are sticking up.
Here are some more shots of the finished product:
What cars see heading down the road towards them
I did a lot of reading and everything I read said that I don't need drip pans, So I didn't put them on. And what do you know it just started raining pretty hard. I guess I will find out tomorrow if I really do need them or not.
I know that they didn't turn out to be perfectly straight due to the use of a sawsall but it is barely noticeable. I'm still not convinced that I like the red. I might just end up painting them black when I do the whole Jeep in flat black.
So what do you think?
Last edited:


