- Location
- In a strange land
As part of my Boostwerks Comp Mount installation I have been trying to decide just where I wanted to mount the winch controls. I found an easy answer, mounting on the AC bracket ( http://www.naxja.org/forum/showthread.php?t=1136273 ), but my own life experiences have taught me that the easy answers always come back to bite me when it is least convenient. Better to pay the price up front and get it over with. So I kept looking.
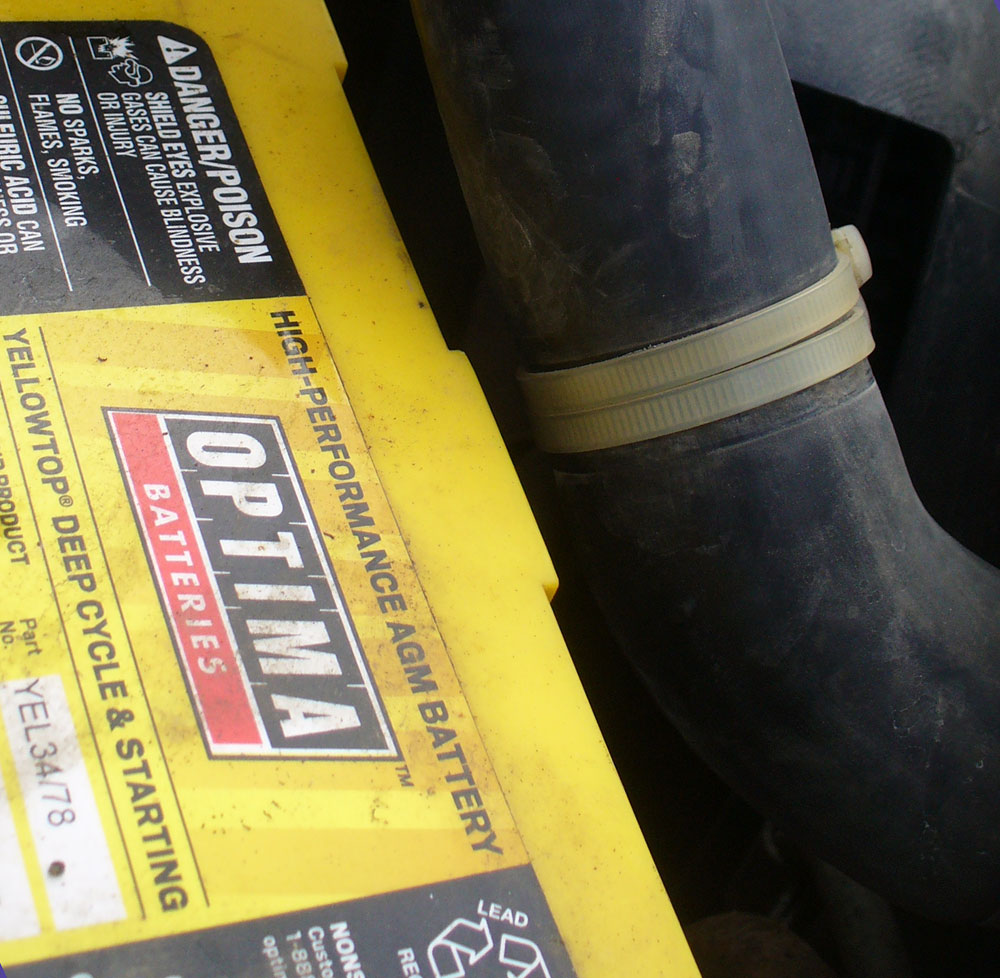
Having to replace my alternator a few months ago I was reminded of just how much extra space there is underneath the battery. Perhaps this isn’t quite so obvious with the factory battery tray, but running a Dirtbound tray it becomes evident. I got to doing some thinking about what could be done with that space. Unfortunately, the Dirtbound tray is not quite high enough to clear the winch relays, but it is really close, like ¼”close. That got me wondering if I could create the space I needed underneath the battery.
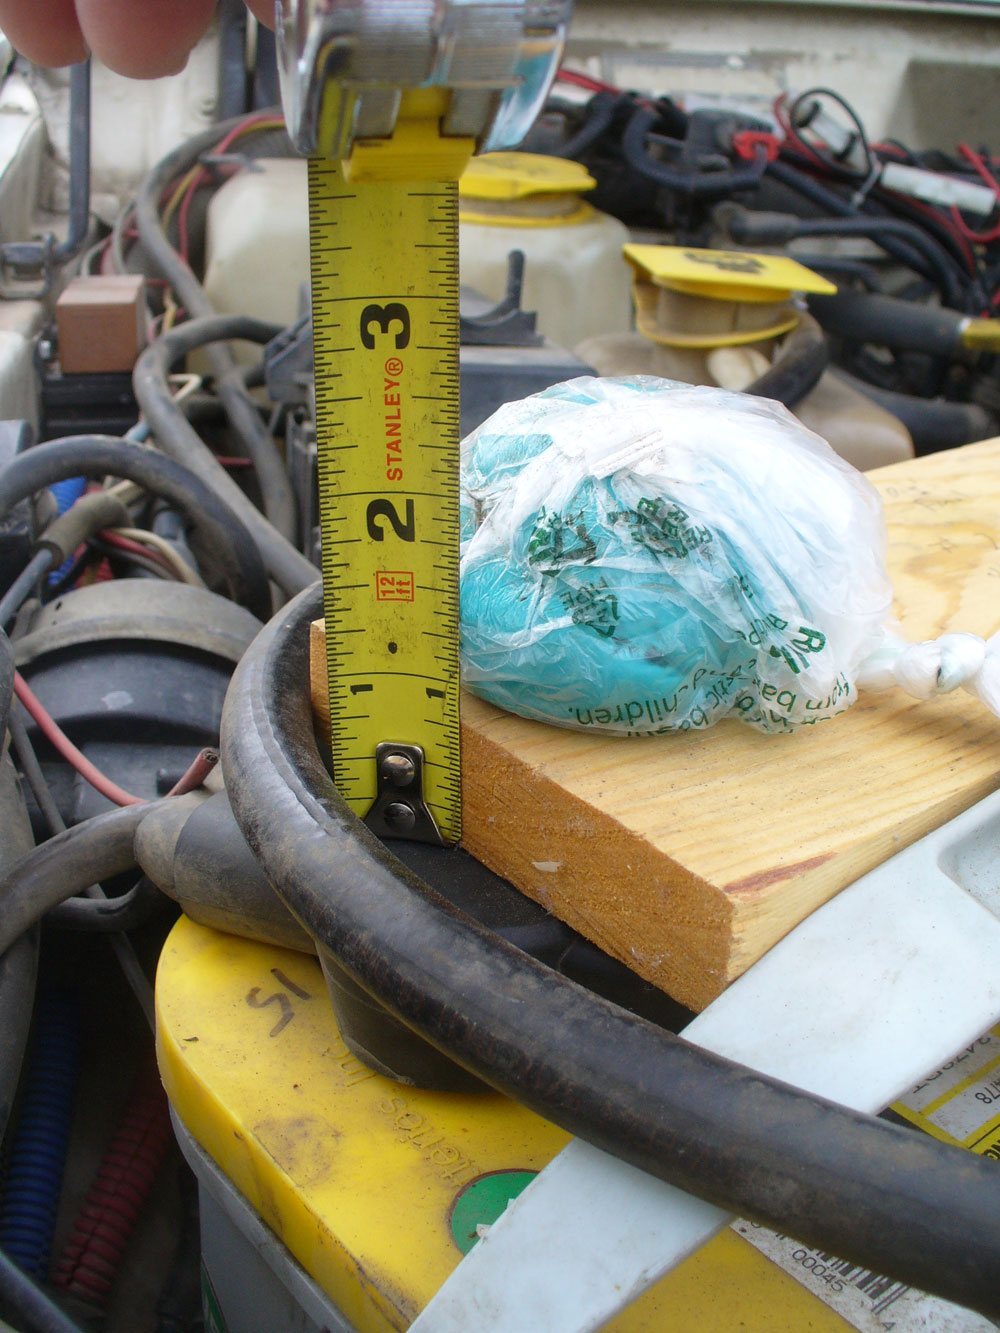
First question, how much clearance is there above the battery? I swiped a lump of Play Dough from The Varmints and ran a squish check. I have easily 1 ½” of clearance above the negative terminal, and even more above the positive:
So next was the question of what will it take to make a custom battery tray? I sent an email to Dirtbound to inquire about getting a tray without a bracket or perhaps a tray in un-welded pieces. No response. I take that as a “No”.
Okay, fine. I have another Dirtbound tray which I bought for “The Parts Jeep” (because XJs accumulate). Lets cut up a perfectly good battery tray.
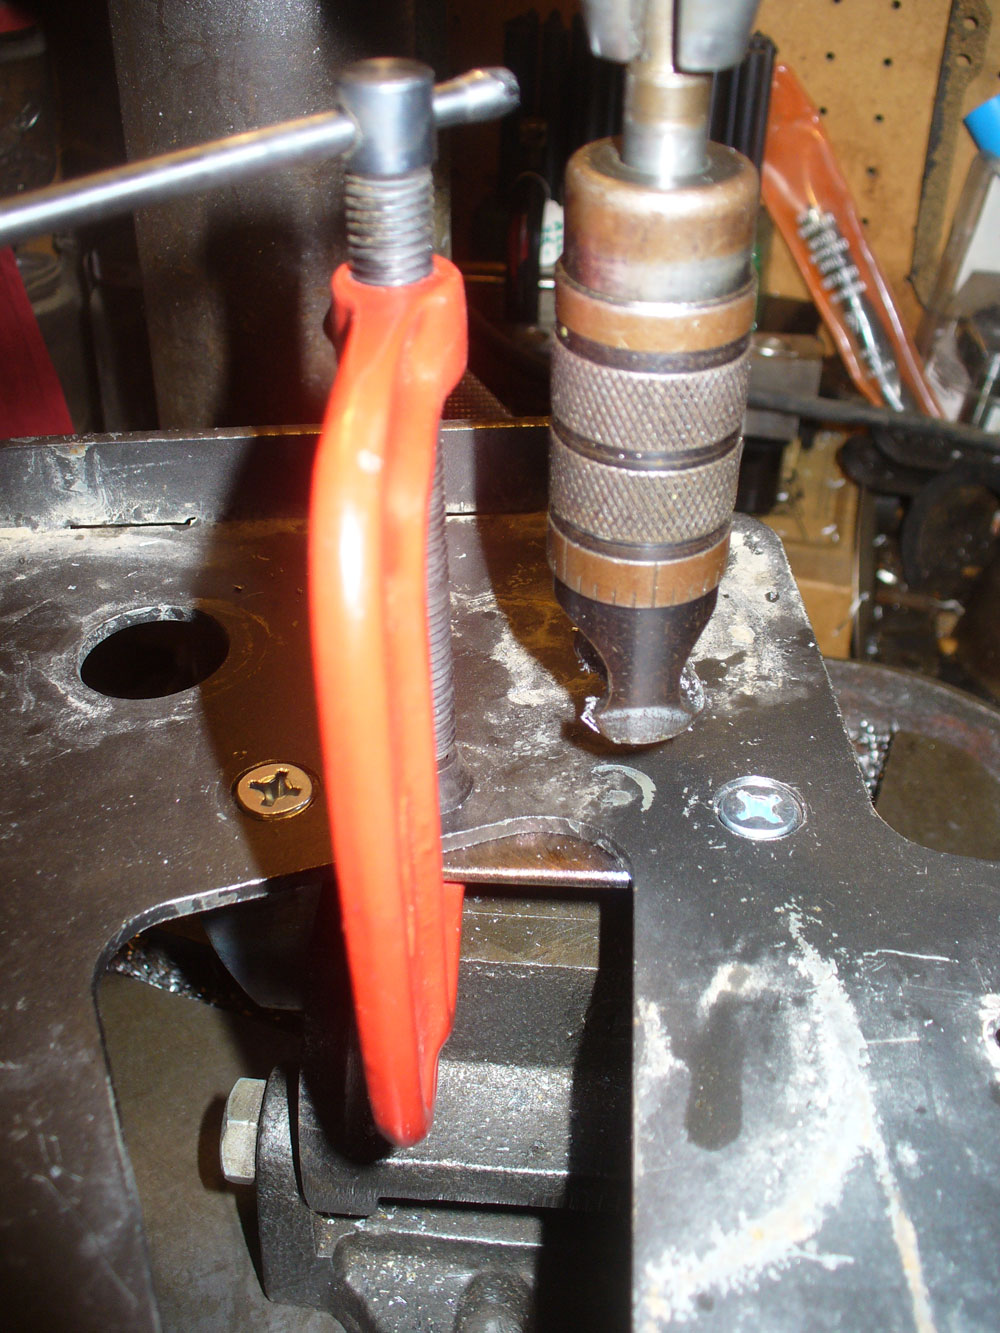
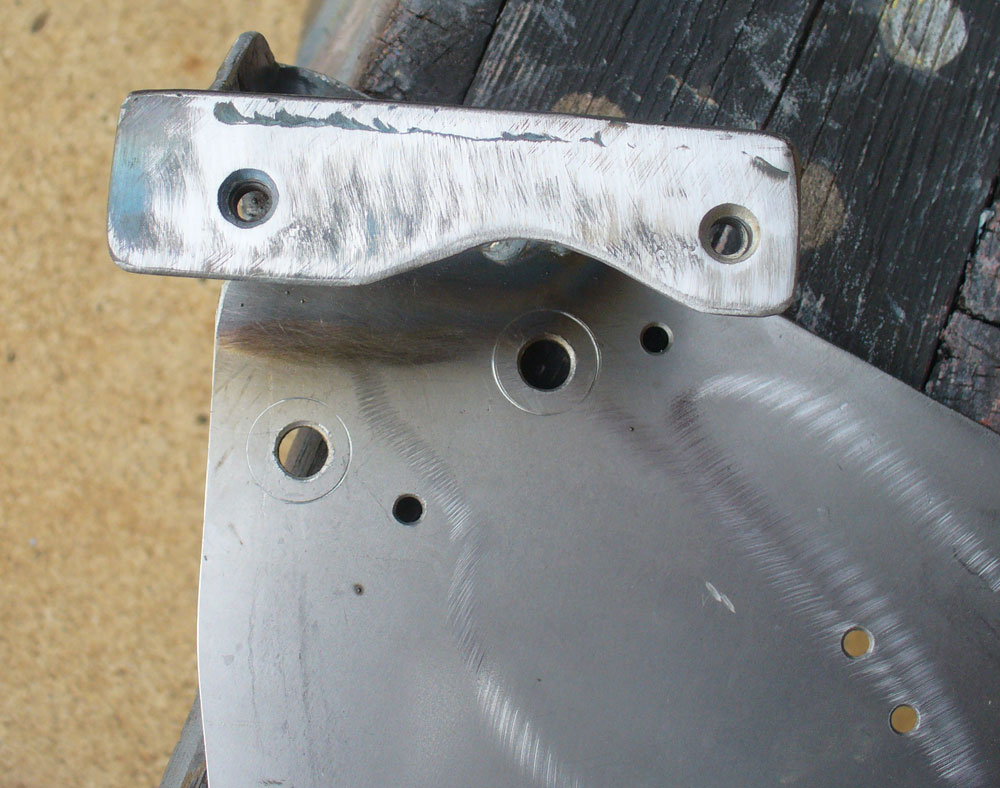
I did at least stop and think things through a bit. Before I started cutting I first made a fixture to locate the tray relative to the mounting bracket, but to still allow height adjustment:
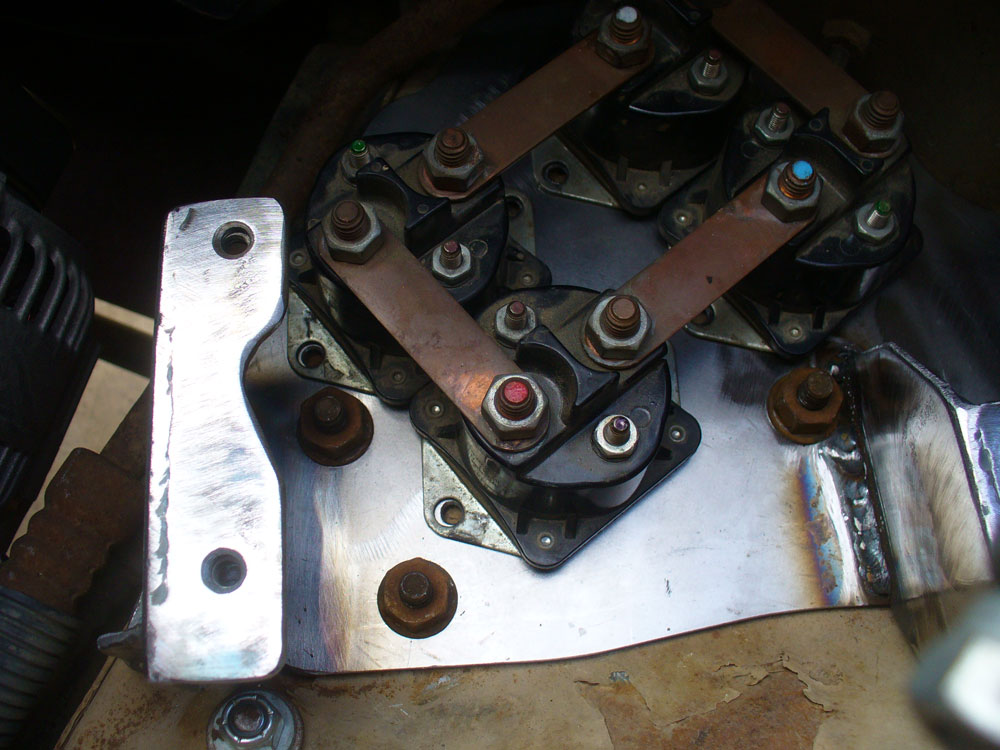
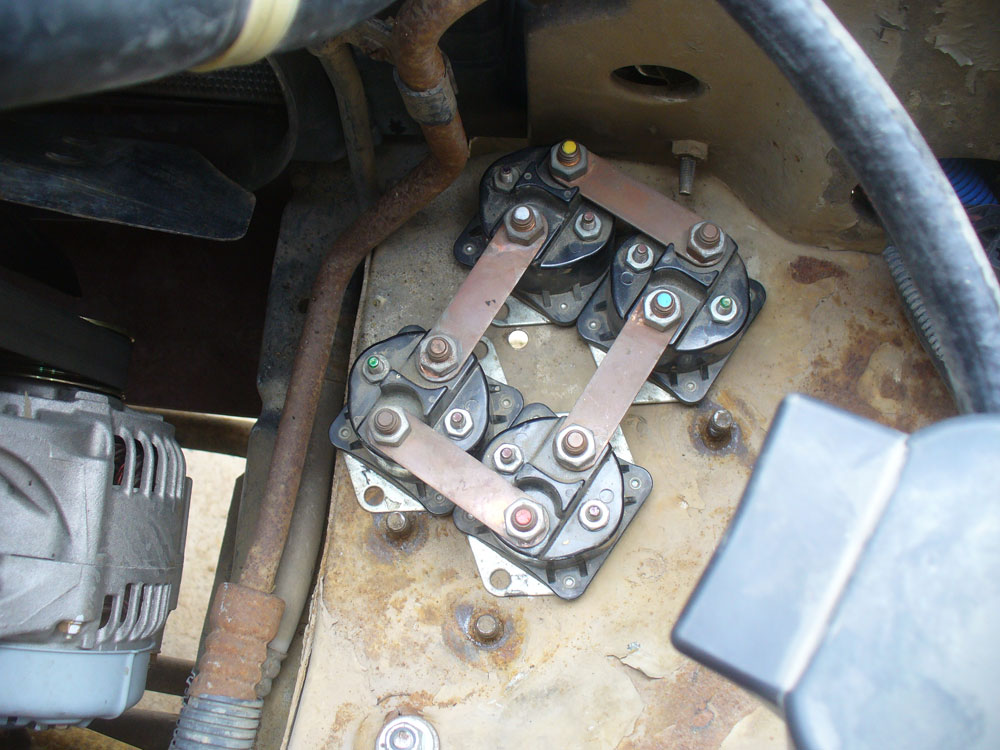
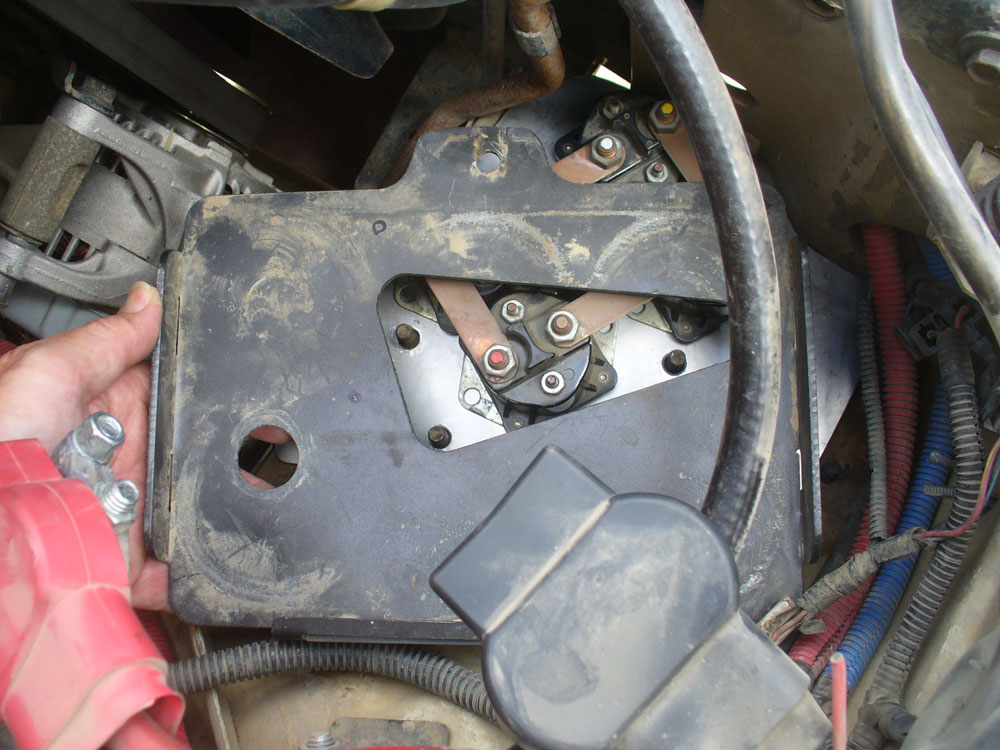
Then I finally got some time to tear into this task in earnest. I pulled out the existing tray and played around with options for locating the relays. I was expecting that I would have to replace some of Warn’s copper straps in order to position things so they would all fit, but I found a spot where they all fit as already configured (Yes, I know, that picture shows them too close to that one stud. The clearance exists with proper positioning.).
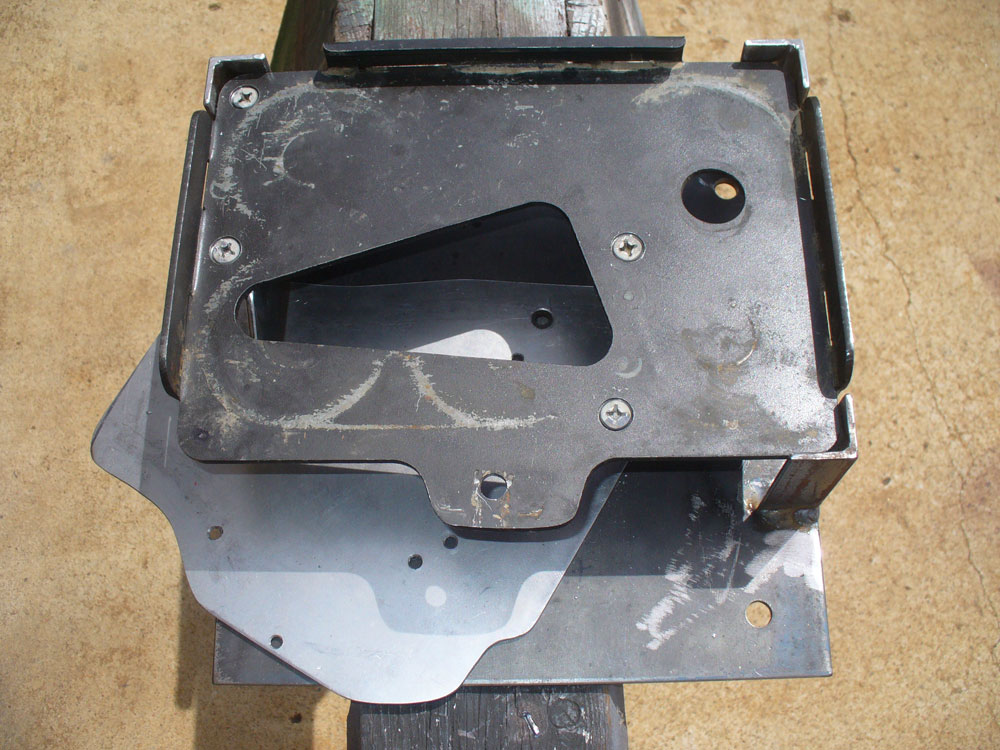
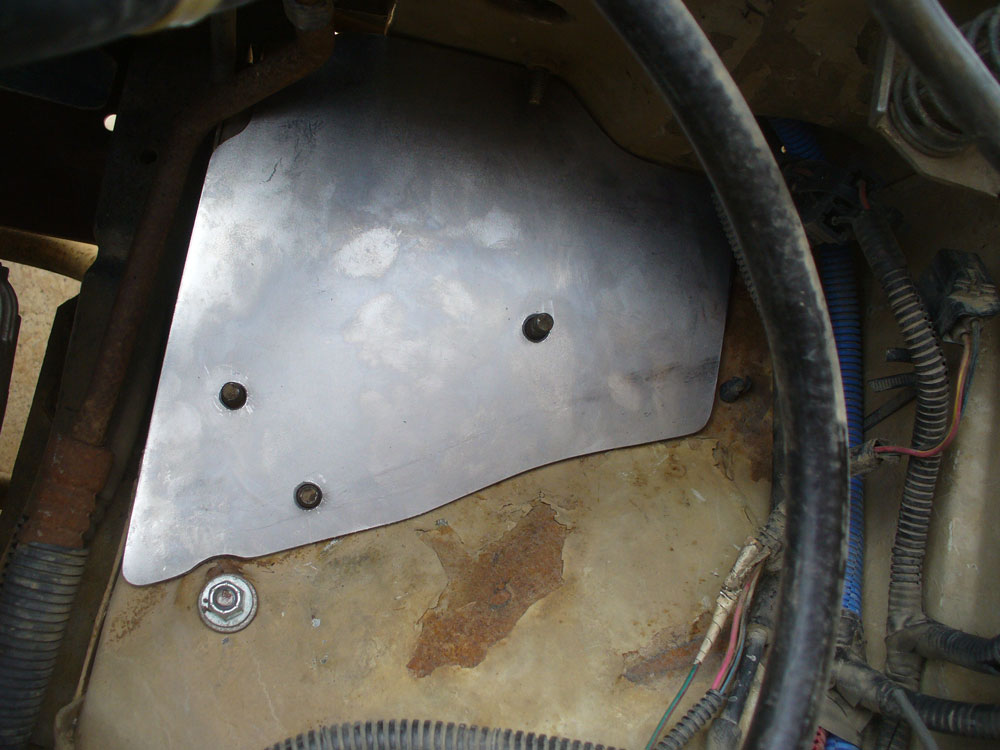
A new baseplate was cut out of 10GA sheet metal (after first making a cardboard template):
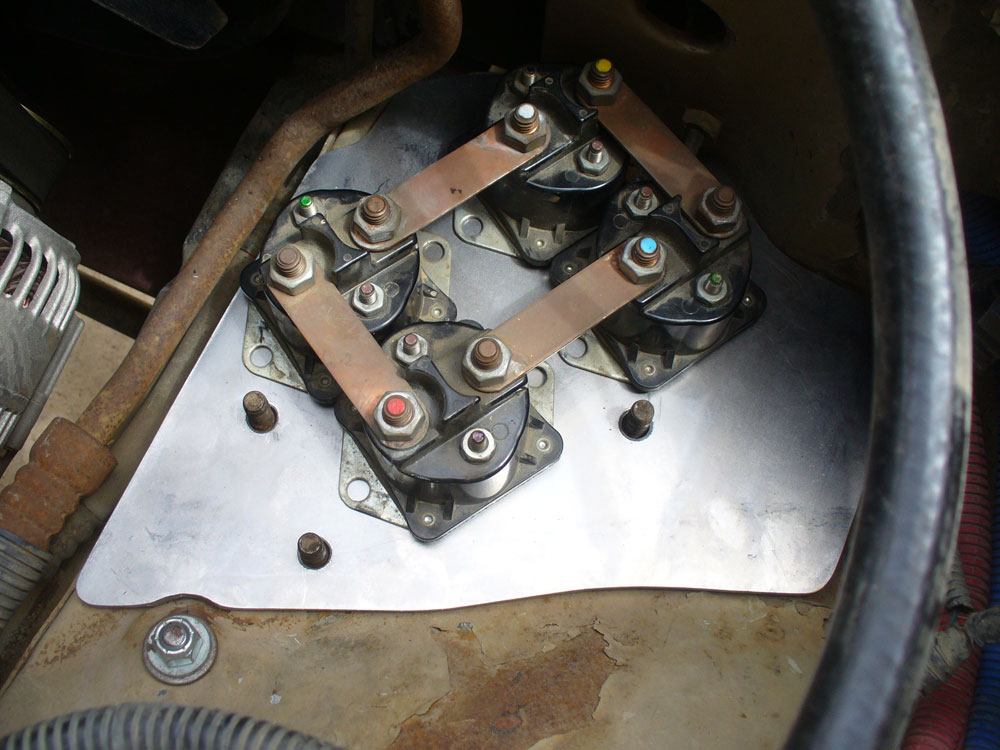
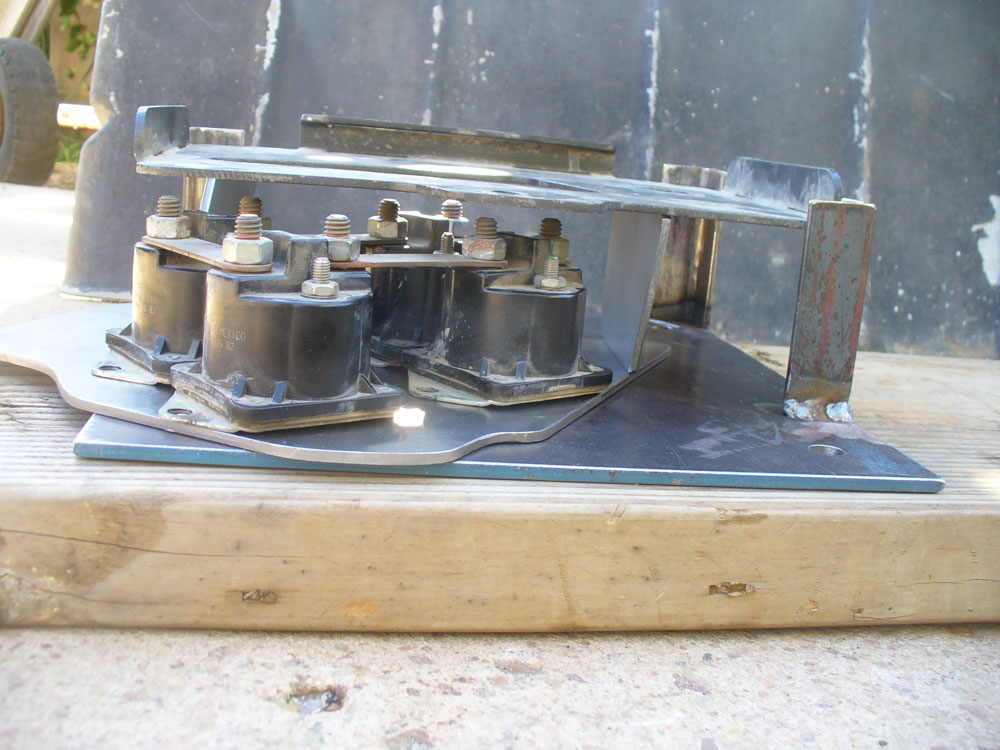
Here is how the plate will look with relays (See? There is clearance.):
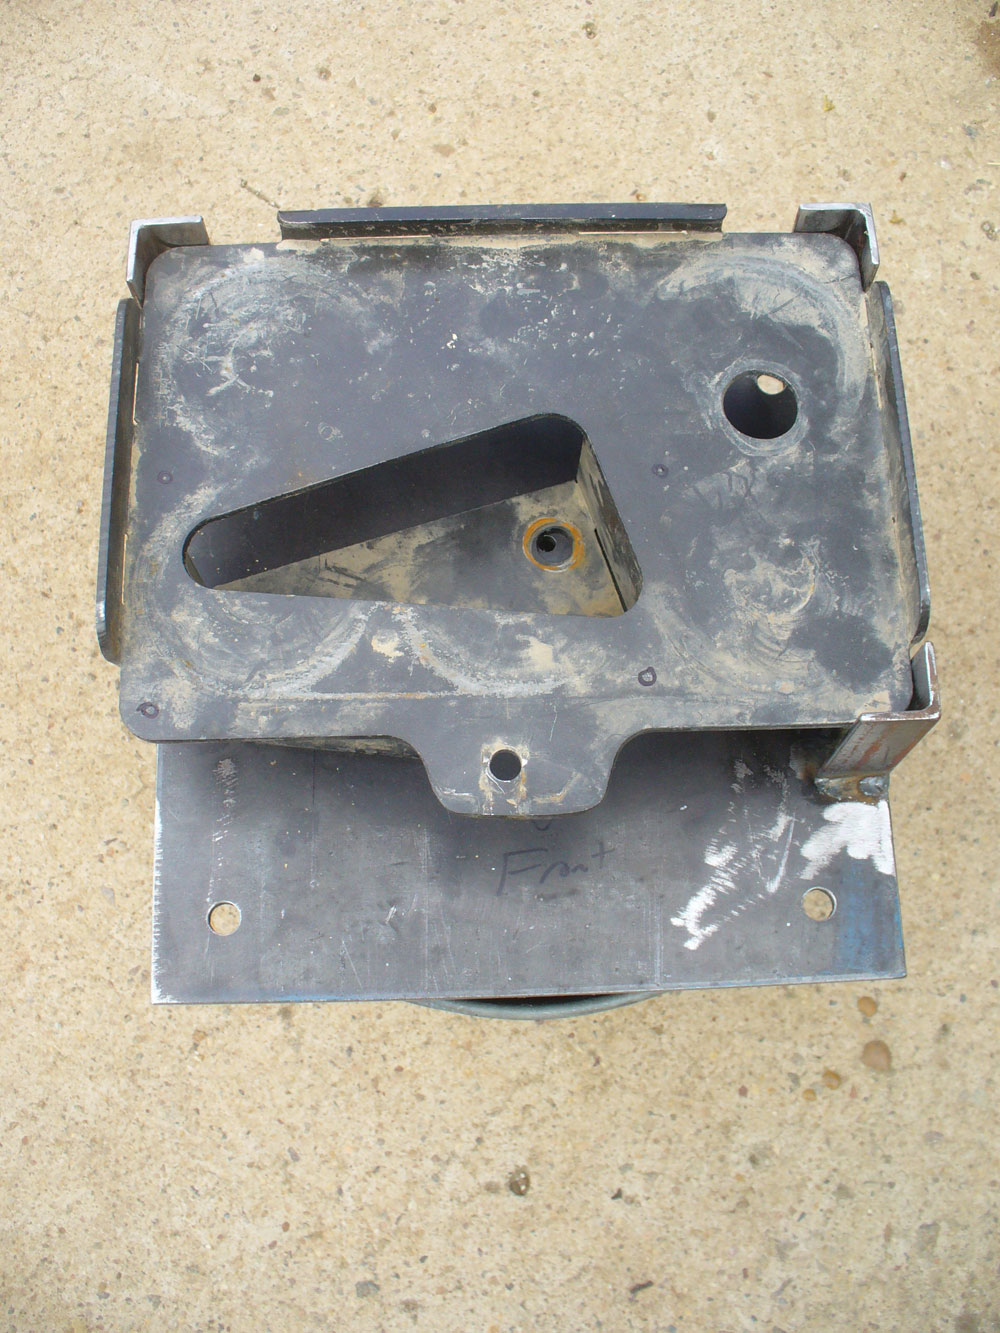
And then with the battery tray in rough position:
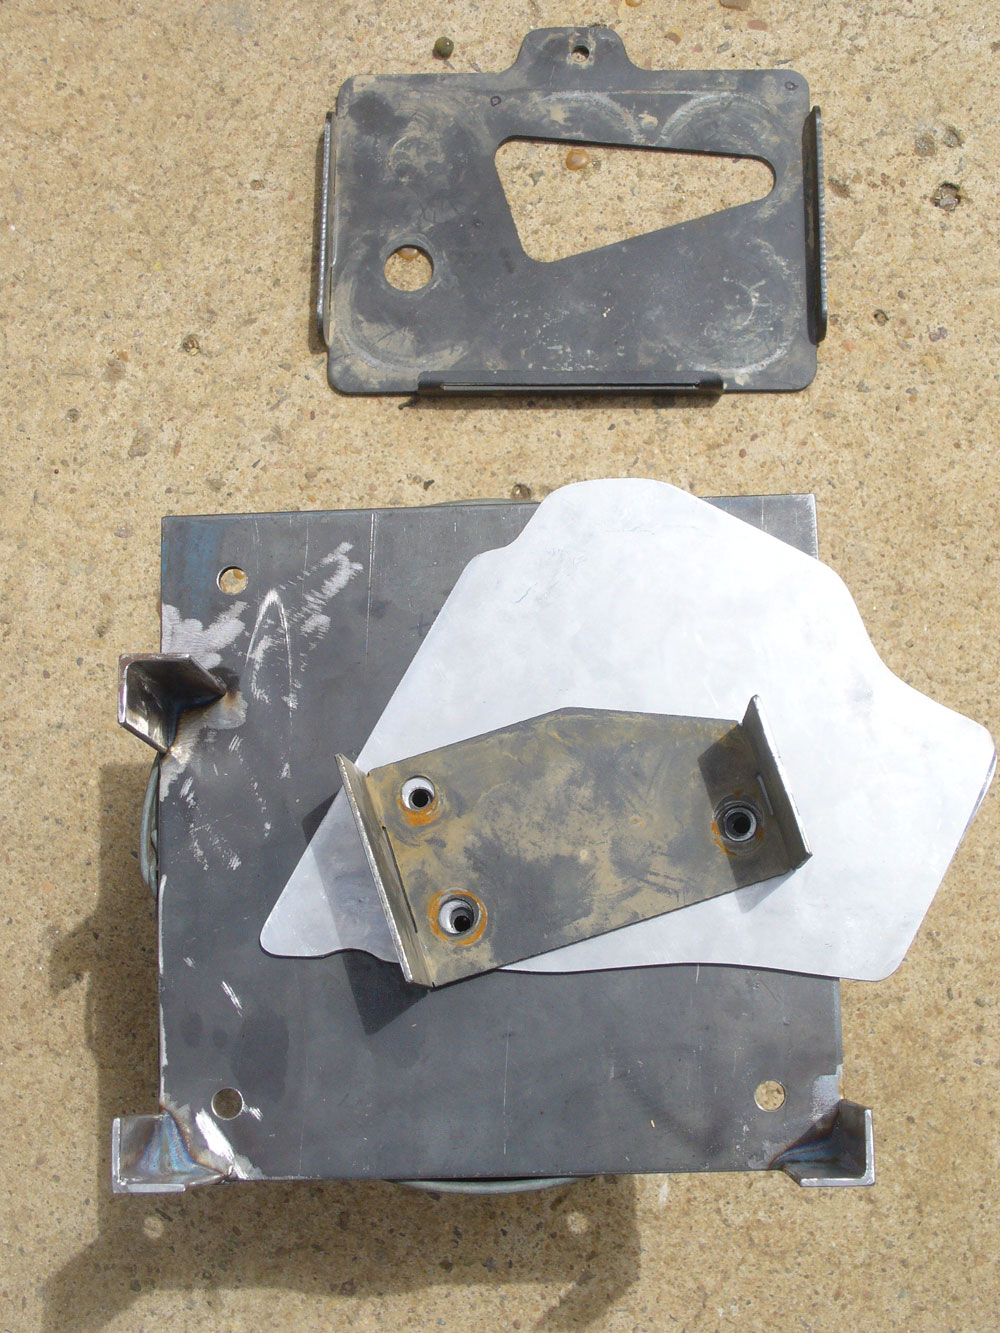
Comparison of the new baseplate to the Dirtbound baseplate:
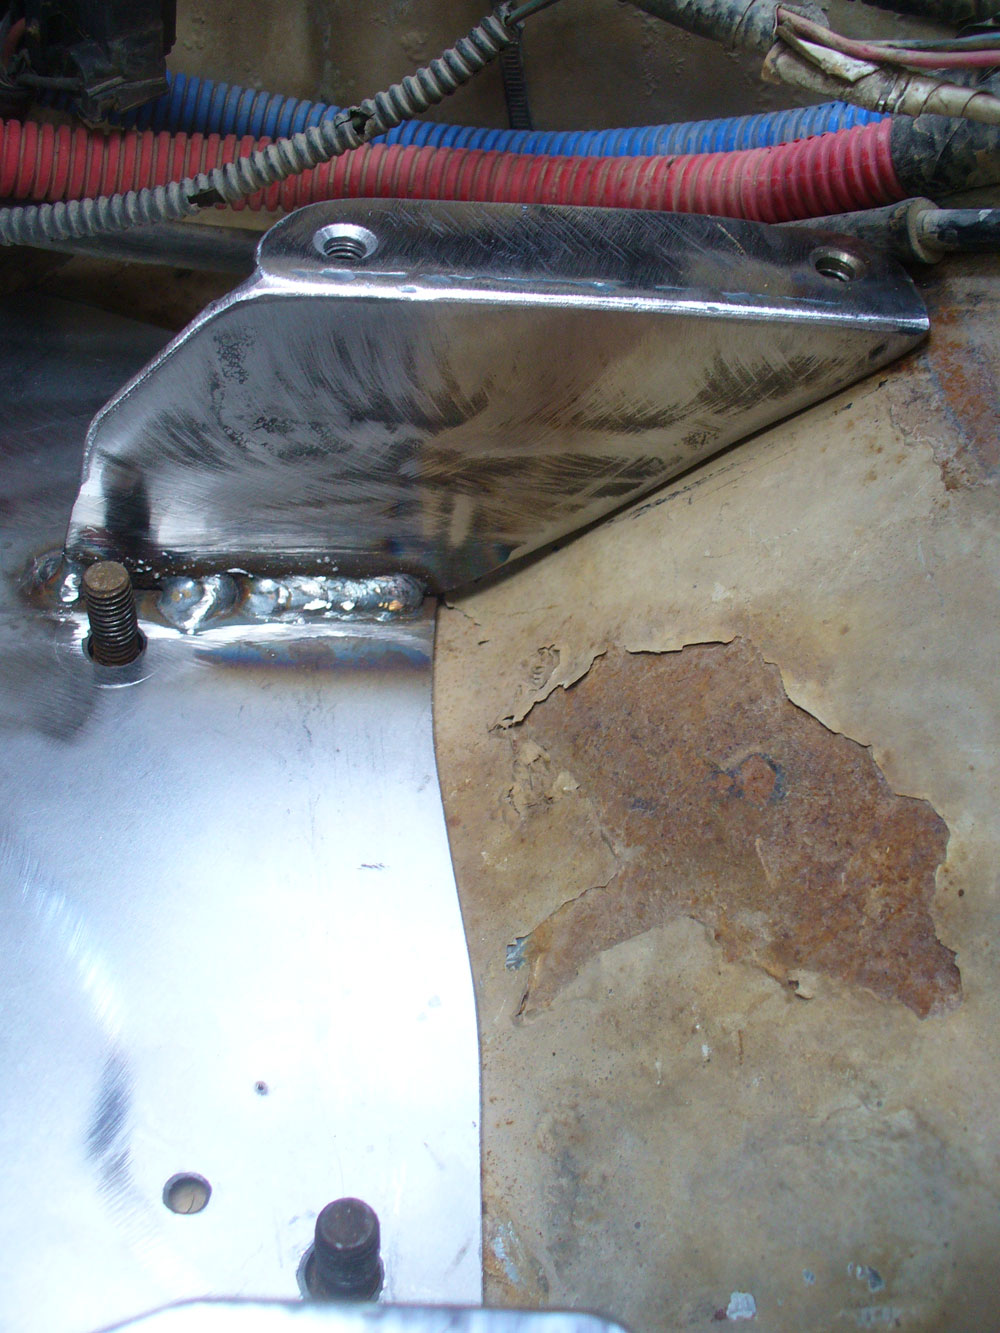
Outside view with roughed in supports:
And another perspective:

Hopefully I will get time on Monday to weld this together. The plan is for the tray to be held to the baseplate and supports with four ¼-20 machine screws so that I can access all the connections. This location should make for nice, short runs to the winch. Additionally, I think I will have some extra room for mounting lighting relays underneath the battery as well. My headlight relays I intend to keep on the fender where I can easily access them if there is an issue, but auxiliary lighting is generally not so crucial, so burying those under the batter is probably not going to be a decision I will regret. Maybe.
Having to replace my alternator a few months ago I was reminded of just how much extra space there is underneath the battery. Perhaps this isn’t quite so obvious with the factory battery tray, but running a Dirtbound tray it becomes evident. I got to doing some thinking about what could be done with that space. Unfortunately, the Dirtbound tray is not quite high enough to clear the winch relays, but it is really close, like ¼”close. That got me wondering if I could create the space I needed underneath the battery.
First question, how much clearance is there above the battery? I swiped a lump of Play Dough from The Varmints and ran a squish check. I have easily 1 ½” of clearance above the negative terminal, and even more above the positive:
So next was the question of what will it take to make a custom battery tray? I sent an email to Dirtbound to inquire about getting a tray without a bracket or perhaps a tray in un-welded pieces. No response. I take that as a “No”.
Okay, fine. I have another Dirtbound tray which I bought for “The Parts Jeep” (because XJs accumulate). Lets cut up a perfectly good battery tray.
I did at least stop and think things through a bit. Before I started cutting I first made a fixture to locate the tray relative to the mounting bracket, but to still allow height adjustment:
Then I finally got some time to tear into this task in earnest. I pulled out the existing tray and played around with options for locating the relays. I was expecting that I would have to replace some of Warn’s copper straps in order to position things so they would all fit, but I found a spot where they all fit as already configured (Yes, I know, that picture shows them too close to that one stud. The clearance exists with proper positioning.).
A new baseplate was cut out of 10GA sheet metal (after first making a cardboard template):
Here is how the plate will look with relays (See? There is clearance.):
And then with the battery tray in rough position:
Comparison of the new baseplate to the Dirtbound baseplate:
Outside view with roughed in supports:
And another perspective:
Hopefully I will get time on Monday to weld this together. The plan is for the tray to be held to the baseplate and supports with four ¼-20 machine screws so that I can access all the connections. This location should make for nice, short runs to the winch. Additionally, I think I will have some extra room for mounting lighting relays underneath the battery as well. My headlight relays I intend to keep on the fender where I can easily access them if there is an issue, but auxiliary lighting is generally not so crucial, so burying those under the batter is probably not going to be a decision I will regret. Maybe.