• Welcome to the new NAXJA Forum! If your password does not work, please use "Forgot your password?" link on the log-in page. Please feel free to reach out to [email protected] if we can provide any assistance.

Project: Restitution

cometcyclonemk

NAXJA Forum User
Location
Seattle, WA
Not quite a build thread, not quite a restoration. To put it simply, my Jeep was stolen, made an accomplice to crime and pawned on a distasteful homeless person to use as a home. This thread will document the process of restitution.

First, a bit about my Jeep before:

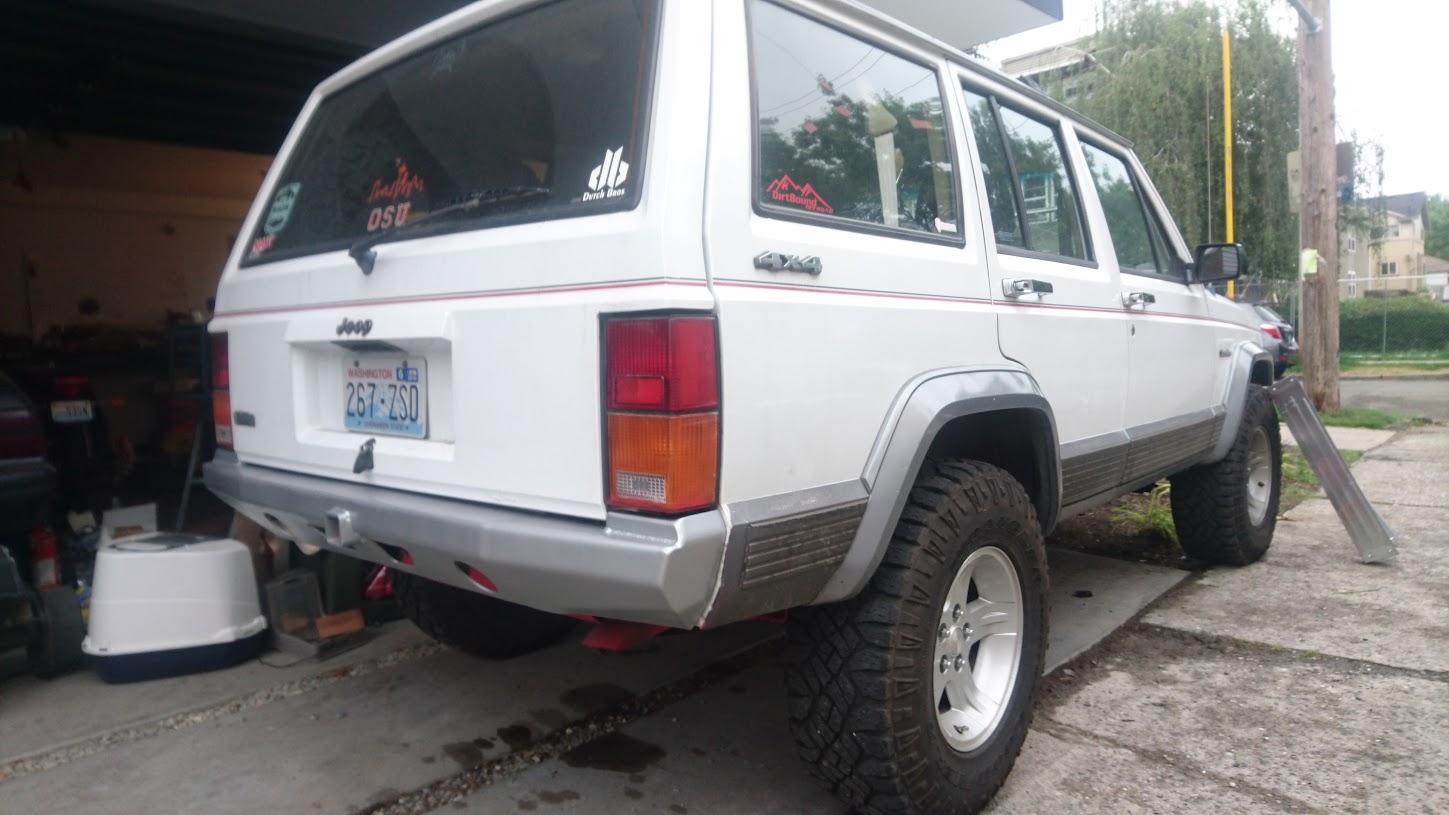
I searched for months to find the perfect first car after college Cherokee. Low miles and a 5spd were the requirements. Came across a 1991, 5spd, 4.0L HO, with 149,000 miles and couldn't pass it up. 4 years, countless camping/mountaineering/ski trips and 60,000 miles later and it had become a forever car. It was mostly stock when stolen, just a 3" OME lift, 31" Duratracs on Ravines, custom exhaust (BBK tunable muffler, 2.5" pipe, Magnaflow Cat), DirtBound rear bumper and still in great condition.


All that changed over the Christmas holiday. One of the locations I work is near an Amtrak station I take to visit family on holidays. Since the parking lot is patrolled, well lit, has cameras I've always thought it safer than the Amtrak lot.

Sadly, I was mistaken. I returned to an empty lot. No Jeep. A police report was filed and not knowing what to expect I began the search for a replacement. It's unfortunate that there isn't really a modern equivalent to a manual transmission Cherokee. The closest I could find really being the H3, (3.7L, 5spd with adventure package of course). But at nearly 1000 extra lbs. All possible replacements were looking like spending a lot more money on a rig not really quite what I was looking for, or buying another Cherokee... That wasn't mine.

Alas! 4 days later and I'm ripping down I5 on the Ducati to get to my Jeep before the police take it to impound. They had found it!

I get there to find a homeless person with all their worldly belongings sitting next to it on the side of the street. The officer having a chat with them. The Jeep seemed intact from afar... Until I got around to the back and noticed they had painted my bumper red. The person occupying my car thought it wise to paint the bumper of a stolen vehicle red. They didn't change the license plate. Didn't remove the various stickers or other identifying features. They painted the bumper bright red.

Then I saw the interior and the homeless scene from "The Other Guys" came to mind. In just 4 days, this person had truly made my Jeep their home.

Then I saw what they had done to the underside... EVERYTHING WAS RED. It is as though the man laid under the Jeep, red can of paint in each hand, held his breath and waved his arms until he ran out of paint. The shocks: red. The springs: red. Exhaust: red. Control arms: red. Axles: red. Everything.


It took a while, but insurance claimed a total loss. I bought it back, and have started the process of restitution.

On the docket:

1. Replace interior. The smell of homelessness shall not remain!
2. Repaint rear bumper. Clean as much paint from underside as possible/repaint where necessary.
3. Utilize opportunity to change to 3.55 geared axles.
4. Replace front bumper (slightly damaged by thief, previously by me as well).

To address 1, I found a "Trim Parts" vinyl floor, and a set of Corbeau heated, vinyl sport seats on craigslist. This is my hiking/biking/camping/climbing rig. It needs to be easy to clean!

To address 3, a 3.55 geared D35 with limited slip and 3:55 geared D30, non-disco were purchased. Both axles have low miles, rear was rebuilt completely, front has new seals/u-joints/100,000 miles. I could have changed to an 8.8, but with 31s I'm not too concerned. Also, at 3" of lift and no TC drop I'm probably on the edge. A slight change in angle due to axles might put me over.

For 4, a JCR bumper was purchased. I love the DirtBound bumper at the rear, but the JCR is IMO slightly better looking up front.


It's a shame the homeless person isn't in jail for the rest of his life, or could be legally maimed or shot. Good luck with your project.
 
Interior is the first step. I've been driving my girlfriend's car (she uses public transit mostly) for far too long and that smelly interior is the only real thing preventing my driving the Jeep.

Step 1 was to gut the interior! I'm going to regret saying this... I've never experienced a single stuck bolt on this Jeep. Not when I did the lift, not during maintenance, and not with the interior.

The interior came out without hassle leaving this: Actually... I didn't take any pictures! But it was a rust free, white floor. Removing the interior did reveal a problem though - the insulation was completely soaked. That wouldn't do so out it came.

Saw a thread on here where a floor received Dynamat and the vinyl molded flooring... But didn't want to spend the money. Thanks, Amazon for showing me Noico.

http://www.amazon.com/gp/product/B012AVX5HQ?psc=1&redirect=true&ref_=od_aui_detailpages00

http://www.amazon.com/gp/product/B00URV8MFC?psc=1&redirect=true&ref_=od_aui_detailpages01

We'll see how it performs, but it seemed fine during installation and at $90 total was a fraction the cost of Dynamat.

That leaves us here:


The ol' hammer to the floorboard test suggests there will be significantly reduced vibrations. Hopefully that translates to sound as well.

Next up will be installing the Vinyl floor. Hoping we get a sunny day here soon so I can set it outside to soften it up and ease installation.

Seats have been test fit and the notorious Corbeau bracket height has come into play. I don't know who thought it was acceptable, but I think anyone at about 5'10" would have their head touch the roof. A plan is in work to bring them down about 2.5-3". Details as that develops.
 
Unfortunately, when they found him there was no evidence he "knew" the car was stolen. No hot wiring (even though the dash was opened), no broken ignition switch. As a result he was charged with possession of stolen property and likely back on the street that night.

When I pulled the front seats out (2 months later) I found the shaved key used to steal it wedged into the driver's seat bracket.

Needless to say, it'll be getting some theft protection as well.

Check out SkyLink for theft protection

Looking at adding it to mine. Like Lojack but gps based and gives you an app. Average recovery time 25 min. Park it, set a geofence and get an alert if it moves
 
Made it a little further today. Vinyl floor installed! I think it'll look great once the wrinkles have worked themselves out, but man what a pain to install.

Lots of trimming is required. Probably 4-5 inches around the entire perimeter. It's difficult to move around until this is trimmed. Then comes of the fun of cutting out the openings for the shifter, e-brake etc. It's reasonable to work with after it has set in the sun, but quickly becomes rigid in the shade of the vehicle (at least in Seattle, in March).

Also tried out the shampooer in the cargo area. I haven't decided yet if I'll be getting the vinyl floor back there as well.

Another test fit of the seat. It's mostly a poor design of the brackets. The seats can move outboard about an inch. This would permit them to drop almost 3 inches. At 5'11" my head just grazes the roof currently. A 3" drop should make things reasonable, otherwise I'll be searching for another solution.


Just some minor work of late, installing switches in console for heated seats and USB ports in rear ash-tray for back seat DJs.

In the mean time: Anything I should do to the D30 / D35 prior to installation? I've seen control arm mount skids, and such. Worthwhile? Anything else? Any special routing for vent tubes, or other cool tricks?
 
A bit more progress...

Installed switches for the heated seats in the console, hacked up a USB quick charger and installed in the rear ashtray Trim and console reinstalled. Time to get the seats right.


I bolted the seats in and noted they were much too high. I'm 5'11" and my hair just touches the headliner (and it's not sagging!). Feels awkward at that height too.


The way the Corbeau brackets are built, you could drop them straight down about half an inch just by cutting and re-welding. The limit is of course - the seats are wider than stock and hover above the transfercase hump. Moving the seats outboard is the solution. Unfortunately the recline lever would contact the B pillar trim if the seat was moved outboard. Swapping seats is the solution!


A couple of additional considerations for those looking at vinyl floor or Corbeau seats.

1. The vinyl floor is (obviously much thinner than carpet). This leaves a gap under the console. I think I may be able to double up the foam insulation underneath to fill the gap, but worth mentioning.

2. Corbeau seats... Had I not scored a deal on craigslist, these wouldn't be worth it. The appeal to Corbeaus over all the others was the prospect of a bolt-in upgrade.

a. The brackets make the seats way too high.
b. They don't even fit! The driver's fit with some BFH application to bend the mounting standoffs. The passenger side isn't even close! Since I have to cut and lower the brackets anyway, this can be fixed... But bolt-in, they are not.
c. The headrests are... Odd. They can tilt forward and back but have provide no resistance. This means that the instant you lean your head back, the headrest leans back with you instead of supporting your head.

Anyway, that's where we are now. Waiting on my brother in law to come visit with his welder so we can modify the brackets (unless someone in Seattle has a welder!). Started modifying my ZJ rear leather bench until I realized I didn't get the other half of the base brackets to install them. Time for a trip to pick n pull.
 
Getting read to order parts for the axle swap. Just want to make sure I'm on the right track with these things and get opinions / thoughts on a few. My amazon cart currently has:

Moog K3150 x2 Sway Bar End Bushings - $8.43ea
Moog DS1312 Steering Center Link - $53.82
Moog ES3096L Tie Rod End $28 - $28.78
Moog ES2079S Steering Center Link - $17.20

Lube Locker D35 - $21.95
Lube Locker D30 - $25.00
Red Line 57905 75W90 GL-5 1 Gallon - $60.54

Rough Country 873172N2 Steering Stabilizer with N2 - $28.95

On to the questions!

1. Please someone, speak up if I've got a wrong part number! :)
2. The steering stabilizer... Picked because the consensus seems to be that they're all the same... And the silver body will match my Bilsteins! Bad choice?
3. Gear oil? I've got a limited slip 35 out back. Anything better? Jeep doesn't tow. Offroading is usually more of the drift around forest roads variety than crawling.
4. I need new leaf bushings (fronts). Current ones are Omix-Ada installed with my OME springs about 20k ago. Torqued with weight on wheels, but they're already shot. Given my use - 60% street, 35% forest roads (often at... higher speeds) 5% mild crawling. Rubber or Poly? The Energy

Rubber, seems like Moog SB371 is the right number. Will Moog hold up better?

Poly - I've used energy in my autocross SVO Mustang. Their Hyper-Flex line claims the firmness is specific to application. Anyone have experience with them? I haven't found a consistent answer - If I go with poly in my OME springs - will I need to re-use the bushing sleeve from the old ones? If not, I might go poly just for ease of installation.

Thanks in advance!
 
Update:

Seats a in!

DSC_0774.jpg


DSC_0775.jpg


For those considering Corbeau seats, it should be known that they can be made to work. After cutting a full 2 inches out of the seat brackets, moving them outboard 1 inch and altering them to tilt more rearward they both fit within the full range of the sliders and are quite comfortable!

Rear axle is in too!

DSC_0776.jpg


I have to say, I'm very happy with the gear change! It feels like a whole new Jeep! Wheelspin on the 1-2 shift on a 200,000 mile Jeep isn't too shabby!

Front bumper is getting there...

DSC_0732.jpg


Fenders trimmed, old removed and brackets installed. Just need to pick paint out, paint it and bolt it on.

[img=http://s31.postimg.org/bh6h97zw7/DSC_0732.jpg]

Front axle ran into some issues...

Turns out buying the axle at night means that I missed the previous owner cutting off the passenger side upper control arm mount...

Need to find a replacement. Anyone have experience with either of these?

Rubicon Express: http://www.4wheelparts.com/Fabricat...PCtMsppQiLC6G49DkRfnlJhRA--pvyPTlchoCUIPw_wcB

Rustys: http://www.rustysoffroad.com/builde...ustys-control-arms-front-upper-mount-kit.html
 
1. Please someone, speak up if I've got a wrong part number! :)
2. The steering stabilizer... Picked because the consensus seems to be that they're all the same... And the silver body will match my Bilsteins! Bad choice?
3. Gear oil? I've got a limited slip 35 out back. Anything better? Jeep doesn't tow. Offroading is usually more of the drift around forest roads variety than crawling.
4. I need new leaf bushings (fronts). Current ones are Omix-Ada installed with my OME springs about 20k ago. Torqued with weight on wheels, but they're already shot. Given my use - 60% street, 35% forest roads (often at... higher speeds) 5% mild crawling. Rubber or Poly? The Energy

Rubber, seems like Moog SB371 is the right number. Will Moog hold up better?


A little late to the party,
2. Any brand is fine, if anything get a autozone with lifetime warranty so it can be swapped out when it goes out.
3. Ant gear oil with the lsd additive will be fine.
4. Get rubber, poly it's going to be harsh. moog works well.

And get the cheaper upper control arm mount, over built is nice but for just a back roads rig. The cheaper will suffice


Sent from my iPod touch using Tapatalk
 
Thanks for the info! Went with the cheaper one. Any tips for ensuring it's properly located? I intend to measure off my old axle, but given that it was CAD the mount is slightly different. I'm guessing it's pretty important to get it right on the money...

Painted the front bumper! 3 coats of Rustoleum Rusty Primer, 3 coats of Hammered silver. I'm hoping the hammered finish will make inevitable scratch touch ups almost invisible.


DSC_0780.jpg

DSC_0779.jpg

DSC_0777.jpg
 
Thanks!

Bumper mounted! Installation is quite straight forward. With the uniframe tie-ins and the steering box spacer - I can't imaging a more stoutly mounted bumper!

DSC_0784.jpg

DSC_0782.jpg


One thing I would note. Instructions recommend trimming fenders even with the bottom of the turn lense. This is what I did, and it works. That said, with a bit more planning one could trim the fender at the signal, but leave a bit more flare such that it transitioned better. Would make a great looking bumper fit that much better!

DSC_0783.jpg
 
Another update: Rear seats are coming along!

Wanting to find leather seats to match the Corbeaus, I went with one out of a Grand Cherokee (ZJ). I had intended to follow the guide posted here: http://naxja.org/forum/showthread.php?t=1042180

Unfortunately that how-to and my brother in laws Jeep (JeepTorino68) both made it clear that headroom would be an issue.

The problem as it turns out is that mounting the brackets to the vertical support moves them back significantly leaving the back edge to rest on the floor as it raises to the level of the cargo area. Moving the seats forward just an inch alleviates this, but leaves the brackets floating in space.

I considered building a spacer, and mounting the brackets to the floor (which would also require a spacer). Ultimately I discovered it is quite easy to relocate the brackets where they attach to the seat bottom! This, combined with removing the latching mechanism (which isn't used in an XJ anyway) yields the desired result.

Latching mechanism (and surrounding plastic) removed:
DSC_0795.jpg


One bracket moved (prior to installing the second two fasteners). This requires cutting a relief into the seat bottom:

DSC_0796.jpg


The brackets also need to get a slight bend. This relocation leaves the front edge of the seat at about the same height as most people leave theirs. The rear drops almost 2 inches. The result is a more reclined (and IMO comfortable) seating position. The brackets need to be bent to the new angle of the seat:

DSC_0798.jpg


And here we are!

DSC_0801.jpg

DSC_0803.jpg


Plenty of legroom:
DSC_0808.jpg


And at 5'11" I have plenty of headroom as well:

DSC_0809.jpg


This mod should be doable even with ZJ seats installed, though you may have a gap if you don't re-position your seat-backs. I'd be happy to post a more detailed how-to if people are interested!

As an additional bonus - moving the seat backs that extra inch forward also leaves space to keep your 31" spare in the stock location :D
 
Still working on it!

Stripped the rear bumper and repainted. It started raining after the last coat and before I could get it in the garage so it may get touched up down the road.

vcK0lE8Fz-uF8ovOOr4JV2zOBgYnlt7bqchABGMFlalQ13cy7h-Ltt1mIDSQ4lYzONEhBskJpK7YTF6Db-OrppOnz-xwNgxbq0e9Mj27MtoZA4zle7IMd0EqknJCrcZR6eON0-pmrD-EtXXLtBO0KRq1g9Ru0sP70pILipo5nWq3DtFUTablmnFI7TYoh-uhyRI0PIUnaCyNlplfi_P65Ke0SAagdNEp5wfvlHDRWO1jHKFDpSLoqEG35yCqK0L6qQfWA8Na8d6WoecgI3qPqaR9mApbVWFjlzPM18OK9tt2q7Pnnd_IaS3d8Cb73Xus-CJ3nBCzAz72ZN3_Q9jtp1sDjDHCoRMeJb05XaPuKJlD7FB_PJUeT8EmHByH3UIZIy95qtykMTs1PAovG47wFe5KOyYnNDENAVD715JB5DLF5vwkY-UreGfFYE1I5iDe2yXFfQNEeKxeizPzqOlsS2v6IYrd2c8s4jfDEUcBf8RJP9YVX7GD_EiCgraQ9X_8LPtR2mHn0sqj1c_RImg6K2K58NtmAfIQLgUVikPGiRFV0V5cTmv_sENY4iYVqBZy-HJMPqI4ClRqVCxjcaS1JcRNnbHoPVi-=w1449-h815-no


Also did the rest of the work to mount the rear seats. Ended up cutting the center bracket like so:

WCUPE19Y6IZdy8vJde2T2xL7H4GhzppNqyB5BDjysmPY0ju9CgBW-6gYD9JrE7irgUnc0Zk1H40HJ7h9_bd4WIZc9dFqUD9MfgJpMLTPpJROp0ZaRLbdijDvIIgLhEw2ZWjzjQwo5vO6jRaIPQMDauHhzFlU5Nyam0RAuZER66H_rddU1iWwKk1D3q5gMsz1NrJekQ7w8FiIASCdywMgxgI-PQRQVnxlaO_ROOZmRbzJysZKQ_t9Lg7-irFNInKmxx1m2DU9LvTMx4e-_xc7ZAe4diYGNTjI_irJ85qYO_P0Sx2doi0HcN-fQsUBM4AqEDPLHoVS504_FW2W_3sVYa5R1ncx8xWegKP0sX5hiap94YkgJXicZAkvSXFCI3qU09d9lFkUZp3EMFrqRpdOb3NEgm9zPo6xdBTHA5THJtKXXU7Z5yrUzqYxCMcEsQhykaHLYxJ9p25mYzO49Pa1m2pF2oMaY22wfFPZNb0MOEQjvVFLwGPUtXo-Hf4tuafYMGGQmrqFsYwgqrrLOeGj-HG-uKepdolPpU1lxKrv236SWhvyDm4tY1VwhUKYlLt7xgjH86z38tbomC3OL5aZBFiU91Ka3wdn=w1449-h815-no


This permitted the bracket to go in it's intended position, under the seat bottom and out of the cargo area. The result is that when folded, the seat backs are barely an inch higher than the cargo area.

2ADtWBO6kAF1qRTd-xu6dXsp5qkSMWPFc4KAjrpovDhumvw_apW2hXJnNQEWnt_Zm0IJ-XOzuwY_ctQJzevGon82-aTnvZfoD4xY7C4hyf3dAnkGIHirNRp3_oSx84H0-RtpBxYBmG-jNd-ytj-qJGdbzlbDKXwsARSn25W_cLlgr922tgxmJOmqaLKqDLaYIEGwARQ08owgx7e4tmucVxL-P5gULMjjyK2WLB_Ki6ACzSWO4gN7K57FOI42hZ06jDx0fEwiZ1SDK2yZj96cKDAFd-a1VK2NTWKttsPc01WHkUHivk-cZwJbpBzczIrGYptvVJQGKUBiLnYvx53gJrHRx0FXVykJUi2xJMq0qPPyTrpPY0CRJtJqE5zyKod0DcEeXK12an1ReW4d5Cr6H-BRoRkS0RTibzU9BlBSo0hbNGOygjddjdwTQYR7yTtQqbTBwwHArC1OKOn0UpzEni86VOcKGQkVB27S9E-QLVRx_RLDFZjGH0v6nIB4y_n1Zeyv5etLelCmeoq9VaS89E85q4APgSZ5jlp389NnmzOdNVJ0A7zVNQ4NZmyw906vbaVl21qJ5igroEFjSoHIEMTbz5OaCIDB=w1449-h815-no


Also got my wrecking yard vinyl cargo area floor installed and an Amazon storage bag. For now I've installed the vinyl floor on top of the carpet. I may eventually pull the carpet and put down the insulation as I did up front.

N4JQItmApGVgxmjTYyJ6jA6omAB49rT6w1Xm2iLxlYVRSKCbwcpQ0PxoHGCNxY0TRuVwB4EXkloeUshtK-xknb_JoLrNgkaA4pvjrUyooqn5noPUcetV7Y8Otw47V7W8gdo2esNvGMxpP4SJoTJ1DZ8YiKmM8hNSHwelFRQeKUY5MY85AIXNqLgkQdl7PKpTuovUpOxR3YiIlKg3bjttMU-xNFSr3WSbuNf9aAqr4kQVGAtgD0sUgSXlS5DUVlgAjQY4IqXRfbtEDVMNyCp-ByfVdYU-PeqXFGca3PdQ8LDTmNk3hmctzMrU508EY5_sZr6DB14dTHeCj5p8VmJ39xcSaXgGv5n1yO7vh75uDtlheqBmO7WZxu4MOLwyIGHToupYs6cVHwoEyzN8VDKZwq353Qvkw5n8UkkuSMuZIrEfc-AAayeXNwjwgqUeS7n3stp422M42wVveFZZipIO6PbUiPICX2Dq9gNk6ef97RR1lNMaoBHGJ-tGN9GH-rjUFr1VDlNEUo_PFAIXEhpxlOg9BoeApA6C4bdGgvG2sQbSlkX3nzXW6PWWcbyOXNI2iFci1KKRooKw2NBSDCmnv5pPqLAQIPBS=w1449-h815-no


8_GTTbCbyjLZBCapf0_ynU5gSt9NkhF3mlCTP8RbS-WAb2kpzR_jKmQSVIfOePRALBLXgYixjrptB_0IFFf71qIy0C7nQyMExX1dt2mNf93-X8s-TekLWa7xmEHa8hJXGzi5DBX-jeA0RJGAt7aBiDdRD2J_QinQAVI3QvLqDcUgDY_vJchSOEJj10FZKxKo0FH6OimlTz6s2C5QjYABsXLlI-6tpGEpiumcRXtT7P7l5y1gFwxHolgvqXNHfKOzTBjqgWmh_SiTwcX3F-gCTjaHheIjeIWBmukkHZ_Fk81zOSeDDdpCPuK6ekT5WWb-5IPomVpW8oZG322OfgJ2lgrFpjOGiRaF9KNZyqPeuuGSgpoFUjsm5dWWcnEEfu_--mLny2fKnlAfeC-BnYm0tG05R-PYyrImGOeVquZi4TYtORI1gglQAjB4rLIvm3VO3bw6Ek3l11OR7KVhh3dqFNm2TbH8GGKEL-IHPa_2Qxhoe20ZLRxFjvcIzhCqPbDJELob8CV8ZK2p0nqkS0G16KzFDT0FvkrUkp9CmzsZZXghsCcL2gGqTH6S6vxuEeRRrd-5hwbCYkTC5BmqajvPNLDG6udjwfVm=w1449-h815-no


I intend to do a full write up of the "New Improved" ZJ seat installation once I get the rest of the Jeep buttoned up.

A couple of questions:

I need to weld on that upper control arm mount to my new to me D30. Any known good way to locate that mount? How crucial is it that it be located exactly as the original?

I'm going with modified WJ lower control arms. I've seen comments that they limit droop where as they contact the mount on the axle side. Has anyone cut a pocket for more travel? Would that combined with some mini-skids be a reasonable solution to getting more travel without weakening the mounts too much?
 
U should put limited slip additive in the rear end even if the gear oil says it has it in there. I've had a couple of comebacks from not putting the extra additive
 
Will do!

Another question: How crucial is the location of the passenger upper control arm mount? The bracket from Rubicon Express is approximately 1.5" taller from center of axle tube to center of bushing. Also, there isn't really any great way to locate it since the bracket is a different shape. I'm going over to a friend's tonight to weld it on - just wondering how exact it needs to be.

My thoughts are that it's probably fine if it's within 1/4" side to side and +/-5 degrees in rotation - given that the bushings on either end are rubber. As for height, it seems like maybe the mount would interfere with the motor mount at full compression on that side. Anyone have any thoughts on this? Would having the upper control arms at a different angle create some sort of binding issue?
 
Back
Top