- Location
- In a strange land
I don't know exactly which years this will apply to. It will apply to Grand Cherokees too, and probably a bunch of other vehicles. If anyone can offer insights as to the scope of the applications it would probably be worth mentioning.
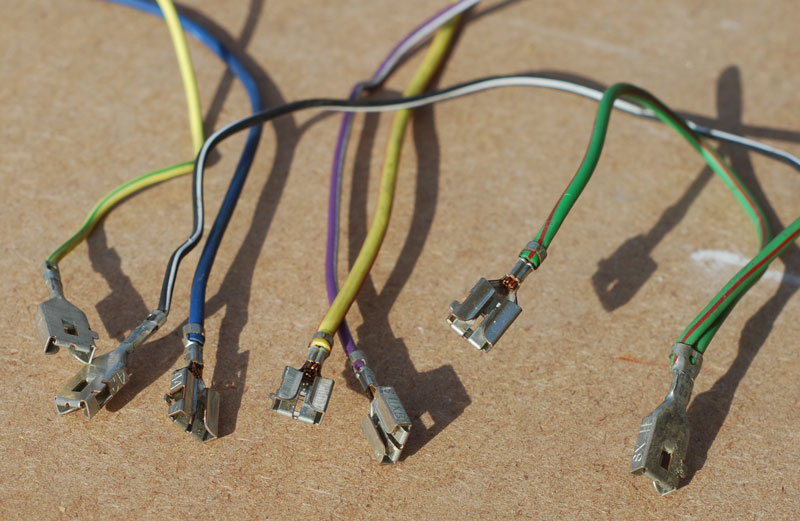
For my own sake I have torn into this with the intent of putting to work some of the vacant space in my PDC as opposed to adding even more fuse blocks in the vehicle, but for the sake of this post this is simply a matter of what is present and how it comes apart. I would very much appreciate input on some details about relays, and if anyone knows where to get some of the connectors involved that would be great.
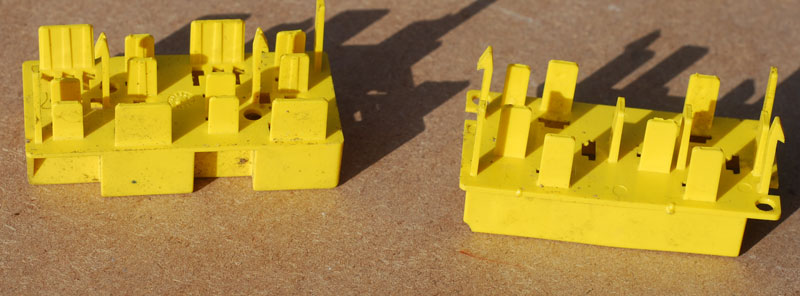
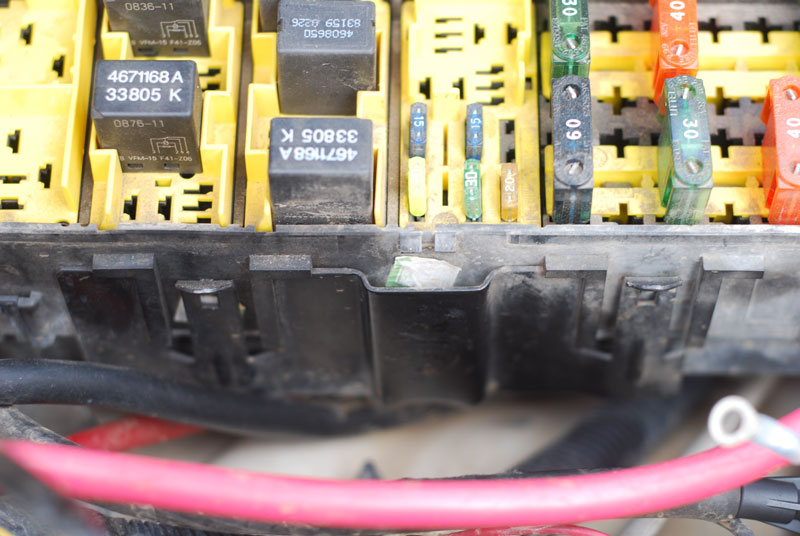
Here is what I have under the hood in my 1996 XJ:

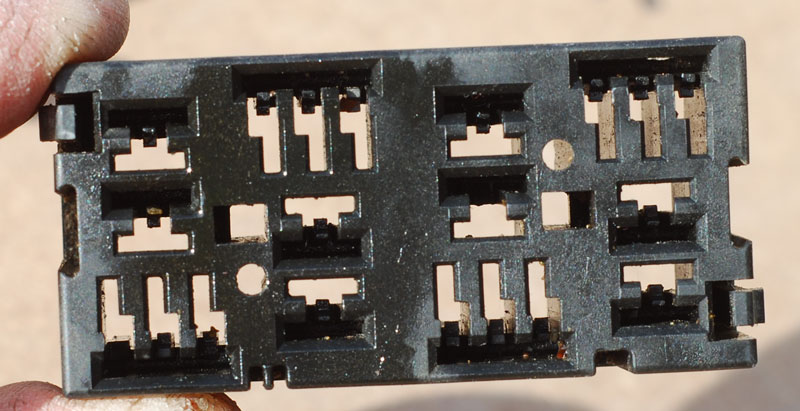
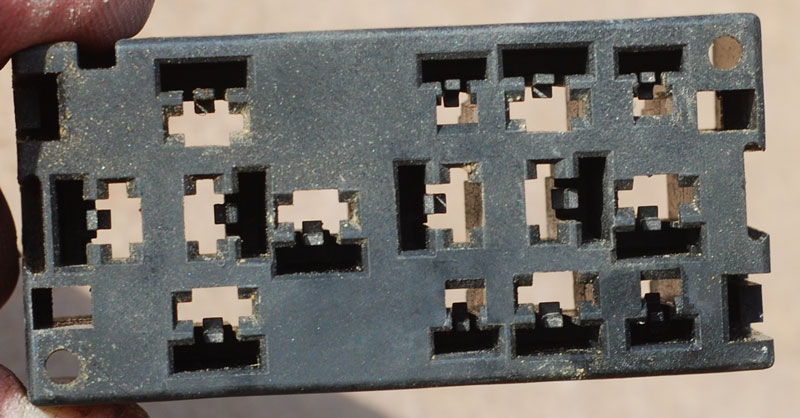
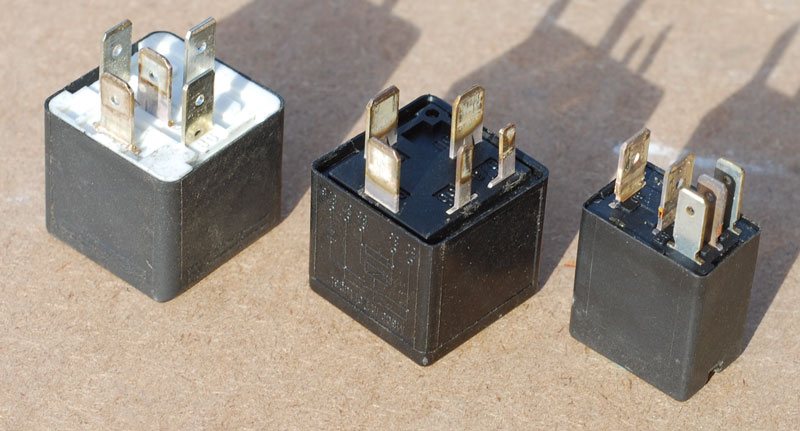
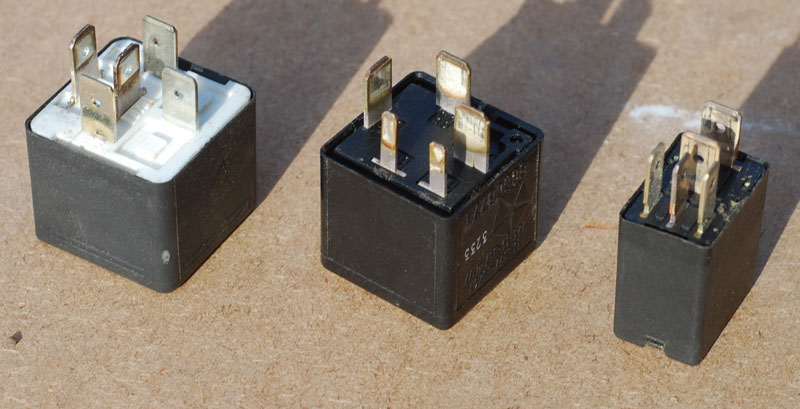
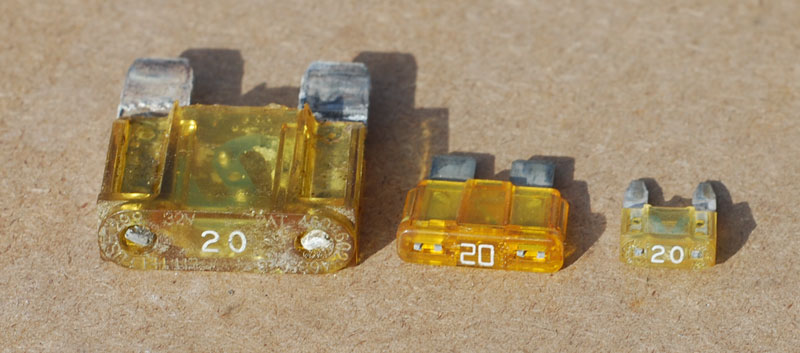
Note that there are a bunch of empty slots for relays (mostly the smaller, rectangular type--anybody know their nomenclature and rating?) and empty slots for those large spade fuses. I see potential for a number of electrical upgrades while maintaining somewhat stock appearance. So what does it take to put this space to use?
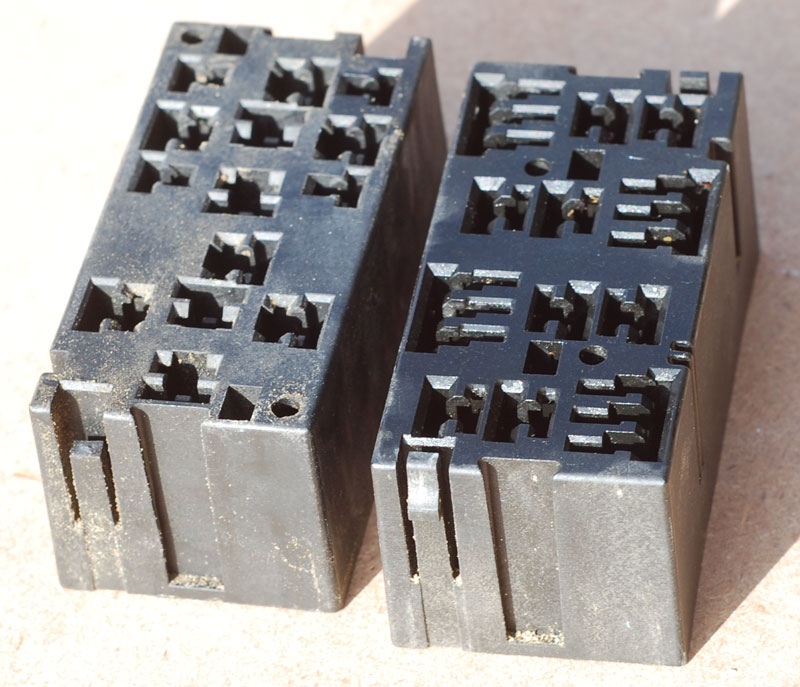
New Year's day I got a couple of hours in the junkyard, and it was 50% off day. A couple of comparable PDCs followed me home. Both of these were out of Grand Cherokees, but I don't expect them to differ in construction.
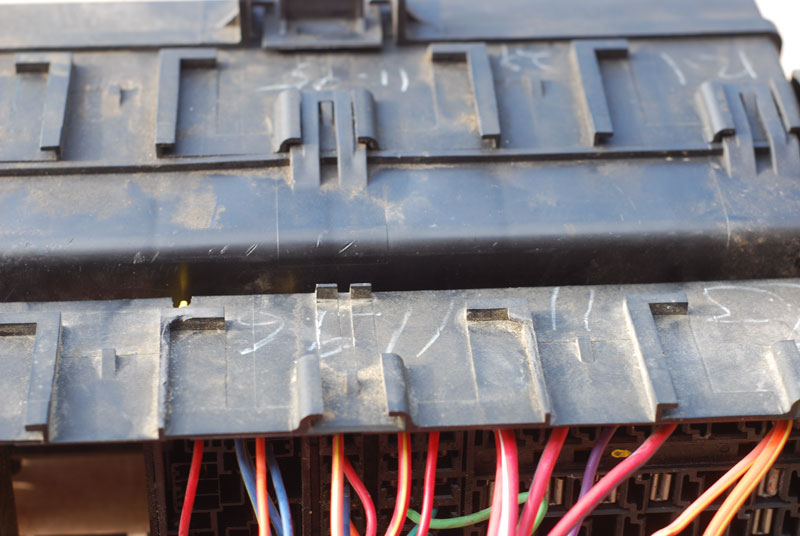
One constant theme in my learning curve has been "this plastic is dang brittle". The years and heat cycles have not been good for this stuff. Plan to proceed with caution. The most important things to note are the locations of the release tabs. I have tried to take the best pictures I can to show where these tabs are and how to go about releasing them. Some of them I am still trying to get to release successfully. Brittle plastic is a pain.
The first step is getting the PDC out of its mount. There are two metal clips which need to be pried back and then the whole box needs to lift straight up. Here's a pic of the box still in its mount, showing the metal tabs which need to be pulled back:
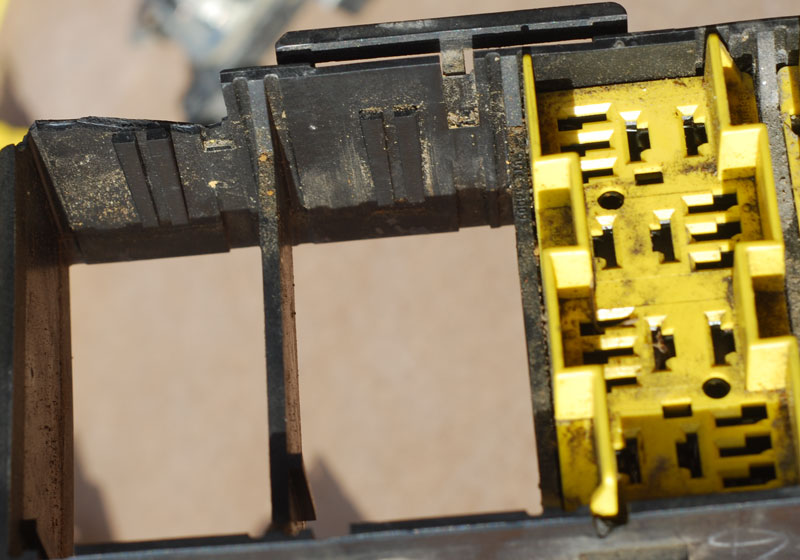
This picture is to show what happens when you don't lift straight up:
Notice the broken out retaining flanges on the lower box (they are still intact on the upper box). It didn't take much force at all to accomplish that, and that is the primary mount for the box. This one (lower) became my candidate for destructive analysis right then and there. Don't make this mistake with the one you need under your hood.
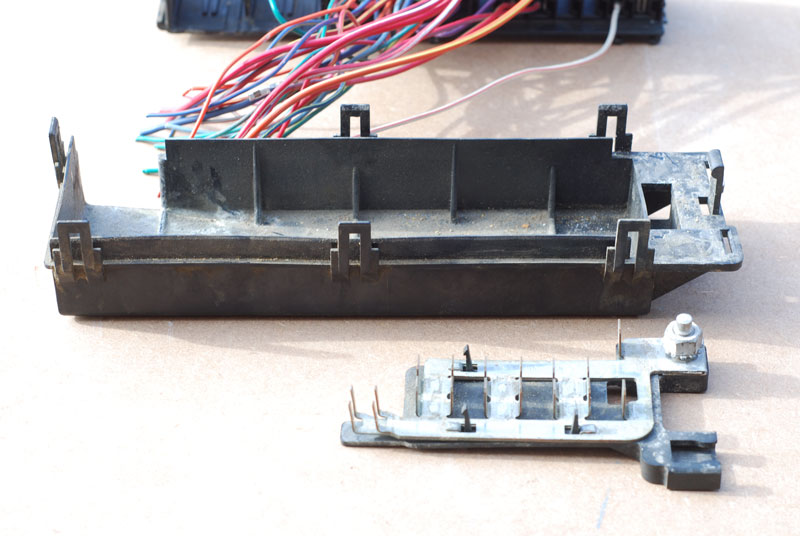
Next step is removal of the bottom of the PDC. There are six clips around the perimeter. I found it helped to snip some thin pieces of sheet metal to help hold several of them open while I pried. I didnt' need all of them to release at once, but I needed more than I could accomplish with my own two hands. That is another theme in this process. There is a need for extra hands, but not much room for them to work in.
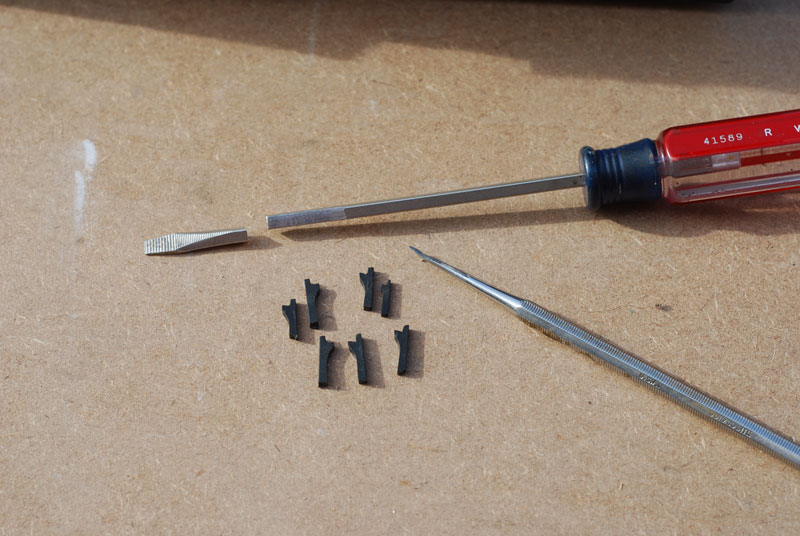
Once the bottom of the PDC is off then the plastic plate which retains the plated copper buss plate needs to come off. It is held on by three plastic hooks. I broke one of these right off the bat too, largely because I had no idea where they were or how to release them. Here are some pictures which should help with that:
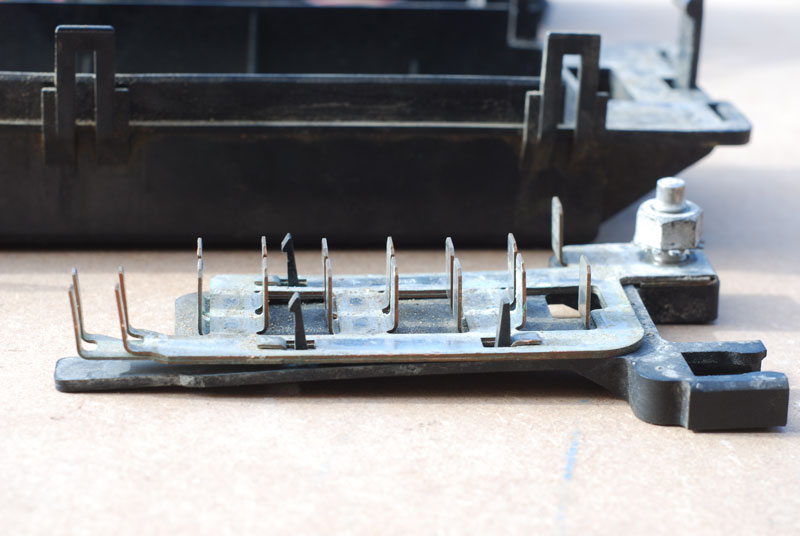
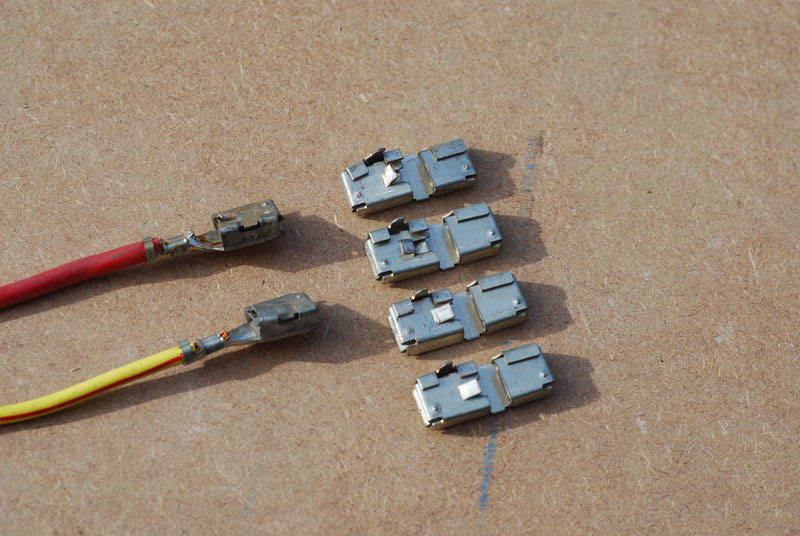
I think the answer is to come at these though the square holes in the bottom of the plastic plate. A thin jeweler's screwdriver would probably be the ticket. The two which are together at the farthest end from the alternator lug will be the easiest and the ones to start with. Hopefully, with them loose, the one closer to the alternator lug will then be accesible. See the following pics for more clarification:


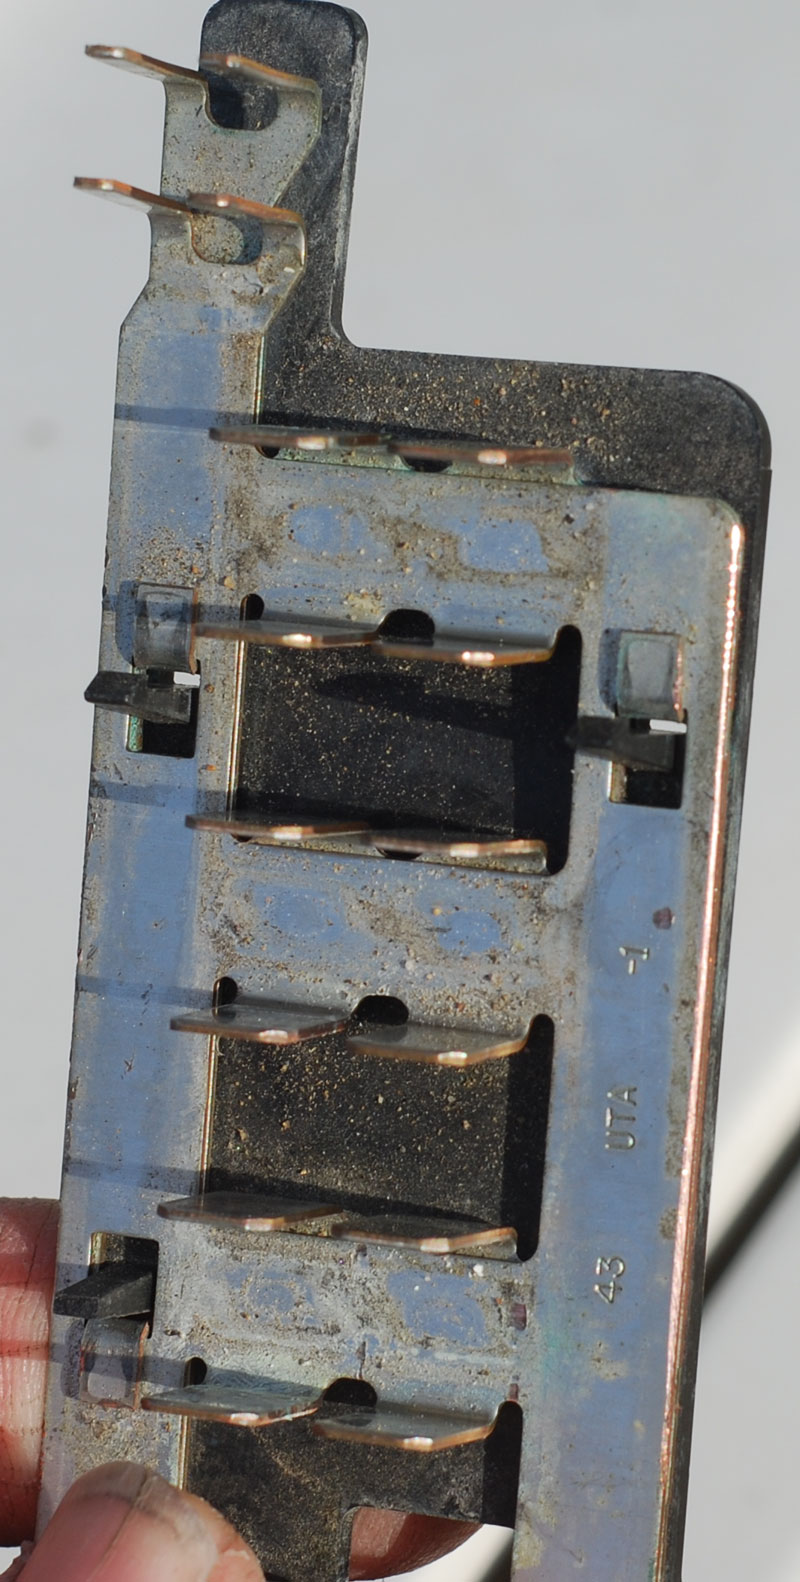
As for the material this buss plate is made of (particularly for 5-90's benefit), it is copper. It mics at 0.032" on the tabs and 0.066" on the bottom where it is doubled up. I would figure it is nominally 0.030" copper.
To be continued...
For my own sake I have torn into this with the intent of putting to work some of the vacant space in my PDC as opposed to adding even more fuse blocks in the vehicle, but for the sake of this post this is simply a matter of what is present and how it comes apart. I would very much appreciate input on some details about relays, and if anyone knows where to get some of the connectors involved that would be great.
Here is what I have under the hood in my 1996 XJ:
Note that there are a bunch of empty slots for relays (mostly the smaller, rectangular type--anybody know their nomenclature and rating?) and empty slots for those large spade fuses. I see potential for a number of electrical upgrades while maintaining somewhat stock appearance. So what does it take to put this space to use?
New Year's day I got a couple of hours in the junkyard, and it was 50% off day. A couple of comparable PDCs followed me home. Both of these were out of Grand Cherokees, but I don't expect them to differ in construction.
One constant theme in my learning curve has been "this plastic is dang brittle". The years and heat cycles have not been good for this stuff. Plan to proceed with caution. The most important things to note are the locations of the release tabs. I have tried to take the best pictures I can to show where these tabs are and how to go about releasing them. Some of them I am still trying to get to release successfully. Brittle plastic is a pain.
The first step is getting the PDC out of its mount. There are two metal clips which need to be pried back and then the whole box needs to lift straight up. Here's a pic of the box still in its mount, showing the metal tabs which need to be pulled back:
This picture is to show what happens when you don't lift straight up:
Notice the broken out retaining flanges on the lower box (they are still intact on the upper box). It didn't take much force at all to accomplish that, and that is the primary mount for the box. This one (lower) became my candidate for destructive analysis right then and there. Don't make this mistake with the one you need under your hood.
Next step is removal of the bottom of the PDC. There are six clips around the perimeter. I found it helped to snip some thin pieces of sheet metal to help hold several of them open while I pried. I didnt' need all of them to release at once, but I needed more than I could accomplish with my own two hands. That is another theme in this process. There is a need for extra hands, but not much room for them to work in.
Once the bottom of the PDC is off then the plastic plate which retains the plated copper buss plate needs to come off. It is held on by three plastic hooks. I broke one of these right off the bat too, largely because I had no idea where they were or how to release them. Here are some pictures which should help with that:
I think the answer is to come at these though the square holes in the bottom of the plastic plate. A thin jeweler's screwdriver would probably be the ticket. The two which are together at the farthest end from the alternator lug will be the easiest and the ones to start with. Hopefully, with them loose, the one closer to the alternator lug will then be accesible. See the following pics for more clarification:
As for the material this buss plate is made of (particularly for 5-90's benefit), it is copper. It mics at 0.032" on the tabs and 0.066" on the bottom where it is doubled up. I would figure it is nominally 0.030" copper.
To be continued...