kevinofhardy
NAXJA Forum User
- Location
- Utah
HD Engineering No lift XJ Shackle Relocation bracket Install
I purchased this set from Brian at HD in May 2013 for $130(they have gone down in price to $100 so get them now!) They were shipped the next day and arrived at my doorstep very quickly.
I was amazed at how heavy the box was when I picked it up. Poor USPS girl may have needed a few days off after delivering it. I opened it up and the bracketry and hardware are crazy. It is all ¼ inch and looks like it could support a tank.
I was pretty new my XJ and real modifications so I was really nervous about cutting it up since it was so clean. I put off the install for a while and finally got to it on 09/20/2013 when I rebuilt my whole rear end.
Install:
First support your jeep on jack stands and drop everything. I took out my rear sway bar for good, disconnected the shocks on both ends since I would need new ones for the amount of flex I would be getting with these relocators.
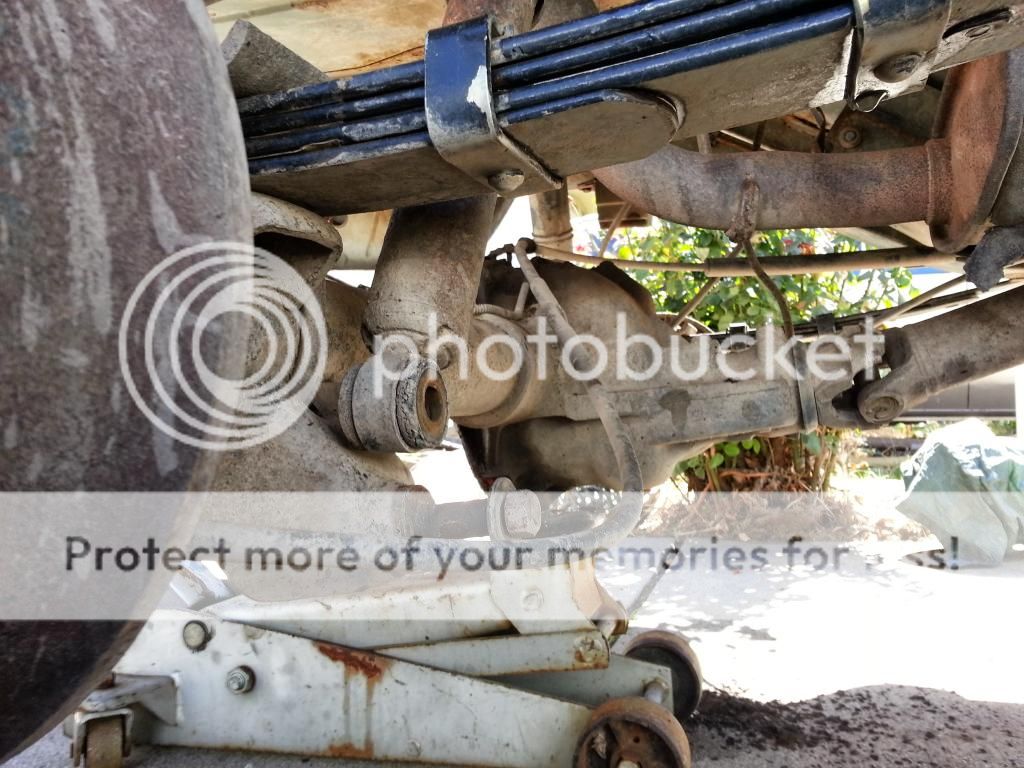
I left the u-bolts on to drag the springs down. Disconnect the OEM shackle from the shackle box. I had new JKS boomerangs so I disconnected the OEM shackle from the leafs as well.

Lower the axle now that everything has been removed. This should give you much better access to the spring hangers.

Now that all of that is out of the way you get to start cutting. Remove the entire OEM shackle box to the frame rail and the rear crossmember. I had a 4.5 inch angle grinder with a cut off wheel so I had to cut in stages.

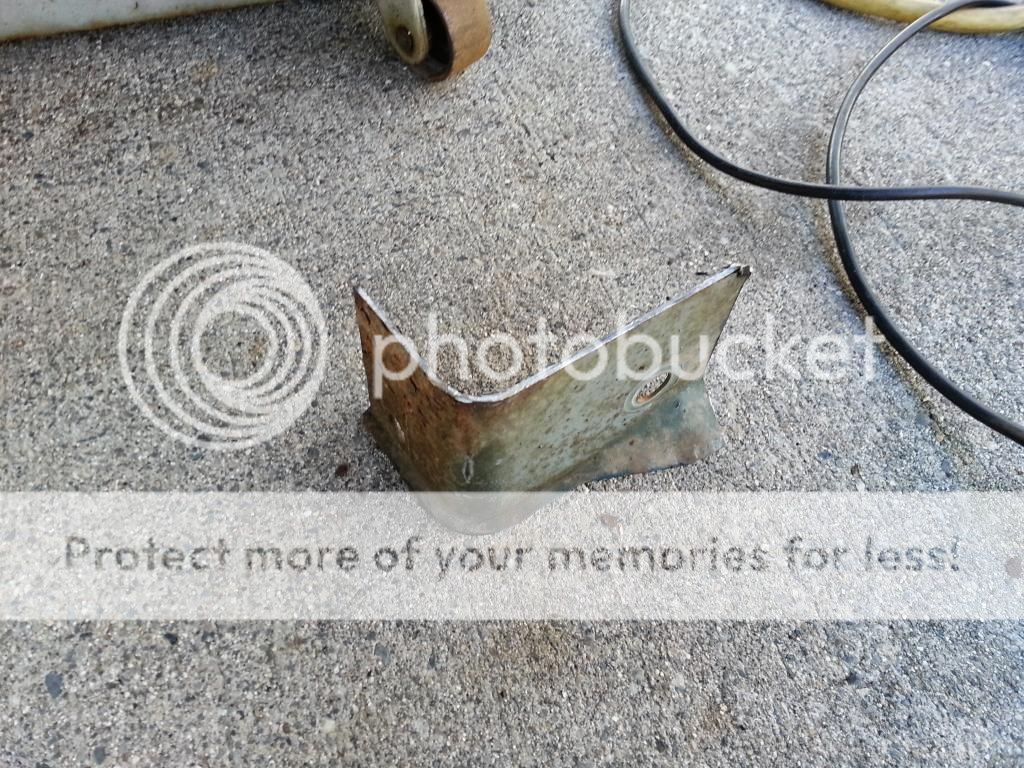

Once I had the bulk of the material removed I switched to a grinding wheel and flattened the cuts down flush to the body.


Now that I had it all cut out I was almost ready to mock it up and drill through the floor. I did not have a hitch when I started this so I had to get some nut strips. I picked them up from the dealership(cost a ton…) I slipped those inside the frame rail and secured the main bracket through the frame and with a bolt in the OEM shackle location.


I marked the holes through the brackets.

I purchased this set from Brian at HD in May 2013 for $130(they have gone down in price to $100 so get them now!) They were shipped the next day and arrived at my doorstep very quickly.
I was amazed at how heavy the box was when I picked it up. Poor USPS girl may have needed a few days off after delivering it. I opened it up and the bracketry and hardware are crazy. It is all ¼ inch and looks like it could support a tank.
I was pretty new my XJ and real modifications so I was really nervous about cutting it up since it was so clean. I put off the install for a while and finally got to it on 09/20/2013 when I rebuilt my whole rear end.
Install:
First support your jeep on jack stands and drop everything. I took out my rear sway bar for good, disconnected the shocks on both ends since I would need new ones for the amount of flex I would be getting with these relocators.

I left the u-bolts on to drag the springs down. Disconnect the OEM shackle from the shackle box. I had new JKS boomerangs so I disconnected the OEM shackle from the leafs as well.

Lower the axle now that everything has been removed. This should give you much better access to the spring hangers.

Now that all of that is out of the way you get to start cutting. Remove the entire OEM shackle box to the frame rail and the rear crossmember. I had a 4.5 inch angle grinder with a cut off wheel so I had to cut in stages.


Once I had the bulk of the material removed I switched to a grinding wheel and flattened the cuts down flush to the body.


Now that I had it all cut out I was almost ready to mock it up and drill through the floor. I did not have a hitch when I started this so I had to get some nut strips. I picked them up from the dealership(cost a ton…) I slipped those inside the frame rail and secured the main bracket through the frame and with a bolt in the OEM shackle location.


I marked the holes through the brackets.


