• Welcome to the new NAXJA Forum! If your password does not work, please use "Forgot your password?" link on the log-in page. Please feel free to reach out to [email protected] if we can provide any assistance.

'98 "Anasazi" Build.

yossarian19

NAXJA Forum User
Location
Grass Valley, CA
I always wanted to build my '98 into something just a little bit tougher. A faster, a little stronger, a couple more mpg... just... More.
I bought it in early spring of 2008 with 68,000 miles on it. I walked around 3 miles through SLC to go get her, so I damn sure wasn't leaving empty handed. The salesman knew it, too, but thats another topic.
Anyway. At times I've had 30" Cooper Starfire LT tires on it, 31x10.50 BFGs, 235 Wrangler Silent Armor, no lift, 2" budget lift, JK shocks, (gulp) no shocks, no sway bar, poly sway bushings... etc. It's been a lot of learning. Jeep has been a hobby, a ride to work, even a home.
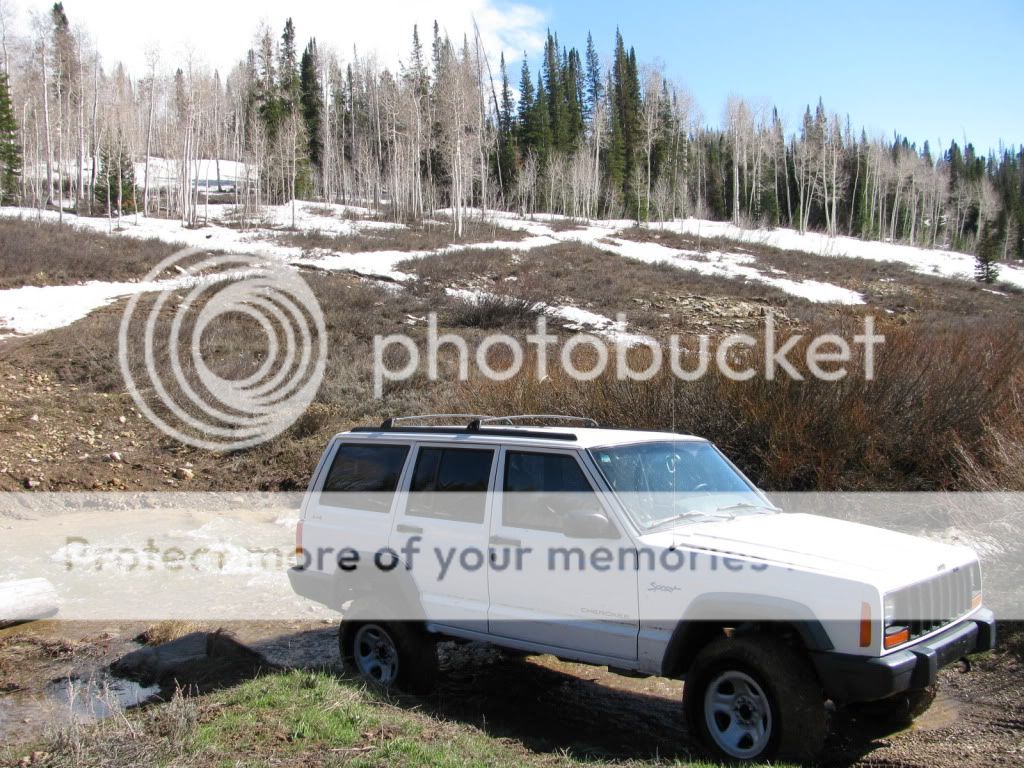
Here she is in the vicinity of Park City, budget boost and 30" Coopers,
IMG_0033-1.jpg

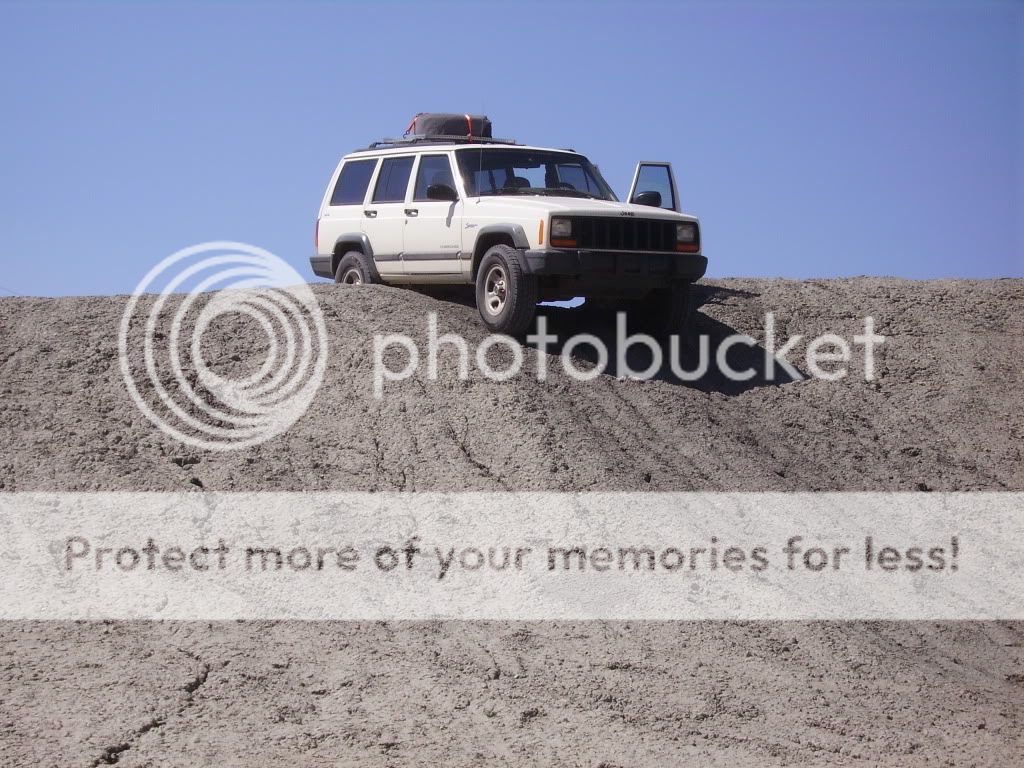
Damn near stuck in (on?) some bentonite hills in Wayne County, UT
IMGP1931-3.jpg

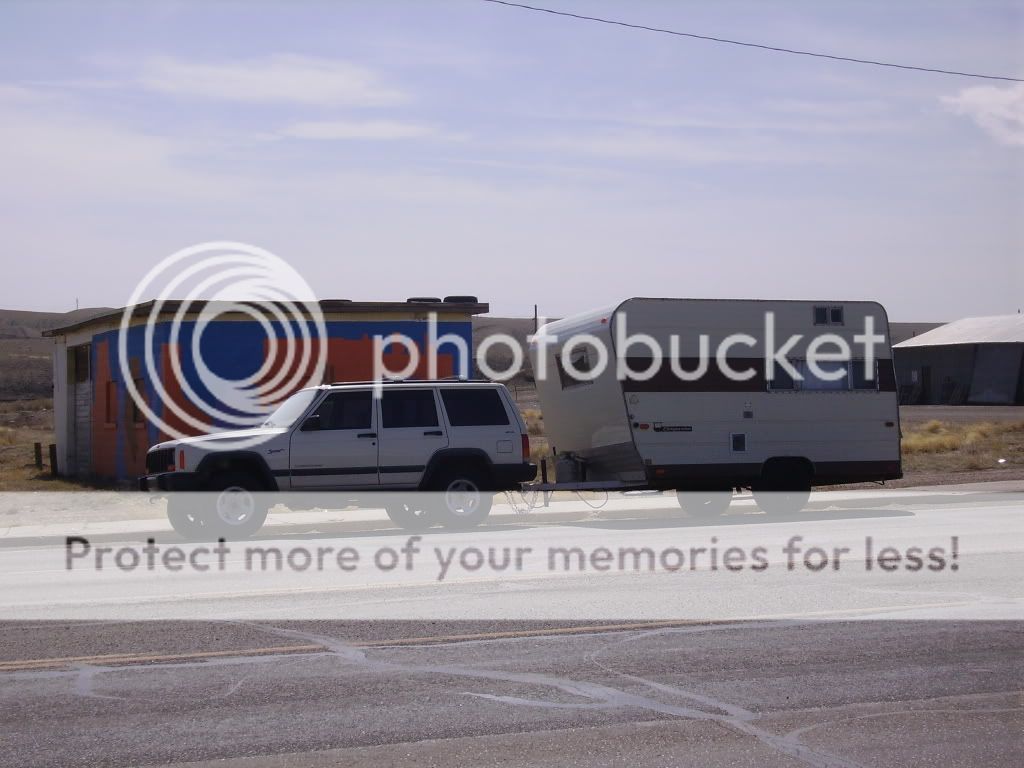
And pulling my old apartment in Green River, IIRC
IMGP1964.jpg

So much for the old days. Next up, I'll post where it is now...
 
So, at one point I'd left Utah and gone back to Maryland. With a buddy to help, I got ZJ rear discs onto my Chrysler 8.25. Still haven't swapped the prop valve guts, but its been probably 60K miles and I'm still happy. Like so:
IMG_20110701_165357.jpg


Recently got around to the WJ lower control arm swap. Much improved road manners. Really a surprising amount of benefit here.
IMG_20130903_143918_zpse6d7171d.jpg


I scored a smog legal CAI kit, used, for cheap. +mpg maybe, +power yes.
IMG_20130910_132521_zps7da17912.jpg


Put a Zirgo 2200 CFM electric fan in place of the mechanical. I'd reccommend going straight to the Taurus fan if you are interested in an electric. 2200 is underwhelming from a cooling standpoint. Here it is, though
IMG_20130910_132536_zps75aaef15.jpg


I wired it to a 3 position dual-throw switch. Switch all the way up, it's wired to the cigarette lighter on the left: ignition hot. Middle is "off", bottom is on when the ECM tells it to be on. I tapped the factory auxillary fan for a relay trigger wire. Like so:
IMG_20130910_105935_zpsa492a846.jpg


Bottom two fuses are for my headlight harness (10 gauge power to each relay, 12 to the bulbs) and the top is for the Zirgo fan.
IMG_20130910_132551_zpsbc581466.jpg


2.5" man-back exhaust. Quiet, mostly, but frees up some power.
IMG_20130910_132634_zps60601b8c.jpg


Add a cubby to the rear pocket. Gain storage without giving up sound isolation.
IMG_20130910_132811_zps2228ccdf.jpg


ZJ leather seats.
IMG_20130910_132826_zpsfaa319f7.jpg


Brown Dog motor mounts.
IMG_20130910_132945_zps2c6f8780.jpg


That mess + the Precision Auto injectors I put in bring me to today's spec sheet: All of the preceding mods, 4.0, AW4, 231 & 8.25 riding 235's and 3.55 gears. 22 mpg highway, 16 on my last tank w/ 6 hours of 'wheeling and around town. Gets up and goes just fine though it's nothing to write home about in the speed department. Crawls fine but again nothing special.
 
The plan, now, is to gather the parts and build it up to:
3" coil / bastard pack lift with 30" Cooper AT/3 or Starfire LT tires, though 4" with drop brackets & 31s & 4:10s will be hard to resist
WJ swap (gathering parts)
Stock 15" steels w/ spacers to clear the WJ calipers up front
ZJ tie rod (already done, actually)
Taurus fan swap, or maybe go back to mech fan with a ZJ clutch
Put in the ZJ prop valve guts & upgrade the rear pads
Add rocker protection, since last trip out put more dents under there.
Iron Rock Offroad track bar. I think they make the best setup going, really, and you can convert to double shear without going to heims on either side.
JK Rubicon shocks. I've run these before with a budget boost, got rid of them when I went back down to stock. Good shocks, low bucks.

So thats the plan. I want to keep it at or under 4" to keep building & operating costs low. On 30" tires and 3.55 gears it will be slow but manageable. 31s I didn't like at all. Course, I might wind up building axles in the garage that I swap in over a weekend. Project will be slow going, since I'm not working just now, but I'll post pics & updates as they come.
 
Net?
If you mean the cubby, I bought a sheet of lexan and used a bit of cardboard to make a template. Half a dozen counter-sink washers & a few screws to secure it.
 
Don't know what the trailer weighed and I should mention that with the trailer package, I ought to have 3.73 gears in it (so says the VIN build sheet I pulled a while back). Never checked to see for sure. Anyhow, it was slow but totally manageable both stopping & pulling.
That was before I put the electric fan in, which I wouldn't recommend for towing unless you go big, like a Taurus or some such.
 
OK, figured it was time for a bored throttle body. I mean... why not?
Too cheap to buy one, though, so I started thinking about how to DIY.
First, I took a rotary burr that I already had and chucked it in the drill press.
IMG_20131123_170407_zps118377a7.jpg

Then I moved on to a sanding drums when it was damn-near done. First 80 grit, then 120. Felt no need to move on past that, as the casting was pitted anyway.
IMG_20131123_170727_zps0c591622.jpg

Here is the finished product, far from perfect but close enough for me.
IMG_20131123_173518_zpsa0c9793e.jpg

I bolted my old TB spacer to the junkyard throttle body for a guide. A little blending work with the dremel, a little polishing, a lot of brake clean & scrubbing... Voila.
I'm in to the project for about 15 - 20 bucks. Of course, I already had the drill press and the rotary burr.
 
I build a new center console lid for my first upholstery project. It came out "OK". I can see a few things I could have done differently to get a better product, though I will probably not bother to do this over again any time soon. I used the old console lid as a template, some scrap plywood laying around, and under $20 in materials. The pictures explain the rest.
IMG_20131211_164846_zpsd0bce623.jpg

IMG_20131211_172312_zps4d5c0a9e.jpg

IMG_20131212_165722_zpse4238f5e.jpg

As I'd said - it could have turned out better looking but DAMN is it much comfier than the plastic crap that Jeep sent it out with. Also pictured, the new tool belt. Fashioned from the center rear seatbelt of an 80s Caprice. The vinyl covering is stapled to the bottom of the plywood. It's a little tricky getting it all tight & folded such that the outside looks nice but I learned from it.
I think next up is armrests on the door panel, though I don't know just how that will work yet.
 
Few minor projects have gotten done, nothing big.
Got around to putting U-joint shafts back in the rig and put full circle clips in while I was at it, not that you can tell through the assembly grease..
IMG_20140120_182809_zps11a46193.jpg

Right around the time that the ignition coil crapped out on me, I got tired of re-half-assing my battery cables when it was time to pull them off & on. As a result, I bought new ground cables at Oreilley and put new lug ends on the positive cables. 4 awg is fine for my needs, so I just freshened it all up with crimped & soldered lugs + heat shrink for good luck.
IMG_20140120_182836_zps4e0090f8.jpg

I've got maybe $30-40 into the cables and they'll last another 10 years, so I'm good there. While I was in basic maintenance mode, I replaced the valve cover gaskets, PCV valves & grommets, oil filter adapter o-rings & reinstalled the mechanical fan after getting tired of the electric. So much for after market - I've just been keeping it on the road...
And lookie here - I put my SAE tool box on an engine block. Hooray for spare engine blocks.
IMG_20140120_182931_zpsa40e569c.jpg

So, hopefully coming soon I'll be re building some XJ lower control arms with more steel and adding a lift to the Jeep again. This is assuming I don't get sucked into a lot more maintenance that I don't feel like doing...
 
I yanked the axle to do a bunch of minor projects on it. Pictured here with shiny new diff cover & some minor reinforcement to the upper control arm mount.
IMG_20140204_142206_zps060891f8.jpg

The extra steel I added wraps 90* from the closed section of the mount down to the tube. I think it was 1/8" thick 1" wide steel, welded to the back of the mount first & bent by hand, hammer & torch. Definitely more sturdy - knocking the bushing out, I could see the mount move a bit. Knocking a new one in, it wasn't moving. And believe it or not, those welds are showing improvement vs my first few...
 
So how much did the burr and the sanding drums cost? I'm always skeptical when someone says something is 'free' . . .
 
I got a set of 7 or 8 burrs for $50 off amazon, the sanding drums were maybe $10. I use those burrs on a lot of projects, though - as will anyone who buys them. Cost of a tool amortized over the life of the tool is usually pretty low.
 
When boring a TB does it help much if the butterfly is not bigger?

When I was at the junk yard last I noticed that the Grand Cherokees (93 to 98 I think) have netting over the cubby in the back. Does anyone know if that will fit in a Cherokee. I was going to remove it but it was too cold and getting late.
 
The bottom of the stock throttle body necks down *much* smaller than the butterfly. If you match the section below the butterfly to the diameter above it, you're getting more flow for a given throttle opening angle. Of course you are likely decreasing air charge velocity which may or may not make a measurable difference. In theory though you are losing fuel economy at or near idle. I already had the CAI, exhaust & injectors, so I thought "hey what the hell". Can't say I notice much difference.
 
I did a DIY bore on my throttlebody years ago (via lathe), taking the bottom part that necks down out so it's the same bore throughout. I noticed slightly more power off the line but it seemed the same everwhere else I also have CAI, 2000 intake manifold. header back, DUI firepower ignition(coil,wires,cap&rotor) ann this helps. I think next is injectors once my axles, suspension, and trans are done.
 
I noticed *zero* differnece, in any dimension, doing injectors. Which makes sense. Chrysler wouldn't ignore a MPG difference to be had with off the shelf parts - there are CAFE standards to comply with, after all. Maybe in a higher performance engine the difference in spray pattern becomes relevant but on a stocker... well, I didn't notice anything with my optimist of a butt dyno.
If your injectors are trashed anyway... yeah... might as well go with the fancy stuff when you replace.
 
More huge pics from this weekend's work:
IMG_20140228_112224_zpsd0753d49.jpg

I put in Moog CC784 coil springs and came up about 20" from hub to flare, 2.5" if I recall. I used Prothane 3.5" coil inserts as well. I'm only running about 1/8" of air gap so I probably should have ordered the 2.5" Prothanes or mounted my striker plates differently (I thru bolted them to a poly "stock replacement" bump stop), but it drives just fine as is. I'll leave it alone for now.
In the rear, I bastardized my XJ's packs with more XJ leaves. Added a main & second to each and came up to about 20.75" hub to flare. This was a lot more lift than I anticipated from just adding two leaves. It rides a little stiff but not bad.
One of the bump stops in the rear came off in my hand as I was inspecting - totally rotten from rust, so I've got some Daystars on order for the rear.
I also put on Ruffstuff 5/8" u-bolts and had to grind out the factory U-bolt plates to work, and threw on some JK Rubicon shocks that I'd gotten from a member here on Naxja.
With bump stops, U-bolts, shocks & everything I'm in to it for $455. Could have been done cheaper but I'm happy.
Only thing I'd do different is find some 2.5" leaf liner but I couldn't source it in the timeframe I was working with. If there's a next time, I'll get some on hand before tearing into the Jeep.
 
Back
Top