I'd expect the shafts to be fine. Make sure when you reinstall them you don't beat up the seals - they have a metal cone to help guide them, so just keep the splined end from touching the inside of the axle tube before it reaches them and it should be fine.
You can tell if you have a vacuum disconnect by whether the passenger side upper control arm mount is a cast section with a square plate and a vacuum solenoid or it is a pressed sheetmetal mount that is open on the front.
Non vacuum disconnect:
http://www.bc4x4.com/pv/tj/ra/img_m/w4-046-fD30rD44.jpg
Vacuum disconnect:
http://i52.photobucket.com/albums/g1/usbombs64/Dan30Vaccumdisco.jpg (and another one:
http://i1198.photobucket.com/albums/aa458/DualPurposeXJ/2012-01-28_16-21-58_944.jpg )
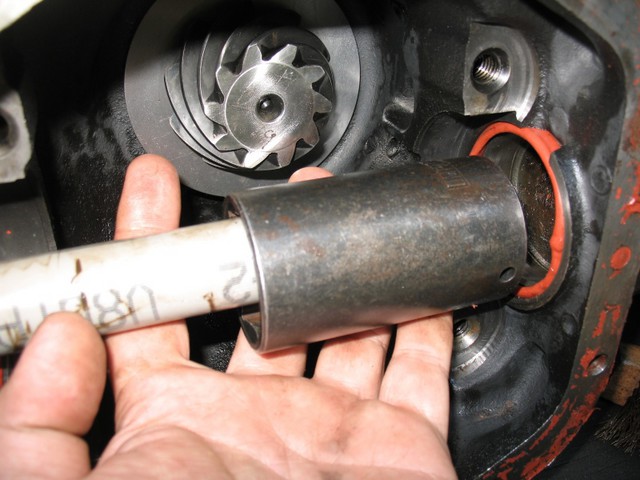
For a non disconnect housing, it's fairly simple, you pull the 3 bolts holding each unit bearing in (12 point 13mm) separate the bearings from the knuckle (use the power steering + socket trick) and slide the shafts out, take the diff cover off (easiest if you drop the tie rod at the driver end to get it out of your way) and remove the carrier. Make sure to take note of which end of which bearing cap goes where, they cannot be put on upside down or switched side for side or you will have bearing issues. Also make sure you keep each bearing cup with the correct side of the differential - sometimes they're prestamped with letters or dots from the factory to keep them straight, sometimes they aren't and you will need to (or put paint dots on, if you aren't comfortable using a punch on differential parts.) Don't drop any of the parts on the ground, either... carrier is a bit heavy if you're not expecting it to pop out when it does.
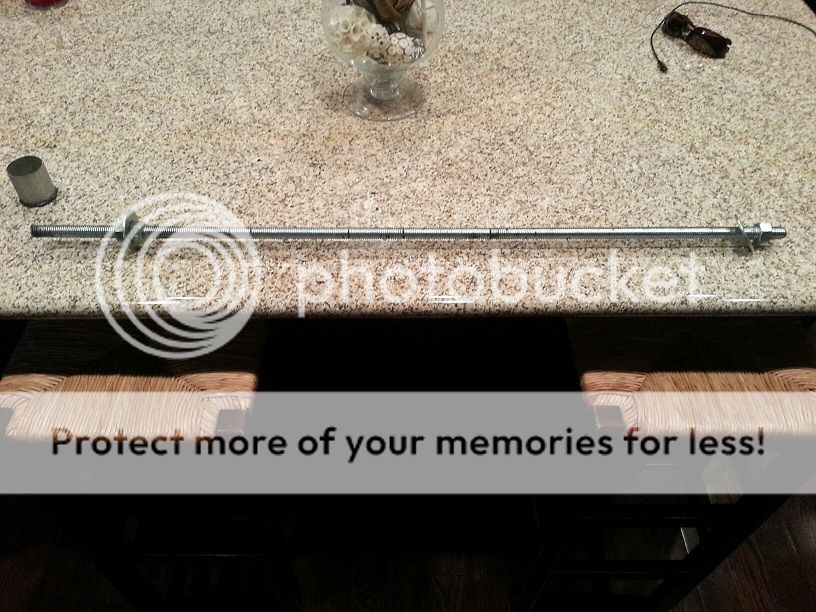
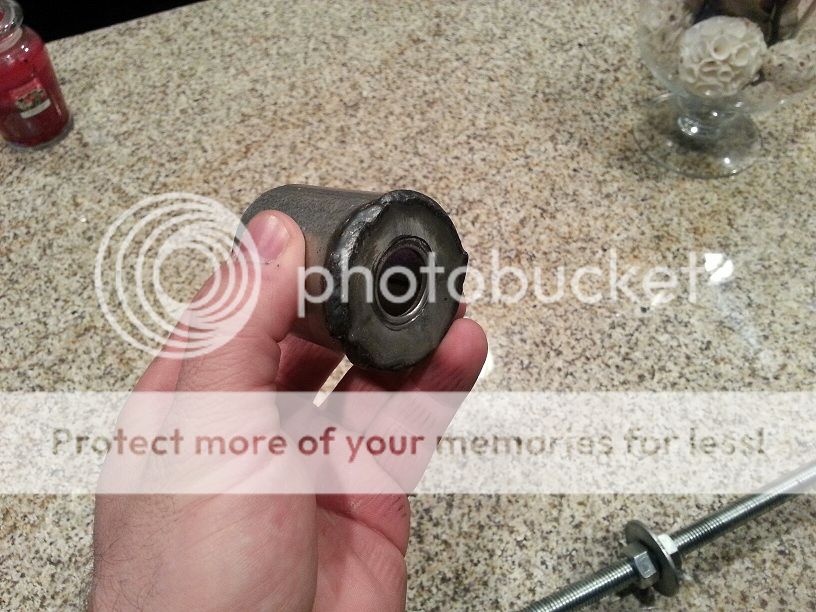
Once that's all out and set aside, the seals are just outward from each carrier bearing seat. Drive each one inward with a broomstick and a BFH, discard. Then use the broomstick+socket method (or any other method, if you prefer the others - a few have been gone over in this thread) to install the new seals. A second set of hands is really nice to have right about at this point.
Once the seals are in, prelube their lips with a dab of gear lube, then reinstall the carrier and bearing cups. The easiest way is to set the carrier (facing the right way... sucks to get everything ready and lift it up and realize it's facing the wrong way) in front of you on a sheet of cardboard, resting on the ring gear edge, then take each bearing cup in one hand and put them over the rollers/cones that are on the ends of the carrier - make sure each goes with the side it came off of. Then lift the whole thing by the bearings and carefully line it up with the bearing seats in the housing. It may just slide in (if the bearings are pretty badly worn) or it may require a little work with a rubber mallet or orange plastic deadblow to go in. This is another of those times it's helpful to have extra hands, keeping the bearings lined up with the seats while bashing it in can be a bit annoying. Once it's in, hold it there with one hand and grab one of the bearing caps. Put it back in the same spot and orientation it came from, hand start the bolts, then do the same on the other side. Once it's hand snugged on each side and seated correctly / meshed with the pinion, get out your torque wrench and torque the bearing cap bolts to 45 foot pounds each.
Vacuum disconnect style: driver side is the same, I have no idea how to work on the passenger side though. It's got a funky setup.
Parts for non disconnect:
seals - 2 of SKF part number 11899
Parts for disconnect:
mystery shit I don't understand
I'm not sure what bearing you are referring to - shaft housing? que?