akelts
NAXJA Forum User
- Location
- Leadville, CO
I won this bumper at our Rockfest event raffle way back in March and just got around to installing it last weekend. I figured this would make a good first write up for me on  . The install was pretty straight forward and the directions that came with the bumper were pretty well written, but like all the work I do on my XJ I ran into a few hang-ups. A few of the issues I had were probably only specific to my Cherokee, but I figure I will share them and maybe I will end up saving some other people some aggravation in the future. Another thing to consider is that this bumper won’t work too well if you have done the cut and fold modification to your rear quarter panels already. Also, YOU NEED TO HAVE FACTORY NUTSTRIPS TO INSTALL THIS BUMPER.
First off remove you old bumper. I had a Tomken rear bumper that I had installed a few years back that was relatively easy to take off. If your still stock you have to remove the plastic bumper endcaps (or scrape them up against some rocks to rip them off as I did). If I remember right when I first installed the Tomken bumper several years ago it was a PIA to get a few of the bolts holding the stock bumper brackets on due to rust. My solution at the time was to drill a hole in the stock bumper with a hole saw so I could get an extension and the socket through it to the bolt….you may have better luck if you try a few different length sockets and wrenches.
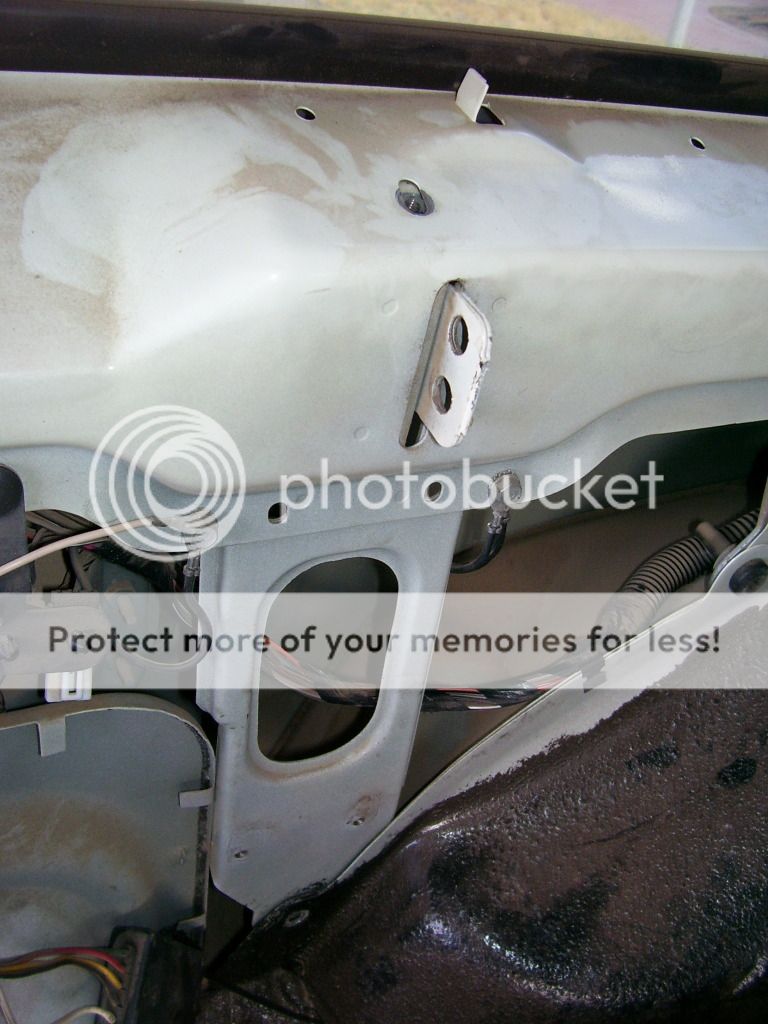
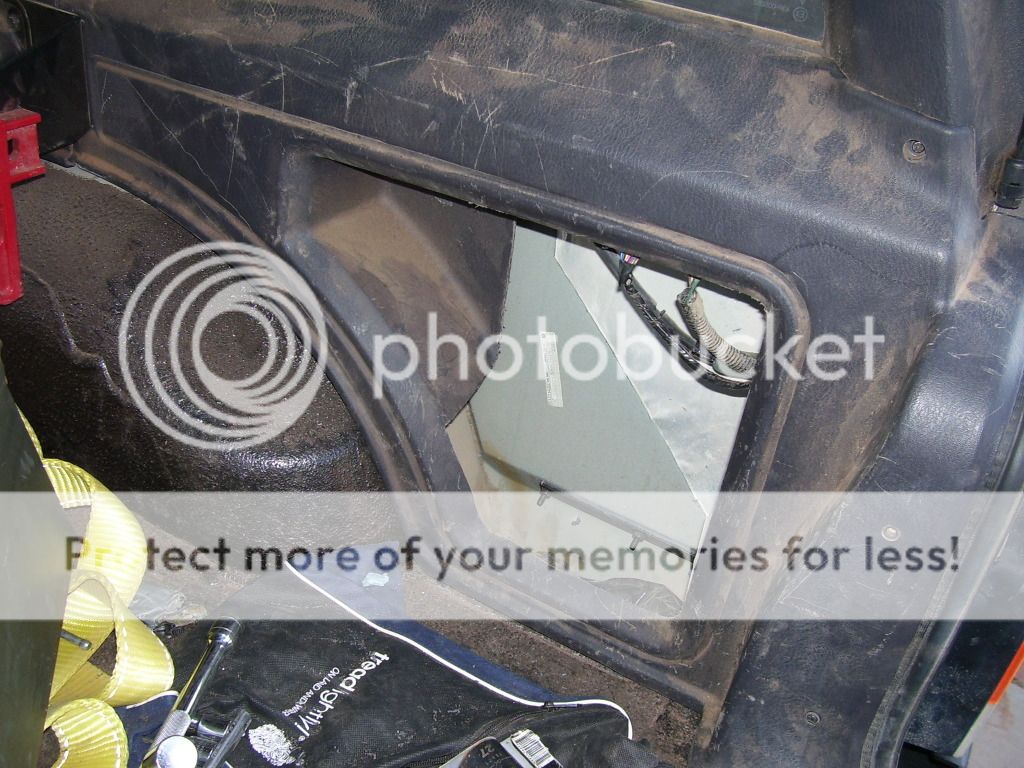
Once the quarter panel plastic is removed you will then have to remove the metal mounting clips that held them on by drilling (with a 1/8” bit) out the rivets that hold them to the quarter panel. I don’t have any pics of this step as I had already removed these a while back when I bedlined the lower half of the Cherokee. I also removed the taillights so I could spray some bedliner in the remaining white areas behind the bumper. Removing them was easier than taping them up to protect them from overspray.
I removed the old rear bumper while I was waiting for the coats of primer and Rustoleum spray bedliner to dry on the new one….MULTI-TASKING. My bumper came bare metal and I used some brake cleaner to remove any dirt and grease before priming and spraying bedliner on it.
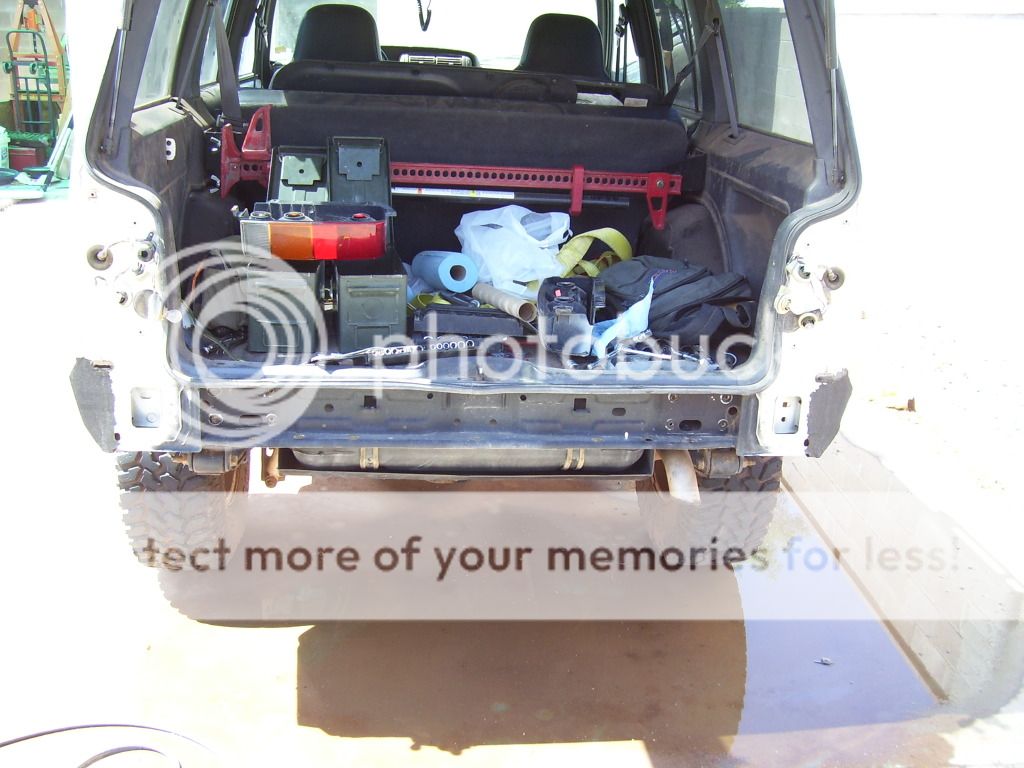
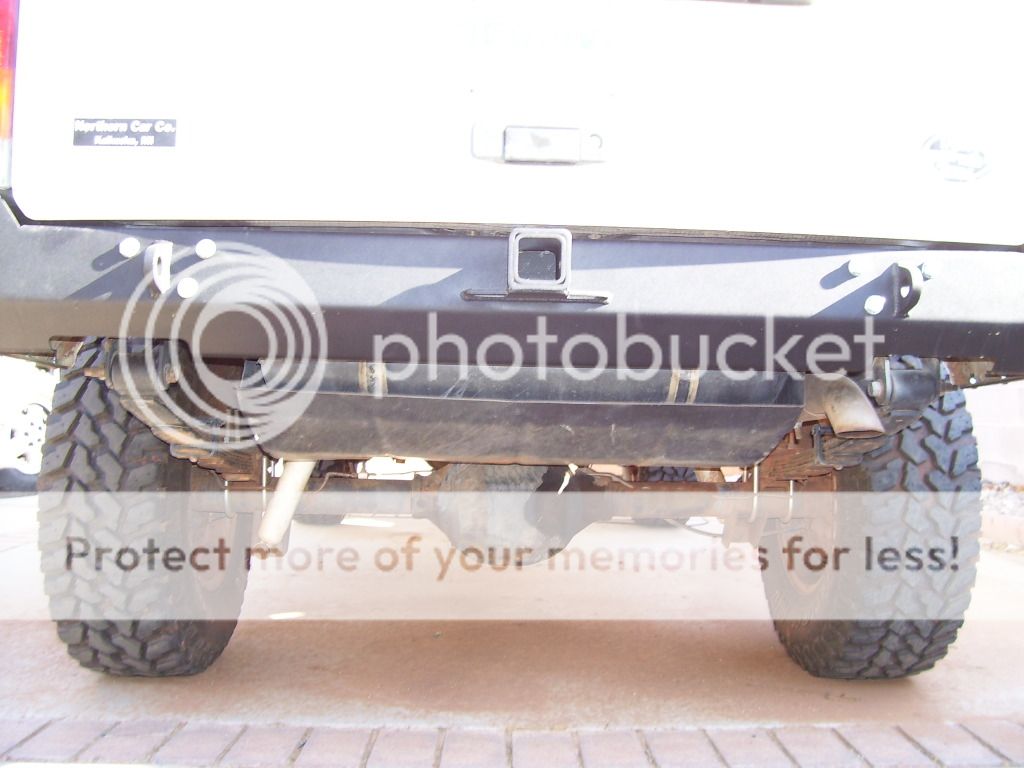
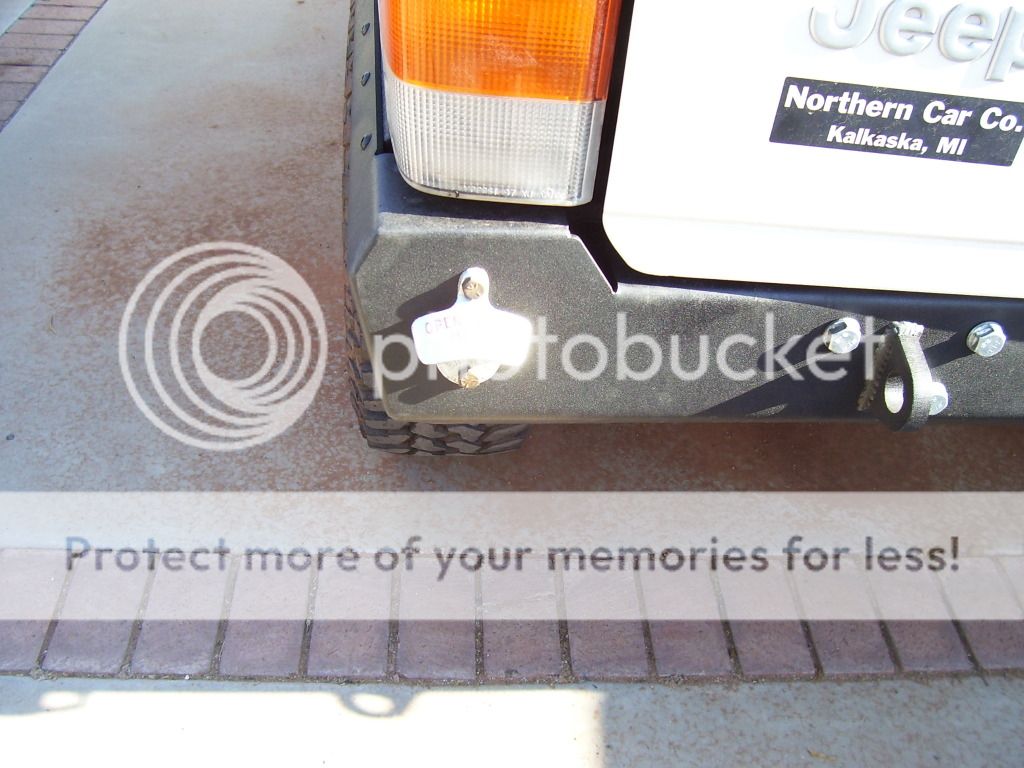
Rear bumper removed:
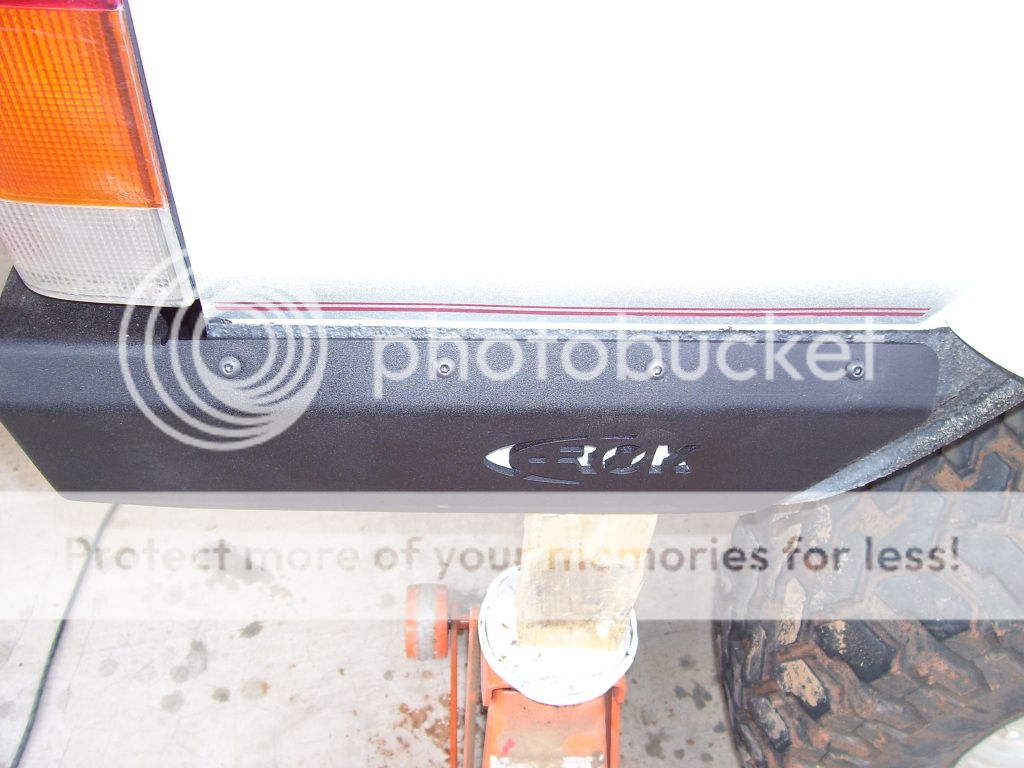
The new C-ROK bumper bedlined and ready to install.

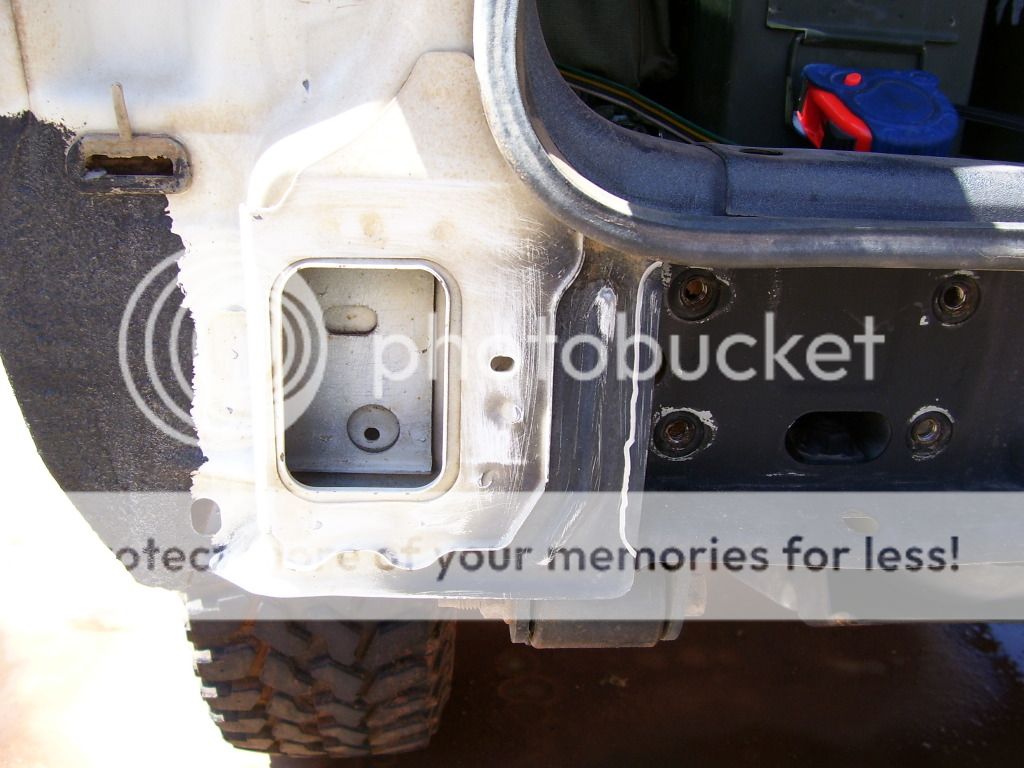
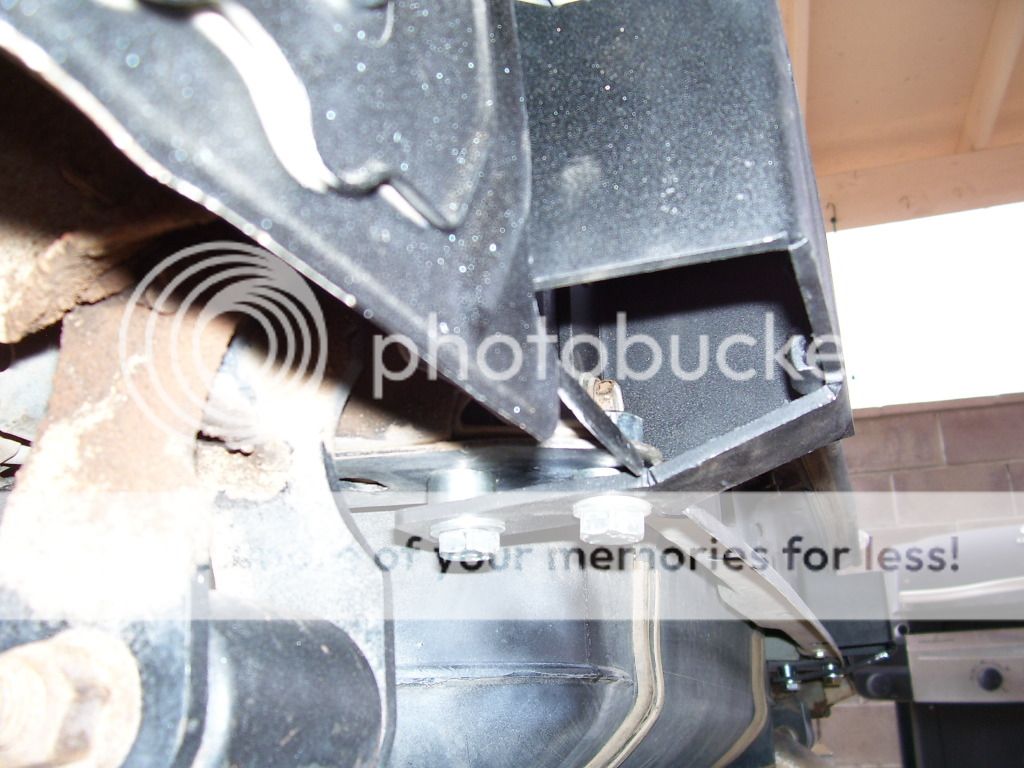
I had previously installed a factory gas tank skid and the nutstrips that I had stripped off of a parts Cherokee I had a few years back. If your XJ doesn’t have the nutstrips you will have to find some before continuing. If you have the nutstrips and the skid plate, remove the two rear bolts on either side that secure the skid plate to the unibody. For some reason that I can’t recall now I had actually cut the rearmost nut off the nutstrip on both sides? I ended up just using a regular nut and washers for the rearmost one.
. The install was pretty straight forward and the directions that came with the bumper were pretty well written, but like all the work I do on my XJ I ran into a few hang-ups. A few of the issues I had were probably only specific to my Cherokee, but I figure I will share them and maybe I will end up saving some other people some aggravation in the future. Another thing to consider is that this bumper won’t work too well if you have done the cut and fold modification to your rear quarter panels already. Also, YOU NEED TO HAVE FACTORY NUTSTRIPS TO INSTALL THIS BUMPER.First off remove you old bumper. I had a Tomken rear bumper that I had installed a few years back that was relatively easy to take off. If your still stock you have to remove the plastic bumper endcaps (or scrape them up against some rocks to rip them off as I did). If I remember right when I first installed the Tomken bumper several years ago it was a PIA to get a few of the bolts holding the stock bumper brackets on due to rust. My solution at the time was to drill a hole in the stock bumper with a hole saw so I could get an extension and the socket through it to the bolt….you may have better luck if you try a few different length sockets and wrenches.
Once the quarter panel plastic is removed you will then have to remove the metal mounting clips that held them on by drilling (with a 1/8” bit) out the rivets that hold them to the quarter panel. I don’t have any pics of this step as I had already removed these a while back when I bedlined the lower half of the Cherokee. I also removed the taillights so I could spray some bedliner in the remaining white areas behind the bumper. Removing them was easier than taping them up to protect them from overspray.
I removed the old rear bumper while I was waiting for the coats of primer and Rustoleum spray bedliner to dry on the new one….MULTI-TASKING. My bumper came bare metal and I used some brake cleaner to remove any dirt and grease before priming and spraying bedliner on it.
Rear bumper removed:
The new C-ROK bumper bedlined and ready to install.
I had previously installed a factory gas tank skid and the nutstrips that I had stripped off of a parts Cherokee I had a few years back. If your XJ doesn’t have the nutstrips you will have to find some before continuing. If you have the nutstrips and the skid plate, remove the two rear bolts on either side that secure the skid plate to the unibody. For some reason that I can’t recall now I had actually cut the rearmost nut off the nutstrip on both sides? I ended up just using a regular nut and washers for the rearmost one.
Last edited:


")