mxracer624
NAXJA Forum User
- Location
- Hemet ca,
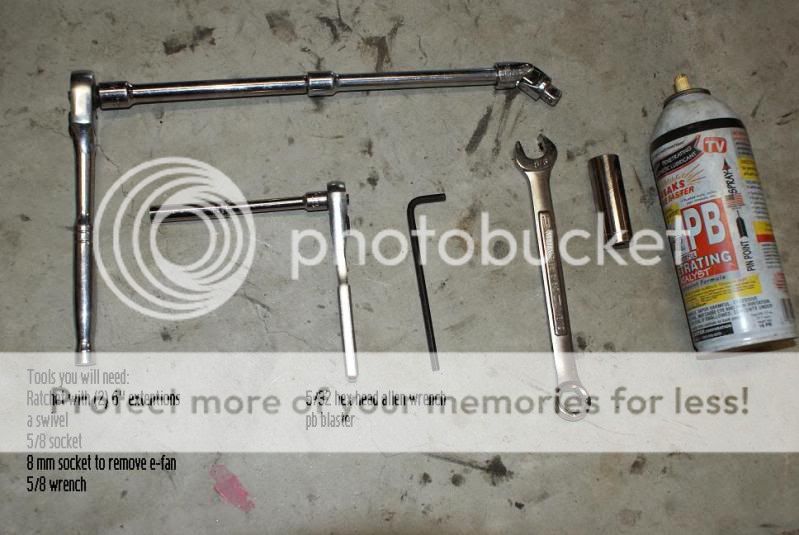
ok im not sure if this has been covered on here but i havent seen it yet. This is my first write up so ill try to give it my best. This will take only about 15 mins or so to get rid of that annoying slop in your steering wheel. Im doing this on my 89 xj 4.0 but im sure it will be the same or really close on most other years. So the tools you will need are:
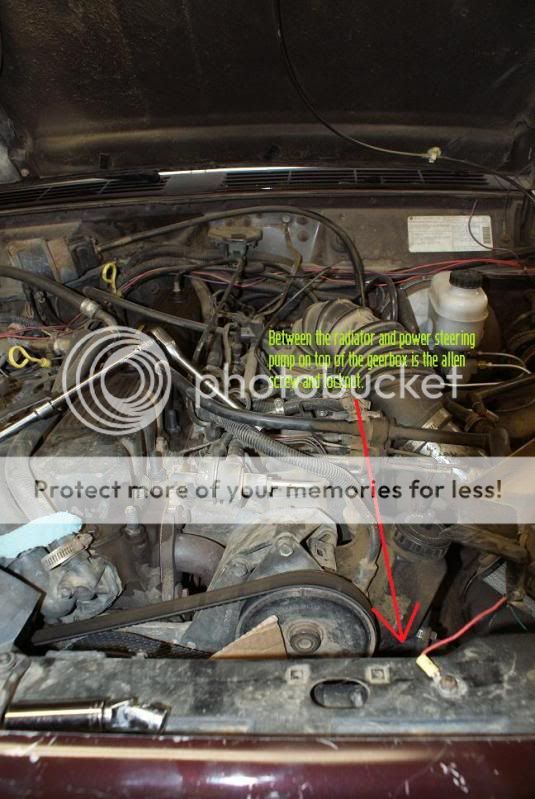
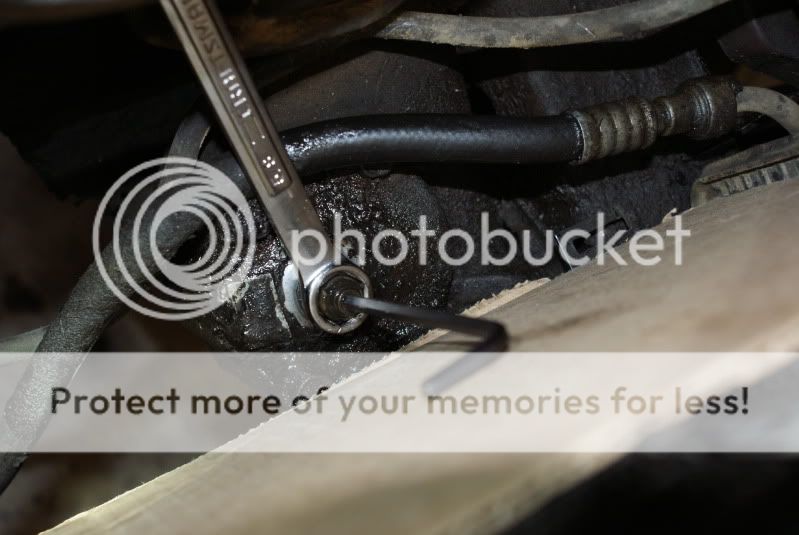
first thing you are going to need to do is remove your e-fan. There are 2 8mm bolts that hold it on and it slides right out. Just set it aside. Now that the fan is out of the way, the adjustment nut is now accessible. The adjustment nut is Between the radiator and power steering pump right on top of the steering box.
here is the nut itself
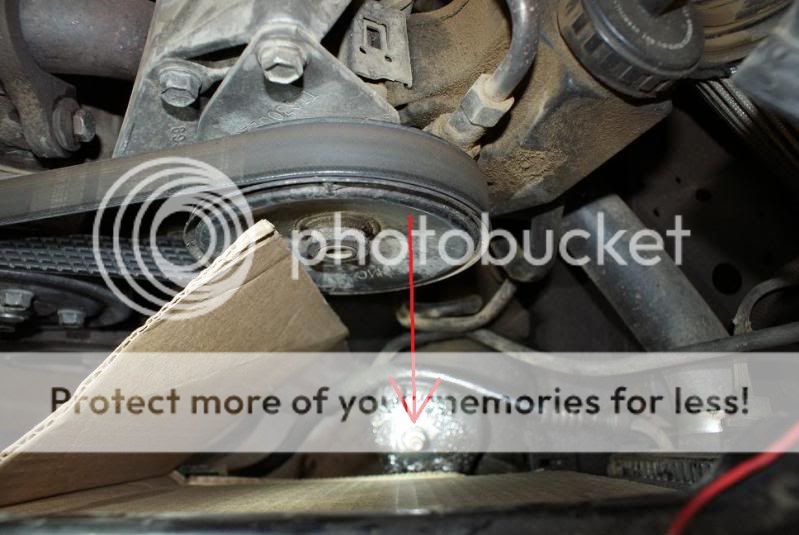
another view and better picture
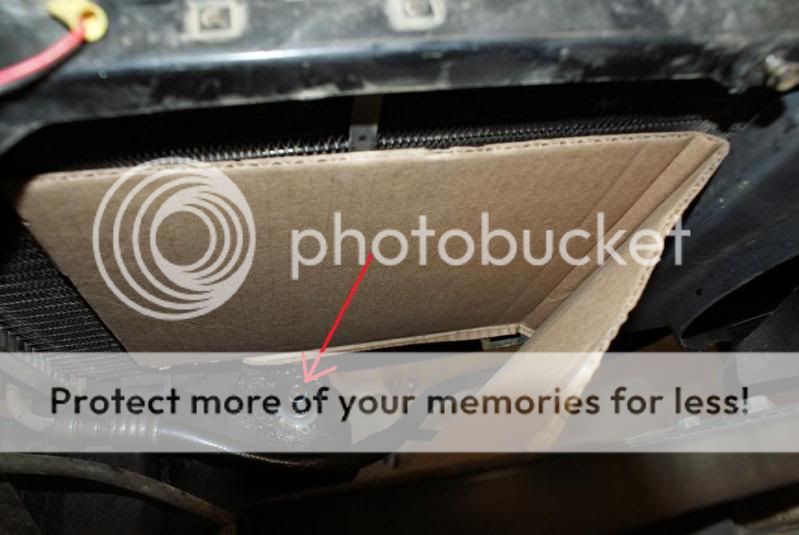
with the fan out of the way the radiator is unprotected so i got a piece of cardboard and put it against it to keep my socket from damaging the radiator. Because of the angle of the geerbox the socket almost sits right up against it, so the cardboard is pretty much a must!
So the next thing i did was take a rag and wipe all the dirt and crap away from around the nut. Then i drenched it with PB blaster because i bet it hasnt been touched since 89 when it was bult!. So after letting the pb sit for a while i took my ratchet with the (2) 6" adapters, swivel, and a 5/8 deep socket and loosened the nut. * a breaker bar may be needed. in my case it wasnt but i was about 2 seconds from using one when it finally broke loose. Just loosen it a few turns thats all you need.


you can see the cardboard really does save the radiator.
Now once the locknut is loose take a 5/8 wrench and put it over the locknut, then take a 5/32 allen wrench and put it on the hex bolt hole on the top like this
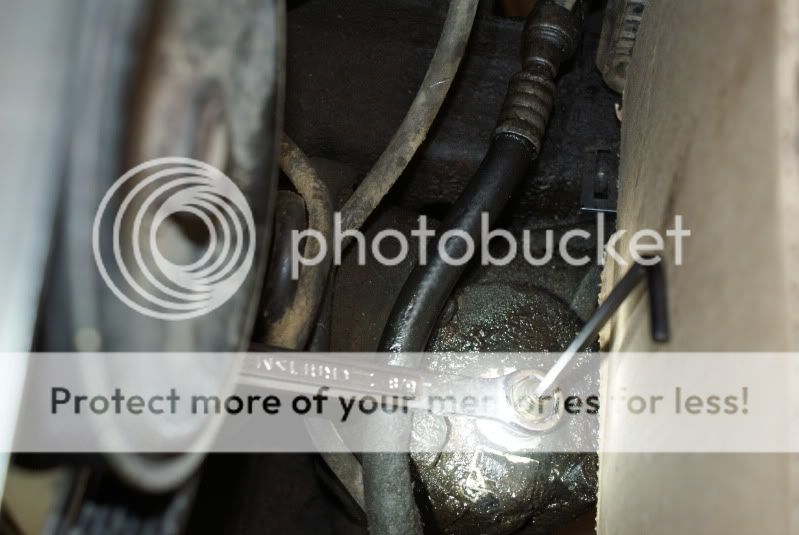
now you must hold the wrench so that the locknut doesnt move while you adjust the top screw. You may need to flip the allen wrench for more leverage. Now turn the allen wrench in 1/2 turn increments to the right (tighten) as a little turn does a lot of adjustment. So turn it 1/2 turn then go to your steering wheel and feel if you need more, then do another 1/2 turn and go back to your steering wheel and see if you need more or not. I got mine to about a half of inch of play which is tremendously better than it was. a half of inch of play when its not running equals NO PLAY while driving! Now with your wrench still on there start tightening the locknut back a little and make sure the hex bolt on top isnt moving with the locknut. If it isnt then put your ratchet back on and tighten it up im not sure of the specs but i just tightened it pretty tight.
after test driving it i noticed a huuuuge difference! Much easier to drive! Hope this helps someone..
first thing you are going to need to do is remove your e-fan. There are 2 8mm bolts that hold it on and it slides right out. Just set it aside. Now that the fan is out of the way, the adjustment nut is now accessible. The adjustment nut is Between the radiator and power steering pump right on top of the steering box.
here is the nut itself
another view and better picture
with the fan out of the way the radiator is unprotected so i got a piece of cardboard and put it against it to keep my socket from damaging the radiator. Because of the angle of the geerbox the socket almost sits right up against it, so the cardboard is pretty much a must!
So the next thing i did was take a rag and wipe all the dirt and crap away from around the nut. Then i drenched it with PB blaster because i bet it hasnt been touched since 89 when it was bult!. So after letting the pb sit for a while i took my ratchet with the (2) 6" adapters, swivel, and a 5/8 deep socket and loosened the nut. * a breaker bar may be needed. in my case it wasnt but i was about 2 seconds from using one when it finally broke loose. Just loosen it a few turns thats all you need.
you can see the cardboard really does save the radiator.
Now once the locknut is loose take a 5/8 wrench and put it over the locknut, then take a 5/32 allen wrench and put it on the hex bolt hole on the top like this
now you must hold the wrench so that the locknut doesnt move while you adjust the top screw. You may need to flip the allen wrench for more leverage. Now turn the allen wrench in 1/2 turn increments to the right (tighten) as a little turn does a lot of adjustment. So turn it 1/2 turn then go to your steering wheel and feel if you need more, then do another 1/2 turn and go back to your steering wheel and see if you need more or not. I got mine to about a half of inch of play which is tremendously better than it was. a half of inch of play when its not running equals NO PLAY while driving! Now with your wrench still on there start tightening the locknut back a little and make sure the hex bolt on top isnt moving with the locknut. If it isnt then put your ratchet back on and tighten it up im not sure of the specs but i just tightened it pretty tight.
after test driving it i noticed a huuuuge difference! Much easier to drive! Hope this helps someone..
Last edited: