• Welcome to the new NAXJA Forum! If your password does not work, please use "Forgot your password?" link on the log-in page. Please feel free to reach out to [email protected] if we can provide any assistance.

Iron Rock Critical Path Long Arm

d10shun

NAXJA Forum User
Location
Az
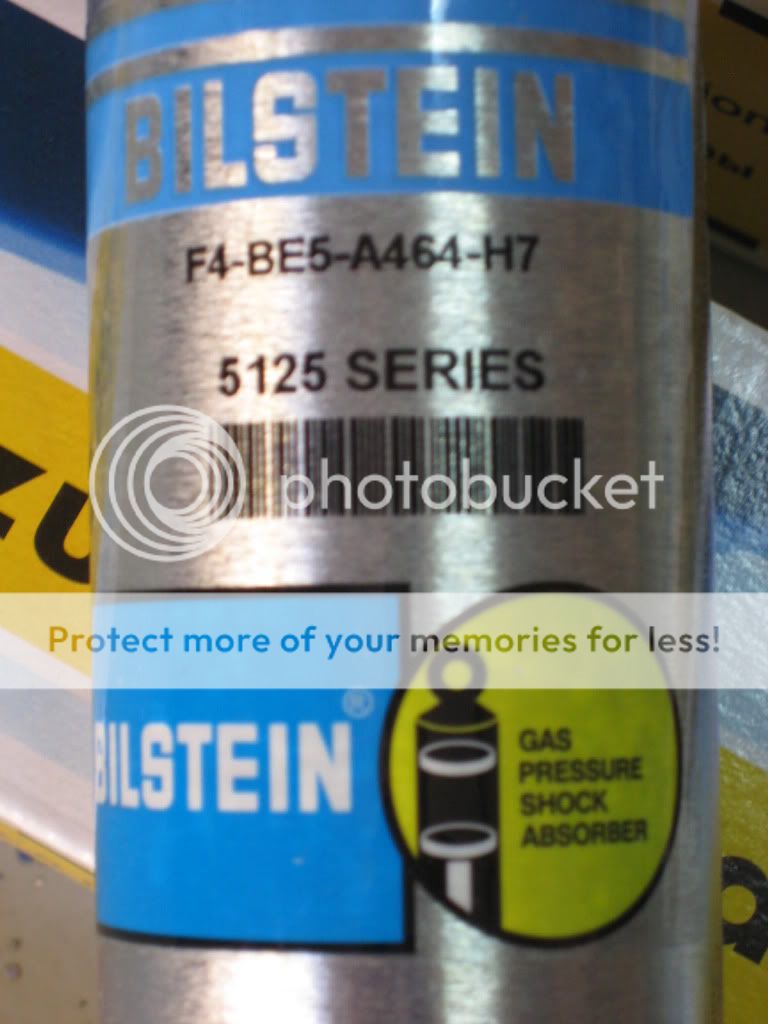
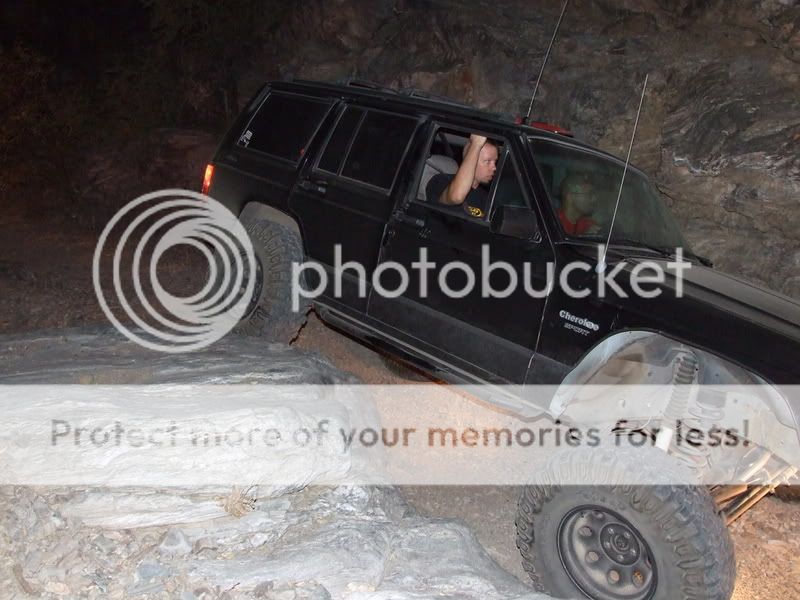
I finally got fed up with my Jeep riding like a cement truck so I purchased the Iron Rock Critical Path Long Arm Ultimate Ride kit. No one has done an install on here so I thought I would be the first. I did read Pbachs write-up on Off-road.com. It was very helpful and he convinced me to purchase this kit. $949.99 for long arms, crossmember and Bilstein 5100 series shocks. The shocks were back ordered and are being shipped now so I will update the thread when they arrive.
http://www.ironrockoffroad.com/Merc...en=PROD&Store_Code=IROR&Product_Code=IR-X_URK

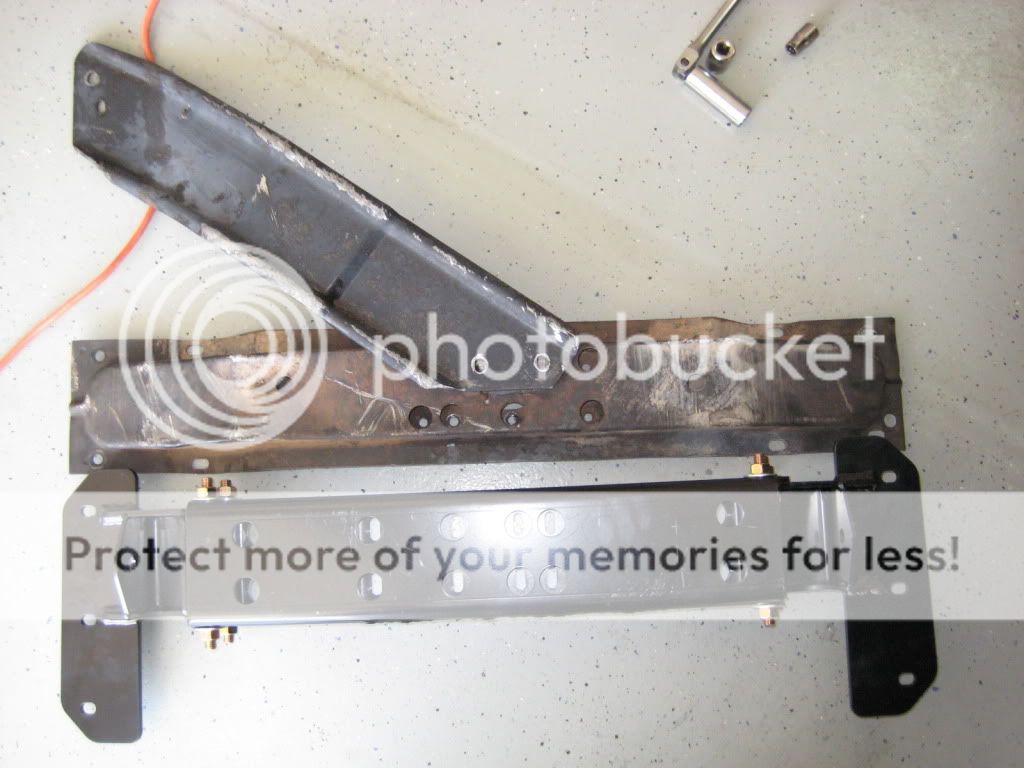
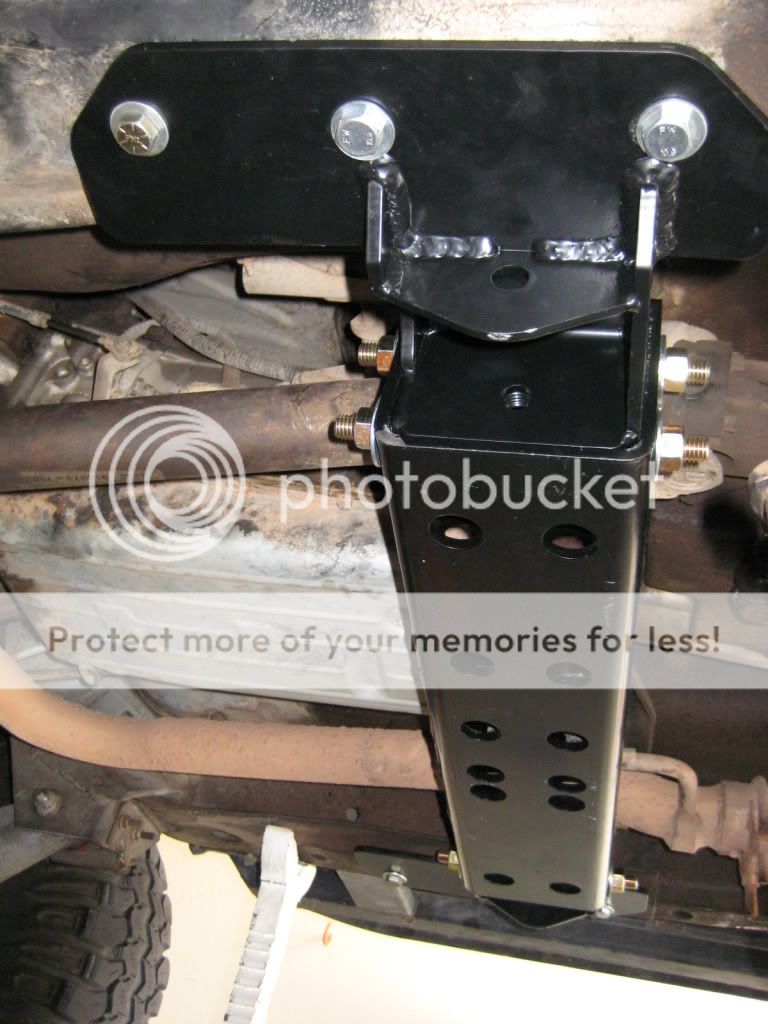
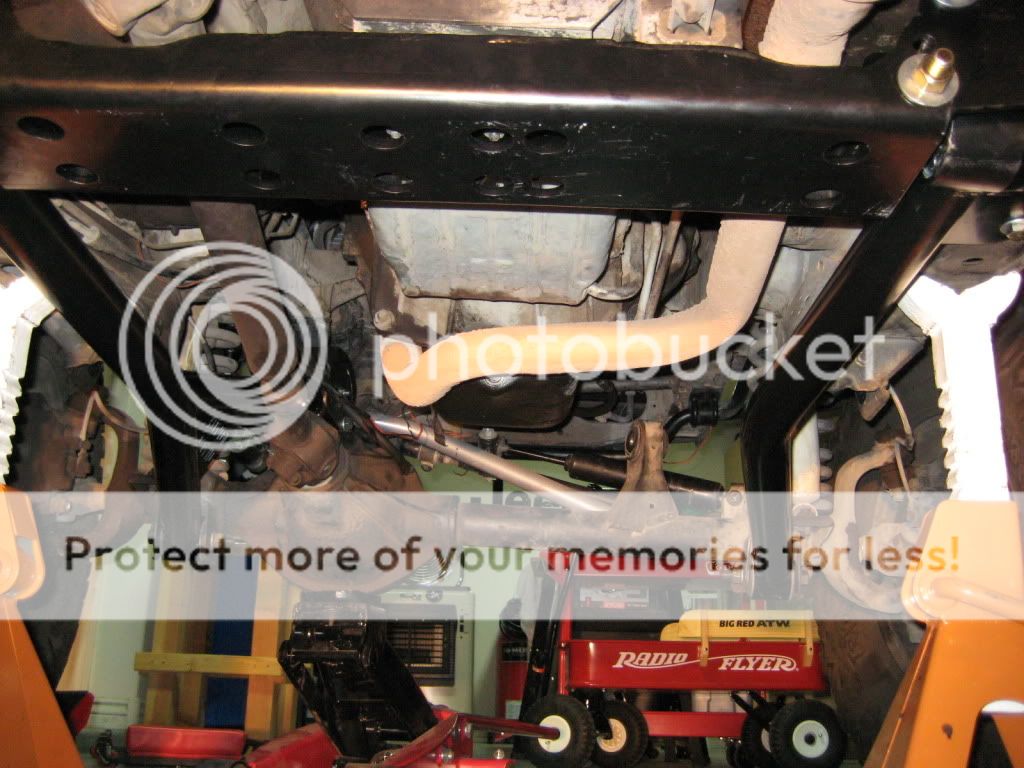
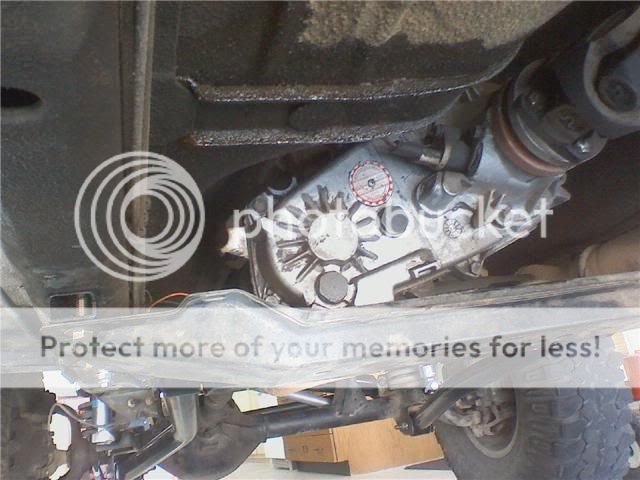
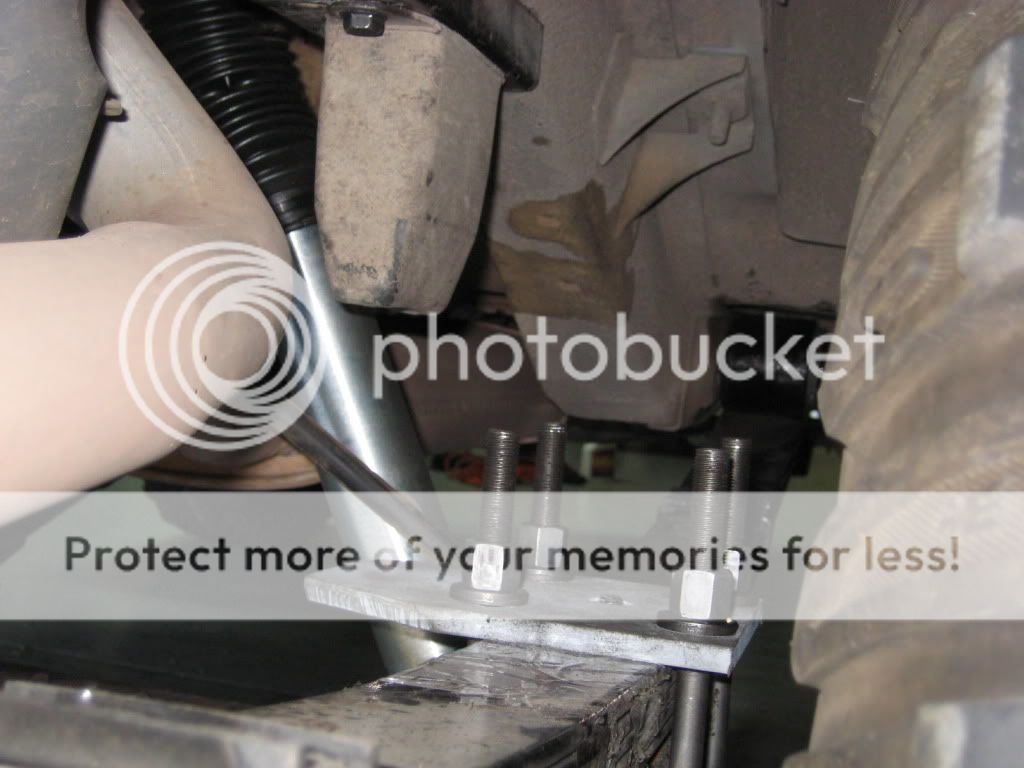
Before I purchased I called Iron Rock and asked a ton of questions, all of which they kindly answered. I was concerned about my JCR Stage II rocksliders interfering with a long arm set-up. Since I welded the sliders on, the long arm kit would have to work on my vehicle. Iron Rock assured me that it would fit and even took a close-up photo with measurements so I could be sure. The crossmember it turns out acts like a factory crossmember with one extra bolt hole per side.

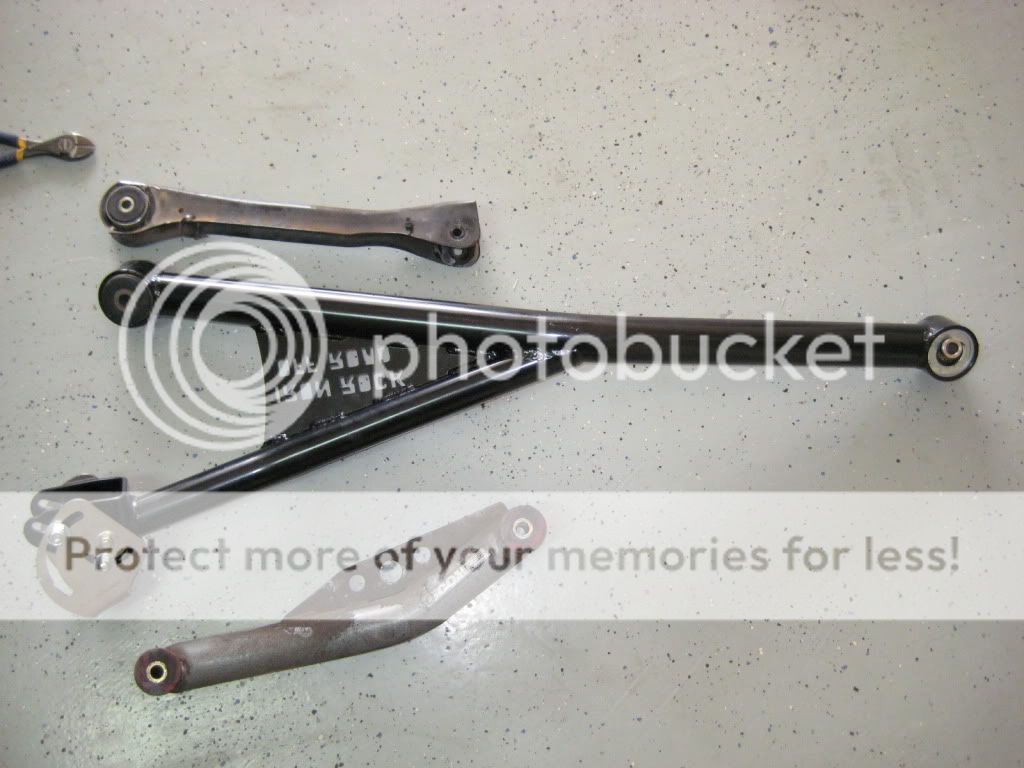
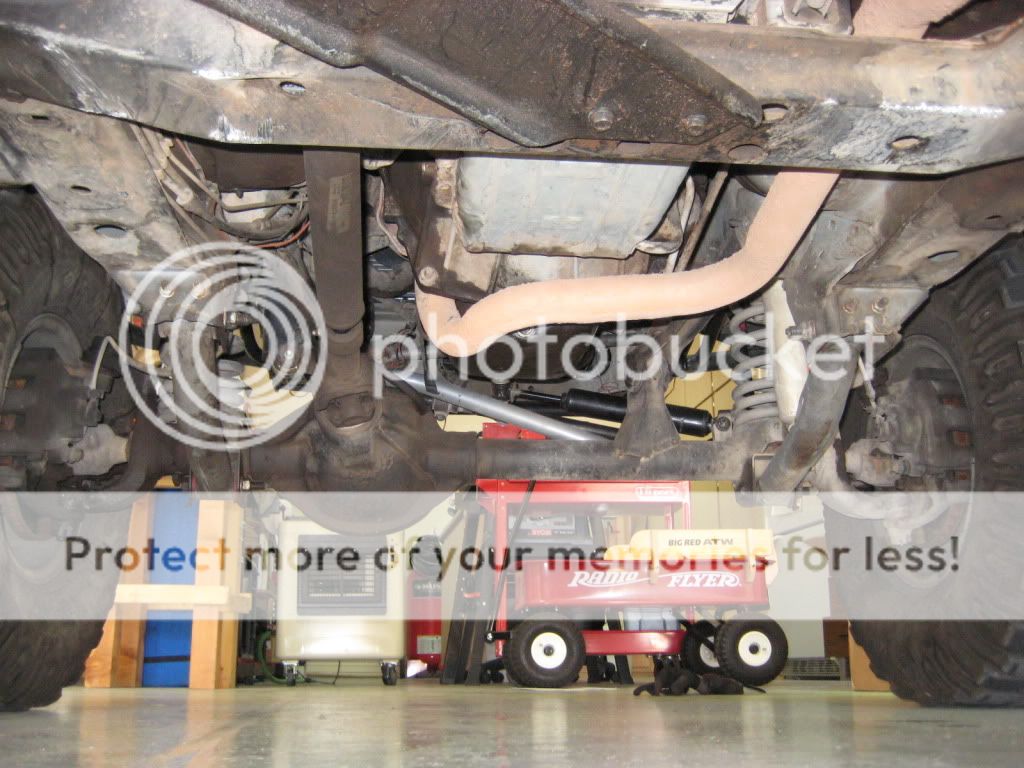
My old set up. Procomp lca and factory uca. 4.5" lift
IMG_5682.jpg


IMG_5683.jpg


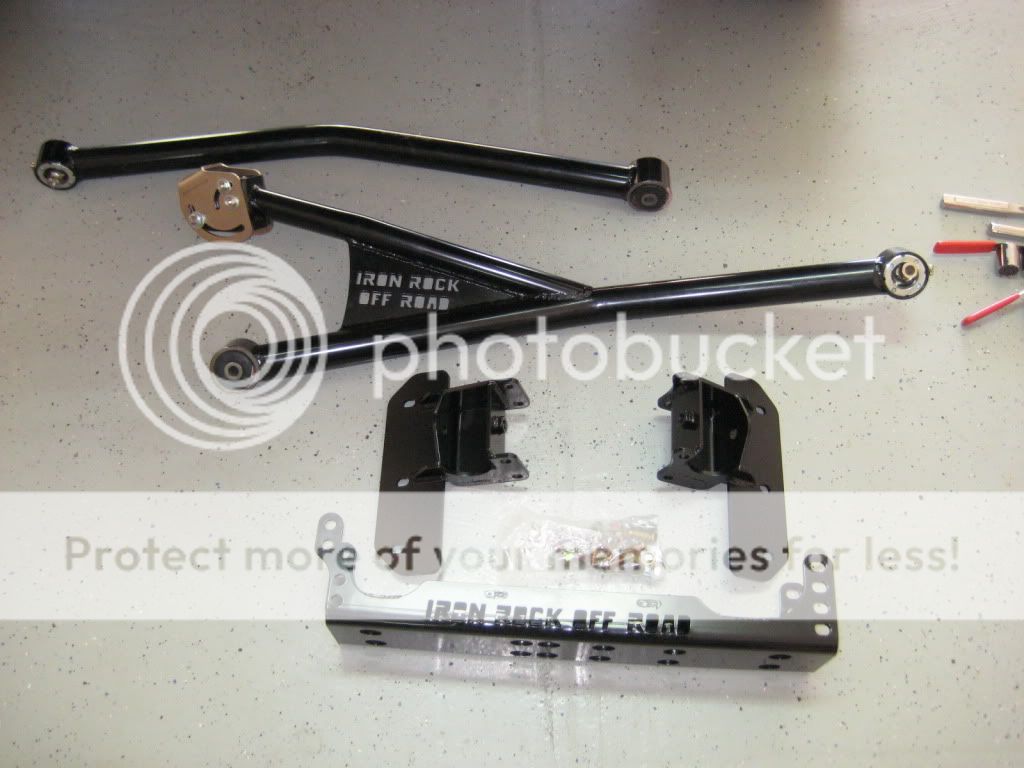
Iron Rock kit. Not much to it, just the way I like it.
IMG_5685.jpg


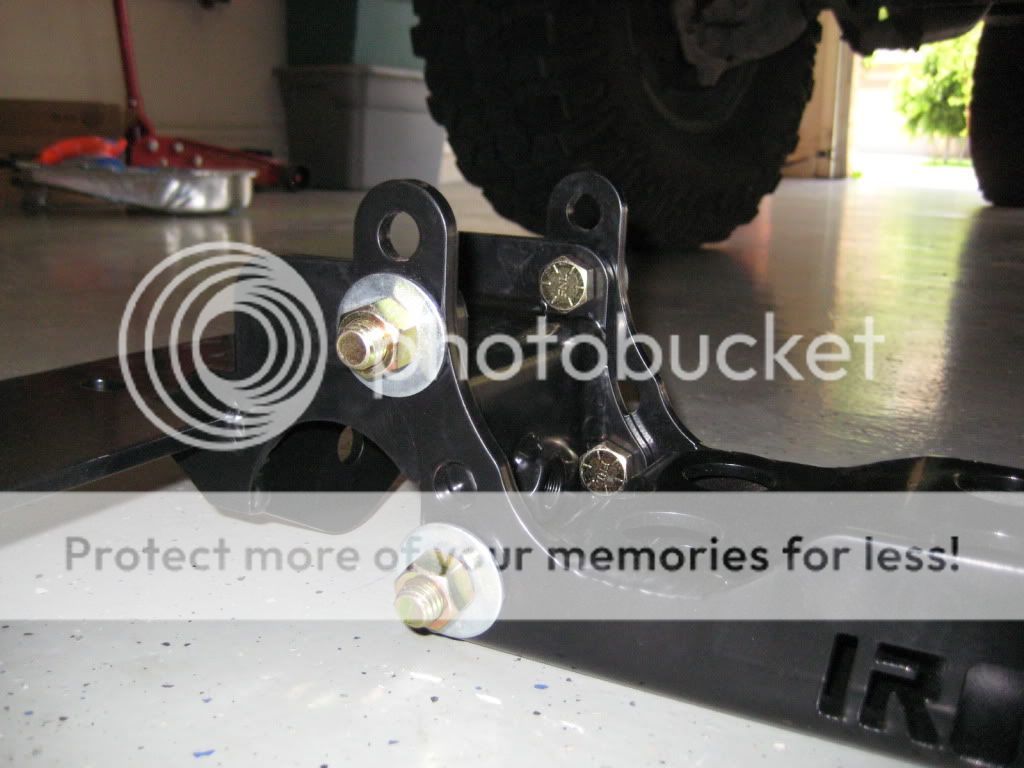
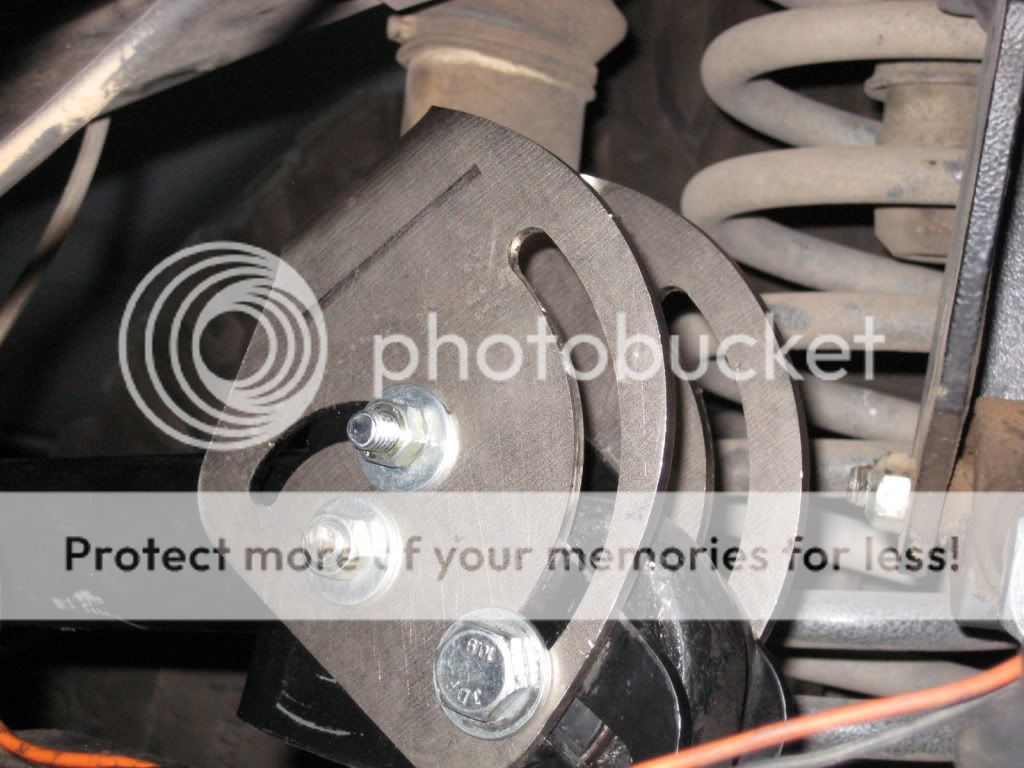
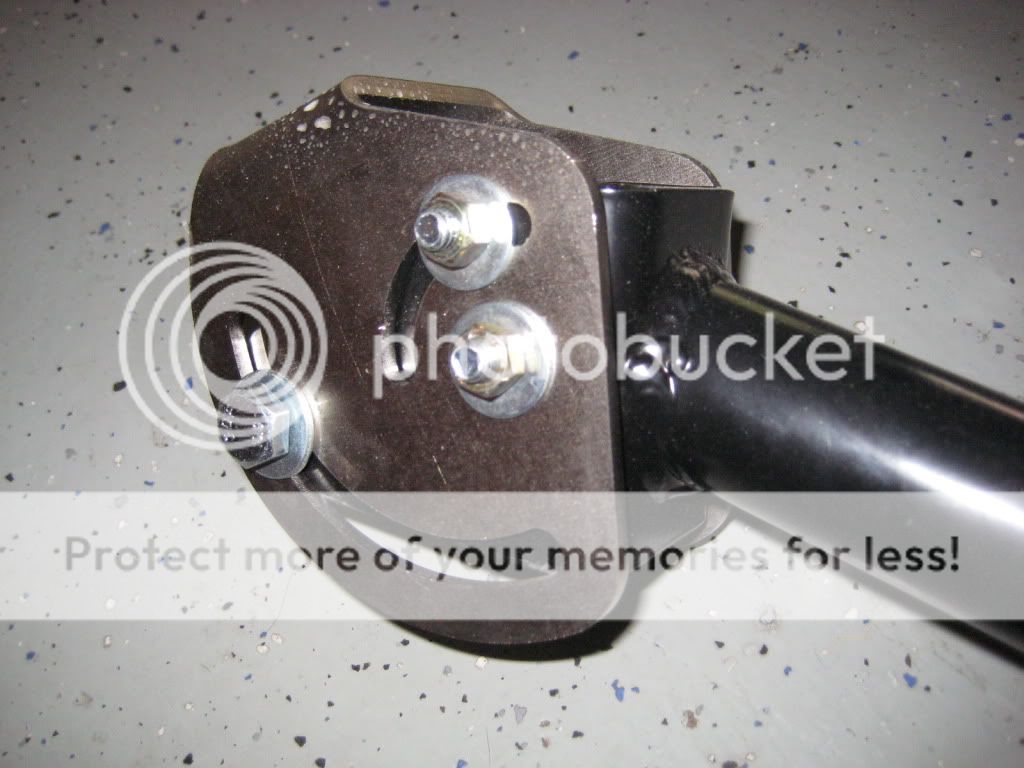
THis is the caster adjustment thingy. The instructions say to have the cambolts in the middle positions but mine are at either extreme. Maybe because I have the lowest lift for this kit. It is meant for 4.5" to 8". I'm guessing I did it wrong but it works for now. I have yet to take it for an alignment.
IMG_5687.jpg


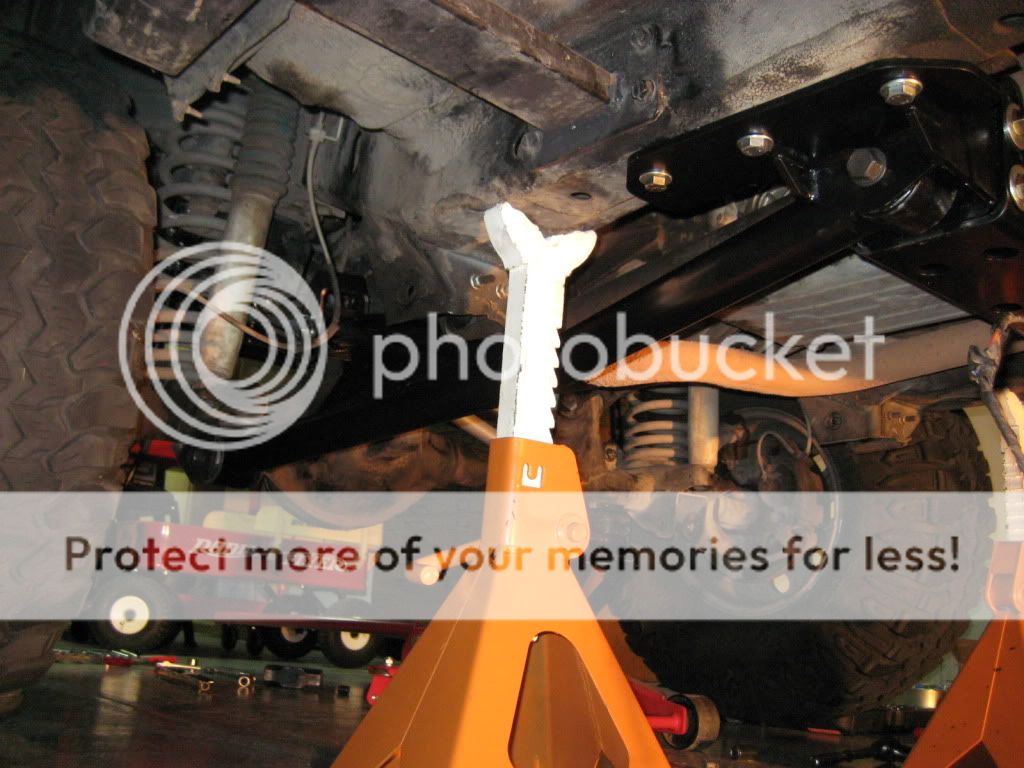
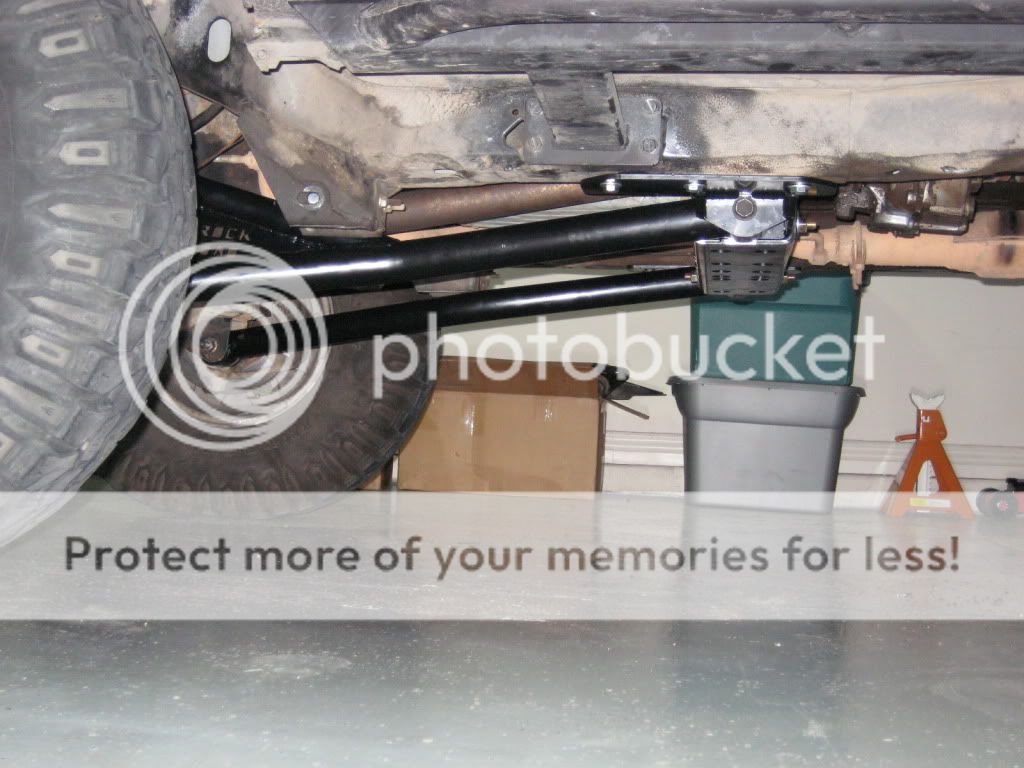
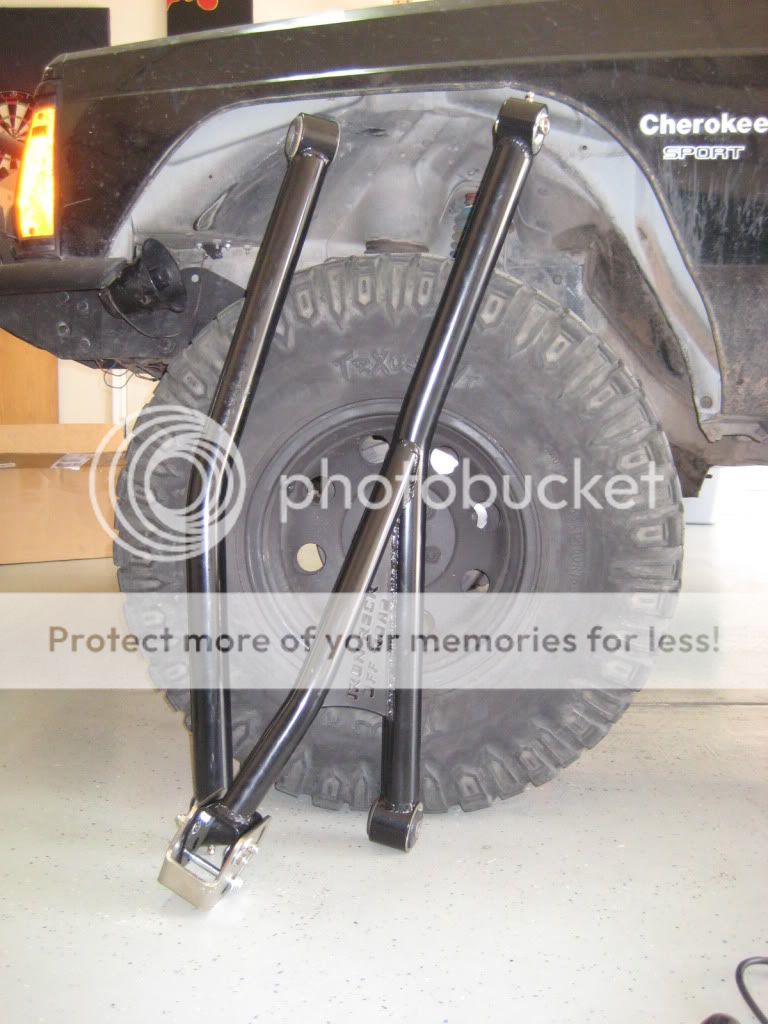
Long arms next to my 4.5" lift and 33" tires.
IMG_5688.jpg


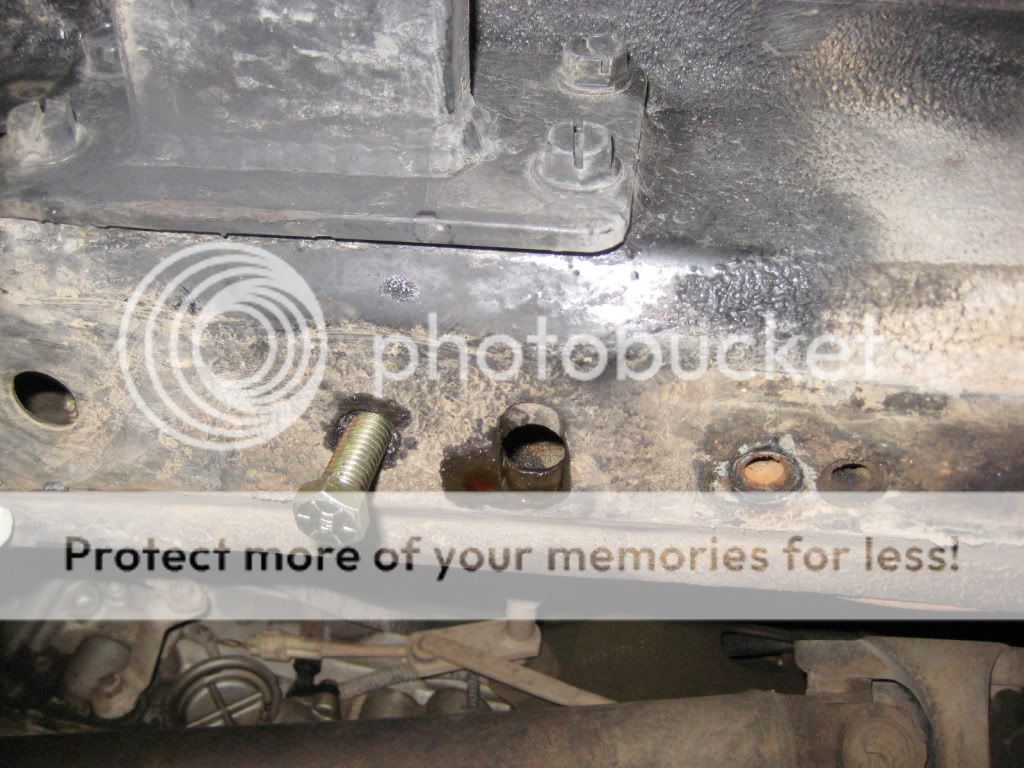
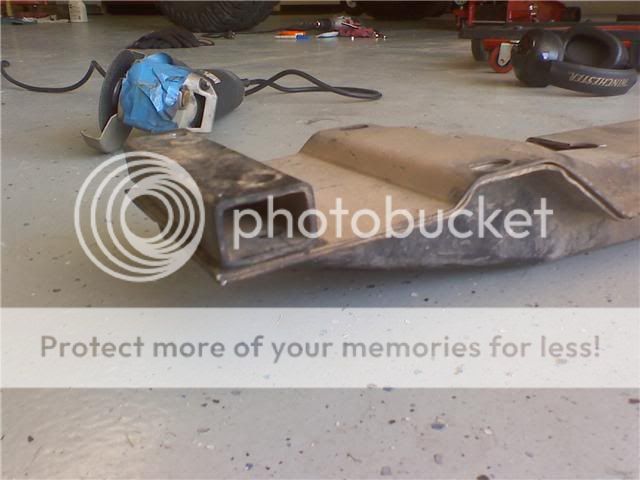
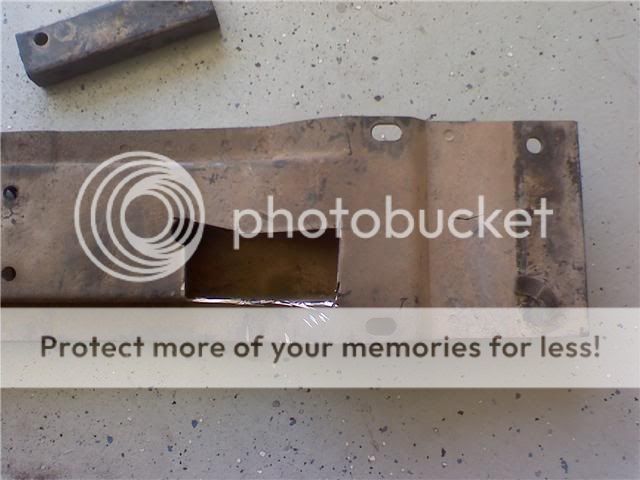
7/16-14 tap and 23/64" bit that is required but not included. This is for the extra hole needed for the subframe. It turns out that there is hole or bung right were this hole needs to be on my truck so I did not need to drill it, so I just tapped it.
IMG_5689.jpg


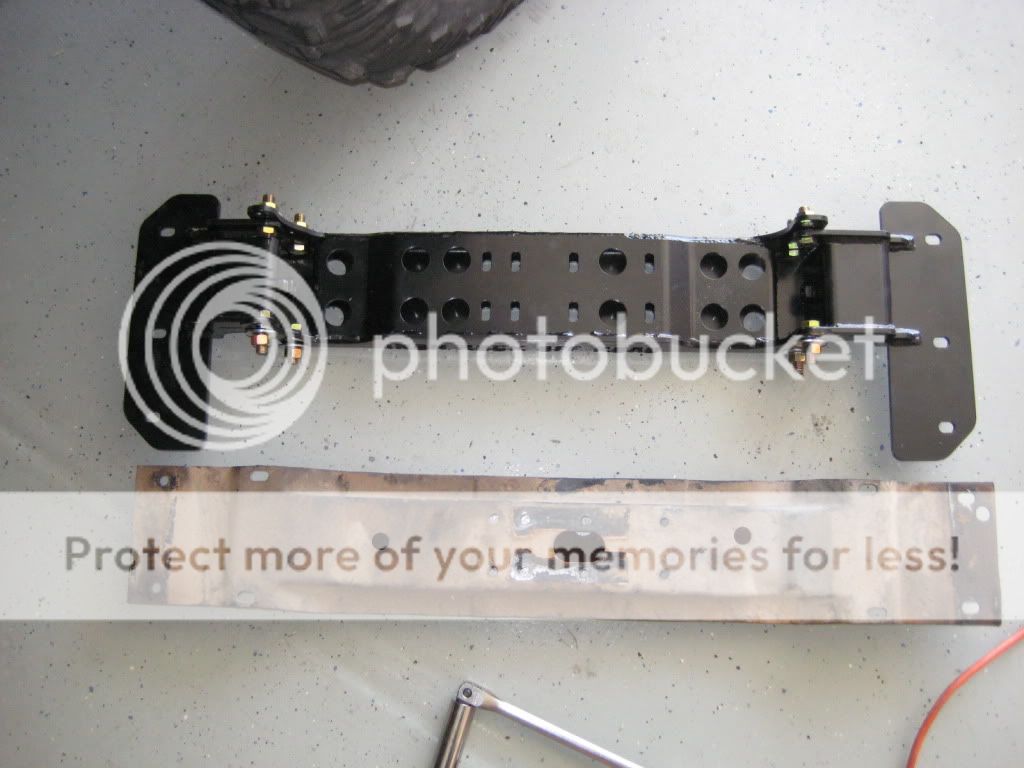
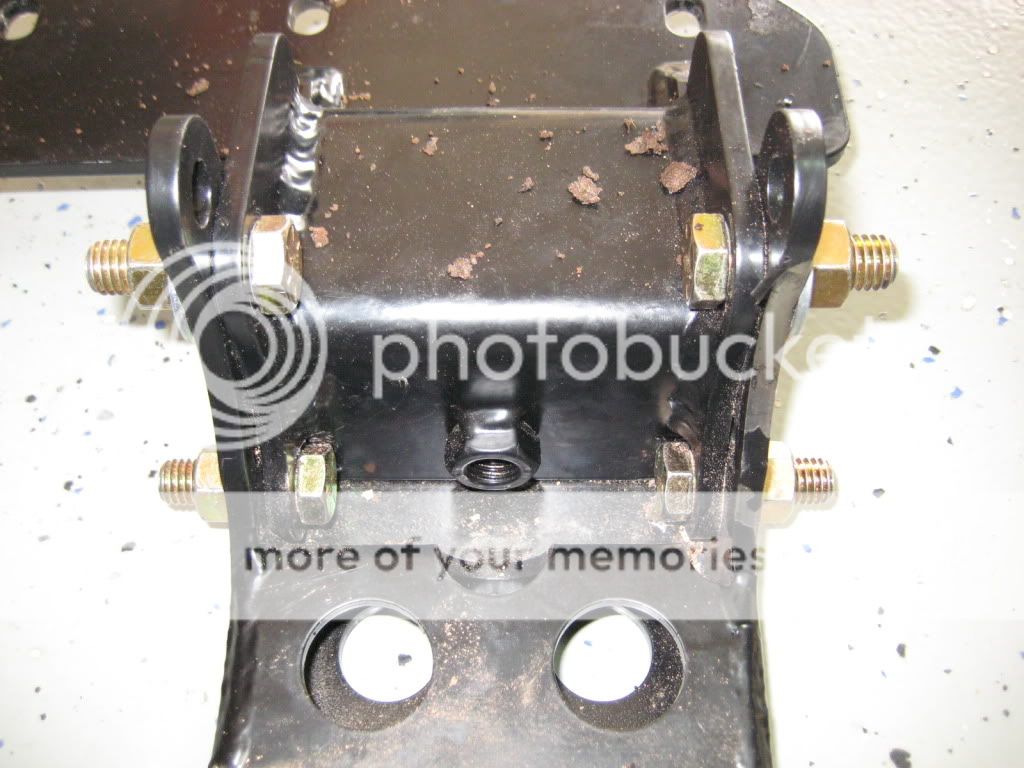
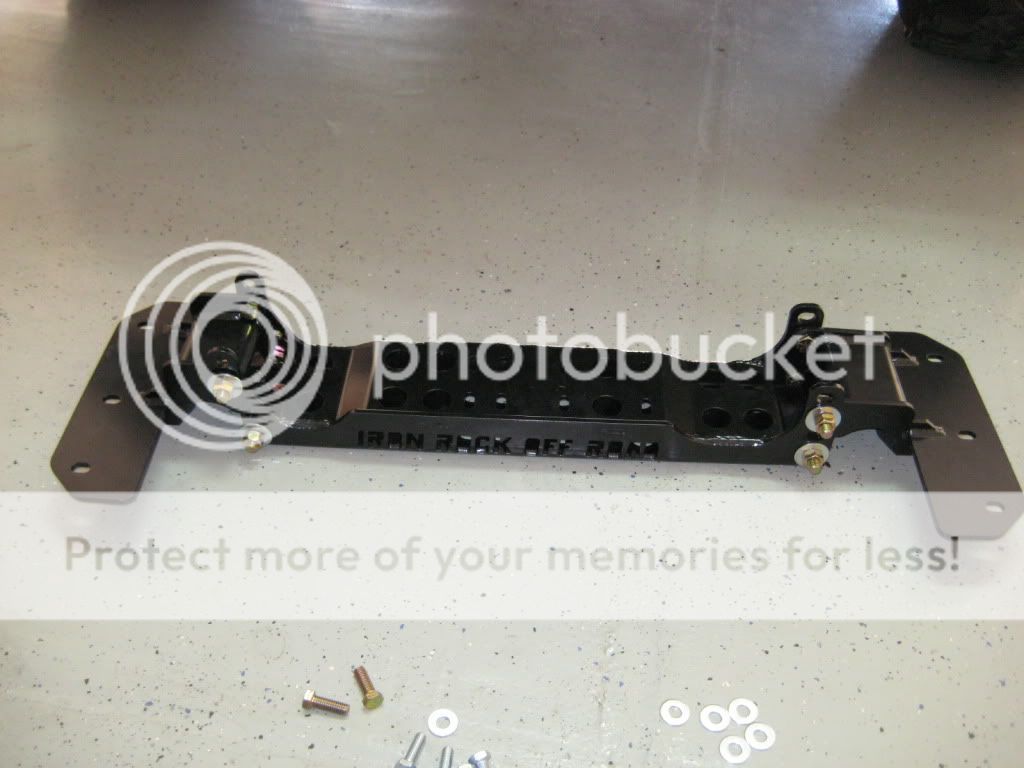
Subframe loosely assembled. Four 1/2" bolts hold it together.
IMG_5690.jpg
 
I didnt have to drill that hole either. I just tapped it... I just finished my 5.5'' kit sunday...
 
Is the Cross Member removable? If it is I would probably feel safer welding in the brackets, three bolts per side that only go in one side of the uni body would scare me.
 
The subframe has holes built in for a t-case drop but I have a SYE so I mounted the pieces on the lower holes. I think this is unnecessary since this kit is for 4.5" and up and an SYE is a must.
IMG_5691.jpg


New crossmember next to old one.
IMG_5692.jpg


This is the pre-existing hole on my truck that needed to be tapped.
IMG_5693.jpg


I shot some cutting oil in the hole and let it drip out to lube the tap process.
IMG_5695.jpg


My attempt at tapping the unibody. Yeah its a little crooked. Big whoop, you want to fight about it?
IMG_5696.jpg


One downside to this kit is that the factory t-case skid cannot be installed. Iron rock verified this before I purchased and said that I could drill holes to mount the stock skid. I didn't want to spend the 9 hours drilling through the thick crossmember steel so I didn't do this. I am thinking about modifying the old crossmember with a cutout and bracing and bolting it under the t-case. Has anyone done this?
IMG_5697.jpg


Close up of the holes. I might have rotated one of the crossmembers incorrectly here but the holes on the new crossmember seemed to be in the way.
IMG_5698.jpg


I spent a long time trying to cinch down the four subframe bolts with it mounted to the truck. After about 2 hours I called the Iron Rock shop and asked for advise. Jason said that sometime the lower, tougher bolts to get to will grip against the metal and tighten or put a wobble socket on them. This didn't work for me. He said I might have to take off the crossmember to tighten them properly. So I tightened what I could then took it off. I put it on the ground, marked the subframe pieces with an awl to make sure they didn't move from their position and tightened them down. The two lower bolts are difficult even with the c.m. off. I would recommend putting some sort of stop for the inner bolt head. There is a welded nut in that area that makes getting a tool in their difficult.
IMG_5699.jpg


C.M installed and snugged.
IMG_5700.jpg


Stock arms and Iron Rock arms.
IMG_5701.jpg
 
Is the Cross Member removable? If it is I would probably feel safer welding in the brackets, three bolts per side that only go in one side of the uni body would scare me.

Removable yes, but that means you have to take apart everything. I am concerned about the issue of the three bolts per side too. Perhaps a few spot welds. I will check torque specs after I drive it around.
 
Drivers side arm. I am leaving the stock lca mounts on for now. I will remove them only if they become a problem.
IMG_5703.jpg


Passenger side arm.
IMG_5704.jpg


Everything on.
IMG_5706.jpg


IMG_5707.jpg
 
Caster adjustment thing. It looks wrong to me but it seems to work. Shout out if I did something stupid. The diff cover doesn't seem too tilted and it drives great.
IMG_5709.jpg


IMG_5708.jpg


Speaking of driving, it is great so far. I have only driven around my neighborhood but that was enough to convince me that the ride is improved 100%. I used to deal with big jostles and a stiff ride. I am taking on the street now to see what it feels like at speed. Please keep in mind I have not installed the Bilstein 5100s yet. I will update when they get installed. I have an old set of Doestech (sp?) that I am sure are ruined. I had crazy death wobble before I put new bushings on my old control arms and Im sure the d.w. destroyed them.
 
i am running the 5.5'' kit and have the big bolt in the center and the small one in the center and when i went and had it aligned they said the caster was at 4... and iron rock says 4.5 is preferred. I am pleased at where mine is set at... and the ride is amazing...
 
Removable yes, but that means you have to take apart everything. I am concerned about the issue of the three bolts per side too. Perhaps a few spot welds. I will check torque specs after I drive it around.
You can spot weld it if that will make you feel better.they have used that mounting system on other xj,zj and wj and haven't had any problems.frame,subframe and t/c all tied together.take a act of god to make it fall off.
 
I called Iron Rock yesterday and asked about my shocks. Bilstein "lost" the order so IRO is 2 day air my shocks out to me. I am very happy with the customer service with IRO. They always answer the phone withing 2 rings and I have never had to listen to a recording during business hours.

I drove the truck some more today. The ride is as good as everyone says. I can't wait for Bilstein 5100's to make it even better.
 
Hello ladies. These came in the mail today. THey are just beautiful shocks. I should have these installed tonight barring any annoying welded nuts in the rear. I also got BPE for the front.

Network Alignment performed the alignment the other day. It turns out that my caster is perfect even though I think the caster thing looks wrong.
IMG_5741.jpg

IMG_5744.jpg
 
Awesome looking setup, how much did you have to trim out of your fenders to clear the 33's with your current lift height?? Also from what few writeups I have found about the IRO long arm setup, you might be trimming that LCA bracket off shortly if you plan to flex out at all... but you might be fine at the same time at least for your DD and hitting up the mud.... Are you going to leave the boots on or take them off of your new shocks??
 
My dead Doestech shocks. All four are like this. Time to rethink my bumpstops!
I ordered some hockey pucks for the bottom of the coil buckets and bought some 2"x2" scrap at Industrial Metal Supply for the rear.
shocks.jpg
 
Last edited:
Awesome looking setup, how much did you have to trim out of your fenders to clear the 33's with your current lift height?? Also from what few writeups I have found about the IRO long arm setup, you might be trimming that LCA bracket off shortly if you plan to flex out at all... but you might be fine at the same time at least for your DD and hitting up the mud.... Are you going to leave the boots on or take them off of your new shocks??

I trimmed a bunch front and rear. Too much in the rear since I cut above the pinch seam. The 5" bilsteins and BPE allow for only 4.5" of uptravel in the front and 5.5" in the rear. I plan to correct the bumpstops and see where my travel ends. If I have enough room I will probably move up to 35" tires.

I called IRO about removing the control arm buckets and they said it is not necessary. I cycled the suspension with a floor jack and it looks like the long arms will clear the buckets.

Is there a benefit to removing the shock boots?

Old pic with old suspension.
upperwoody2.jpg
 
The crossmember on the IRO long arm kit does not have bolt holes for my old t-case skid so I came up with something. I used my old crossmember as a t-case skid and used my old t-case drop bracket for clearance. I tapped for holes and bolted it all up. I am not very confident it will hold up though since the bolts are going into sheet metal. What do you guys think about cutting little access holes in the side of the 'frame' so I could put a washer and nut on the four bolts?

cm4.jpg


I had to cut a bit out of the top to clearance the catalytic convert.
cm3.jpg


cm2.jpg


cm1.jpg
 
Stuff I got done today. Kids were out of the house so I had no distractions.

I liked what I saw on DPG offroad so I decided to make my own.
Swaybar disconnect cables. 3/32" cable with drip line outer covering, carabiners, and eyebolts. About $7.
http://www.dpgoff-road.com/site/dpg_disco_cables.htm

IMG_5889.jpg


DPG also had some nifty bumpstop plates and risers. I used some 3/8" plate rems from Industrial Metal Supply in Tempe, $1.19/lb and it is cold rolled. My buddy cut them out with his tiny plasma. The cuts are rough and the holes were ugly but it works. My Bilstein 5100 have about 4.75" of uptravel. The bumpstop will hit at 4".
http://www.dpgoff-road.com/site/dpg_adj_bumpstop_plates.htm
IMG_5891-1.jpg


IMG_5892.jpg


The front shocks have about 4.5" of uptravel. I bought some practice hockey pucks from Behind the Mask in Chandler, 99ct/each. I went to Polar Ice first to get some free used ones but the coaches had snagged them all. The three pucks limit uptravel to about 4". I used silicone glue to hold them together. They slip easily between the coils.
IMG_5888.jpg
 
Last edited:
Back
Top