rienzio
NAXJA Forum User
- Location
- Golden, CO
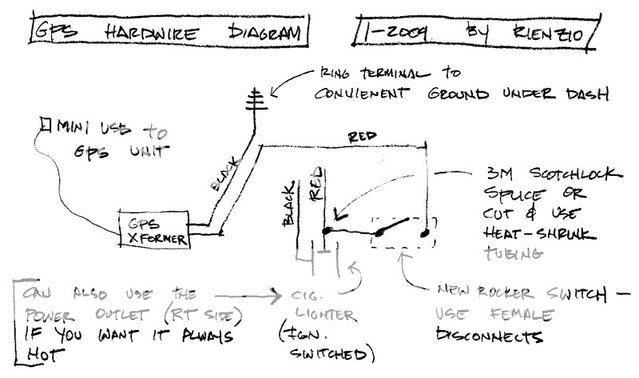
My XJ got a few Christmas gifts: a garmin Nuvi 350 (highly recommended, it was very affordable as a refurb and I am happy, haven't found that I need features that the new 265 series have that I can't live without.) I wanted to hardwire it, but also have a rocker switch to turn it off for everyday driving when I know where I'm going. I got a hardwire kit from amazon.com, there are two available, but I choose this one because its mini USB connector is straight, not 90 degree.
I also picked up a KC Highlites 516 kit, which includes two 2x6 multi-use lights and clear fog, amber fog, and clear driving lenses. Per the reccomendation of others on this forum, I got a Mopar 82204235 kit from the dealer, which includes a new switch panel and OEM fog light switch. If you are happy with a KC rocker switch under your dash, the 516 kit includes all the relays and wiring you'll need. I ended up fabbing some brackets from 2" x 1/8" bar stock to place them behind the air dam.
Here's the install:
Part I: electrical
=========================
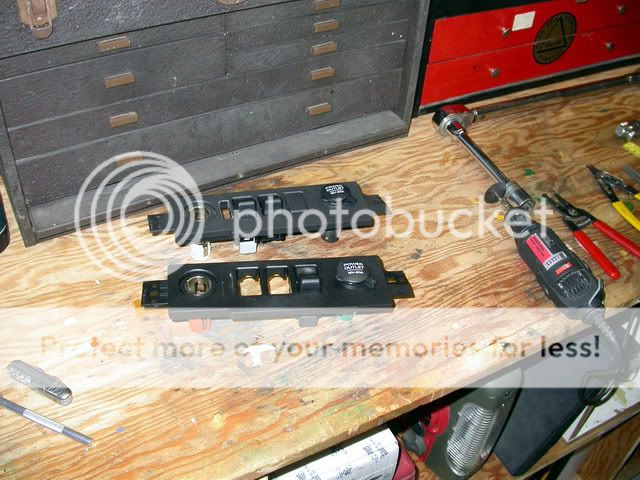
first, I scribed and cut a hole in the switch panel for the extra rocker switch. Sure, I could've ordered a 4-bay panel, but in the interest of KISS, I went to checker and got a $2 black rocker.

next, we followed the MOPAR directions for the harness. It went fairly smoothly. You'll need to pull the yellow wire thru the firewall grommet on driver side. We used a awl to make a small hole, then snaked it thru using some uncoated floral wire.
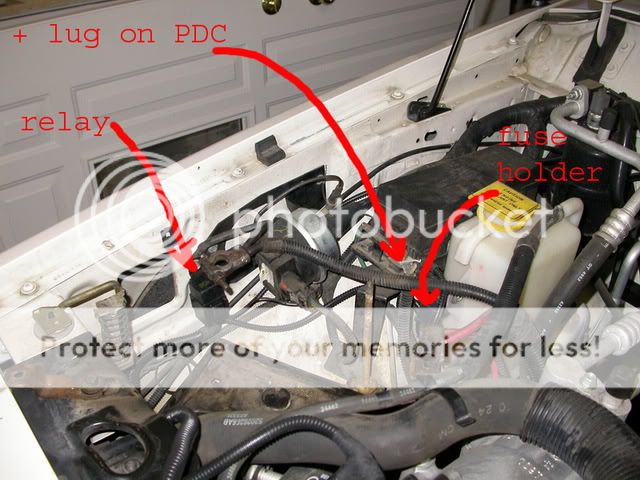
Relays and fuse holder found places using existing bolts on the right side fender:
Here's the new switch panel installed and the new wiring behind the knee blocker. THe small black box is the transformer for the Garmin. I snaked the USB connector up behind the far left AC vent. There was a module just to the right of the throttle pedal (cruise? delay wipers? can't remember) that I attached the ground lugs for both. Note that the jumper is where you are supposed to connect the high-beam cutout relay. I did not. Driving with foglights and high beams is illegal in most states. I don't condone this practice, i just want to have all candlepower available to me if I'm off-road in an emergency.

Here's dad buttoning the battery back up. Note that we dropped the grille and headlight surround to route the harness to the light locations. Well worth spinning a few 10mm bolts.

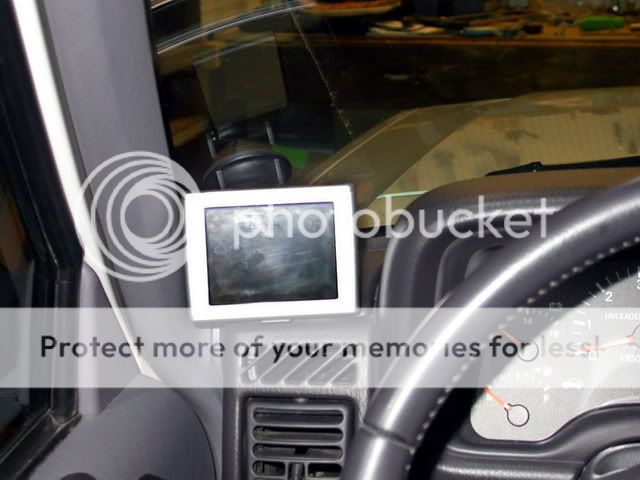
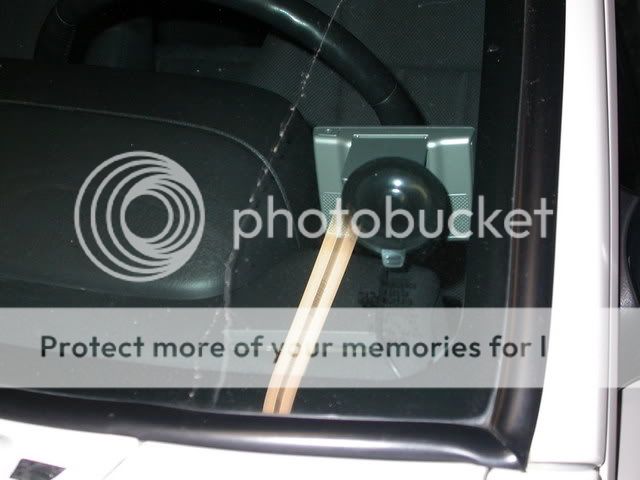
Here's the finished garmin mount. Works really great. THe USB plug was rattling loose ocassionaly, so I just tweaked the metal part a bit with some small needlenose, and it fits tighter. I will probably order a RAM mount shortly and screw it to the A-pillar or gauge surround, as i ocassionaly park in the sun to find the suction cup has de-sucked and the garmin is dangling by the cord. Other than that, it works really well.
And the view from outside: mr. policeman should be happy--he can still read the VIN, and colorado doesn't have any anti-suction cup laws. I'm happy because there are no wires in the way!
Part II: mounting fog lamps:
=========================
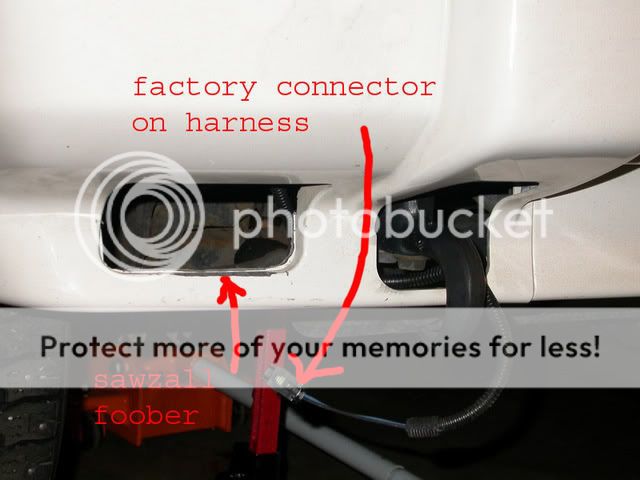
first I cut out the knock-outs in the bumper cap. On the first one, i didn't have the dremel handy (left it at dad's house, d'oh!) so I grabbed the sawzall. be careful. the ABS is like soft cheese under a sawzall. I'll have to order some touch-up. If you have the black corners on you sport or base model, the cutting will be much less noticeable.
Next I made a template and marked the holes to match the factory bumper and the KC light:

Here's the light attached to a completed bracket:

Next bolt up your brackets with 1/4" x 1/2" hex bolts, and cut off the factory pigtail. I used bullet disconnects to mate up with the pigtails on the KC lights.
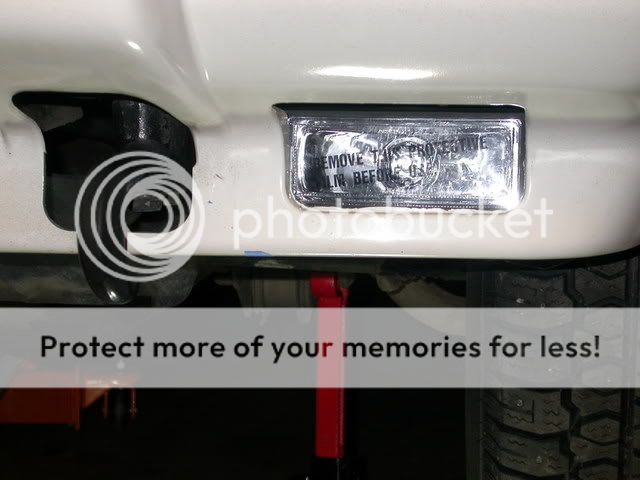
And here's how the completed lights look: from 6 ft away, you won't know they arent OEM, and cost a lot less! My 98 classic is now fully loaded!

hope that was helpful for anyone looking for OEM appearance fog lights on a budget or looking to integrate a GPS. Let me know if you have any questions or comments.
I also picked up a KC Highlites 516 kit, which includes two 2x6 multi-use lights and clear fog, amber fog, and clear driving lenses. Per the reccomendation of others on this forum, I got a Mopar 82204235 kit from the dealer, which includes a new switch panel and OEM fog light switch. If you are happy with a KC rocker switch under your dash, the 516 kit includes all the relays and wiring you'll need. I ended up fabbing some brackets from 2" x 1/8" bar stock to place them behind the air dam.
Here's the install:
Part I: electrical
=========================
first, I scribed and cut a hole in the switch panel for the extra rocker switch. Sure, I could've ordered a 4-bay panel, but in the interest of KISS, I went to checker and got a $2 black rocker.
next, we followed the MOPAR directions for the harness. It went fairly smoothly. You'll need to pull the yellow wire thru the firewall grommet on driver side. We used a awl to make a small hole, then snaked it thru using some uncoated floral wire.
Relays and fuse holder found places using existing bolts on the right side fender:
Here's the new switch panel installed and the new wiring behind the knee blocker. THe small black box is the transformer for the Garmin. I snaked the USB connector up behind the far left AC vent. There was a module just to the right of the throttle pedal (cruise? delay wipers? can't remember) that I attached the ground lugs for both. Note that the jumper is where you are supposed to connect the high-beam cutout relay. I did not. Driving with foglights and high beams is illegal in most states. I don't condone this practice, i just want to have all candlepower available to me if I'm off-road in an emergency.
Here's dad buttoning the battery back up. Note that we dropped the grille and headlight surround to route the harness to the light locations. Well worth spinning a few 10mm bolts.
Here's the finished garmin mount. Works really great. THe USB plug was rattling loose ocassionaly, so I just tweaked the metal part a bit with some small needlenose, and it fits tighter. I will probably order a RAM mount shortly and screw it to the A-pillar or gauge surround, as i ocassionaly park in the sun to find the suction cup has de-sucked and the garmin is dangling by the cord. Other than that, it works really well.
And the view from outside: mr. policeman should be happy--he can still read the VIN, and colorado doesn't have any anti-suction cup laws. I'm happy because there are no wires in the way!
Part II: mounting fog lamps:
=========================
first I cut out the knock-outs in the bumper cap. On the first one, i didn't have the dremel handy (left it at dad's house, d'oh!) so I grabbed the sawzall. be careful. the ABS is like soft cheese under a sawzall. I'll have to order some touch-up. If you have the black corners on you sport or base model, the cutting will be much less noticeable.
Next I made a template and marked the holes to match the factory bumper and the KC light:
Here's the light attached to a completed bracket:
Next bolt up your brackets with 1/4" x 1/2" hex bolts, and cut off the factory pigtail. I used bullet disconnects to mate up with the pigtails on the KC lights.
And here's how the completed lights look: from 6 ft away, you won't know they arent OEM, and cost a lot less! My 98 classic is now fully loaded!
hope that was helpful for anyone looking for OEM appearance fog lights on a budget or looking to integrate a GPS. Let me know if you have any questions or comments.