magimerlin
NAXJA Forum User
- Location
- Flatonia, Tx
So I have searched a crap load of places and no real write-up for the early XJ's. I have an 89 cherokee. Soooo here is my go at it.
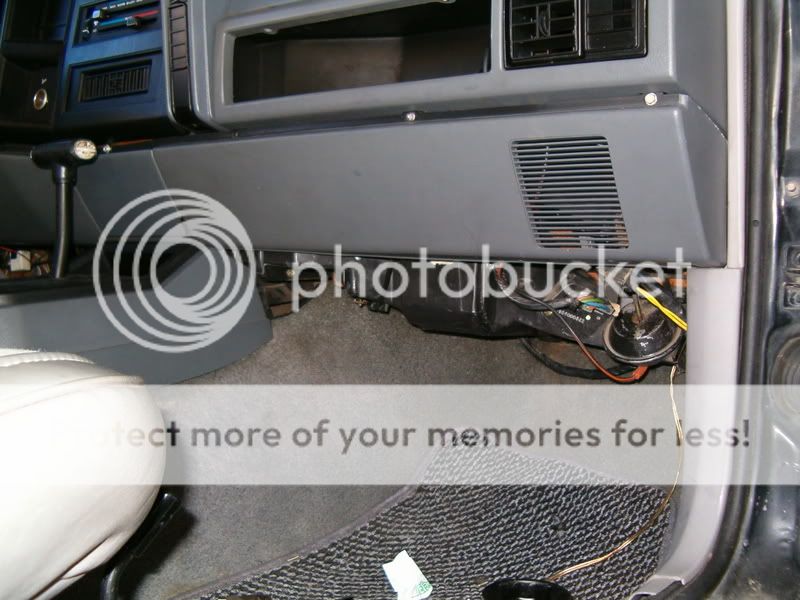
First things first. After you remove your heater lines. Mines been bypassed for awhile till I could get to replacing the core. You need to remove the center console and lower dash panel and kick panel. The beer is optional.
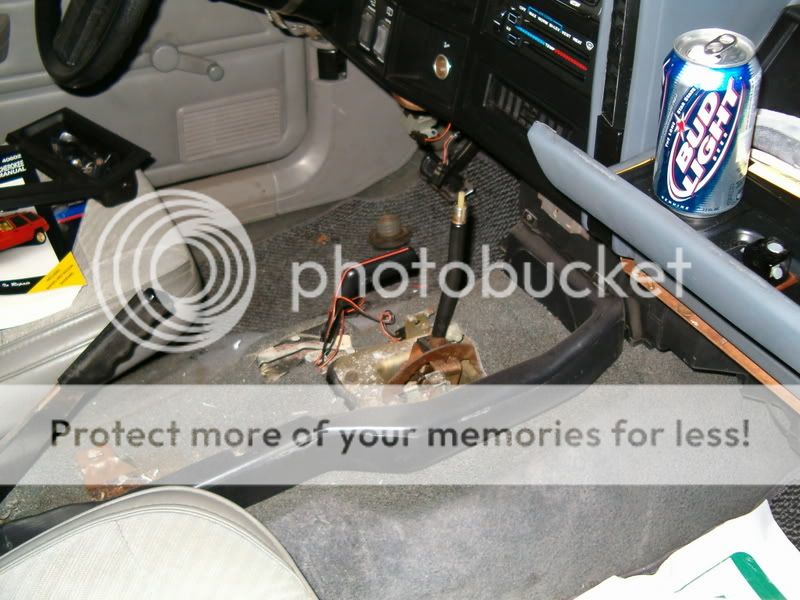
Disconnect your electrical wiring and the one vac line, and heater control cable.
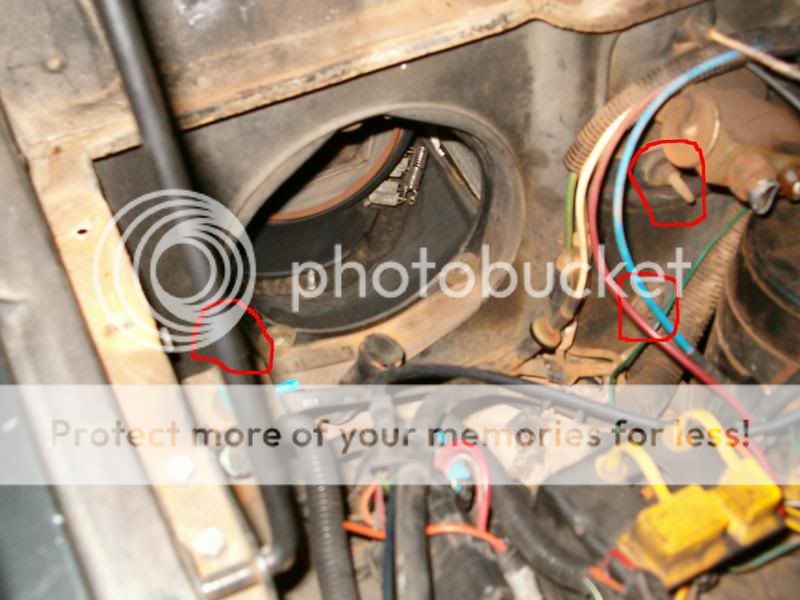
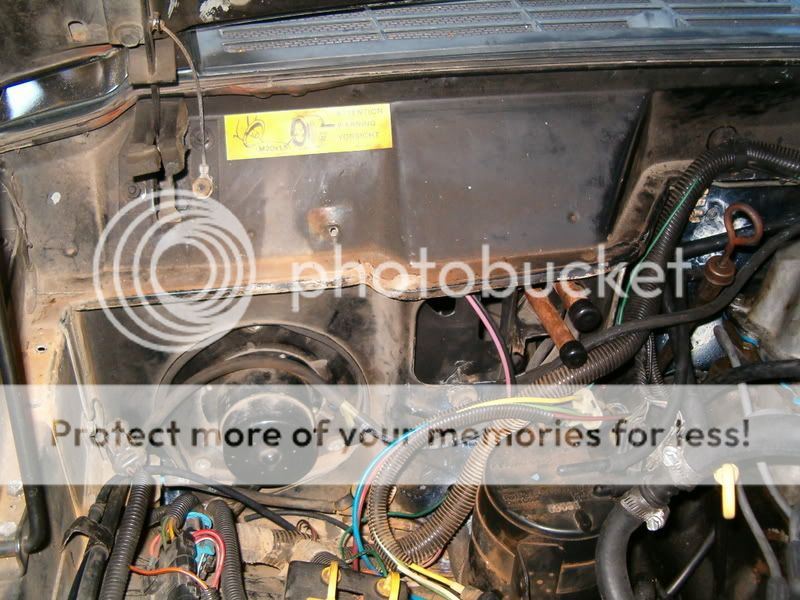
Remove your blower motor and remove the 3 nuts that are holding in the heater box section. (I circled them in red)
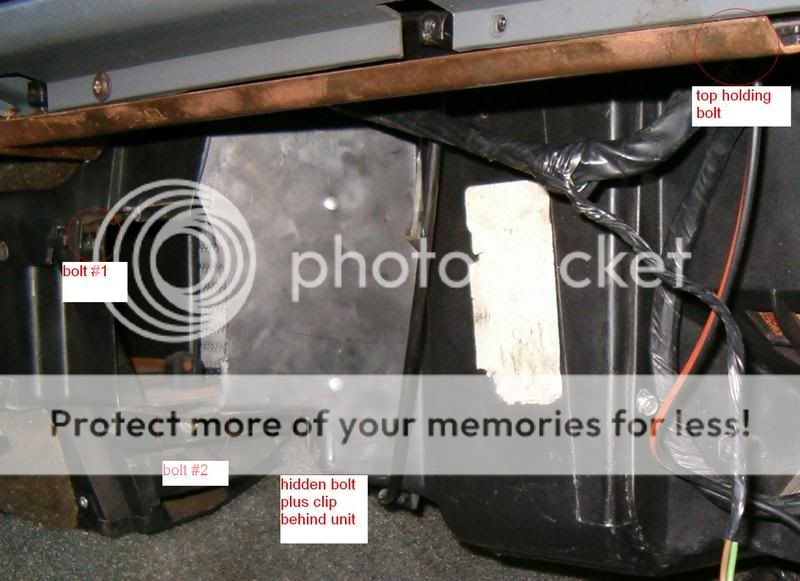
Back on the inside. There are four screws/bolts that hold the housing in. Bolt 1 and 2 are obvious. 3 is in the back. Just follow the seem that #2 is on and you will find it. There is a clip on the same bolt that has to be removed after the bolt is out. 4 is up in the dash, right above the words in the pic.
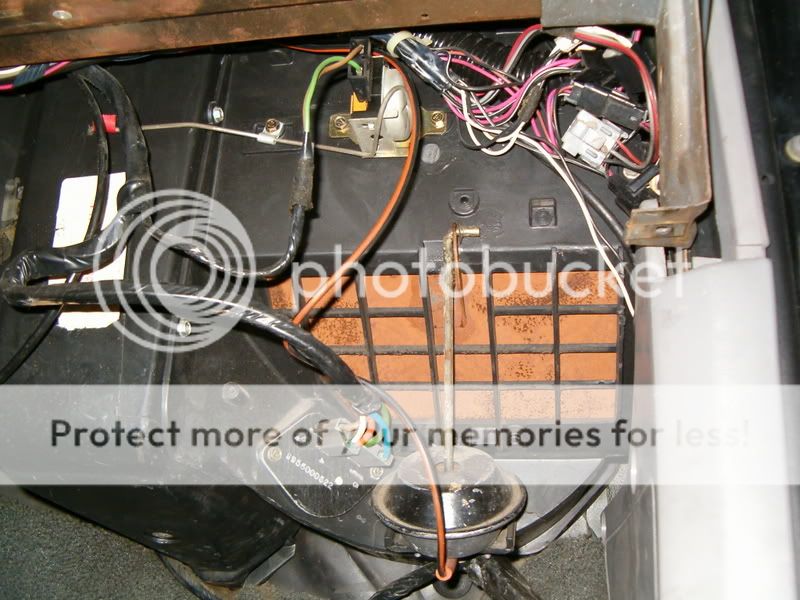
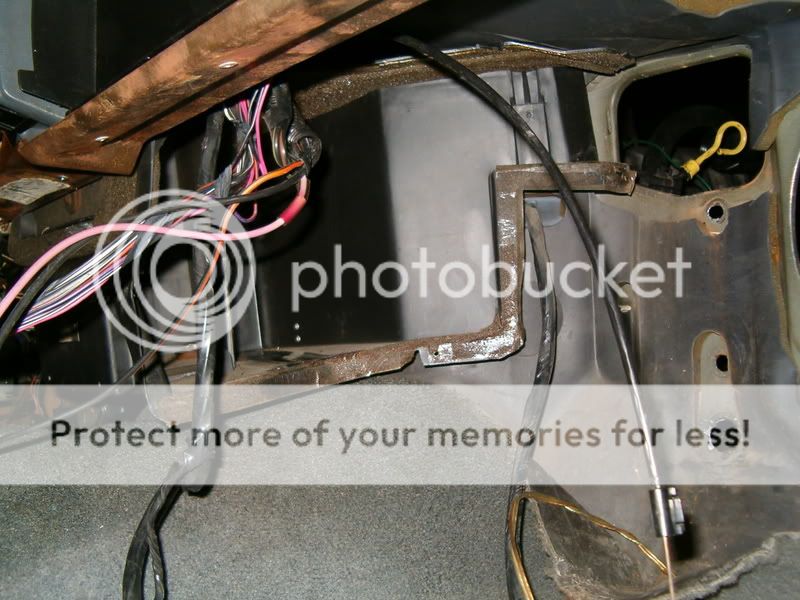
Once the bolts are out. The dash main support bolt on the right side has to be removed. Next step I have no pic of as I needed both hands to do it. You need to pull the dash out carefully and pull the heater housing back and down at the same time so the mount studs on the firewalll will come away from the dash and let it come out. This is what you will have after the housing and heater core is out.. hint-- I pulled the dash out of the way(past the support mont hole) then put the bolt back in abit, that held the dash out enough to get both hands on the housing.
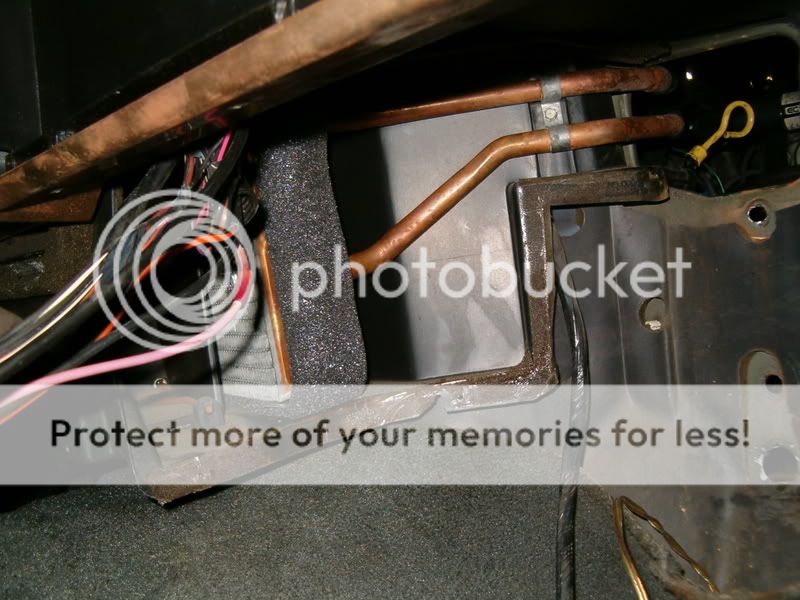
Put new core in and screw it in(by the top between the two tubes)
It goes back in just like it came out. The hardest part about putting it back in was getting the studs back through the holes in the firewall. I am not going to say it was easy becouse it was a pain in the rear. But it does go back. Once up put the 4 screws back in and tighten then replace the 3 nuts that hold it to the firewall.
Replace your blower motor.
Reconnect your wiring and heater control cable, then replace your lower dash panel and center console
Then hook haeter lines back up, add coolant, and start the coolant air bleed process. I was able to do this in about 5 hours and that is with taking pics. I think my neighbors think I'm crazy. I was out doing this and didn't finish till about 1am. If you want to post this else were on the web feel free aslong as you add my name Jay Furness as the original writer. I hope that this helps some people out. Thank you
First things first. After you remove your heater lines. Mines been bypassed for awhile till I could get to replacing the core. You need to remove the center console and lower dash panel and kick panel. The beer is optional.
Disconnect your electrical wiring and the one vac line, and heater control cable.
Remove your blower motor and remove the 3 nuts that are holding in the heater box section. (I circled them in red)
Back on the inside. There are four screws/bolts that hold the housing in. Bolt 1 and 2 are obvious. 3 is in the back. Just follow the seem that #2 is on and you will find it. There is a clip on the same bolt that has to be removed after the bolt is out. 4 is up in the dash, right above the words in the pic.
Once the bolts are out. The dash main support bolt on the right side has to be removed. Next step I have no pic of as I needed both hands to do it. You need to pull the dash out carefully and pull the heater housing back and down at the same time so the mount studs on the firewalll will come away from the dash and let it come out. This is what you will have after the housing and heater core is out.. hint-- I pulled the dash out of the way(past the support mont hole) then put the bolt back in abit, that held the dash out enough to get both hands on the housing.
Put new core in and screw it in(by the top between the two tubes)
It goes back in just like it came out. The hardest part about putting it back in was getting the studs back through the holes in the firewall. I am not going to say it was easy becouse it was a pain in the rear. But it does go back. Once up put the 4 screws back in and tighten then replace the 3 nuts that hold it to the firewall.
Replace your blower motor.
Reconnect your wiring and heater control cable, then replace your lower dash panel and center console
Then hook haeter lines back up, add coolant, and start the coolant air bleed process. I was able to do this in about 5 hours and that is with taking pics. I think my neighbors think I'm crazy. I was out doing this and didn't finish till about 1am. If you want to post this else were on the web feel free aslong as you add my name Jay Furness as the original writer. I hope that this helps some people out. Thank you
Last edited:
