First off, check your laws. It may be illegal to change your odometer in your state.
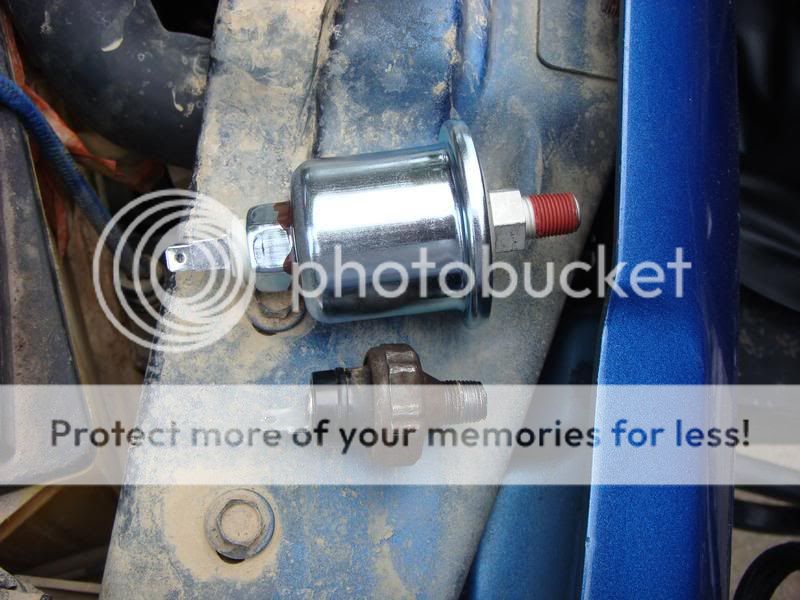
Now for the How To. I have only found a couple of How To's for the gauge cluster install and odometer recalibration. How ever, the ony ones I have seen are for the XJ's that use an electronic speedometer connection. This How To was done on a 1987 Jeep Cherokee with the 4.0 and Automatic trans, if that matters. For this swap you will need a Gauge cluster to replace your idiot lights, new Temp sensor, and new Oil Pressure sensor. You may also want to disconnect your battery.
Temp sensor: Wells TU108 (from AutoZone) $8.99
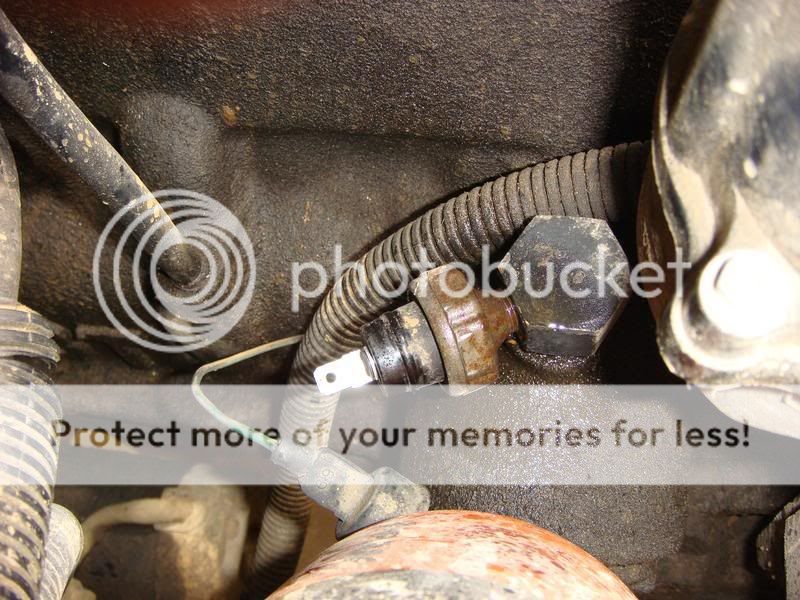
Oil pressure sensor: Duralast PS133 (from Autozone) $12.99
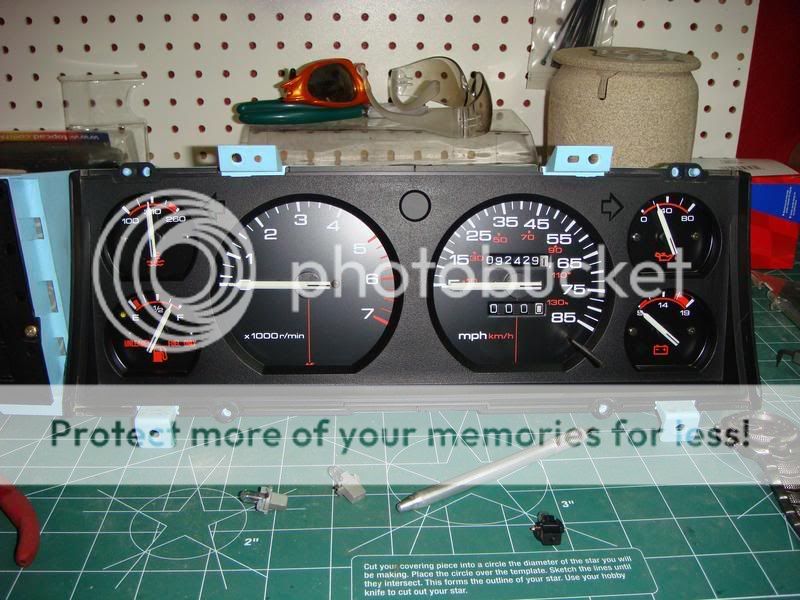
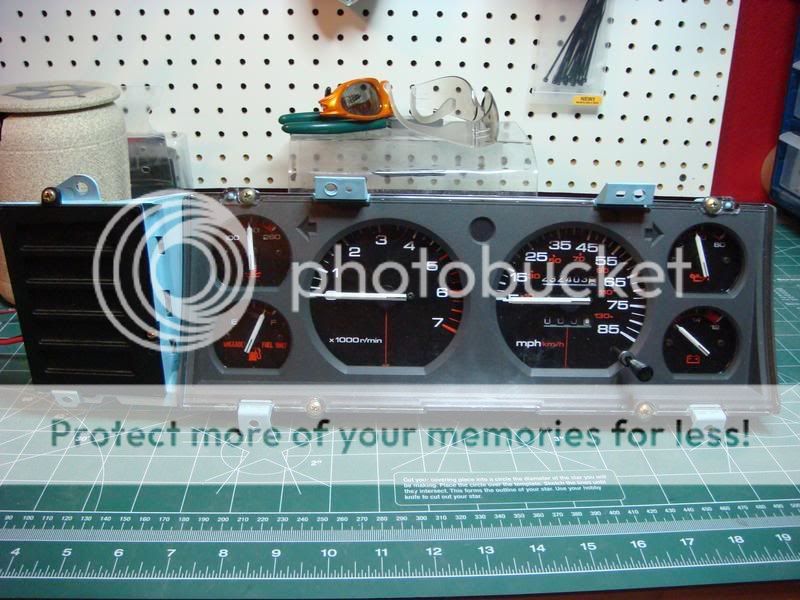
First start by getting your cluster, I got mine off of Ebay. You may also want to take a picture of your old and new Odometers for any legal stuff or for your reference.
(I think you can only do the Odometer Recalibration for the Pre '91 gauges, I am using a '90 for my swap because that is what works for my '87)
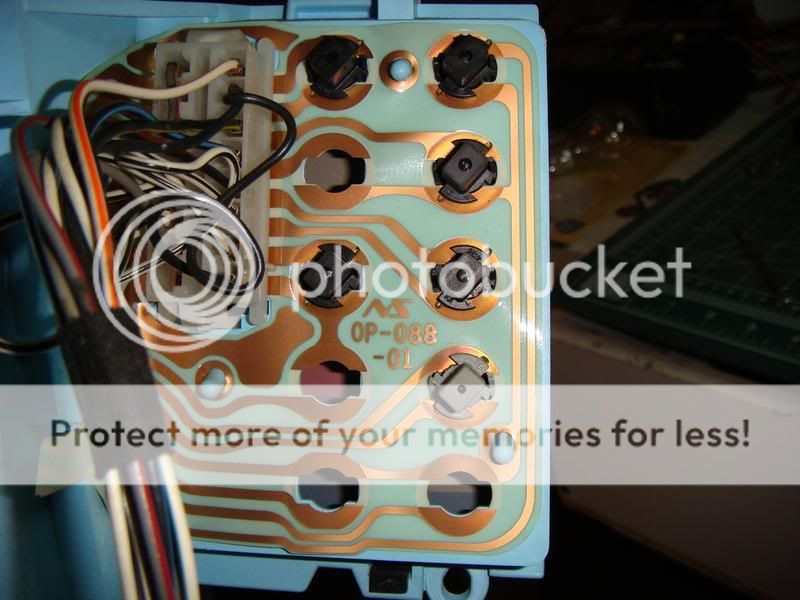
Start off by removing the 4 screws that hold the clear plastic cover on the cluster, remove the handle on the Trip Reset button (It just slides off) and then remove the cover and colored gauge surround.
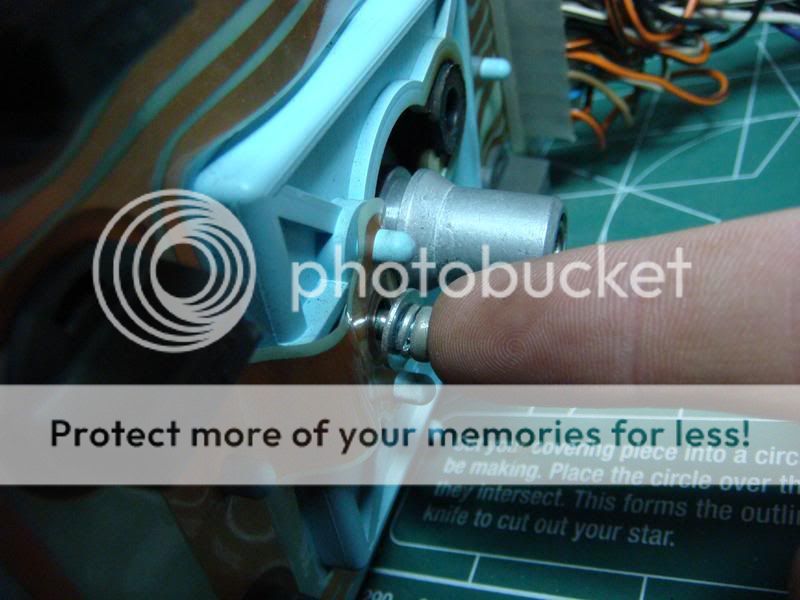
Turn the cluster around and remove the two screws holding the speedometer in

Then remove the screw on the front that holds the speedometer in

I found it easier to remove the speedometer if you take one of the screws that held it in from the back, and pushed on it so it would force the speedometer out.
With the speedometer out, turn it around and take a pick of some sort (I used a Hobby Knife with a small blade (watch your eyes). Push it in to the side of the clip on the odometer and pry it out. Be careful, it may go flying.
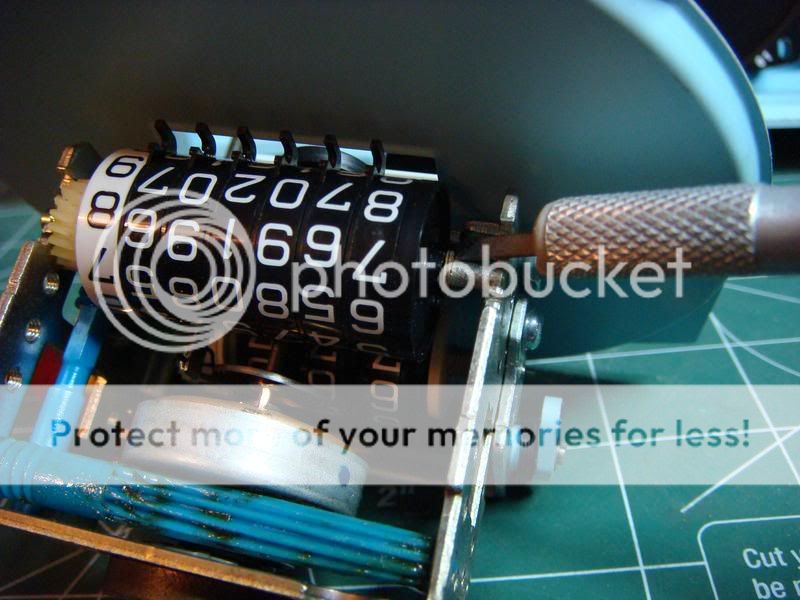
Now all you do is slide the number wheels over slightly so they spin freely, then put it to the mileage of your vehicle. The 10th's wheel rides on a little click piece. Now put the speedometer back in, but not the gauge surround.

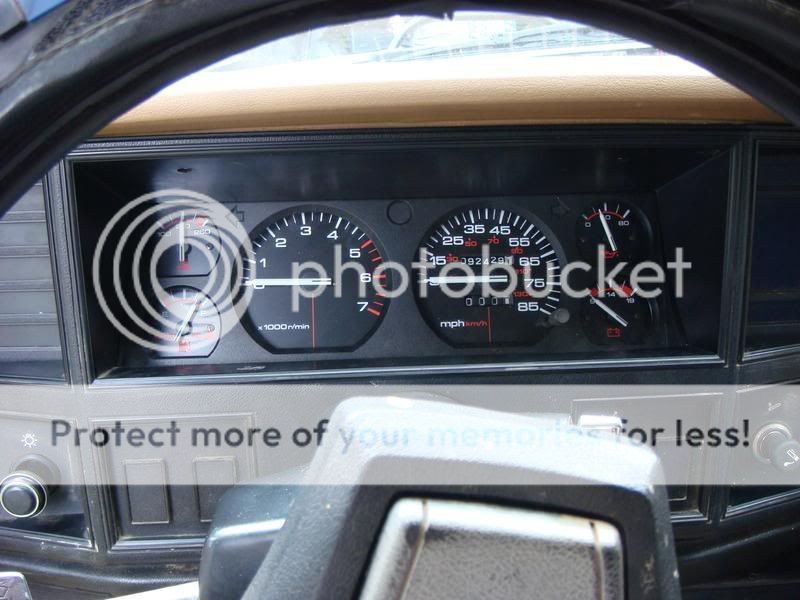
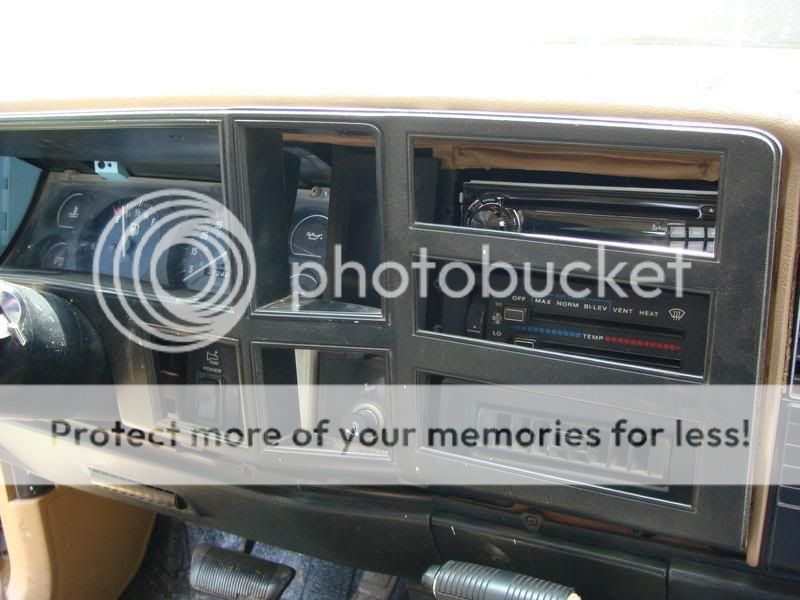
Now go remove your old cluster, there are 4 screws you need to remove


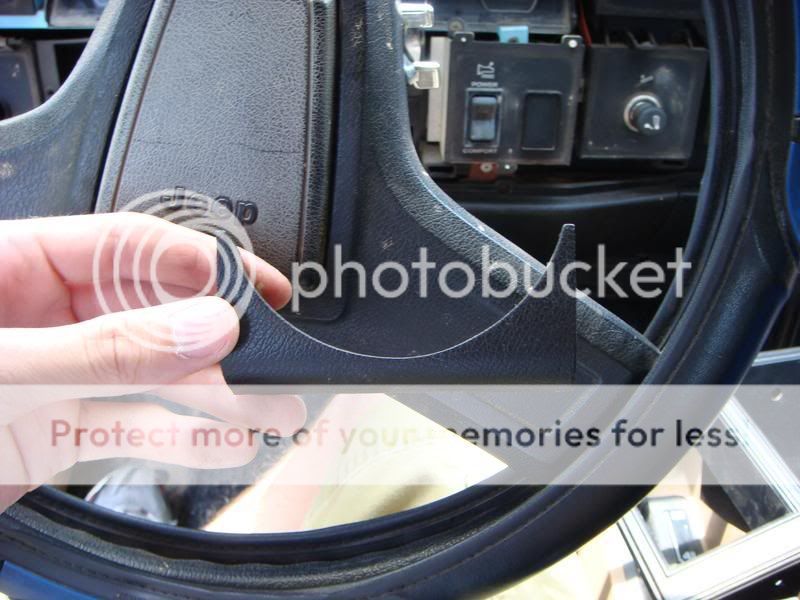
Now pull the dash face off
Watch for this piece, it will fling off
Now locate all of the screws holding the old cluster in, and remove them (there are 6) Also remove the piece next to the cluster. It will either be a clock, or a fake piece to cover up the space (2 screws)

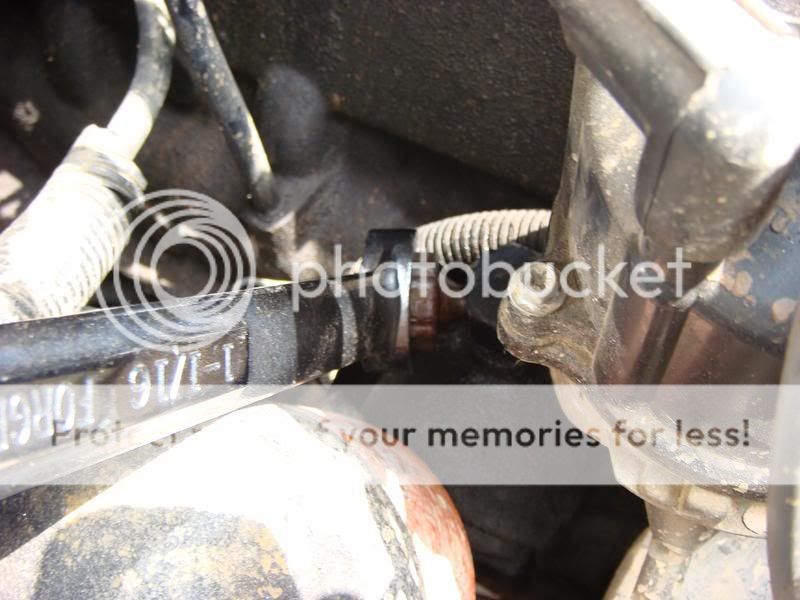
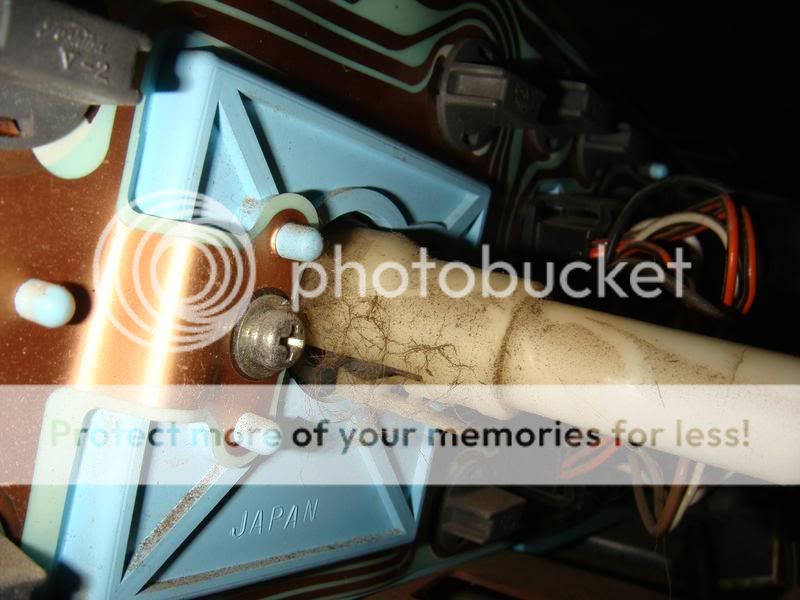
Slide the cluster out far enough to get your hand behind it. Stick it through the side where the clock would go. You will need to remove the speedometer cable, there is a clip on it, press it and it will release.
http://s22.photobucket.com/albums/b346/TMXONR/Gauge Cluster Swap/?action=view¤t=MOV00368.flv
Now for the How To. I have only found a couple of How To's for the gauge cluster install and odometer recalibration. How ever, the ony ones I have seen are for the XJ's that use an electronic speedometer connection. This How To was done on a 1987 Jeep Cherokee with the 4.0 and Automatic trans, if that matters. For this swap you will need a Gauge cluster to replace your idiot lights, new Temp sensor, and new Oil Pressure sensor. You may also want to disconnect your battery.
Temp sensor: Wells TU108 (from AutoZone) $8.99
Oil pressure sensor: Duralast PS133 (from Autozone) $12.99
First start by getting your cluster, I got mine off of Ebay. You may also want to take a picture of your old and new Odometers for any legal stuff or for your reference.
(I think you can only do the Odometer Recalibration for the Pre '91 gauges, I am using a '90 for my swap because that is what works for my '87)
Start off by removing the 4 screws that hold the clear plastic cover on the cluster, remove the handle on the Trip Reset button (It just slides off) and then remove the cover and colored gauge surround.
Turn the cluster around and remove the two screws holding the speedometer in
Then remove the screw on the front that holds the speedometer in
I found it easier to remove the speedometer if you take one of the screws that held it in from the back, and pushed on it so it would force the speedometer out.
With the speedometer out, turn it around and take a pick of some sort (I used a Hobby Knife with a small blade (watch your eyes). Push it in to the side of the clip on the odometer and pry it out. Be careful, it may go flying.
Now all you do is slide the number wheels over slightly so they spin freely, then put it to the mileage of your vehicle. The 10th's wheel rides on a little click piece. Now put the speedometer back in, but not the gauge surround.
Now go remove your old cluster, there are 4 screws you need to remove
Now pull the dash face off
Watch for this piece, it will fling off
Now locate all of the screws holding the old cluster in, and remove them (there are 6) Also remove the piece next to the cluster. It will either be a clock, or a fake piece to cover up the space (2 screws)
Slide the cluster out far enough to get your hand behind it. Stick it through the side where the clock would go. You will need to remove the speedometer cable, there is a clip on it, press it and it will release.
http://s22.photobucket.com/albums/b346/TMXONR/Gauge Cluster Swap/?action=view¤t=MOV00368.flv