• NAXJA is having its 18th annual March Membership Drive!!!
    Everyone who joins or renews during March will be entered into a drawing!
    More Information - Join/Renew
  • Welcome to the new NAXJA Forum! If your password does not work, please use "Forgot your password?" link on the log-in page. Please feel free to reach out to [email protected] if we can provide any assistance.

Minecraft Jeep - Build Thread

Alexia

NAXJA Forum User
Location
Huntsville, AL
Hey - I am bringing this build thread over to NAXJA to share the technical rebuild information into restoring a Jeep. I originally started this over on JPF.

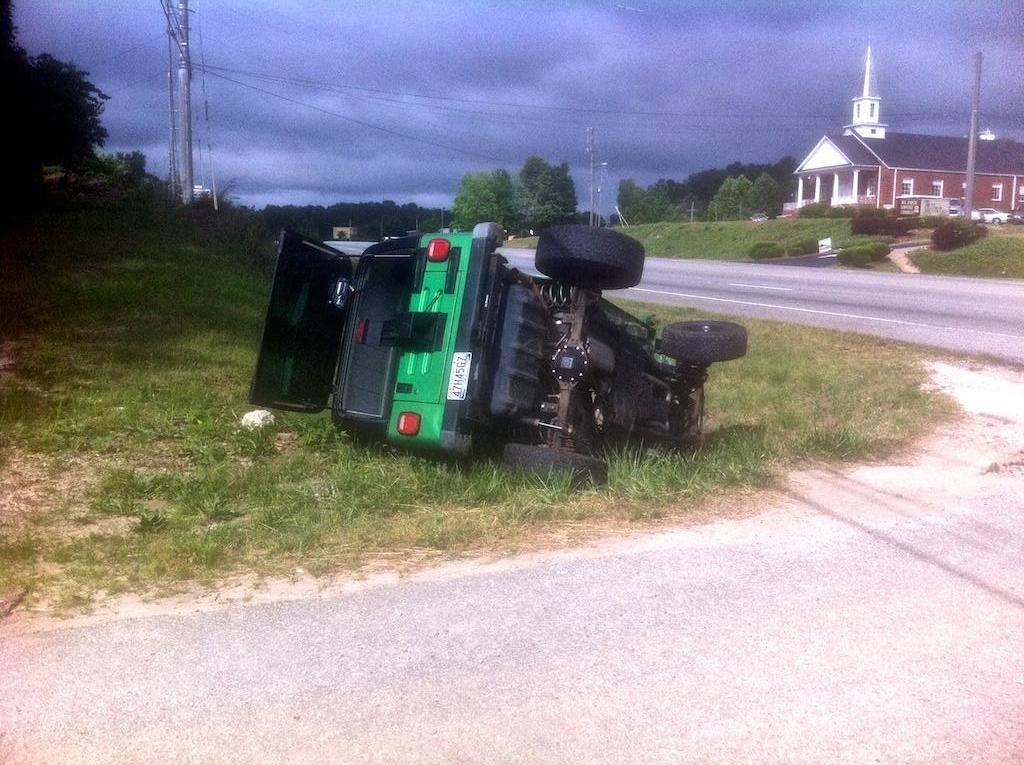
Many of us that have drove for a long time know the agony of wrecking your favorite vehicle is painful. I previously had a Cherokee that I wrecked and was repaired by a shop. This is one of those stories, but in this story I will be doing the repairs. I responded to a Craigslist advertisement for a cheap 1996 Jeep Cherokee Classic. It was very cheap, a mechanic special for any one with the skills to fix it. A deer was upset with a creature more beautiful than it being in its territory and took a suicide bombing run into the grill. The Jeep survived and continued to run strong with need of immediate surgery. I promised the previous owner after taking it into my care I would fix it to keep a Cherokee on the road. Considering that many were lost to Cash for Clunkers, this is a worthy clause.

I will include some step by step of what you should do during the rebuild of your smashed front end.

TO DO
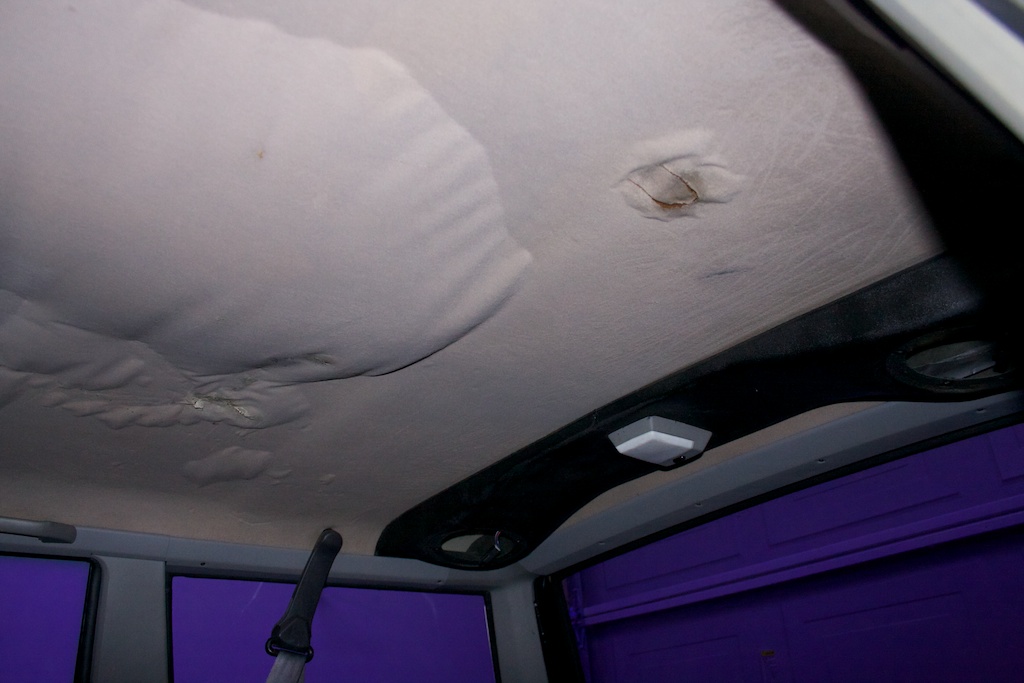
Strip Interior.(Reeks of smoke.)
Remove crappy tint.
Remove rat nest of light wiring including roof lights.
Redo head liner.
Paint interior plastic trim black.
Line-X Interior
Straighten bumper brackets

ENGINE PARTS
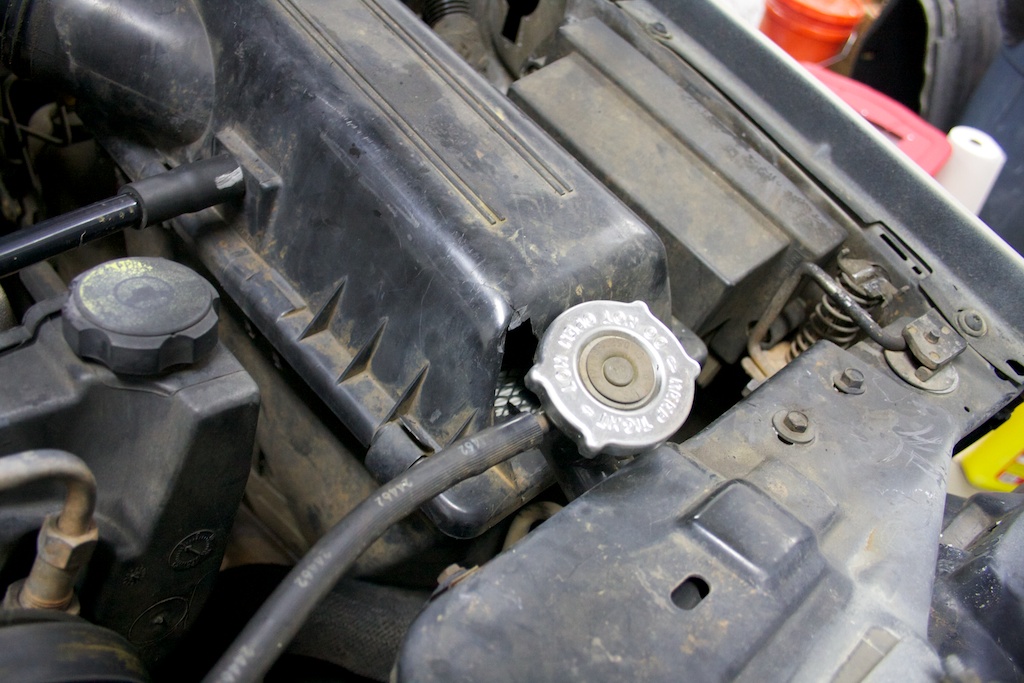
Steering pump with out reservoir
Air box
Fan clutch
Fan(Possibly)
AC Condenser
Radiator
Radiator support
Radiator isolators(Manufacturer 52002585, Quadratec 51219.000)
Electric Fan
Mechanical Fan Shroud

EXTERIOR PARTS
Header panel
Grill insert
Head light bezels
Head lights
Head light buckets/brackets
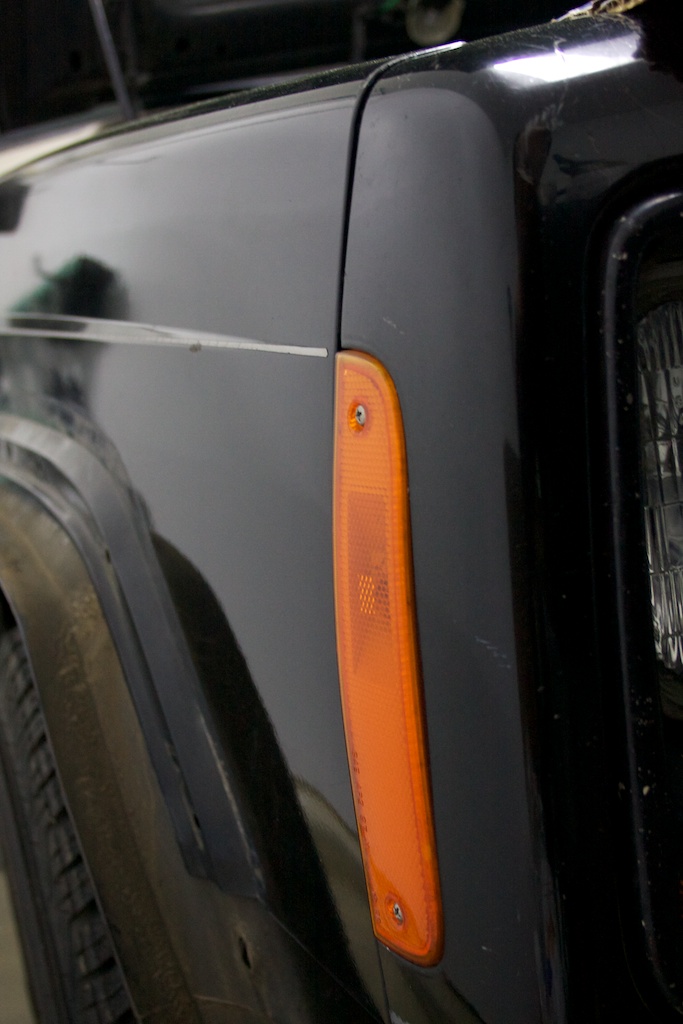
Marker lights, front and side
Light wiring harness connectors
Left Fender
Hood
Right Fender(Only if doing 1997-2001 swap.)
Front Bumper

INTERIOR PARTS
Switch plates next to steering column


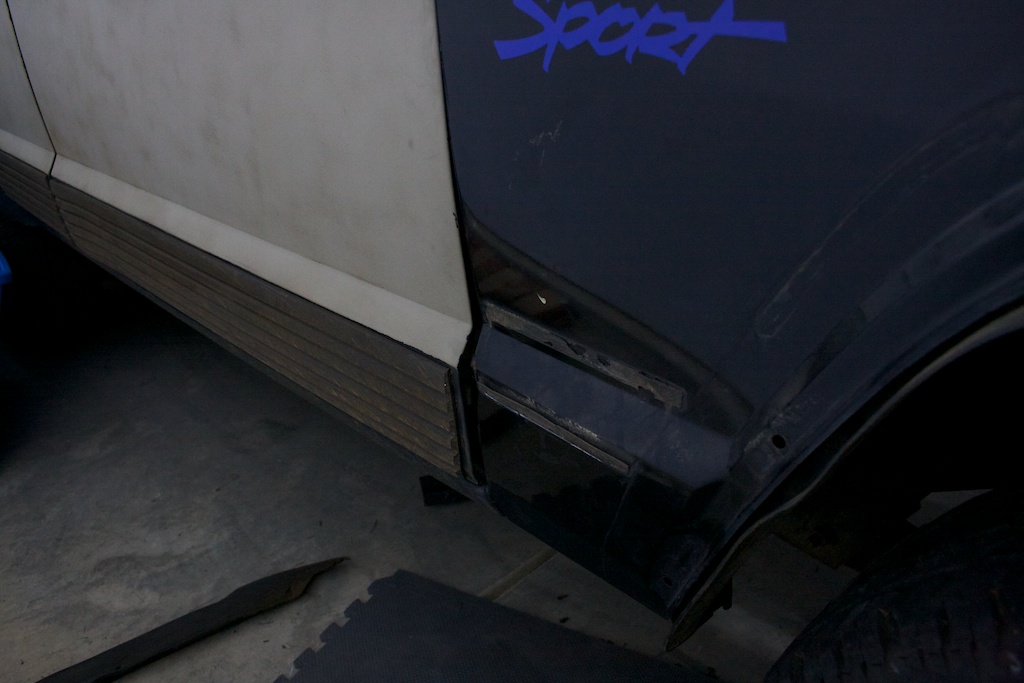
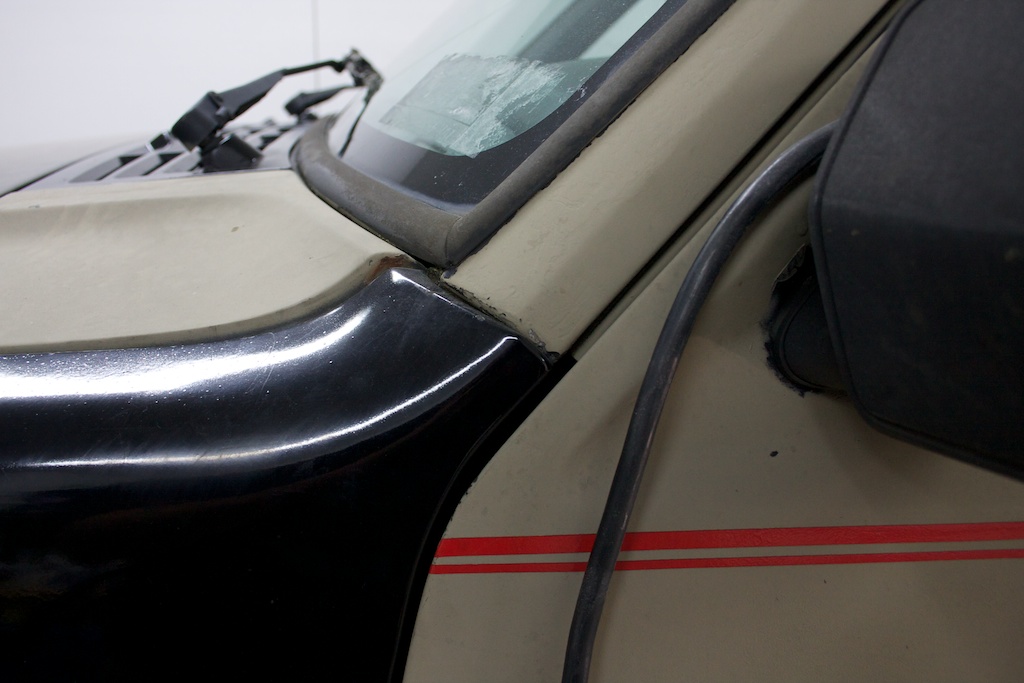
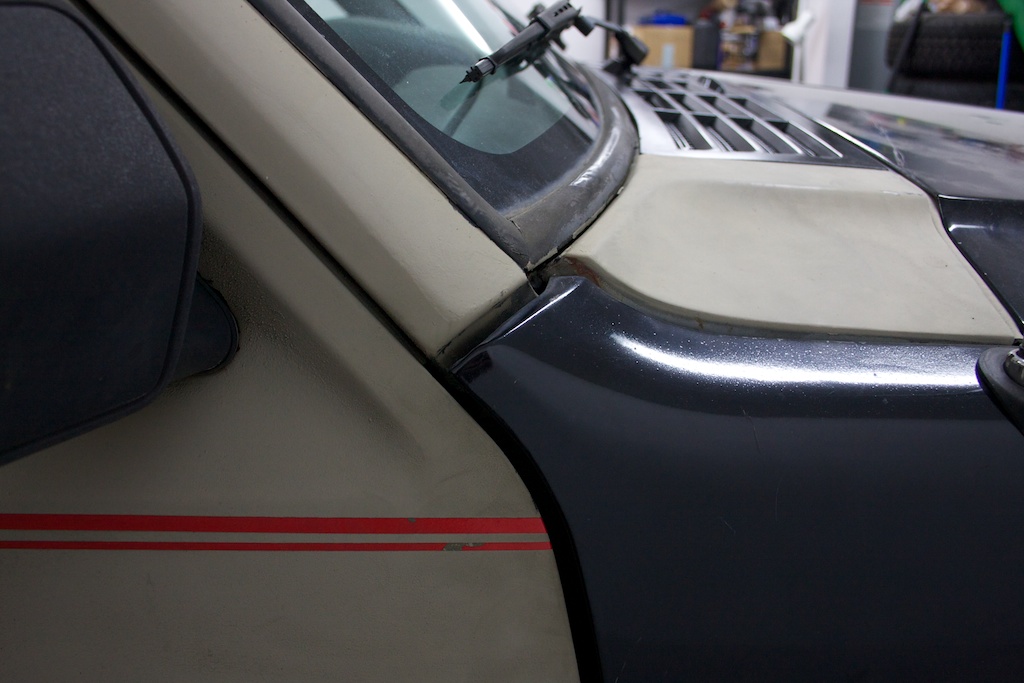
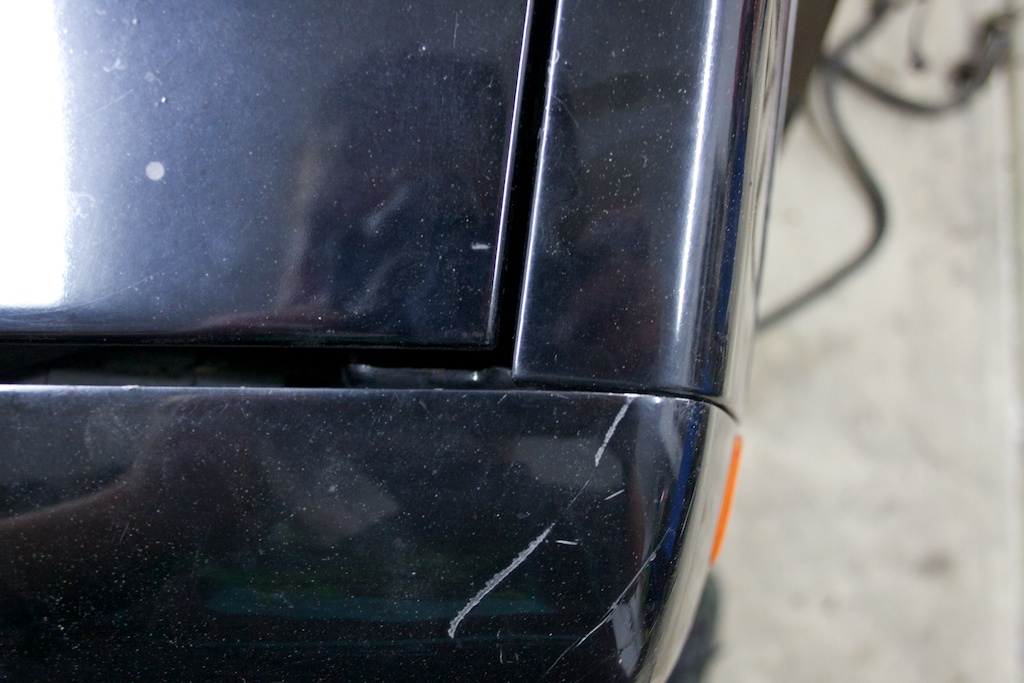
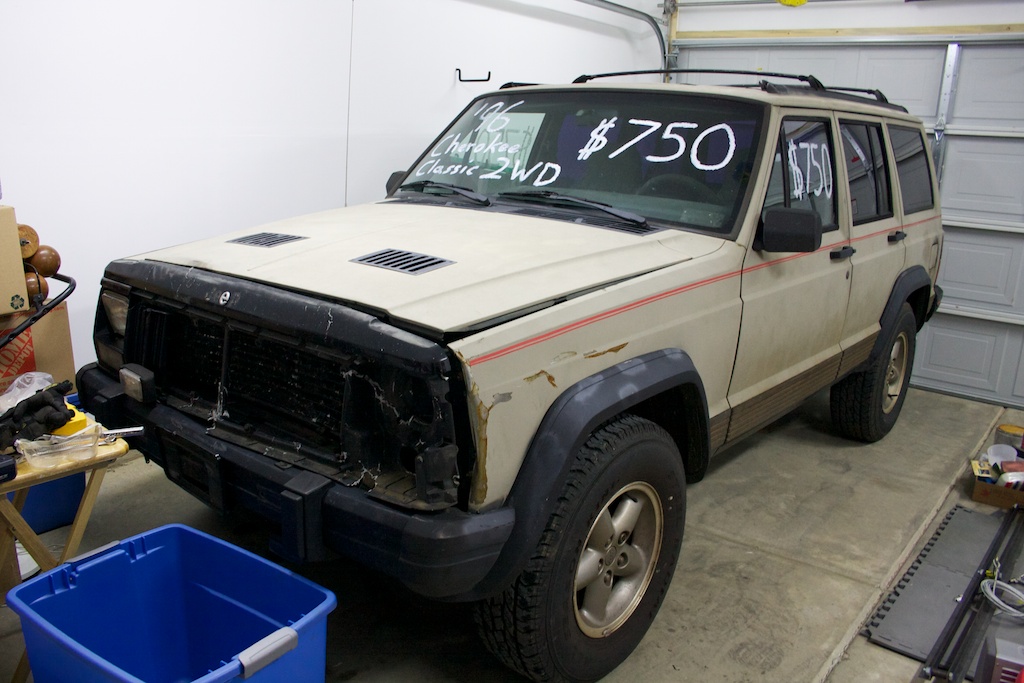
I did not pay the price listed on the glass! Yes, this is a 2WD drive Jeep and may become a candidate for Jeepspeed. Also, the real paint color is black. The flat cheap spray paint poop/olive color has become contaminated with dirt that will not come out in a wash.
gallery_1_5_17204.jpg


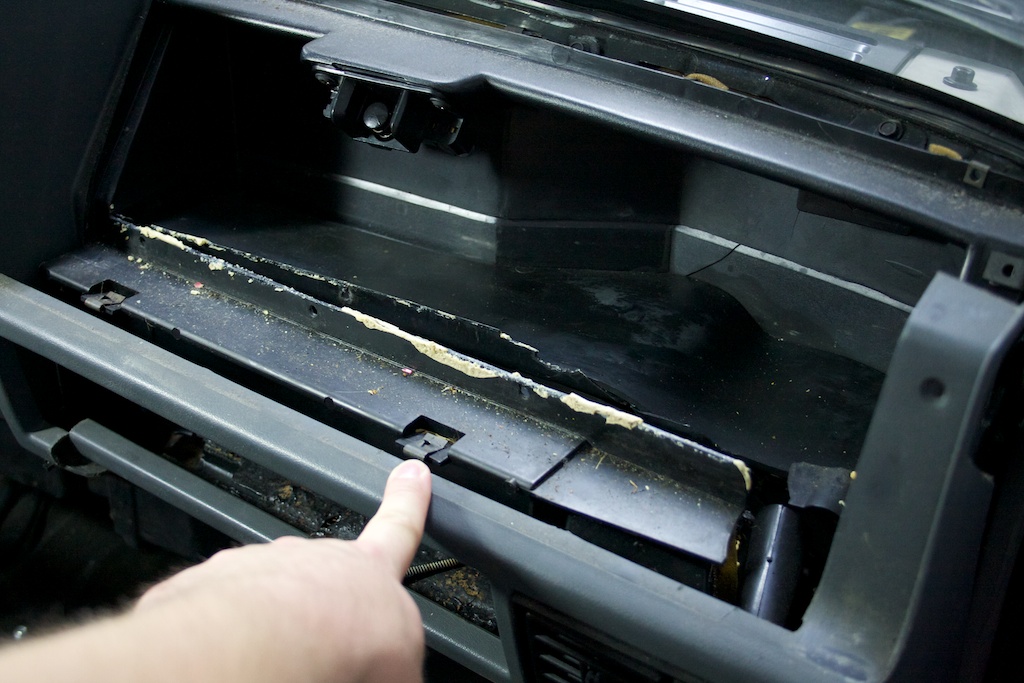
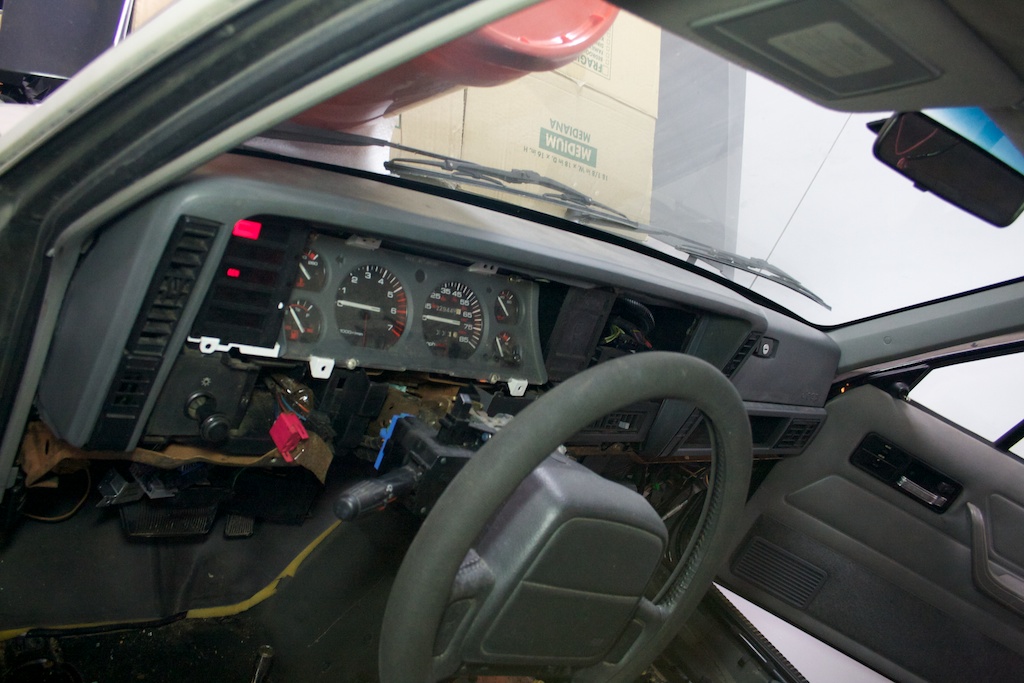
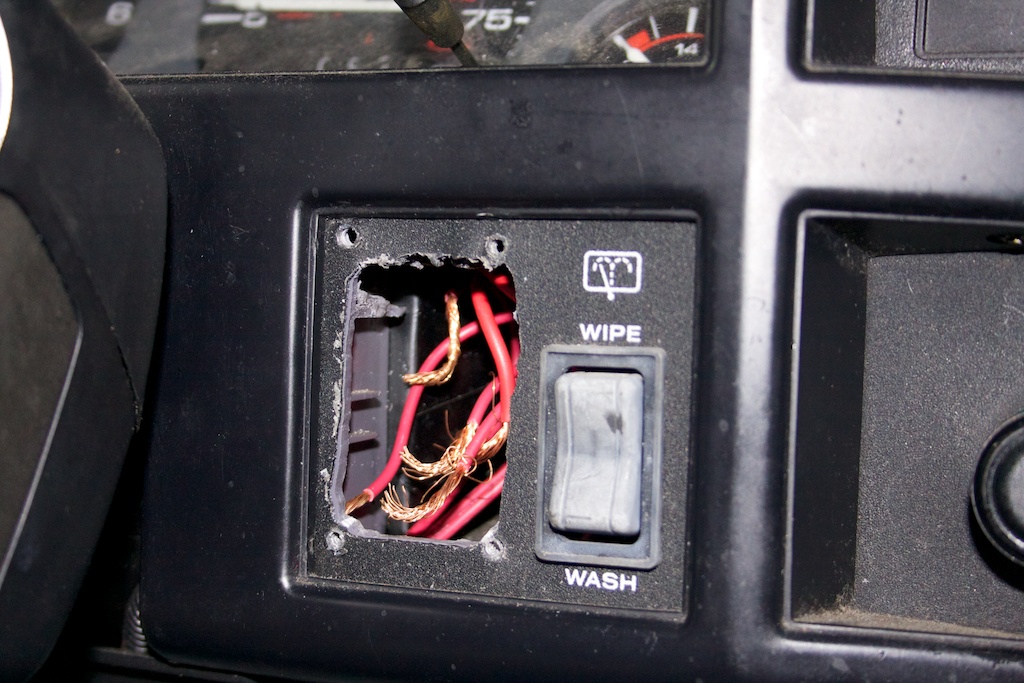
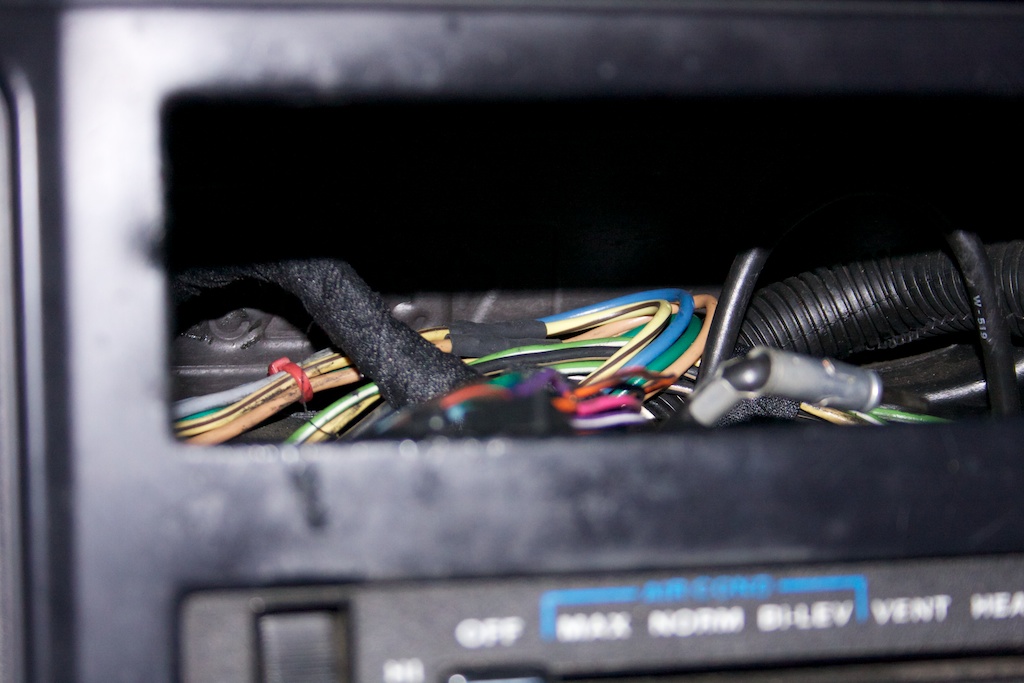
The minor, the interior. Those are exposed hooked up wires!
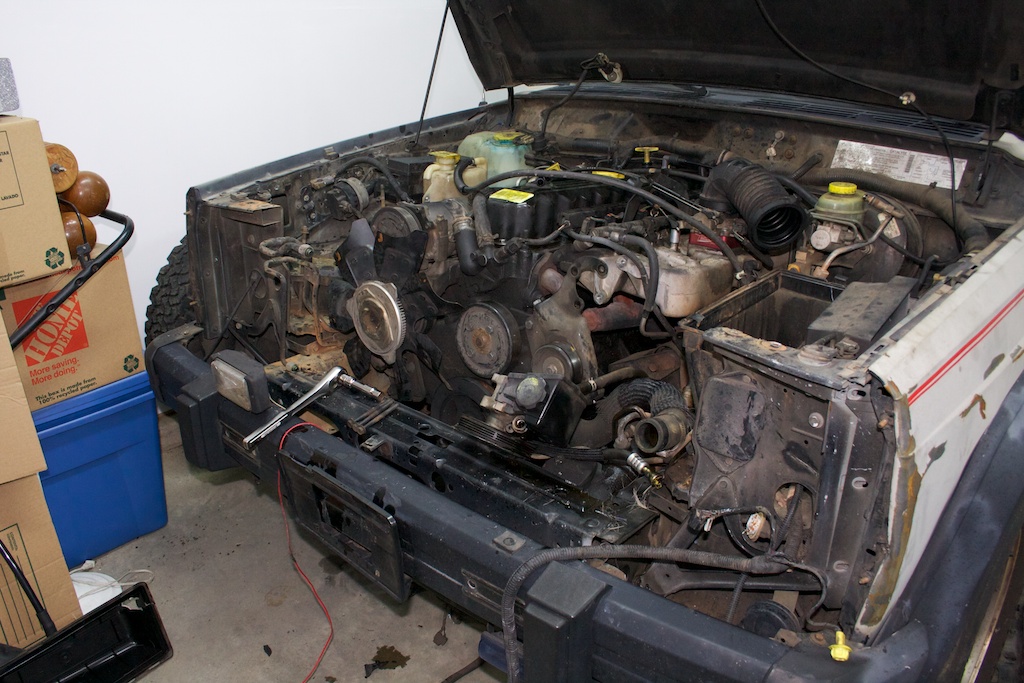
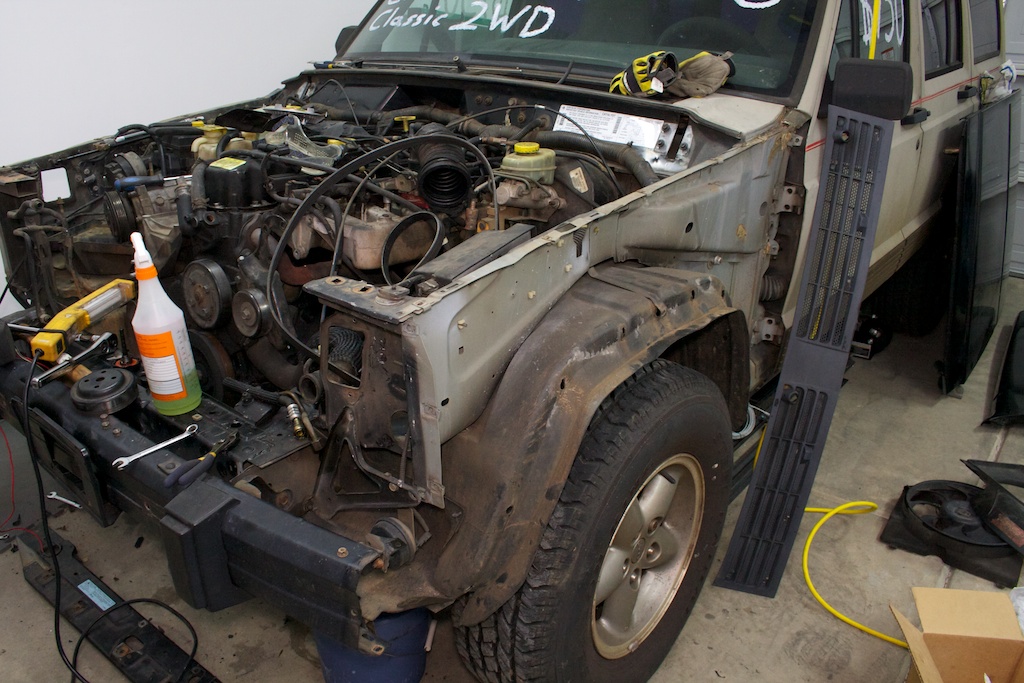
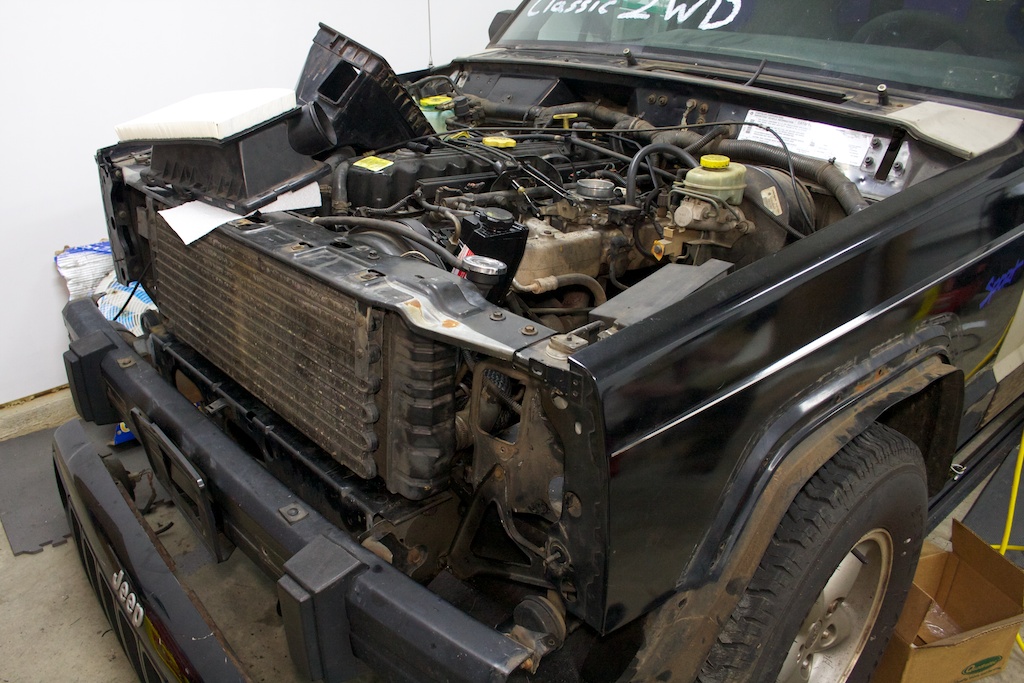
gallery_1_5_23127.jpg

gallery_1_5_146988.jpg

gallery_1_5_154021.jpg


Front End
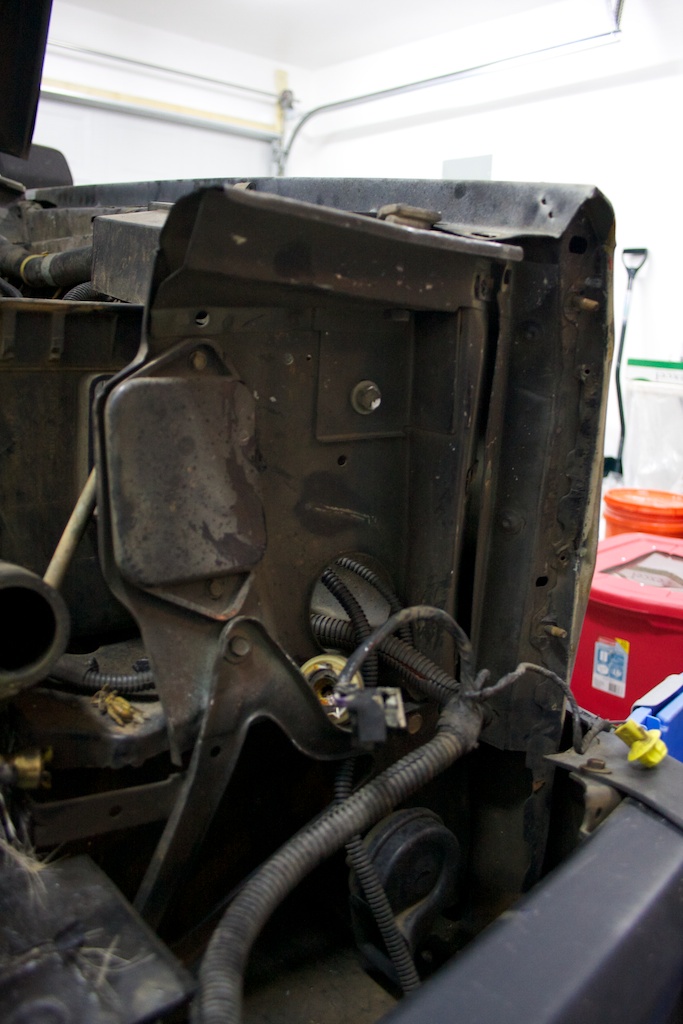
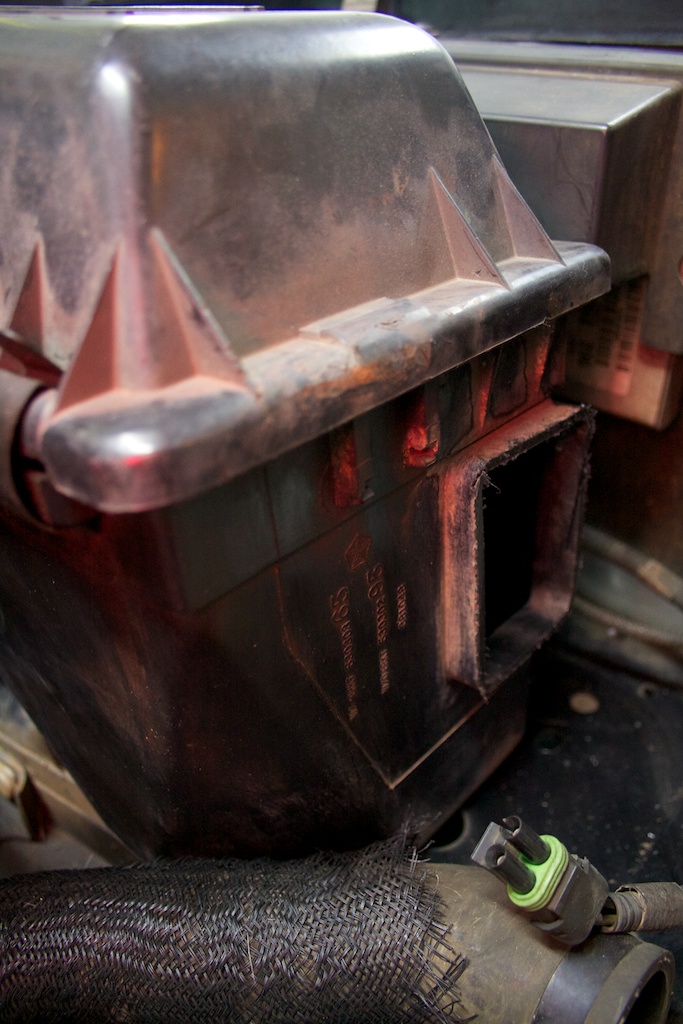
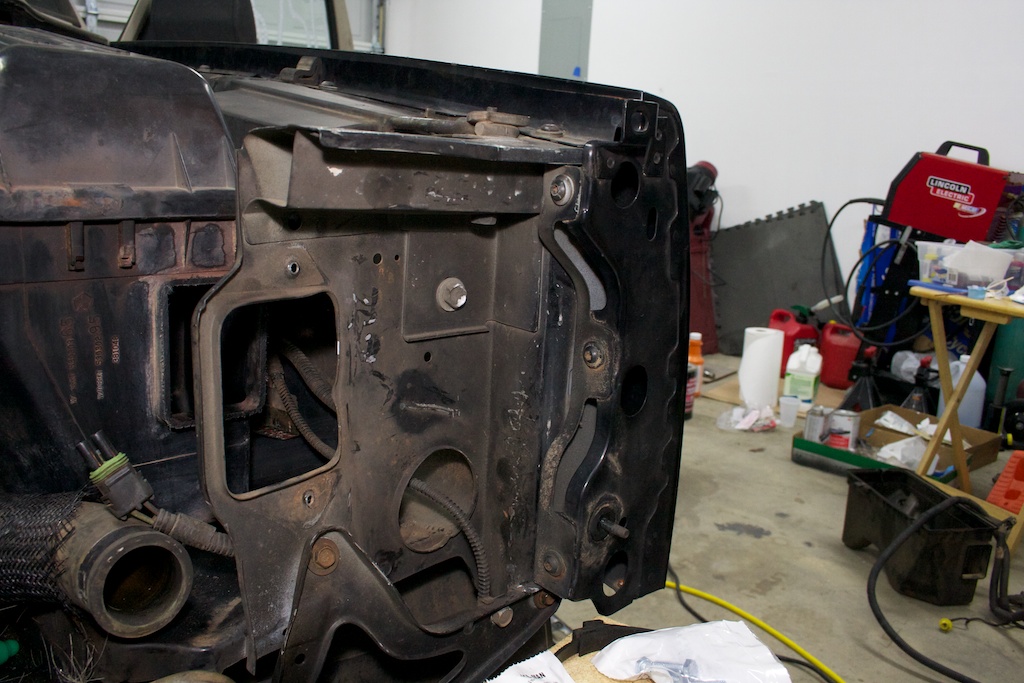
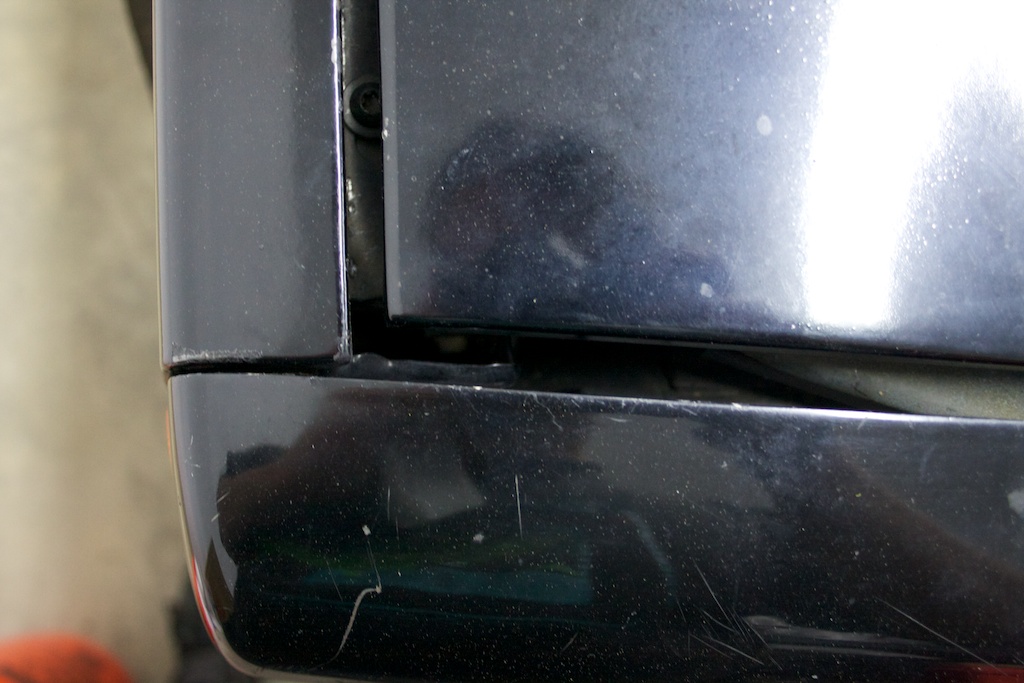
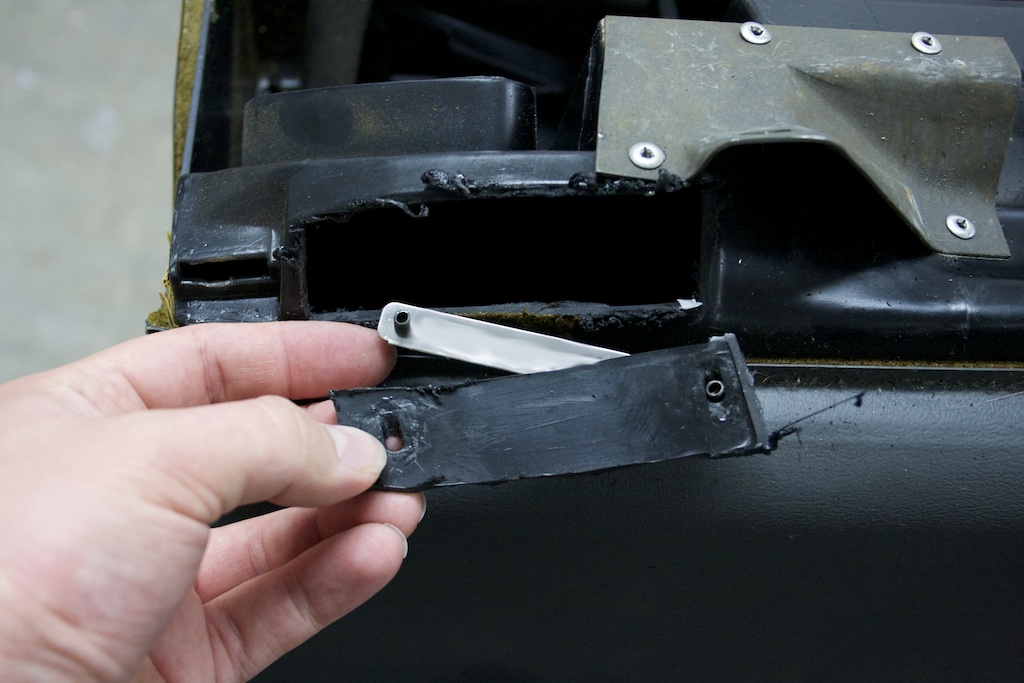
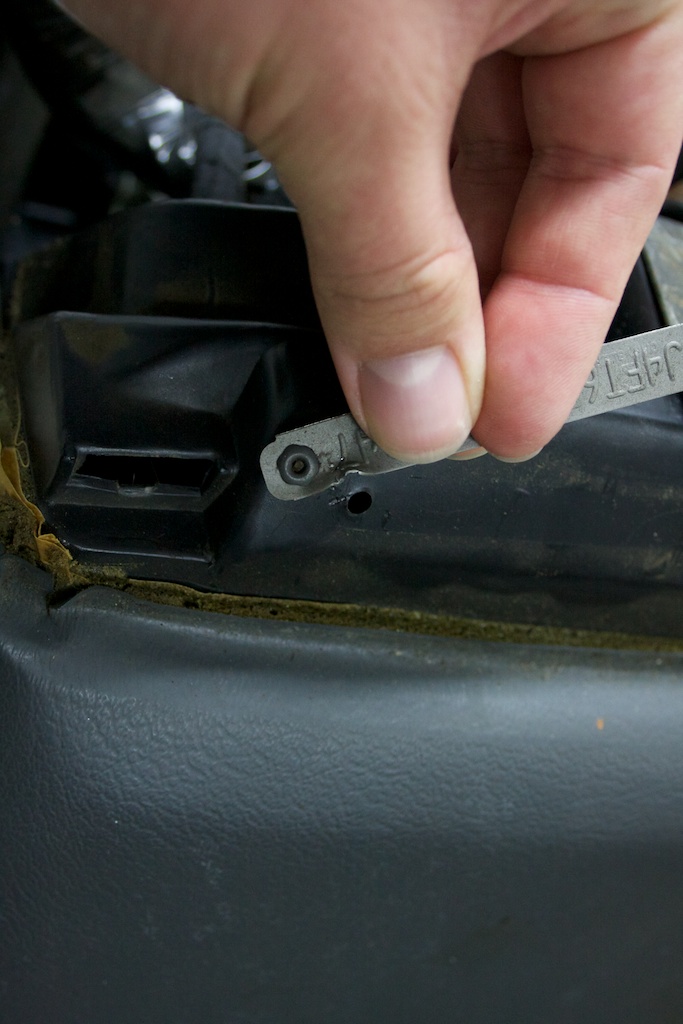
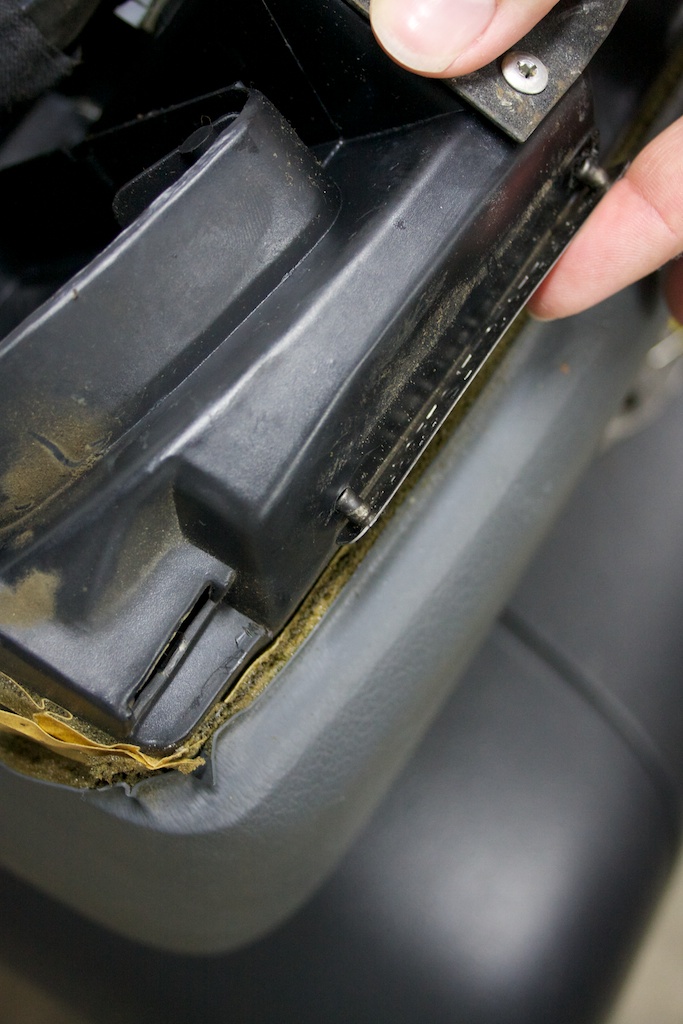
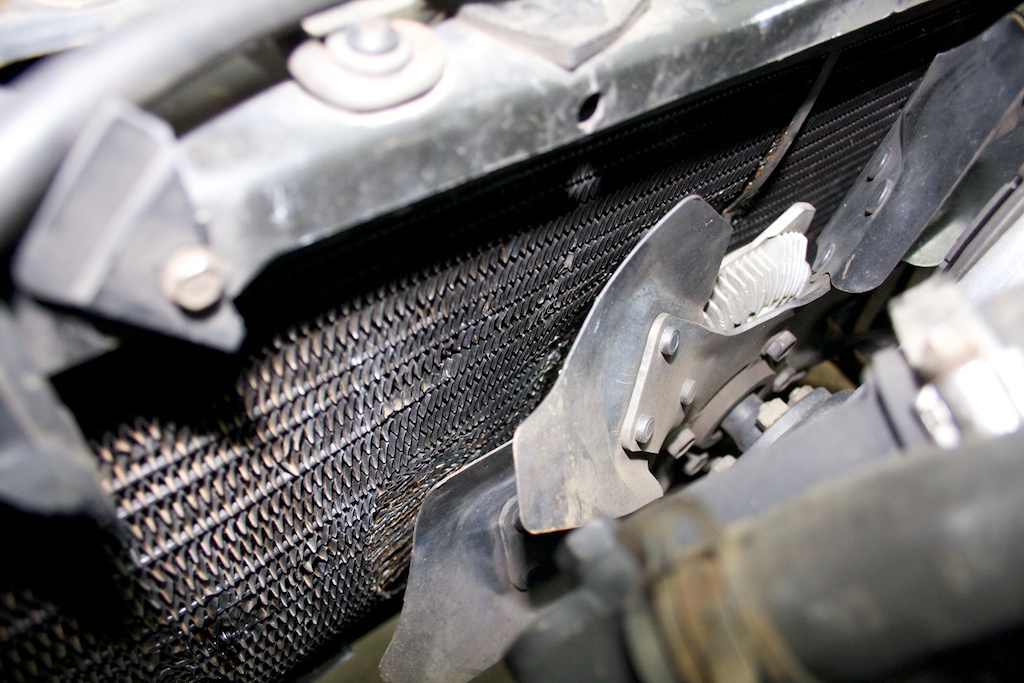
Radiator filler neck destroyed the air box. The radiator support looks salvageable, but the inner fender needs repaired.
gallery_1_5_37439.jpg


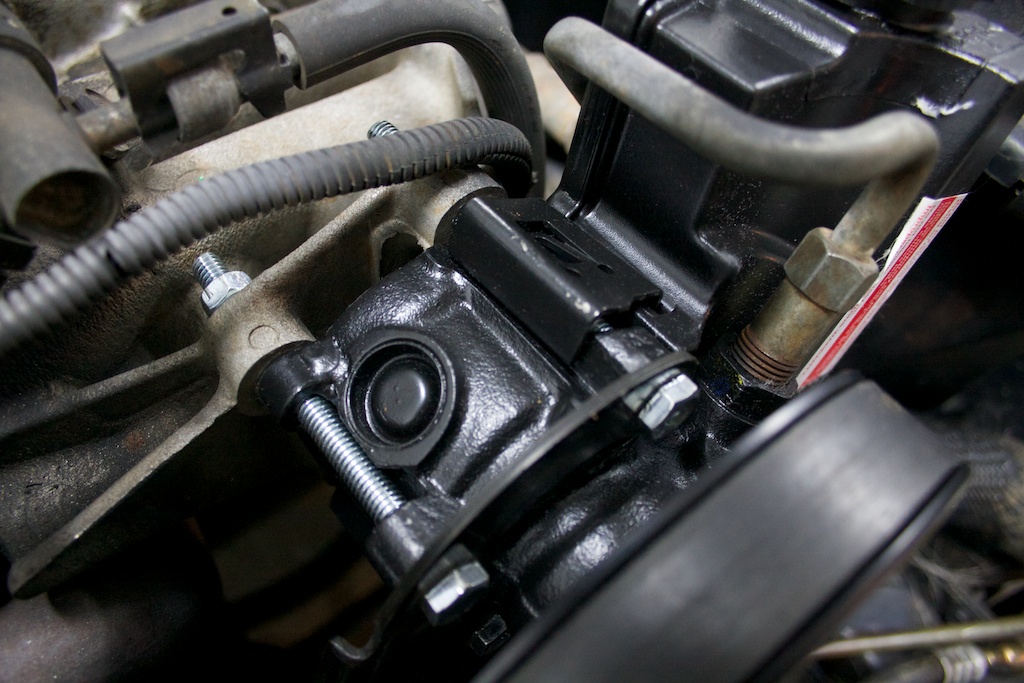
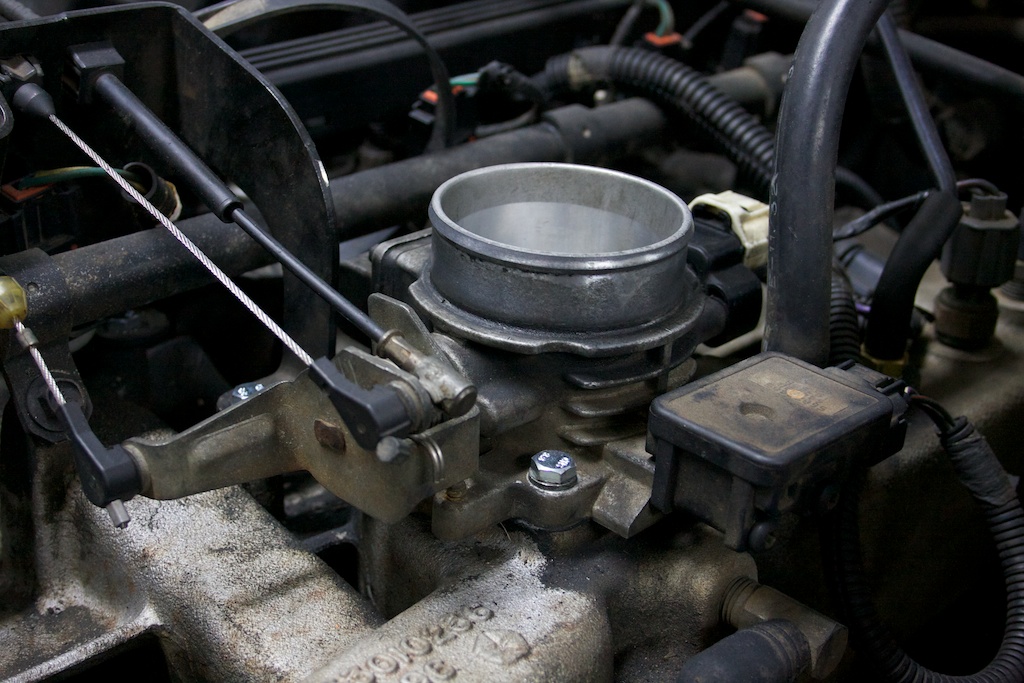
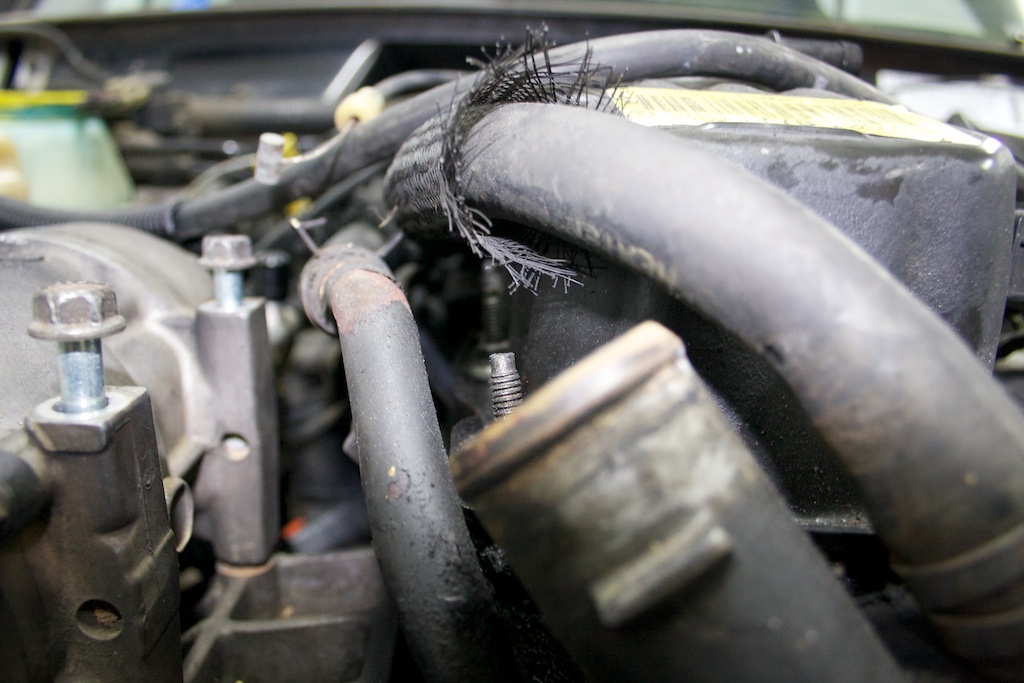
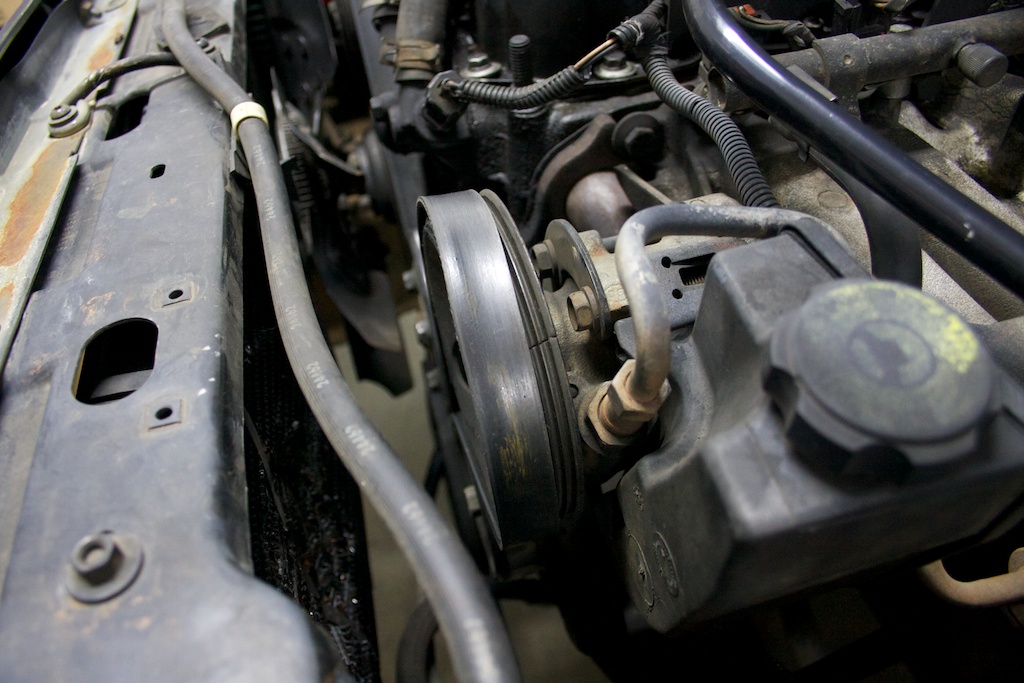
The belt is actually straight. The steering pump pulley is bent in a comically wobbly fashion.
gallery_1_5_122259.jpg


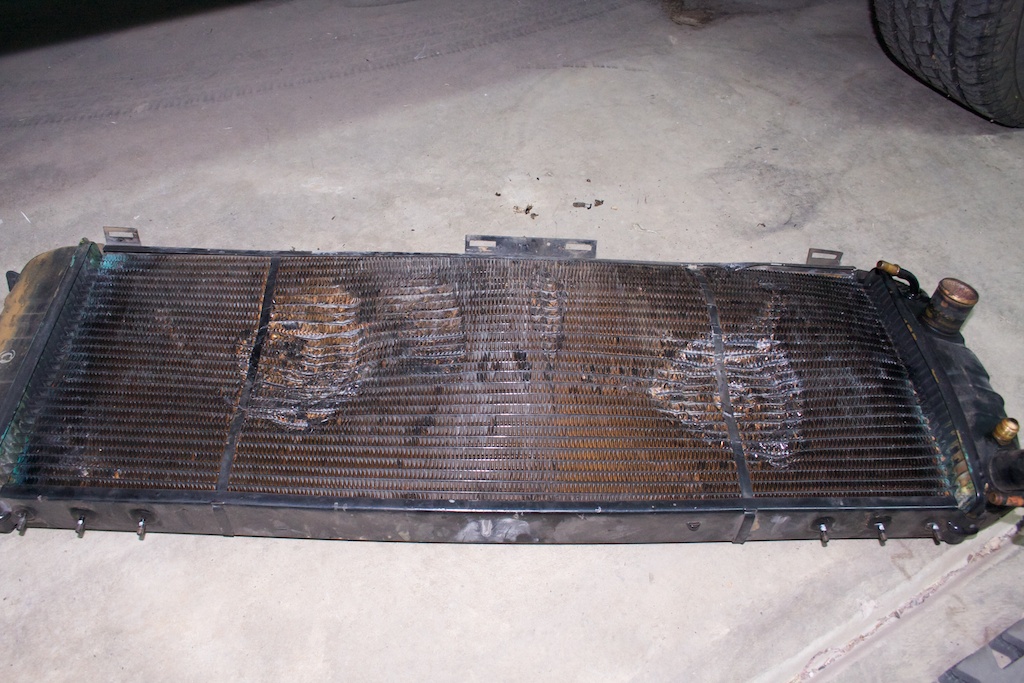
I will get a better picture of the pulley and fan dents on the radiator once I get it pulled apart.
gallery_1_5_28887.jpg


gallery_1_5_146434.jpg
 
Last edited:
Re: Cherokee Resurrection - Build Thread

Stripping down the front end of the a Cherokee is fairly easy. There are no hidden bolts and there are no Torx bolts until you get to the fenders. The exact details about the number of screws/bolts apply to Cherokees up to 1996, but the process is essentially the same for 1997-2001 Cherokees.

When removing nuts and bolts tape them to the part that was removed or bundle them together in a piece of tape and label the tape.

Steps to remove components in front of the engine.
1.) Start by removing the orange side markers held in with two screws. Tape the screws to the marker. The marker bulb holder twists counter clock wise to remove it. Remove the bulb and set it aside to prevent breaking it.

2.) Remove the head light bezels. Two screws are under where the side marker lights were and one in the upper left/right of the bezel by the grill.

3.) Remove the four screws holding the chrome head light trim on and disconnect the head lights. The head light buckets will come off with the header.

4.) Remove the two screws that hold in the front marker lights. Again, twist the bulb holder counter clock wise to remove it. Remove the bulb and set it aside to prevent breaking it.

5.) Lift the hood. Remove the four bolts at the top of the grill. There are four more bolts, two on each side, that were previously hidden by the side marker lights. Once all eight bolts are removed the header plus grill should come free. Carefully unclip the wire loom from the header and set the header aside.

6.) The radiator support is held in by six bolts and four nuts. There are three large bolts that connect each end to the inner fenders. Four nuts along the top hold the support to the radiator. Once these are all removed it will lift away.

6a.) Models with AC: Remove the two tabs on the top of the radiator that holds the AC condenser to the radiator.

7.) At this point it is time to drain the radiator. If your radiator has a drain valve, use it, otherwise remove the bottom hose and let it drain into a bucket. Afterwards remove the top hose with the bucket underneath to catch any excess.

7a.) Models with automatic transmissions: There are two transmission cooler lines that must be removed from the left side of the radiator. Prepare to a rag, hose clamp, or stopper to prevent the losing transmission fluid. The top fitting is removed with a crescent wrench. The bottom fitting is a quick disconnect fitting. Depending on what year your Jeep this may require a special tool. If you see two plastic tabs, squeeze, pull on the tabs, and yank the line off.

8.) With some wiggling and fiddling, remove the radiator straight upwards.

9.) Models with AC: Removing the AC condenser. WARNING: The AC system is under high pressure! Releasing the pressure/removing the refrigerant without facial, eye, and arm protection can cause frostbite burns on exposed skin and blindness if splashed in the eyes. You must use a reclamation system on the service port to prevent venting the refrigerant into the atmosphere. Not using the proper reclamation tools, if found out, can result in massive fines from the federal government. Once you have drained the AC refrigerant use two wrenches to remove the fittings at the condenser. One to hold the condenser side to prevent damage, if in good condition, and one to remove the compression fitting.

10.) Recover all brackets from the AC condenser and radiator. Not all aftermarket replacements come with the brackets needed.

Congratulations! You now have full access to the front of the engine and can now begin working on the inner and out fenders.

Stripped down front.
gallery_1_5_256928.jpg


Damaged inner fender pieces. From the look of the damage they can probably be hand pulled straight.
gallery_1_5_8650.jpg


Back side of the damaged radiator, shown upside down. Steering pump pulley indentation on the right and fan indentation on the left.
gallery_1_5_286838.jpg


The only salvageable parts from the front end which are mostly bolts and small brackets.
gallery_1_5_114992.jpg
 
Re: Cherokee Resurrection - Build Thread

It has been two weeks since I started on this project and I have put many hours into sourcing parts during the repairs. I spent all of last Saturday hopping around Atlanta Pull-A-Part yards to get great condition replacements.

Parts sourced:
1997+ Left Fender
1997+ Right Fender with antenna
1997+ Hood
Radiator Support
Electric Fan
Mechanical Fan Shroud
Air Box

Lets start off with fixing that power steering pump!

Power steering pumps are rather robust in their normal operation; rotating. However, they are easily damaged by objects slamming into the shaft. Early pump fairly is usually due to inexperienced installers hammering on the pulley.

Removing the old pump is simple if it still has the OEM style pulley. Simply disconnect the screw in fluid line on the front and remove the push on line from the rear of the reservoir. Afterwards the three bolts holding the pump in place are easily removed through the holes in the pulley.

The solid style replacement pulley from Doorman is a world of annoyance. The remove the pump the pulley must be pulled off to remove the bolts. If the pulley is damaged a large hole can be drilled through the pulley to access the bolts.

TIP: If the hard to find M8 1.25 85mm long bolts were destroyed in removal they can be replaced with 5/6" 4" long bolts and nuts after drilling out the threaded hole in the intake manifold.

Fully reinstalled power steering pump with a brand new Doorman pulley.
gallery_1_5_4830.jpg


The replacement air box from a junk yard. This came from an earlier Cherokee that had the extension tube. Simply cut the front off the extension tube off to make it match.
gallery_1_5_14975.jpg


Other replacement parts. The radiator support ended up being too damaged to reuse. Pictured at the top are a replacement electric fan, mechanical fan shroud, and the throttle drying after being cleaned.
gallery_1_5_234277.jpg
 
Re: Cherokee Resurrection - Build Thread

Minor body work can be easy to tackle especially if it is in areas that are not structurally critical and are rarely seen. Repairing the inner fender were the radiator support attaches too just needs two hands, big hammers, and a measuring tape to compared the adjustments to the opposite side.

The first step to working on the inner fenders is to remove the outer fender. The outer fender is held on by eleven T27 Torx screws and a bunch of nuts that hold it to the wheel well lining. There are four Torx screws along the top, two at the bottom by the rocker, two behind the door hinges, and three in the front. Once you have removed all the Torx screws and nuts holding the lining on the fender should come off with some wiggling. Heavily damaged fenders may require damaging the fender even more to remove it.

NOTE: The corner bracket attached to the front of the outer fender is specific to the 1984-1996 and 1997-2001 models. Converting to the different style fender will require swapping this bracket as well.

Starting repairing the inner fender by gently tugging at the metal to feel where it naturally wants to move. Remember this is thin sheet metal and has already been stressed once. Too much force could causing more breakage. Use the opposite side of the Jeep for reference as to what it should look like. A mini-sledge hammer can be used to make large movements. After major adjustments take measurements to compare against the opposite side to get an idea of what needs to be done.

Completely removed left fender.
gallery_1_5_258766.jpg


Reference - Damaged state of the inner fender.
gallery_1_5_8650.jpg


After about two hours of beating on the metal to get it into a rough shape the new fender was test fitted. More adjustments were made after this photograph was taken.
gallery_1_5_238779.jpg


gallery_1_5_214584.jpg


The matching replacement right fender has some damage that needs to be addressed.
gallery_1_5_147722.jpg
 
Re: Cherokee Resurrection - Build Thread

It is time to resolve the throttle body issue. Which is that there is an amazing useless spacer in there. Remove the four bolts that hold the throttle body in place and the three bolts on the throttle cable bracket. Remove the throttle body spacer, three bracket spacers, extra gasket, and set them aside with the extra long bolts. Replace the bolts with seven M6 1.00 20mm long bolts. While the throttle body is removed take the time to remove any dirt, carbon, or oil build up on it. Oil build up on the intake side of the valve may indicate oil blow by coming from the valve cover.

gallery_1_5_116175.jpg


gallery_1_5_121261.jpg


Getting all the replacement parts bolted into place. The radiator and AC condenser from Pull-A-Part cost a total of $50. No leaks and brass tanks on the radiator!
gallery_1_5_4882.jpg
 
Re: Cherokee Resurrection - Build Thread

Body Work

Doing body work requires patience. Some body panels may require being installed ten times just to get them perfect. However, with some simple guidelines aligning the front end pieces of a Cherokee can be easy.

1.) Start with the fenders. Aligning the hood and header panel will be impossible without these. The back of the fenders are fairly easy to line because of the corresponding body panels all around.

2.) After the fenders move on to the header panel. At this step you will immediately see if the front of the fenders need to be pulled together or pushed out. Always start by aligning the top of the fenders. The bottom of the fenders require minimal work to get right.

3.) Once you are satisfied with the alignment of you fenders and header panel grab a friend to help install the hood. Note that the hinges on the body side allow for very little adjustment. The majority of adjustments will be done where the hinges bolt to the hood.

4.) Start checking the gaps on all sides of the hood. The gap on the left and right should be roughly 6m to 8mm wide which is about the top width of the rubber hood rests on the fenders. The front of the hood should line up with the end of the fenders 2mm to 3mm back depending on the year of the Cherokee. A quick way to determine if the hood needs to move forward is it hits the plastic cowl cover when opening and closing.

Back fender alignment on the left fender. Due to the differences in model years of the sourced parts the cowl does not line up correctly.
gallery_1_5_6487.jpg


Still requires some backwards movement.
gallery_1_5_123983.jpg


Header panel needs to slide downwards slightly on this side so the top and bottom line up.
gallery_1_5_111787.jpg


Top of the fender needs to move in about 2mm to line up perfectly.
gallery_1_5_140261.jpg


Gap on the left side is too narrow and the hood needs to move forward.
gallery_1_5_106273.jpg


Right side gap is way too big and can really see the gap in front of the hood on this side. Can also been seen from this angle that the header panel is not fully seated against the fender.
gallery_1_5_40993.jpg
 
Re: Cherokee Resurrection - Build Thread

Valve Cover
Slight side track from the body work. This engine was rebuilt 80,000 miles ago and whoever did it was a moron. Missing, misplaced, and bent bolts. The bolts that hold the AC compressor bracket to the engine head were missing. The support for the power steering pump was not bolted to the block. Even worse was when I took the valve cover off. Four of the head bolts were in the wrong locations. This only affects the placement of the valve cover gasket so a little modification to the non-critical areas of the gasket got it to fit.

However, every single valve cover bolt was bent. I have absolutely no idea how some one accomplishes that! When I was looking for the culprit of oil blow by on the air filter I noticed all the bent bolts and that the cover was not seated correctly. The cover would audibly creak as the engine heated up.

Replacement bolts are 1/4", 20 threads per inch, one inch long. Replacement studs can be hard to find so I made my own. The stock studs are two inches long and I needed three of them. I took a 6" long threaded rod and cut it into three pieces. Thread about one inch into the head, apply red Loctite where the nut will rest, and then put the nut on.

While you have the valve cover off now is a good time to clean it of gunk and built up oil. With a clean cover you can quickly see during periodic inspections if the valve cover is still leaking. Also, it is a great time to paint it!

Hard to tell in this picture, but every stud straight back is bent to the left.
gallery_1_5_177587.jpg


gallery_1_5_131265.jpg


gallery_1_5_46369.jpg
 
Re: Cherokee Resurrection - Build Thread

like the valve cover, I painted mine chevy orange! How did the valve springs and junk look when you pulled off the cover? if there gunked up that tells you the oil wasnt changed to often.

So how much do you have invested so far? Gonna by a daily driver or a offroad toy?

Insides looked clean except for the poor head bolt placement.

About $800 right now. I also just picked up a replacement dash and wiring harness today for about $80. HOWEVER... In the process of doing that I caused over $5,000 worth of damage to my love. $3,000 just being the hard top. So I have about $500 in insurance deductibles to add to the cost of this! No, the replacement dash was not in the Jeep at the time. Yes, I immediately got it uprighted and went to another Pull-A-Part yard.

So... This project is on hold for about two months now until I recover.

gallery_1_1_262081.jpg
 
Re: Cherokee Resurrection - Build Thread

damn and you dont see to many of those electric green TJ;s. I feel for ya.


By the way that "amazing useless spacer" is generally considered to increase horsepower. But if you don't want it ill take it :D

Only would see an increase of power if you had a carb.
 
Re: Cherokee Resurrection - Build Thread

subscribing..........
 
Re: Cherokee Resurrection - Build Thread

I love the valve cover. I'm gonna have to copy that since I already have my skid plates and diff covers that green. :)

Yes do tell what happened to get your flipped on your side and post pone this great build??
 
Re: Cherokee Resurrection - Build Thread

I love the valve cover. I'm gonna have to copy that since I already have my skid plates and diff covers that green. :)

Yes do tell what happened to get your flipped on your side and post pone this great build??

When I herp, I derp. I mean it was really stupid. I misjudged the side of the driveway I was turning around in, side embankment gave away, and flop!

I believe I misspoke about this delaying the project. In my weird way of getting lucky and making things work out this accident may accelerate the project! At least it will be on track. The soreness from the flop went away in a day and the only soreness is in my left Achilles tendon where I dropped the busted hard top on. Plus all the sun burn from driving with no top...

I will be posting up the dash refit within the next few hours.
 
Re: Cherokee Resurrection - Build Thread

Swapping the Dash
The dash that was in this Jeep was completely busted on the right side and cleverly hidden with some black felt. It was also glued back together in such a way that prevented proper disassembly. If you do not have a Haynes or FSM now is the time to get one. There are a lot of screws that hold the dhas into place. This is worked out well in this case since the dash needed to be removed to swap the entire wiring harness.
However, it turns out that the wiring harness was never an issue. The brake light switch was causing the wiring short!

Swap Tips
Have a helper to hold the other end! Never try to support the weight of the opposite end by leverage alone. The plastic will break.
It is easier to swap the entire dash with the wiring harness already attached to the dash.
Be careful leaning the dash forward. It is easy to bash it into the shifter handle and loose steering column.
The shifter needs be pulled as far backwards as possible.
Have both front doors open.

Dealing with the dash VIN plate.
Before dealing with the dash VIN plate check state laws regarding the transfer or tampering of plates. Most states allow for the removal and reinstallation of VIN plates on the same vehicle during repairs. Depending on the state it may be required to produce documentation for the salvaged dash if ever questioned. Attempting to misrepresent a vehicle by swapping in mismatching plates is what will get an owner in trouble. In this example case the bad dash is being swapped for a good dash into the same vehicle and the VIN plate is being swapped to keep it correct. However, if an inspector or police officer looks at the plate and believes it has been swapped, even if legally, the owner will be going through a painful process of verification.(Usually involving vehicle impound and jail time during verification.) The good news is that the dash VIN plate is barely held in place and is stupidly easy to swap without detection. The rivets that hold the plate in are special six flat sided rivets that are expensive to replace. The back side of the rivets on a Cherokee dash are not formed AT ALL! This makes it very easy to push the rivets out of the dash.

1.) Cut around the desired old VIN plate from the dash. The old broken dash is being trashed and access is needed to get behind that section. The VIN plate is made of thin metal and is easy to damage while attempting to PULL it out. Once that section is cut out simply PUSH on the backside of the rivets and they will pop out.

2.) Mangle and pull the unwanted VIN plate out of the replacement dash. If you attempt to drill out the rivets the plastic dash will melt around it and will have signs of tampering. The unwanted VIN plate will need to be damaged to PULL it out.

3.) Make sure your desired VIN plate is oriented correctly then push the rivets into the hole.

4.) NEVER MENTION IT TO ANYONE. EVER. It does not matter if it is legal in your state to do this, even have the proper rebuilder license to do it, and killed a tree to make a proper paper trail. The DMV/BMV/police officer/inspector will smack you down for it just because they can.(Good luck suing them for being wrong after spending a few nights in jail while they inspect your Jeep relentless for the other VIN plates.) Especially do not make a post on NAXJA explaining how you did this for your restoration project!

If all steps are done correctly then the end result will look stock!

The basic process for removing the dash:
1.) Remove all panels, lower and uppers.

2.) Remove the cowl cover. You will need a long screw driver to reach the screws down by the glass. There are more bolts behind this that hold up the top of the dash.

3.) Remove the two bolts that hold the steering column in place. Lower it carefully and find something to rest it on to reduce strain.

4.) There are two 15mm bolts at the bottom of each side. Loosen, but do not remove these bolts! Pull the shifter all the way back and the dash will rotate forward then slide out.

Busted dash that was poorly glued back together.
gallery_1_5_85883.jpg


Getting the correct VIN plate off the broken dash.
gallery_1_5_127696.jpg


Mangling the unneeded VIN plate out of the good dash.
gallery_1_5_143653.jpg


Lining up the rivets.
gallery_1_5_24659.jpg


Reinstalled VIN plate. So stock looking it even has the original fifteen years of dirt build up!
gallery_1_5_73301.jpg


Replacement dash in place with full working electronics! Letting me know the battery needs charged as well.
gallery_1_5_73212.jpg
 
Re: Cherokee Resurrection - Build Thread

I want to grab some opinions about the paint colors I am working with. The current plan is to paint both the exterior and interior in a two tone color scheme.
Exterior - Metallic black below the main body line and metallic silver above.
Interior - Black carpet, black seats with red accents. Lower trim satin black, upper trim rough metallic silver. Dash black or silver is undecided.

Here is an example of the trim paint with a fade between the black and silver.

gallery_1_5_214149.jpg
 
Re: Cherokee Resurrection - Build Thread

great job so far, and while i am personally a great fan of pre face lift XJ,s ( mine is a 1994 Limited)

seeing as you have up dated the front sheet metal why didnt you up date the dash??

just curious
 
Back
Top