TRAILREADYXJ
NAXJA Forum User
- Location
- Raleigh NC
I figured I'd post this as it may be useful for those with older CAD D30s. Just installed a Clayton 3 link and went with the full truss vs just the bridge. Yes the bridge would have been a much easier option in this case, or I could have picked up a non CAD 30, but my build budget is about maxed out at this point, so I figured I'd try to make it work.
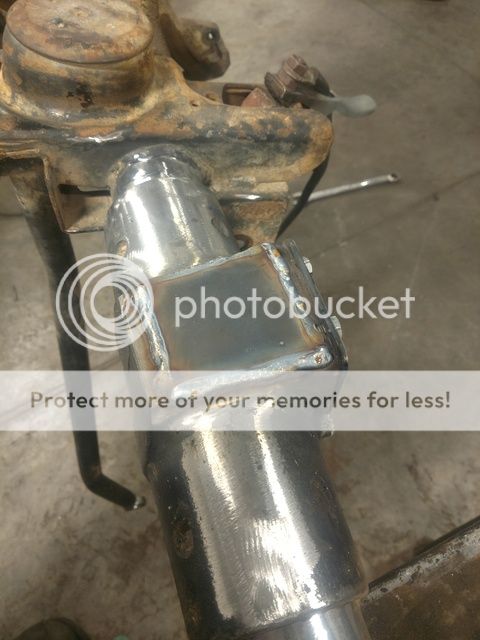
One big problem is the casting actually has a cavity that goes up into the UCA mount, so once you cut it off enough, there's a hole that needs filled.

Cut and welded a patch plate. There was enough beef in the casting I am not concerned about strength. I am running a 1 piece shaft, but feel this could still be made to work with a functioning disconnect if for some odd reason you wanted to do so.

Yeah, I got a little deep near the bolt hole to the left, but nothing a little weld won't fix.
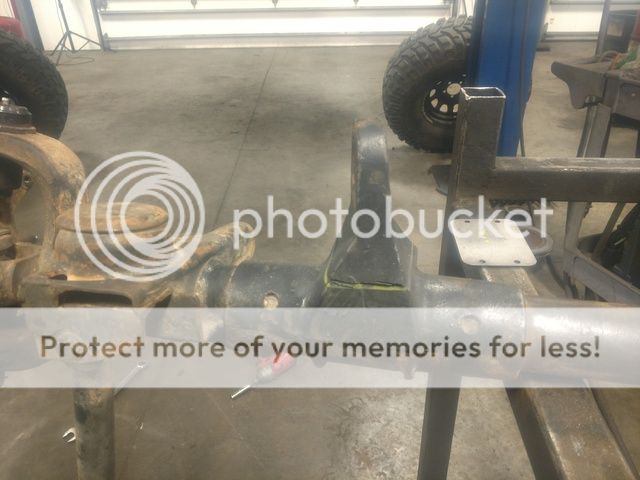
It will fit now,but did need to cut a notch in the truss to fit the CAD cover/block off plate. Then I proceed to trim the gusset to fit the CAD housing. Got busy here and didn't take pics, but simply used cardboard to make a template and traced it to the gusset.
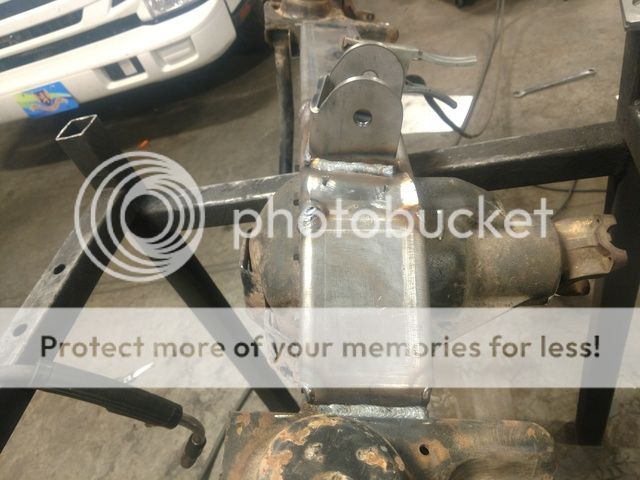
The truss keys into the UCA mount on the drivers side so it's a no brainer where everything goes, and the instructions were spot on. Remember to weld SLOWLY and jump around a lot to avoid warping the housing. I jumped back and fourth between welding the truss and installing the crossmember so it didn't get too hot.

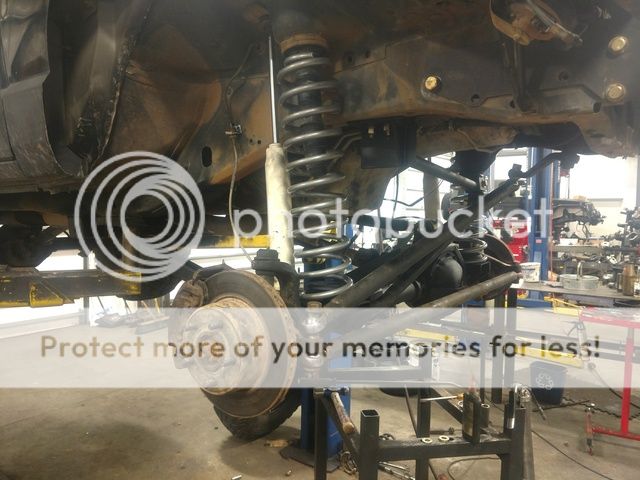
Ready to go!

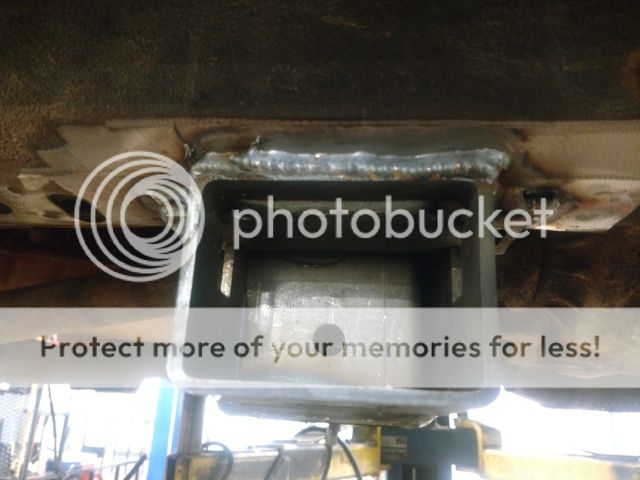
Crossmember weld, gotta love welding to sheet metal! Keep in mind I'm an axle builder, not a welder, but I feel pretty comfortable this will hold.
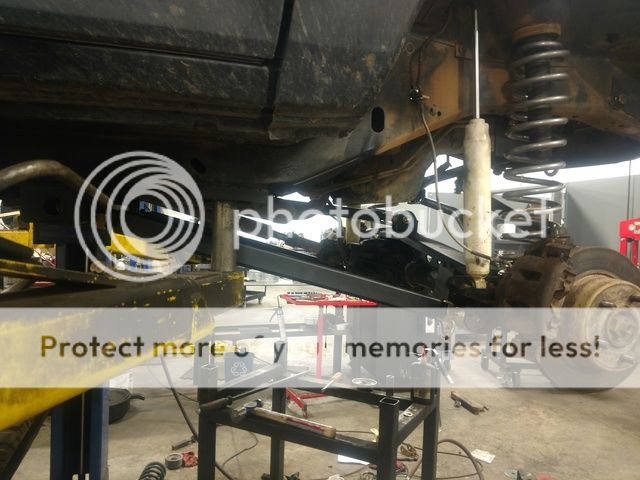
Final Install pics

One big problem is the casting actually has a cavity that goes up into the UCA mount, so once you cut it off enough, there's a hole that needs filled.


Cut and welded a patch plate. There was enough beef in the casting I am not concerned about strength. I am running a 1 piece shaft, but feel this could still be made to work with a functioning disconnect if for some odd reason you wanted to do so.

Yeah, I got a little deep near the bolt hole to the left, but nothing a little weld won't fix.

It will fit now,but did need to cut a notch in the truss to fit the CAD cover/block off plate. Then I proceed to trim the gusset to fit the CAD housing. Got busy here and didn't take pics, but simply used cardboard to make a template and traced it to the gusset.
The truss keys into the UCA mount on the drivers side so it's a no brainer where everything goes, and the instructions were spot on. Remember to weld SLOWLY and jump around a lot to avoid warping the housing. I jumped back and fourth between welding the truss and installing the crossmember so it didn't get too hot.


Ready to go!

Crossmember weld, gotta love welding to sheet metal! Keep in mind I'm an axle builder, not a welder, but I feel pretty comfortable this will hold.

Final Install pics


