• Welcome to the new NAXJA Forum! If your password does not work, please use "Forgot your password?" link on the log-in page. Please feel free to reach out to [email protected] if we can provide any assistance.

My cargo area build... lots of pics

goalieman24

NAXJA Forum User
Location
Maryland
Finally decided to post this up, although it's been done for quite some time now... and I have since gotten rid of my jeep.


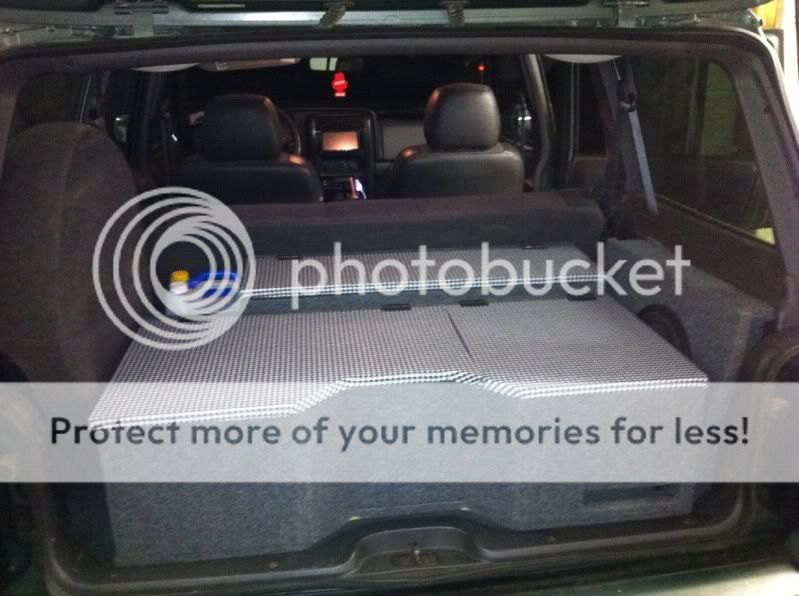
I started this project with a goal of building a nice rear storage system, without taking up most of the cargo area like a lot of other builds I've seen. At the same time, I also wanted to enhance my stereo system a bit as well.
All of this was designed with the ability to be able to remove everything on short notice, leaving the rear looking completely stock and untouched.

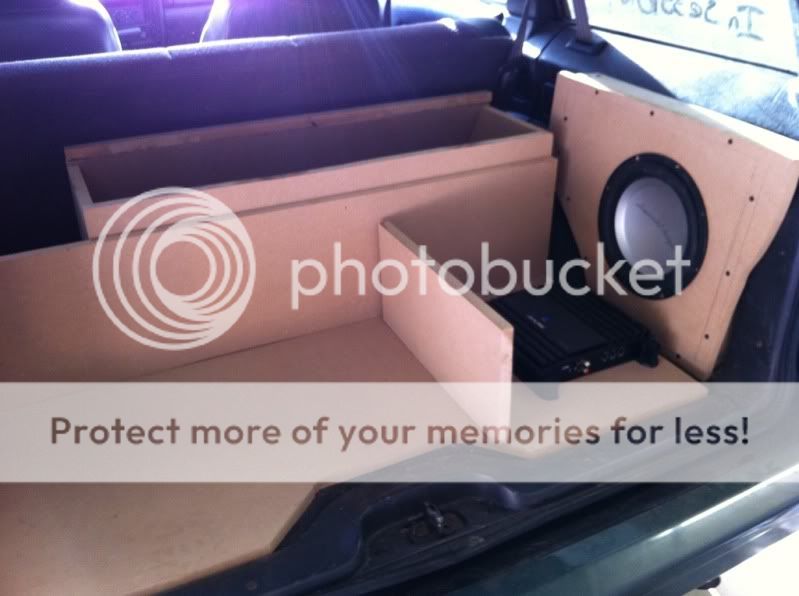
I began with building the sub box. It's a similar location to a lot of the "cubby hole" boxes that are built... however like I said before, no cutting/drilling/screwing of that plastic panel.


Started out with a cardboard template...


Then transferred it to MDF...


Covered it...


To match my..


Old sub in there just to test. It was designed to specs of an Alpine Type S(which I currently have in there)...


And that's about it for the sub box.

Storage box pictures will be posted shortly...
 
I really dig the concept and can tell the work is well done but I have to say I don't like the digital camo it just sticks out like a sore thumb.
 
So with the sub box finished, I had the exact dimensions of the space available for the storage box.
Again, this is a lot more low profile than a lot of other designs. The jeep was a DD 90% of the time, so I just wanted some space to hold a few things.
I liked the idea of having a hinged top, but also planned to keep my tire on top which made a sliding drawer a must... so I used both.

After planning out most of it on paper, I started cutting.
Began with the main frame..


Left side is only accessible if the top is open, main compartment is for the drawer...


Framed up the drawer. Used 100 pound drawer sliders from Home Depot.


Added a bottom...


In there. Handle also from Home Depot...


It works...


Started working on the top of it.
Layer 1 of 2...


Layer 2. Not connected/secured yet, just sitting on top of each other...


Used a big "piano hinge" for the back, thanks again Home Depot..


Got these flush-mount tie downs off of Ebay. Pretty heavy duty...


It's pretty much finished at this point, minus something to cover it..


To cover it, I couldn't quite figure out exactly what I wanted to do. Ideally, I kinda wanted to use an automotive carpet that matched the factory stuff. I got a few samples from some places, but nothing I found matched very closely.
Instead, I decided to go with some bedliner... Grizzly Grip to be specific. Definitely some quality stuff and more affordable than some of the other bedliners. They also sell in pints, quarts, and gallons.. which was nice since a gallon was way more than I needed for this.

 
Taped up and ready to roll...


Didn't really take any pictures during the process because it got pretty messy, but this is how it ended up..


Close-up of the texture..


And it's in there..


Drawer action..


Hinge action...


Both...


This was very lightly wheeled and a rollover wasn't exactly a big concern, but I still wanted to have this secured. I used some thick carriage bolts, washers, and wing nuts through the existing tie downs. Wing nuts allowed for no tools and a quick & easy removal if necessary.


Voila


31" A/T with about 2 inches of clearance.


Enjoy!

Open to hearing any comments/criticism as well.

Thanks
 
Beautifully done - I really wish I was a better designer... My projects usually end up far, far more complicated than they need to be (see my "My box build" thread for a clear idea of what I mean).

If you want exact-match, OE-style carpet, let me know - I found a supplier, but it goes for nearly $30 per yard (72" wide, agate for a 2001). I opted for the ~$9 per yard Walmart black interior repair carpet.

But again, well done!
 
That looks pretty damn good dude, great job. I need to get on the ball and make something like this. The huge rubbermaid container in the back takes up wayyy too much space.

Is that all just 1x4" wood screwed together and plywood for the top?
 
That looks pretty damn good dude, great job. I need to get on the ball and make something like this. The huge rubbermaid container in the back takes up wayyy too much space.

Is that all just 1x4" wood screwed together and plywood for the top?

The main frame for the box is 1x6, and the drawer frame is 1x4.

Trying to keep costs lower, I got the cheapest 1x6 they had. For future reference, I'd definitely get the nicer stuff... the same wood that the 1x4 is(I forget what it's called). The 1x6 boards weren't exactly the straightest, which made getting the drawer slides lined up and smooth-sliding a bit troublesome.


Thanks for all of the other comments.
 
nice build looks very well built, im planing on doing a metal rack build this weekend. i plan on doing a build thread on it, if my welds are up to par.
just wondering what roof console is that and how do you get the switches and radio into it.
 
nice build looks very well built, im planing on doing a metal rack build this weekend. i plan on doing a build thread on it, if my welds are up to par.
just wondering what roof console is that and how do you get the switches and radio into it.

That's just a factory 97-01 overhead console. The switches are the popular "ARB-style" switches, and the CB radio is just a inexpensive Cobra model.

Just had to do some cutting of that piece in the console and fab a few brackets to hold the CB.
 
hey do you have the dimensions of the sub-box? I have had 3 sets of subs stolen from me and want something a little more permanent and I like the look of this and I have wanted to do a storage drawer set-up for a while.
 
I hope you don't expect that "net" POS to hold the tire in place in a collision/rollover. Other than that, damn nice storage box.
 
That's just a factory 97-01 overhead console. The switches are the popular "ARB-style" switches, and the CB radio is just a inexpensive Cobra model.

Just had to do some cutting of that piece in the console and fab a few brackets to hold the CB.


Those are 'carling' style switches if anyone is ever looking for them.

And looks like now I'm not the only one with my CB mounted backwards behind my head haha. I use the rear view mirror to tell what channel I'm on. Gets a little confusing with the 5 and 2 though...
 
WOW. That box turned out really good. I may have steal that from you. I have a box like that in mine but it is just a box with a flip lid. Yours makes mine look like piece of crap.
 
omg i saw how you did the sub box it gave me chills and i had to posted what i did in november..

86f83fe6.jpg


e84fc01c.jpg


f696a874.jpg
 
Back
Top