• Welcome to the new NAXJA Forum! If your password does not work, please use "Forgot your password?" link on the log-in page. Please feel free to reach out to [email protected] if we can provide any assistance.

Durango 160a Alternator install

Figures. . Like 40 bucks more. :(
2a1e81a41f500616a43ae93bae6d608f.jpg
 
UPDATE -

One issue I had in the past was that my stock alternator could not keep up with the AC/fan/headlights at idle. During the summer if I had the A/C cranked full at night and stopped at a traffic light, my voltage would drop and lights would dim and fan would slow noticeably. I do not have that issue any longer. I tested it last night and let it sit and idle with everything on for about 5 minutes and it was sitting right at 14 on gauge (13.8 on my DVM).

Also wanted to clarify the application (thanks guys for the reminder) - 2001 Durango with a 5.9. Note the 160a was an option, so be careful not to accidentally get the 137a.
 
Would this work on a 2000 4.0?
 
Finished this off this morning.

Got a new Mopar Denso unit from ebay for 151 shipped.

QgCS3u2.jpg


bZKul3Y.jpg


First step, swap the pullys, the XJ pulley is smaller and one less rib.

xcZ5KYQ.jpg


Pull that busted plastic batter box and throw it in the recycling bin.

tEWU9nE.jpg


Pull old alternator off. take bracket over to the bigger beefier alternator and address the size difference.

9afAdG7.jpg


Perfect. I had some left over rust proof silver paint I hit it with afterwards.

This part they dont talk about in some of the write ups but was necessary and a huge pain.

Orientate the grinder from top and bottom and open it up.

nhzY3Uk.jpg


Grind Grind, check grind a little more and it bolts right in like the stock one.

I had all new HD wiring in there so it fit right on the new post and no problems there. on my 2000 the plug just went right in no problem too.

SCmt0qn.jpg


It lives. I am always surprised how tight you have to make the belt on the 4.0,

IxbeyTw.jpg
 
Thanks for the inspiration to finally get this done right.
 
I too had to grind the timing chain cover and block quite a bit to get my GC 136A Alt to fit. It is a Bosch, it is possible the Denso's have a smaller case. You could probably grind the Alt itself, but then if you have to replace it you have to grind that Alt and chances are it will fail when you are not near home so you will be in parking lot of Napa trying to remember why your new Alt won't fit...

When I built my stroker I got a good picture of how much I had to grind...
Post # 217 2nd pic.
https://www.rme4x4.com/showthread.php?83436-Nathan-and-Tanja-s-99-XJ-Build-up/page15

Nathan
 
Sorry NAXJA is a little different than RME4X4, on RME I can easily upload pics to their site, so anyway I got around to putting the pic online. So here is a good shot of what I had to grind to fit my GC ALT on my 99 xj. The black(block) and red(timing cover) have yet to be ground in this pic. The bracket was previously ground when it was on the old motor. On the old motor oil did not leak due to grinding this bit off.

1CSgOnFYMceMV-rXdT3GLb_xCtVhHCsHYulto4YzT5V9LKsnzrEH8dFoUV0T2sid29l4V-ppBExlNriPg94sGsj8MtkC35R40V62SmOjxPLpjIvmm8Sk8BVP9OkHkHmmzf5MLk4oVLXu3809UcakuTOv4FnxbXssJ0A_qg5JQ2AdQj87eDQw7RJ8R3eKUb2k9j650SOLHrz9B9EyLJWOBhsinZXPrHO6RESCwvvAIWdyG8ddoi62ouIjY7YbsgLHNZDB2J4iLpmC0rYph4wd8lsb8uL3darpMocR5VFj6LHsVj_eaPr-doRggc3t9PpwWygalL0dEBJPU_vDza2WBLWJruRjLo3GVVi8z5pzXhSXGg-1yT3MNsb7smRw7GpXp5tqwi8VDQ_Vi08apBC3V1NSyIqiABVuvwnJM2DIRbAviahsOThUGcRjS0bscFcTQ7NoA6dkKNzBuh8DdvjqMiAY9QpBVaUy6ChnhNa_xjw-jojKULjBLqKyOAnK7Q9pv4JVXDyBWalQlE7e8vVCeLIc5je_I7kAGr-5o5Ggaci9BiBKGbgRFesneRgdUQv3GHmj=w1094-h818-no
 
Will this work on my 94 xj?
I have a 3 electric fan setup and when I run the a/c or really anytime the underhood gets hot my alternator voltage starts to drop and thus effects A/c performance and engine cooling. I assume a 160 amp Durango alternator would out preform my current 90 amp alternator and fox my issues. Also where are y'all buying upgraded wiring from?. I'm really interested in the Denso unit if it's affordable. They make great parts.
 
I'm curious how much block grinding was required for your install. I remember reading somewhere some years XJ require more grinding than others?

Here are some pics to help determine the difference between a small frame Denso (stock oe fit for Denso alts on the XJ) and the large frame Densos
which are usually 136+ amps.

Small Frame Denso case markings

DSC03487.jpg


Large Frame Denso case markings

upgrade-amp-006.jpg


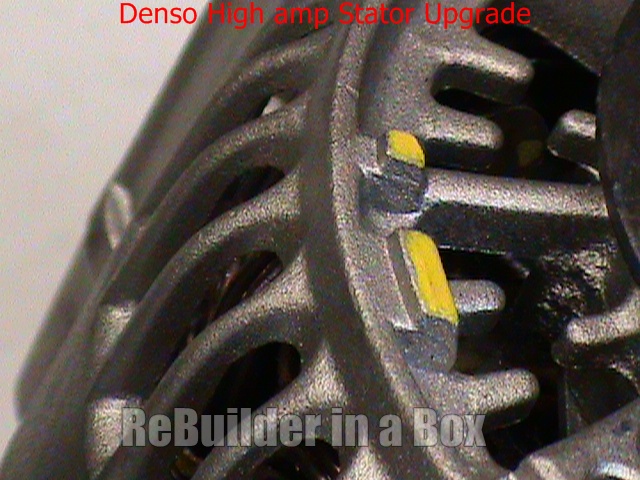
Most all HO's use a large frame Denso however there is a method to add another 40 to 50 amps to a small frame Denso, by installing an upgraded HD stator.

https://alternatorstarterrebuildkits.com/product/denso-small-frame-high-amp-upgrade/

Most re builders of higher output alts prefer to work with the large case Denso, but it's possibly to increase the output rating of a stock or aftermarket 90 and 117 amp small case Densos installed in XJ's.

The above upgrade kit is suppose to be good for at idle output. increasing output by as much as ~50 amps.

Here's a link explaining the different type of field terminal connections.

http://alternatorrebuildkits.com/jeep-denso-alternator-rebuild-kit/

I have seen only one plug for the pin type that can be spliced into the wiring harness.

The other method used to adapt different field terminal connections is to swap out the alternator's terminal block.

This site has some information on various alternator parts and kits. Enter a part number or vehicle make, model and year. Should provide a list of available alternator parts at least for some years and part numbers.

https://www.aspwholesale.com/

Some kits and part found from an eBay seller, includes some field terminal blocks for changing to another connector.

http://www.ebay.com/itm/181353389019?_trksid=p2057872.m2749.l2649&ssPageName=STRK%3AMEBIDX%3AIT

Information found about Bridge Rectifiers for the XJ with Densos.

99-00 rectifier - INR403P with grounding strap
92-98 rectifier - INR729P without grounding strap
2001 rectifier - INR739

Specifications I have:

INR403P = 8 x 40 amp diodes
INR729P = 8 x 40 amp or 8 x 50 amp diodes
INR739 = 8 x 50 amp diodes
 
Last edited:
Back
Top