87xjco
NAXJA Forum User
- Location
- Denver, CO
These are the methods that I use for rebuilding differentials like the Dana 44, and most of these methods apply to all axles. I was taught most of these methods years ago, when I worked with a very good transmission builder. They have helped me do many successful rebuilds. I’ve simplified some procedures compared to what you may find in a service manual. The idea is to complete the rebuild in a timely manner without sacrificing the quality of the rebuild.
Donor axle is out of a 88 Wagoneer.
Diff. cover has been removed and axles will be un-bolted and pulled out next.
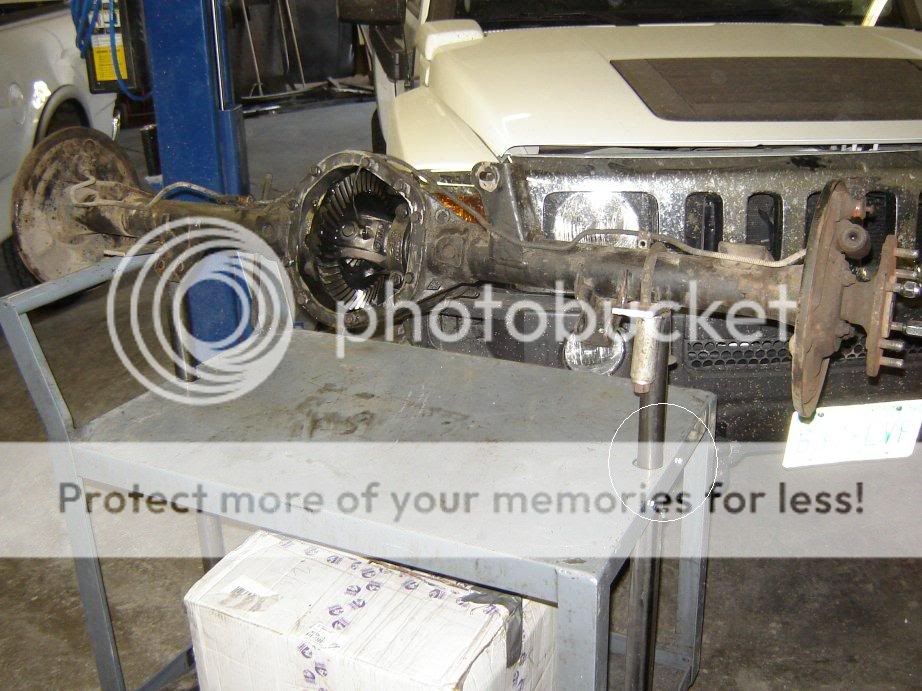
I have the housing secured on a cart that I fab’d some tubes onto. I built it so that I could remove the upper tubes and use the cart normally when not rebuilding an axle.

There are parts that require a lot of torque and/or prying force during the build, so it’s helpful to have the housing secured, either on a stand or in the vehicle.
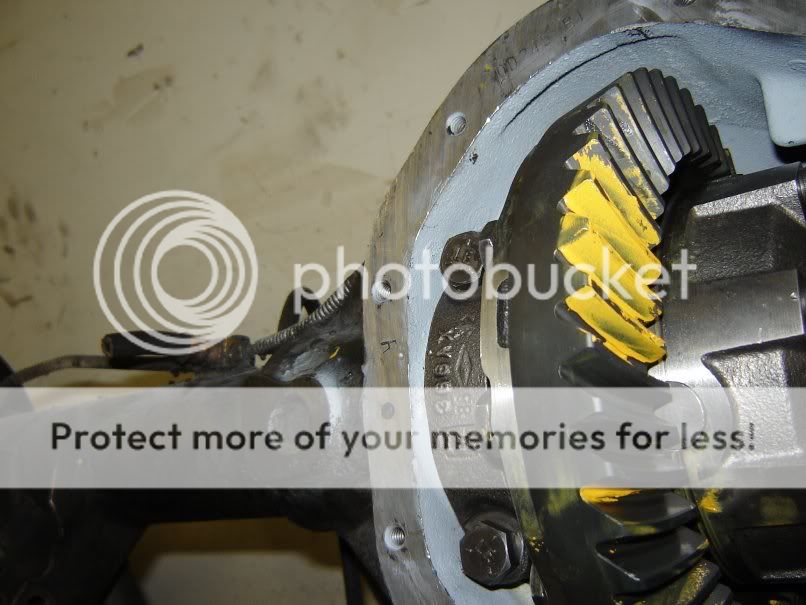
If I am discarding the old ring and pinion gears, it’s o/k to use an impact to loosen (not remove at this time) the pinion nut. And if I’m using the impact gun, I do this before the carrier is removed.
But, the impact gun can damage these gears, so if I want to re-use them, I use a pipe wrench on the pinion flange and a long breaker bar. Then I loosen the pinion nut (this method can be done later after the carrier is removed if so desired) I never use an impact when assembling differentials.
(If you’ve ever used an impact to remove a pinion flange or to put one on, you have been using the impact to slam the pinion gear against the ring gear, until the nut turns or tightens, this is not good for gears)
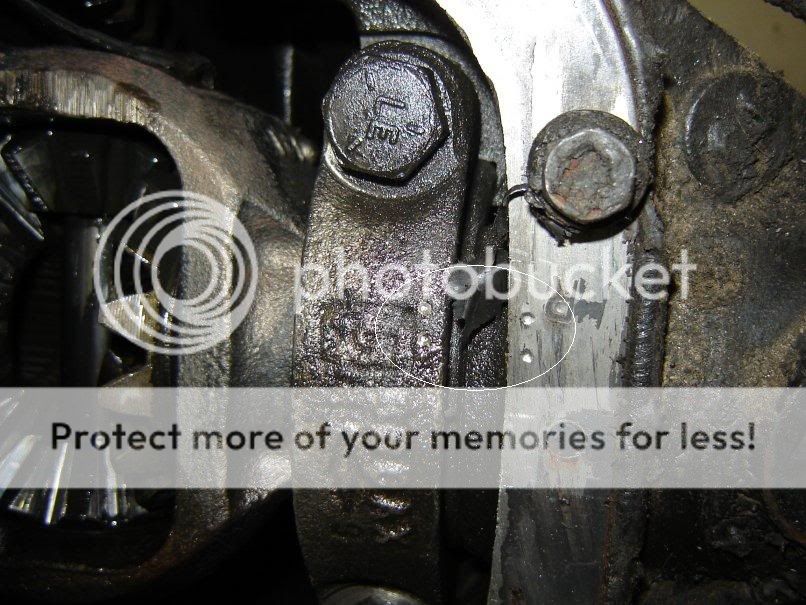
Next I mark the carrier bearing caps so that I’m sure they will go back on the same way. There's a lot of ways this can be done. I use a center punch and mark one side with 1 mark on the cap next to 1 mark on the housing and the other with 2 marks each. I do this instead of marking parts left or right, which can easily get confused, I mark and refer to everything as “1” or “2”.
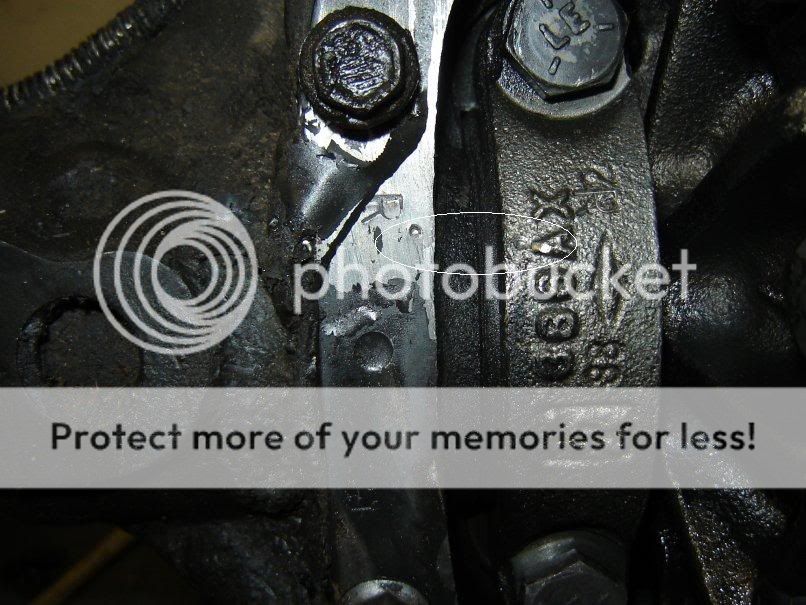
and the other side like this
After removing the caps, the carrier needs to be removed. It should be wedged in fairly tight and will require some prying to get it out. I take care to work it out evenly, so it won’t bind up. This is one of the places where some manuals suggest using a case spreader, I don’t have one so I never use one myself.
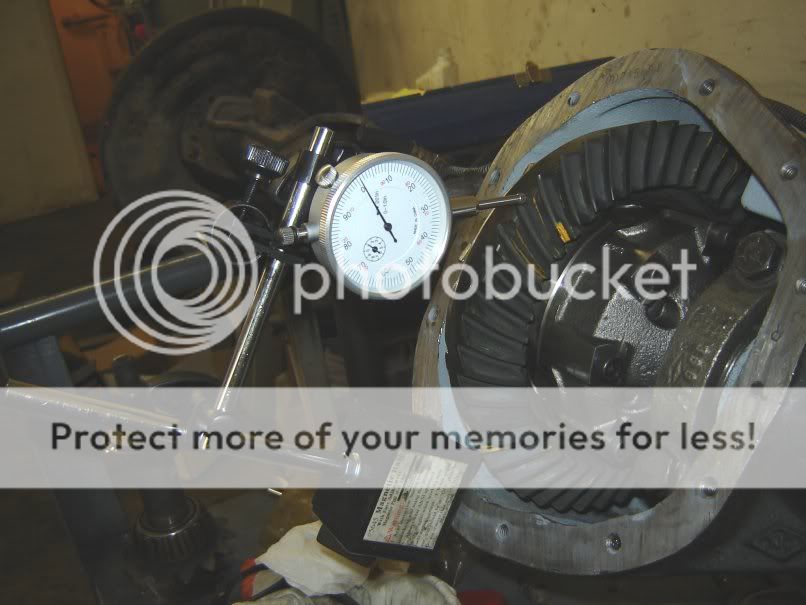
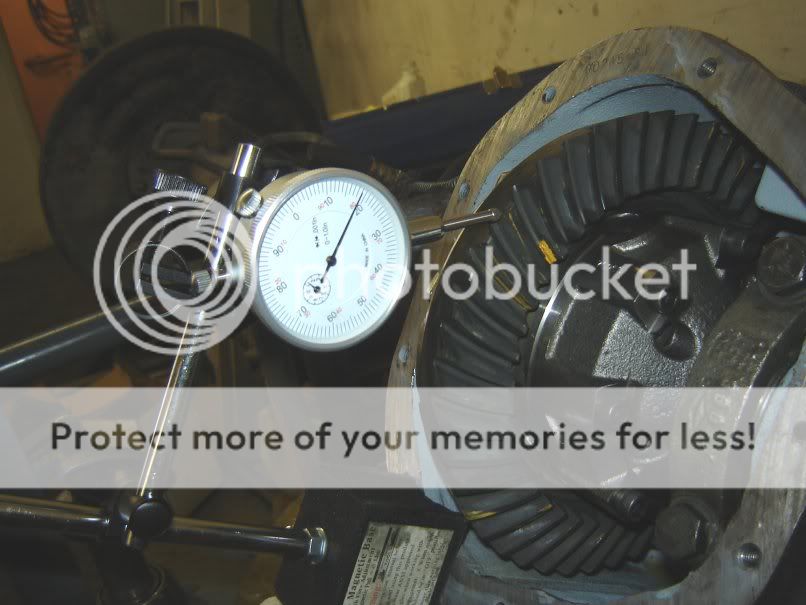
I will need a set of bearings that can be used as set-up bearings (more on how to use these later) and most importantly, I need to know what thickness of shims, are under the carrier bearings. Sometimes it’s possible to remove them without damaging them, using a bearing splitter and puller kit.
But on the Dana44, it’s very hard to get under the bearings and get them off without damaging them or the roller cage. Sure enough I wasn’t able to do it without damage this time. So I cut a slot in the inner race with a grinder and then smacked them with a hammer & chisel to split them.
Since I can buy a couple of new carrier bearings separately for about $30.00, I’m not too upset that I couldn’t get them off.
The good news is that once I have these set-up bearings made, I can use them again.
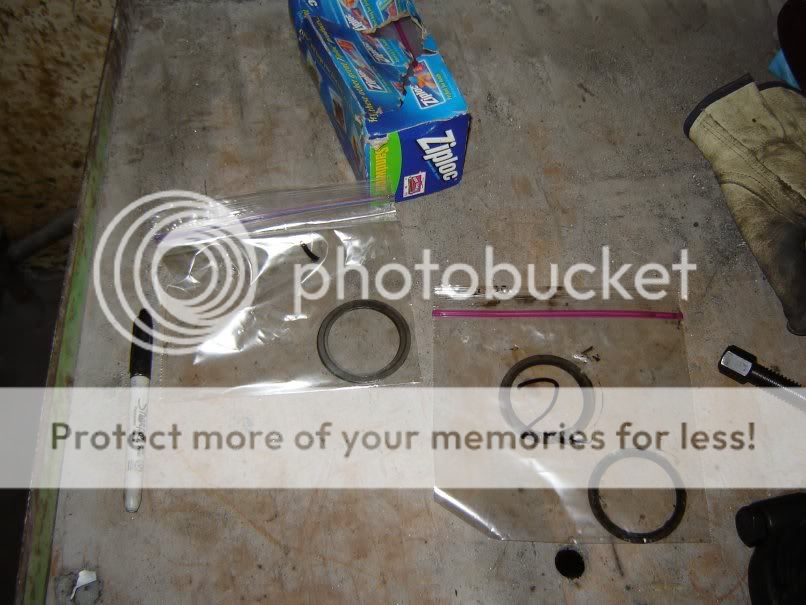
It's important to keep track of all the shims and which side they came out.. I like to start with the same amount of shims installed on the new carrier, as there was on the old, and then adjust as needed. It makes it much easier to get the new gears set-up. Most of the time, the new carrier will fit with the same amount of pre-load if you keep the shim thickness the same as the old carrier had. Same is true with the pinion bearing shims.
Shims in the bag marked “1” came out of the side that I had marked with 1 center punch mark. Bag marked “2”, same.
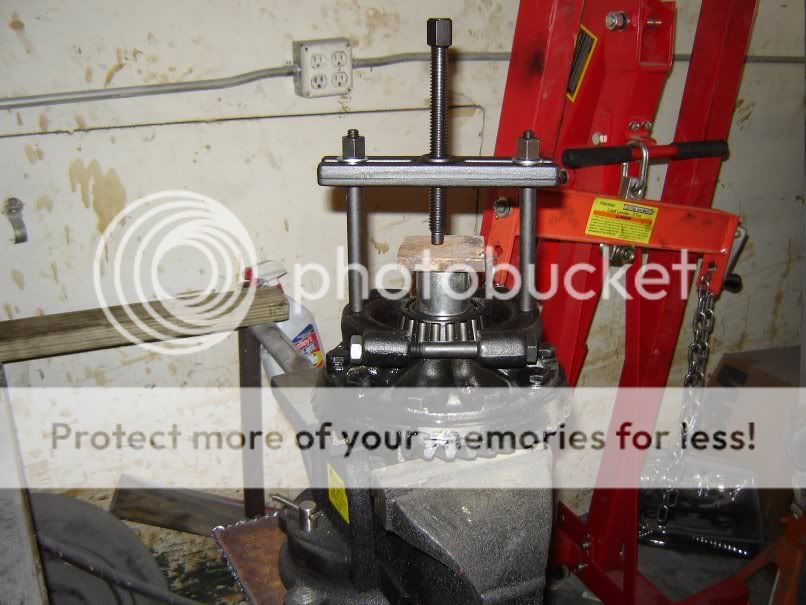
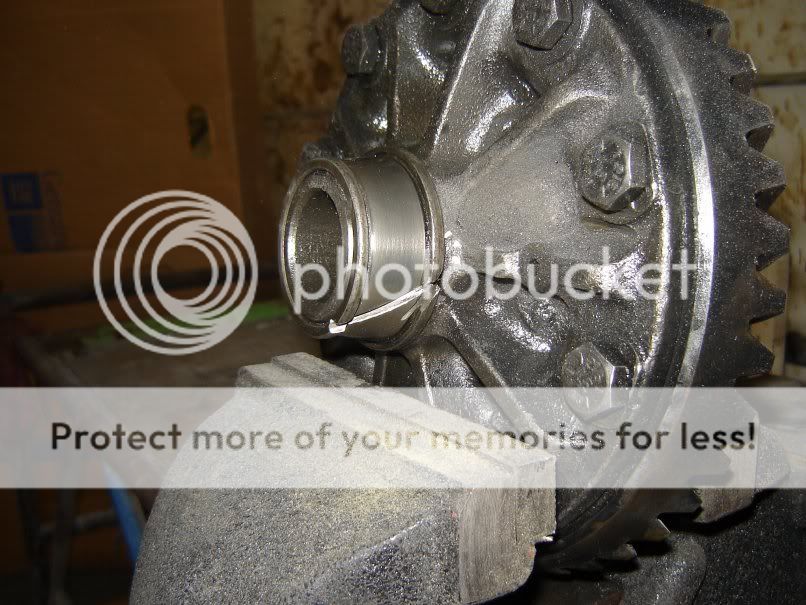
So now I will grind the inner race surface of the newly purchased carrier bearings, until I can slide the bearing on and off the carrier. I grind evenly around the race so that the bearing will not be misaligned. This die grinder works well for this. I work the die grinder around the race, keeping equal pressure and an even circular motion. This takes a while to do. Patience grasshopper.

I keep trying the bearing on the old carrier until it fits snug but can be removed by hand. Then I thoroughly clean it off.
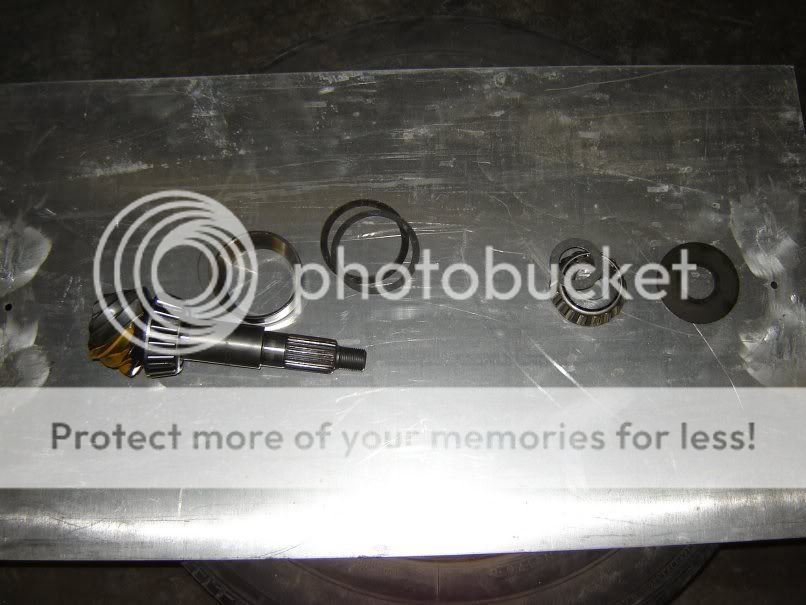
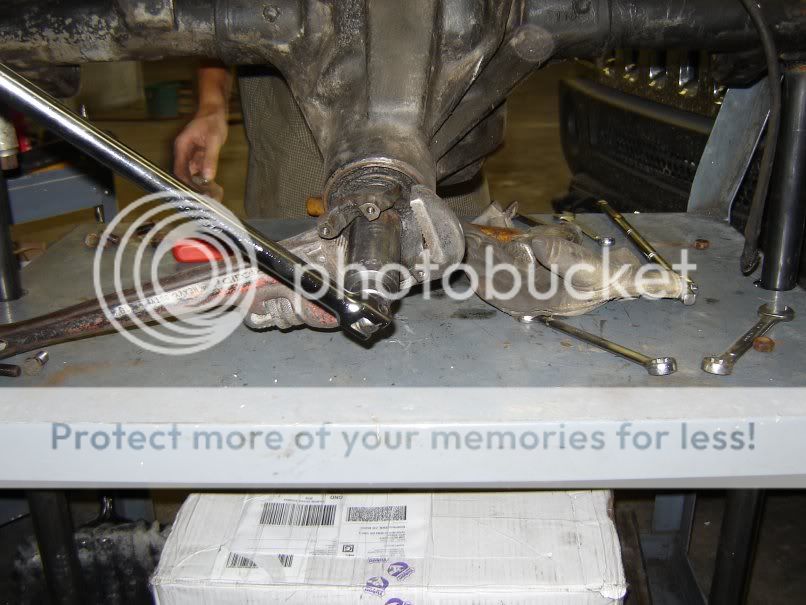
Next I take the pinion nut off that I had loosened earlier. I can then tap the pinion gear out of the outer pinion bearing and remove the pinion gear from the housing.
Then I pry out the pinion seal and remove the outer bearing and bag the shims that are on the backside of the outer bearing, and are used to set the pinion bearing pre-load (sometimes these shims stay on the pinion shaft as it’s being removed)
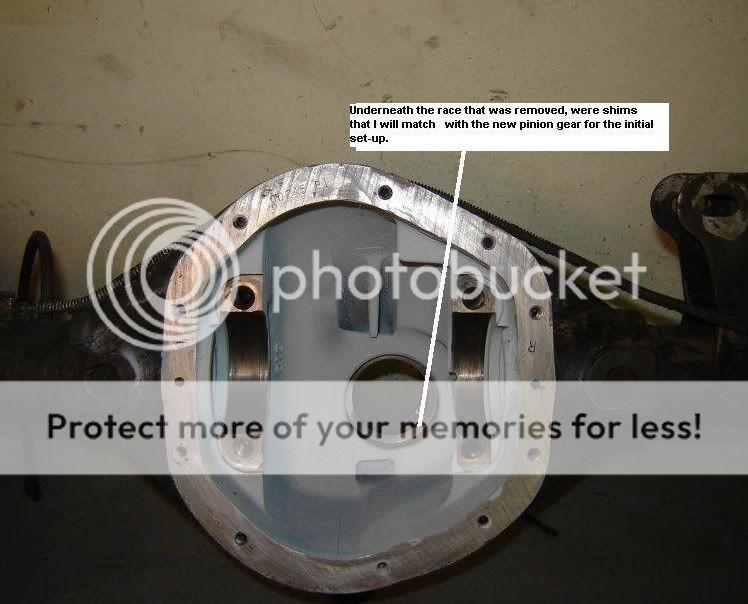
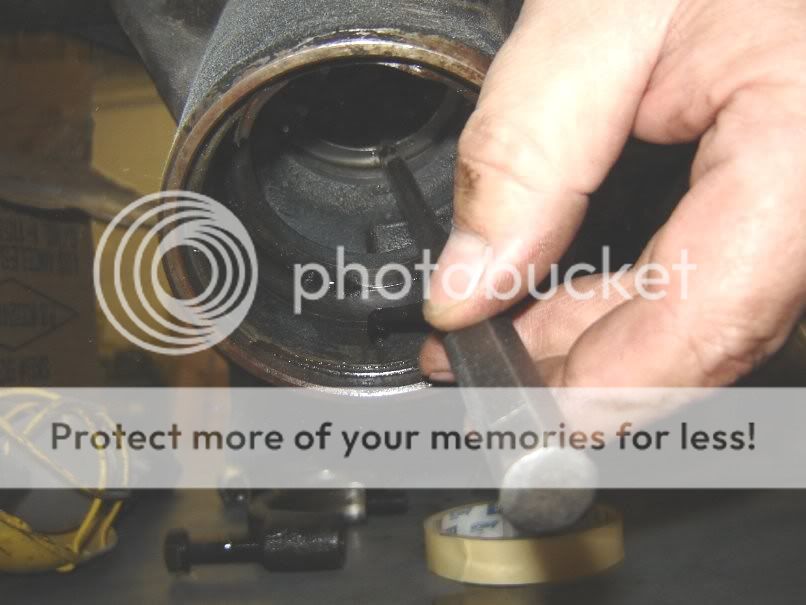
I then need to remove the pinion bearing races, out of the housing. I use a long punch with a flat end. As long as I work my way around the race and don’t let it get in a bind, then it can be tapped out with minimal force.
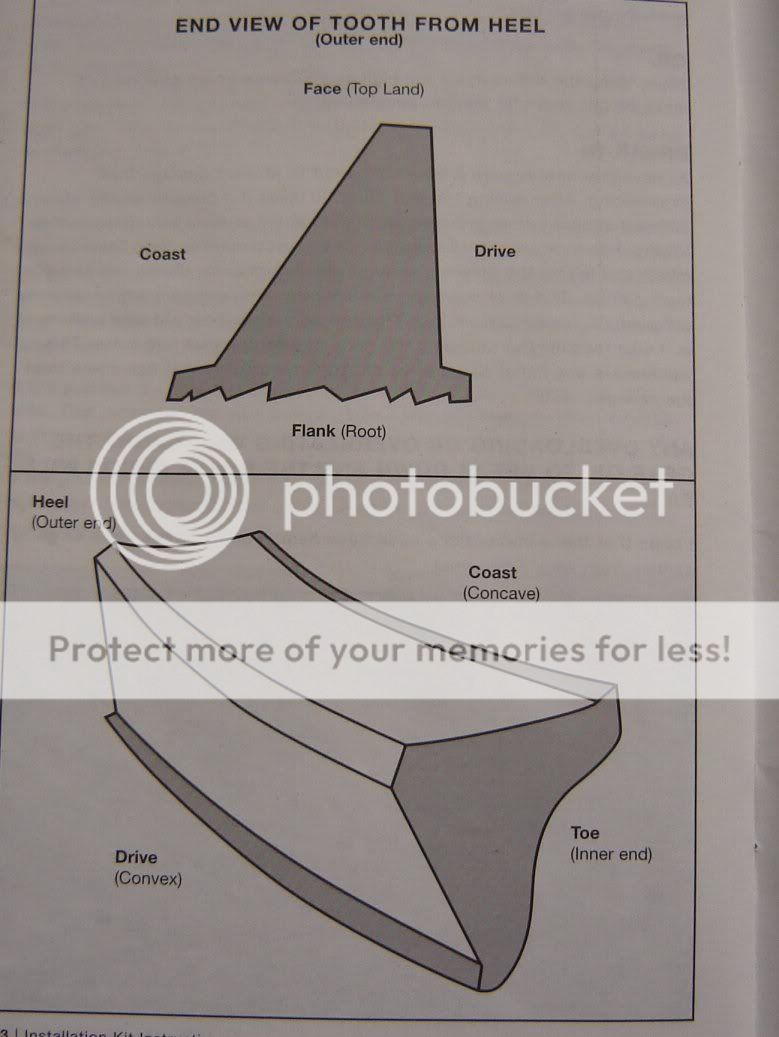
Under the above race are shims and once again, I need know the thickness of those shims so I can put the same amount back in. Shims are bagged separately and I will measure them with a micrometer and install the same thickness of shims, back in during assembly. “P” for the inner pinion shims and “O” for the outer pinion shims. (No crush sleeve is used on this Dana 44, there are some slightly different assembly methods for crush sleeved pinion gears).

I will also need to grind the outside of the old inner pinion bearing race so that I can slide it into the housing by hand. Then I can use it for set-up.

Donor axle is out of a 88 Wagoneer.
Diff. cover has been removed and axles will be un-bolted and pulled out next.
I have the housing secured on a cart that I fab’d some tubes onto. I built it so that I could remove the upper tubes and use the cart normally when not rebuilding an axle.
There are parts that require a lot of torque and/or prying force during the build, so it’s helpful to have the housing secured, either on a stand or in the vehicle.
If I am discarding the old ring and pinion gears, it’s o/k to use an impact to loosen (not remove at this time) the pinion nut. And if I’m using the impact gun, I do this before the carrier is removed.
But, the impact gun can damage these gears, so if I want to re-use them, I use a pipe wrench on the pinion flange and a long breaker bar. Then I loosen the pinion nut (this method can be done later after the carrier is removed if so desired) I never use an impact when assembling differentials.
(If you’ve ever used an impact to remove a pinion flange or to put one on, you have been using the impact to slam the pinion gear against the ring gear, until the nut turns or tightens, this is not good for gears)
Next I mark the carrier bearing caps so that I’m sure they will go back on the same way. There's a lot of ways this can be done. I use a center punch and mark one side with 1 mark on the cap next to 1 mark on the housing and the other with 2 marks each. I do this instead of marking parts left or right, which can easily get confused, I mark and refer to everything as “1” or “2”.
and the other side like this
After removing the caps, the carrier needs to be removed. It should be wedged in fairly tight and will require some prying to get it out. I take care to work it out evenly, so it won’t bind up. This is one of the places where some manuals suggest using a case spreader, I don’t have one so I never use one myself.
I will need a set of bearings that can be used as set-up bearings (more on how to use these later) and most importantly, I need to know what thickness of shims, are under the carrier bearings. Sometimes it’s possible to remove them without damaging them, using a bearing splitter and puller kit.
But on the Dana44, it’s very hard to get under the bearings and get them off without damaging them or the roller cage. Sure enough I wasn’t able to do it without damage this time. So I cut a slot in the inner race with a grinder and then smacked them with a hammer & chisel to split them.
Since I can buy a couple of new carrier bearings separately for about $30.00, I’m not too upset that I couldn’t get them off.
The good news is that once I have these set-up bearings made, I can use them again.
It's important to keep track of all the shims and which side they came out.. I like to start with the same amount of shims installed on the new carrier, as there was on the old, and then adjust as needed. It makes it much easier to get the new gears set-up. Most of the time, the new carrier will fit with the same amount of pre-load if you keep the shim thickness the same as the old carrier had. Same is true with the pinion bearing shims.
Shims in the bag marked “1” came out of the side that I had marked with 1 center punch mark. Bag marked “2”, same.
So now I will grind the inner race surface of the newly purchased carrier bearings, until I can slide the bearing on and off the carrier. I grind evenly around the race so that the bearing will not be misaligned. This die grinder works well for this. I work the die grinder around the race, keeping equal pressure and an even circular motion. This takes a while to do. Patience grasshopper.
I keep trying the bearing on the old carrier until it fits snug but can be removed by hand. Then I thoroughly clean it off.
Next I take the pinion nut off that I had loosened earlier. I can then tap the pinion gear out of the outer pinion bearing and remove the pinion gear from the housing.
Then I pry out the pinion seal and remove the outer bearing and bag the shims that are on the backside of the outer bearing, and are used to set the pinion bearing pre-load (sometimes these shims stay on the pinion shaft as it’s being removed)
I then need to remove the pinion bearing races, out of the housing. I use a long punch with a flat end. As long as I work my way around the race and don’t let it get in a bind, then it can be tapped out with minimal force.
Under the above race are shims and once again, I need know the thickness of those shims so I can put the same amount back in. Shims are bagged separately and I will measure them with a micrometer and install the same thickness of shims, back in during assembly. “P” for the inner pinion shims and “O” for the outer pinion shims. (No crush sleeve is used on this Dana 44, there are some slightly different assembly methods for crush sleeved pinion gears).
I will also need to grind the outside of the old inner pinion bearing race so that I can slide it into the housing by hand. Then I can use it for set-up.