fyrfytr1717
NAXJA Forum User
- Location
- Turlock, CA
OK, so here it is. The XJ Dana 44 ABS thread I've been promising for so long. All you ABS haters can just click on by and continue to hate anyone interested in maintaining their factory ABS when they upgrade their rear end. I’m not going to get into the pros and cons of ABS in different driving situations. I’ll leave that decision up to you. I’m also not going to show you how to swap in a new rear end, there’s many, many threads already in existence about that. I won’t cover disc brake swaps or how to make ABS with work them. I’m just going to show you how easy it is to maintain your ABS when upgrading your rear end to a stock XJ Dana 44. So if you’re interested, grab a cold one and be prepared to do a little reading. This is going to be long, but I promise, there will be LOTS of pictures along the way.
The usual disclaimers first… Modifying your braking system may be dangerous, do it at your own risk. Additionally in this write up I’m using an ’87 XJ D44 and swapping it into a ’99 Cherokee Classic that originally had a D35 with ABS. I’d imagine all ’87 XJ D44’s are pretty similar, but I’m not familiar enough with the older ABS systems to tell you if this will work on a pre ’97 XJ or not. Maybe somebody that has an older ABS system can chime in later and let me know.
So here we go….
Parts you’ll need:
From your Dana 35-
Brake lines
Brake line guides
E-Brake cables
ABS sensors
ABS sensor mounts
ABS tone rings
From your Dana 44-
Axle housing
Axle shafts
Backing plates
Brake hardware
Brake shoes
Brake drums
Additional parts-
None, unless your brakes are in need of a rebuild
Required tools-
Typical mechanic’s hand tools
Feeler gauge set
Compass (circle drawing type)
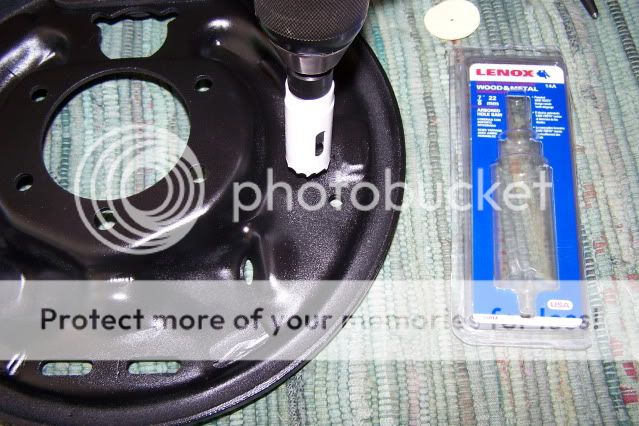
7/8” hole saw
7/16”-20 tap set
A lathe (or more likely, access to a competent machine shop)
Tools for bearing removal/install (again, I’d have someone do it for me)
Optional tools-
Torque wrench
Dremel
Welder (Either the machine or the person, whichever suits your needs)
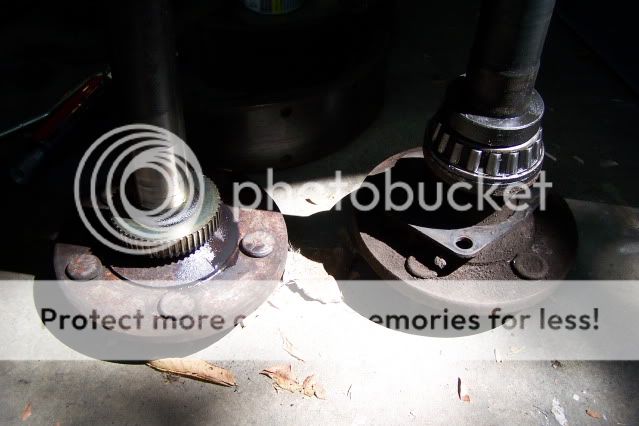
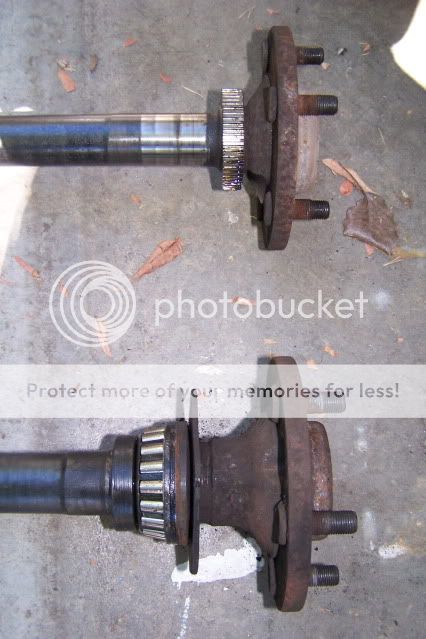
First off, here’s the Dana 35 and Dana 44 axle shafts side by side for comparison.
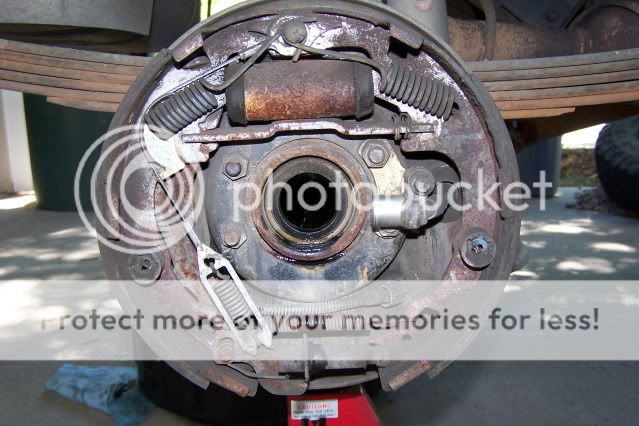
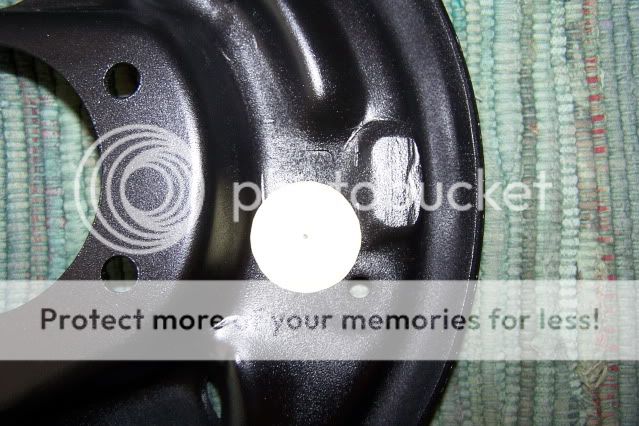
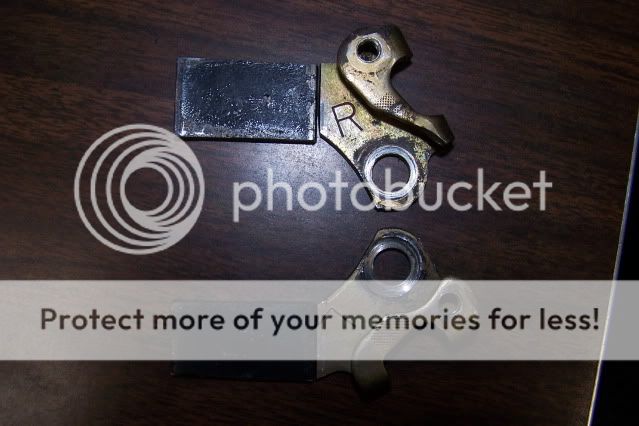
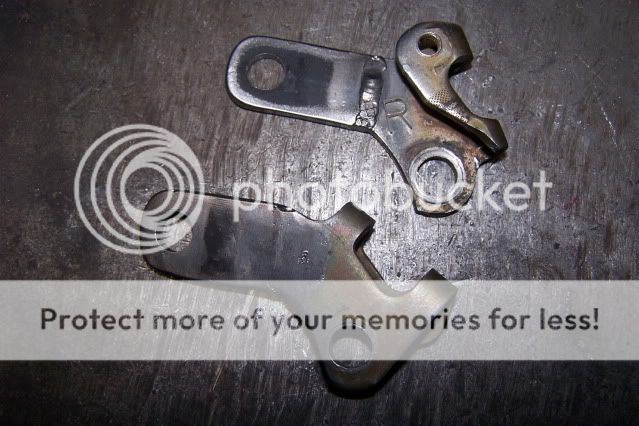
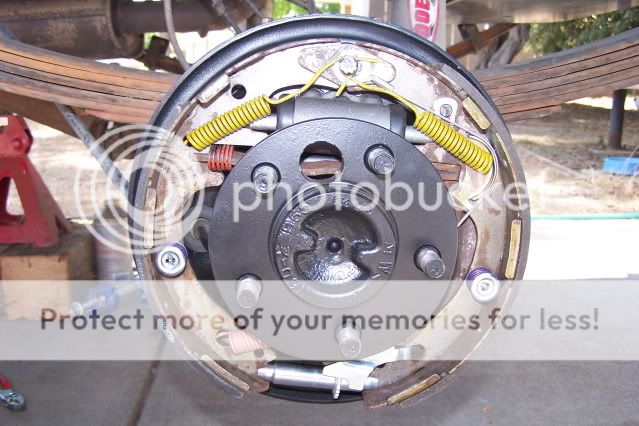
The Dana 35 backing plate and brake assembly.
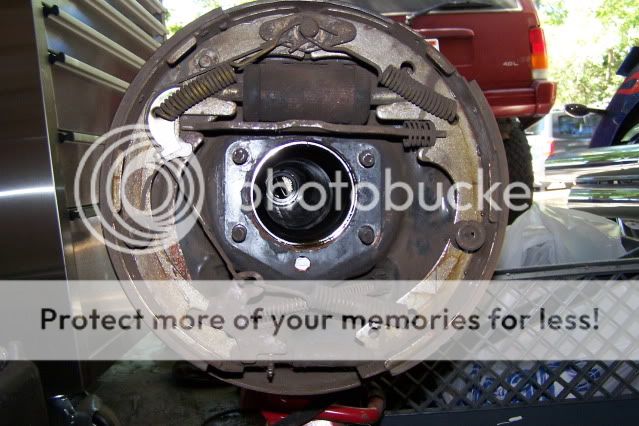
And the Dana 44 backing plate and brake assembly.
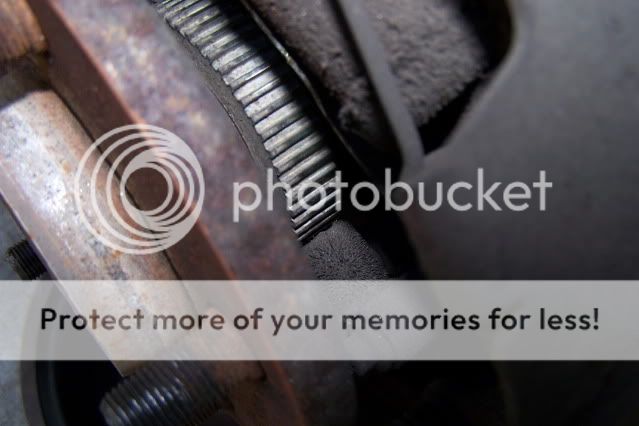
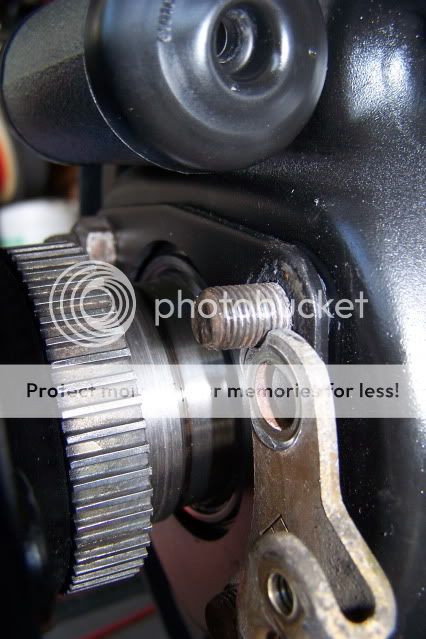
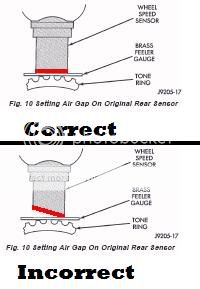
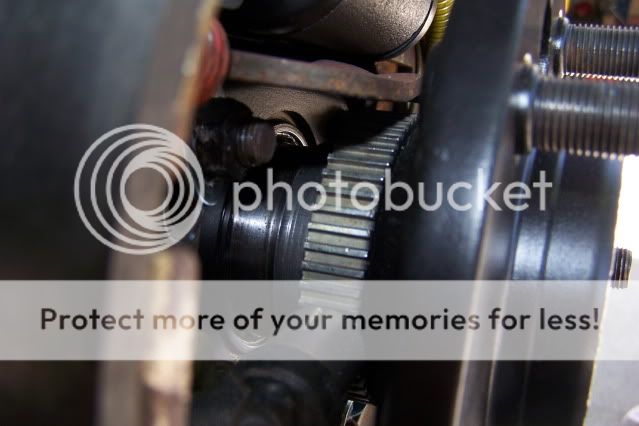
This is the orientation of the sensor and the tone ring on the Dana 35 and is what we are trying to recreate on the Dana 44.
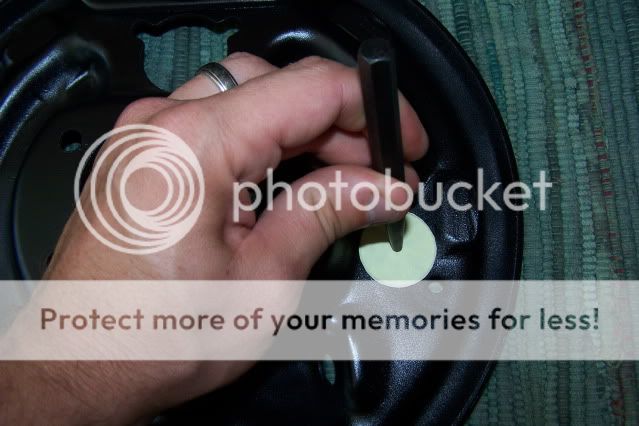
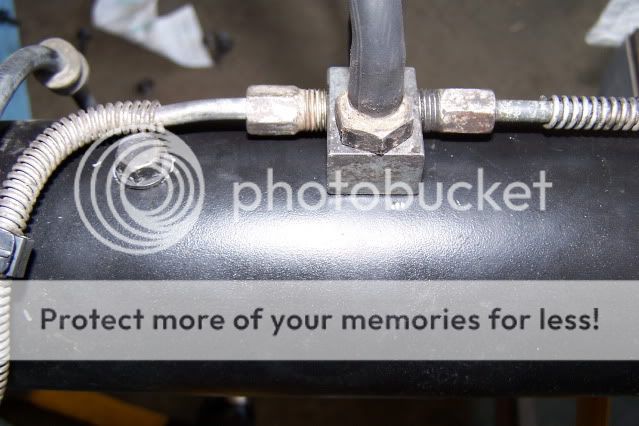
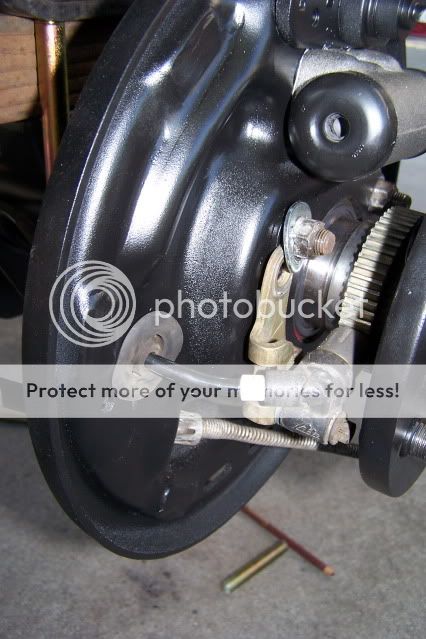
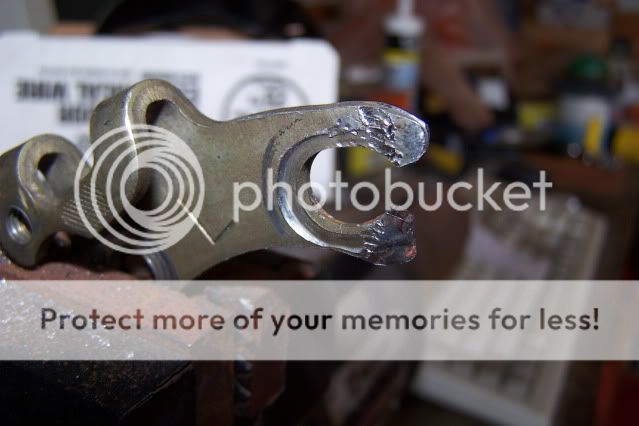
After a lot of careful measuring, I determined that in order to get the tone ring where it would properly match up with the sensor, its outer edge needed to be exactly 1 3/8” away from the surface of the retainer plate. I used the retainer plate as a reference point as it was close by, easy to measure from, and it’s the surface your ABS sensors will mount up to. You can see the marks I scribed on the flange in the following picture indicating where the tone ring has to be mounted.

I realized while writing this up some of you may have already removed your retainer plates. I figured you could use the wheel mounting surface for a reference, but I can’t get an exact measurement with the axles and brakes already installed. As best I can tell it is 1 1/16” from the WMS to the outer edge of the tone ring.
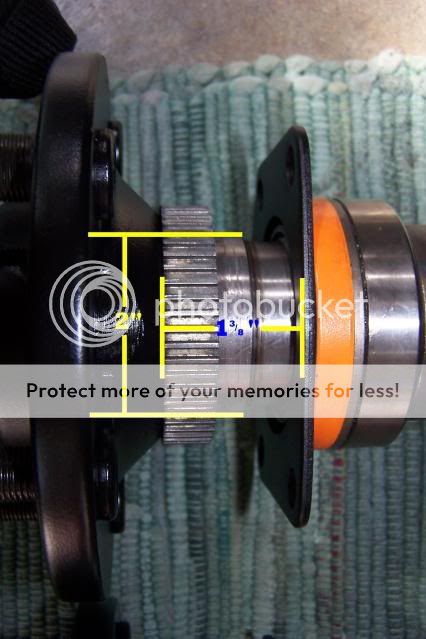
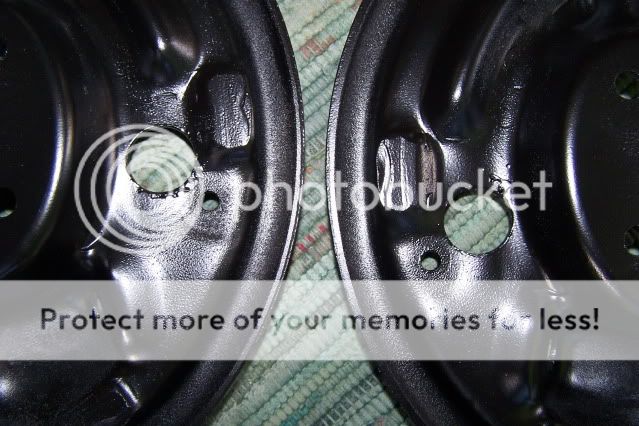
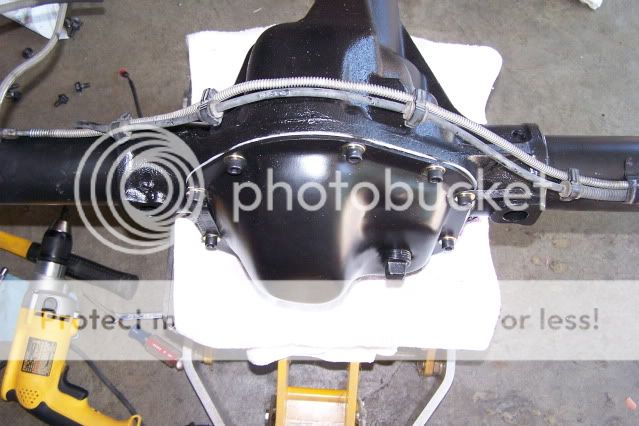
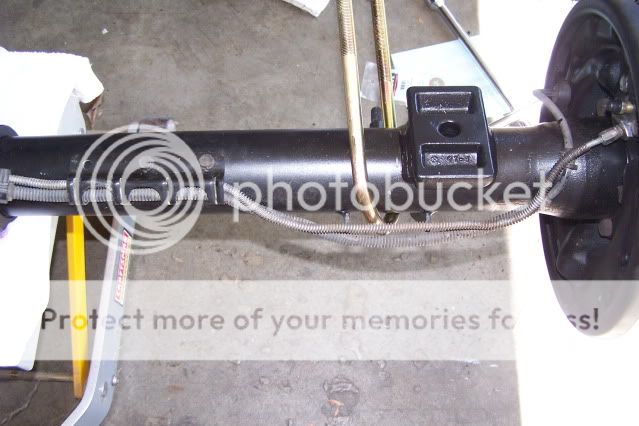
I wanted to remove as little metal as possible when installing the tone rings so I asked the machinist to turn the flange just until there was a nice machined surface for the rings to press onto. Turns out that at exactly 2”, the rough casted surface is machined off, leaving you with a nice clean shoulder to press the rings onto. The inside diameter of the tone rings are then machined out to 1.999” for an interference fit. Unfortunately, I don’t have any pictures of either part as the machinist pressed all the parts on before I could take a picture of them. Here’s a picture of the finished product (after a fresh coat of paint) with the dimensions drawn in to help eliminate any confusion.
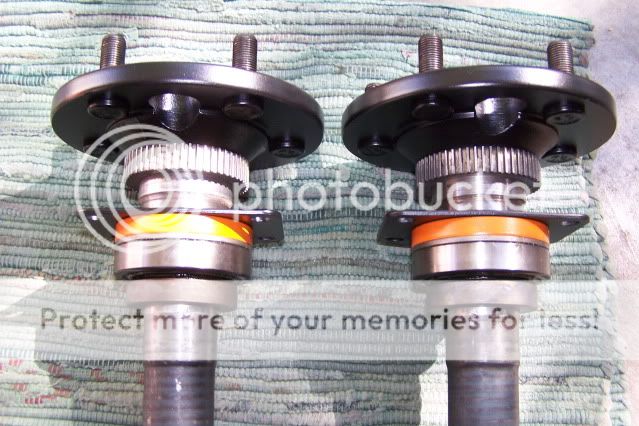
And the pretty pair all ready to be installed.
So what’s this going to cost to have done by a competent machinist you ask? Well, that all depends. The going rate where I live is $80 per hour. I brought in my old axles, new axles, and new set of bearings in a milk crate. I told him what I wanted accomplished and asked him to just take care of it all. I ended up getting charged for 2½ hours of labor. He said the machining only took about 1 hour, but taking the rings off the old axles, taking the bearings and retainer rings off the new axles, and then reinstalling all the parts afterwards made up the other 1½ hours. If I were to do it all over again, I would have removed the tone rings from the D35 axles, cut the bearings and retainer rings off the new axles, brought just the D44 axles and tone rings in to him for machining, and then brought all the parts in to an auto shop to have the bearings pressed on. While he was an excellent machinist at $80 per hour, he was a pretty lousy mechanic, especially at that price. He used heat to get the retainer rings on and I think he installed my axle seals dry as I had to replace both of them within a few months due to them leaking. I had new ones pressed on for $20 per axle by another machine shop that dealt more with automotive applications and have had no problems since then.
The usual disclaimers first… Modifying your braking system may be dangerous, do it at your own risk. Additionally in this write up I’m using an ’87 XJ D44 and swapping it into a ’99 Cherokee Classic that originally had a D35 with ABS. I’d imagine all ’87 XJ D44’s are pretty similar, but I’m not familiar enough with the older ABS systems to tell you if this will work on a pre ’97 XJ or not. Maybe somebody that has an older ABS system can chime in later and let me know.
So here we go….
Parts you’ll need:
From your Dana 35-
Brake lines
Brake line guides
E-Brake cables
ABS sensors
ABS sensor mounts
ABS tone rings
From your Dana 44-
Axle housing
Axle shafts
Backing plates
Brake hardware
Brake shoes
Brake drums
Additional parts-
None, unless your brakes are in need of a rebuild
Required tools-
Typical mechanic’s hand tools
Feeler gauge set
Compass (circle drawing type)
7/8” hole saw
7/16”-20 tap set
A lathe (or more likely, access to a competent machine shop)
Tools for bearing removal/install (again, I’d have someone do it for me)
Optional tools-
Torque wrench
Dremel
Welder (Either the machine or the person, whichever suits your needs)
First off, here’s the Dana 35 and Dana 44 axle shafts side by side for comparison.
The Dana 35 backing plate and brake assembly.
And the Dana 44 backing plate and brake assembly.
This is the orientation of the sensor and the tone ring on the Dana 35 and is what we are trying to recreate on the Dana 44.
After a lot of careful measuring, I determined that in order to get the tone ring where it would properly match up with the sensor, its outer edge needed to be exactly 1 3/8” away from the surface of the retainer plate. I used the retainer plate as a reference point as it was close by, easy to measure from, and it’s the surface your ABS sensors will mount up to. You can see the marks I scribed on the flange in the following picture indicating where the tone ring has to be mounted.
I realized while writing this up some of you may have already removed your retainer plates. I figured you could use the wheel mounting surface for a reference, but I can’t get an exact measurement with the axles and brakes already installed. As best I can tell it is 1 1/16” from the WMS to the outer edge of the tone ring.
I wanted to remove as little metal as possible when installing the tone rings so I asked the machinist to turn the flange just until there was a nice machined surface for the rings to press onto. Turns out that at exactly 2”, the rough casted surface is machined off, leaving you with a nice clean shoulder to press the rings onto. The inside diameter of the tone rings are then machined out to 1.999” for an interference fit. Unfortunately, I don’t have any pictures of either part as the machinist pressed all the parts on before I could take a picture of them. Here’s a picture of the finished product (after a fresh coat of paint) with the dimensions drawn in to help eliminate any confusion.
And the pretty pair all ready to be installed.
So what’s this going to cost to have done by a competent machinist you ask? Well, that all depends. The going rate where I live is $80 per hour. I brought in my old axles, new axles, and new set of bearings in a milk crate. I told him what I wanted accomplished and asked him to just take care of it all. I ended up getting charged for 2½ hours of labor. He said the machining only took about 1 hour, but taking the rings off the old axles, taking the bearings and retainer rings off the new axles, and then reinstalling all the parts afterwards made up the other 1½ hours. If I were to do it all over again, I would have removed the tone rings from the D35 axles, cut the bearings and retainer rings off the new axles, brought just the D44 axles and tone rings in to him for machining, and then brought all the parts in to an auto shop to have the bearings pressed on. While he was an excellent machinist at $80 per hour, he was a pretty lousy mechanic, especially at that price. He used heat to get the retainer rings on and I think he installed my axle seals dry as I had to replace both of them within a few months due to them leaking. I had new ones pressed on for $20 per axle by another machine shop that dealt more with automotive applications and have had no problems since then.


") ), you just have to push a little harder on the brake pedal. I'm sure discs would be an improvement, but my drums suit my needs at this point in time. We'll see when the day comes that I bump up to 35's.
), you just have to push a little harder on the brake pedal. I'm sure discs would be an improvement, but my drums suit my needs at this point in time. We'll see when the day comes that I bump up to 35's.