• Welcome to the new NAXJA Forum! If your password does not work, please use "Forgot your password?" link on the log-in page. Please feel free to reach out to [email protected] if we can provide any assistance.

Replace the crank from underneath?

stephenspann27

NAXJA Forum User
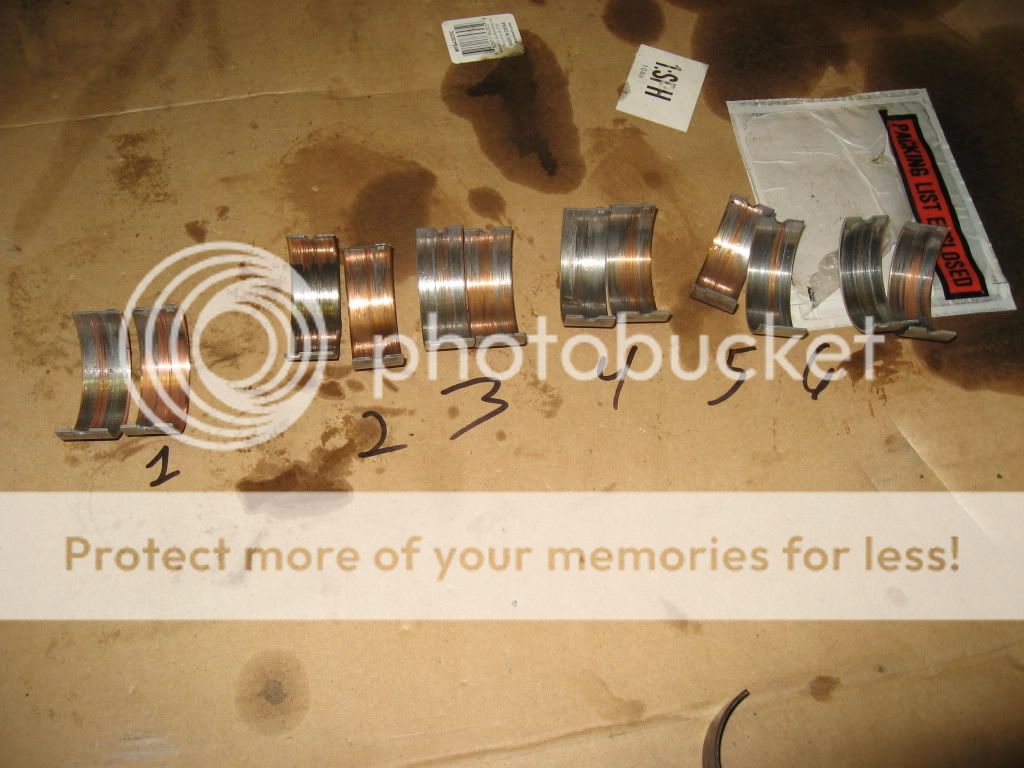
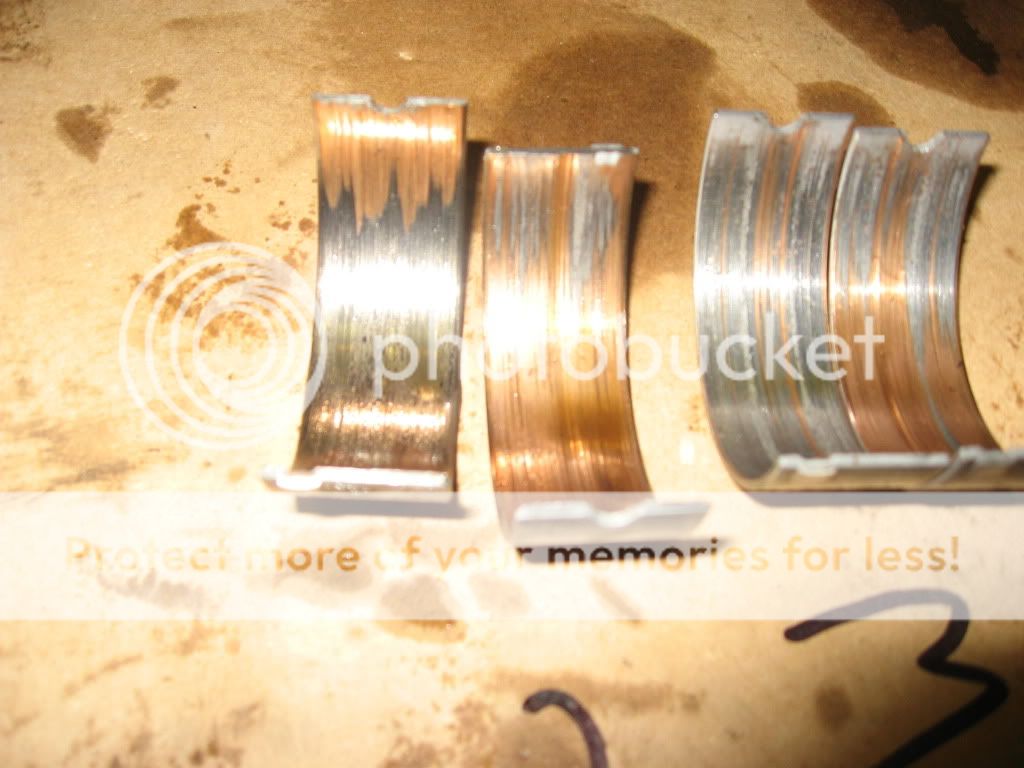
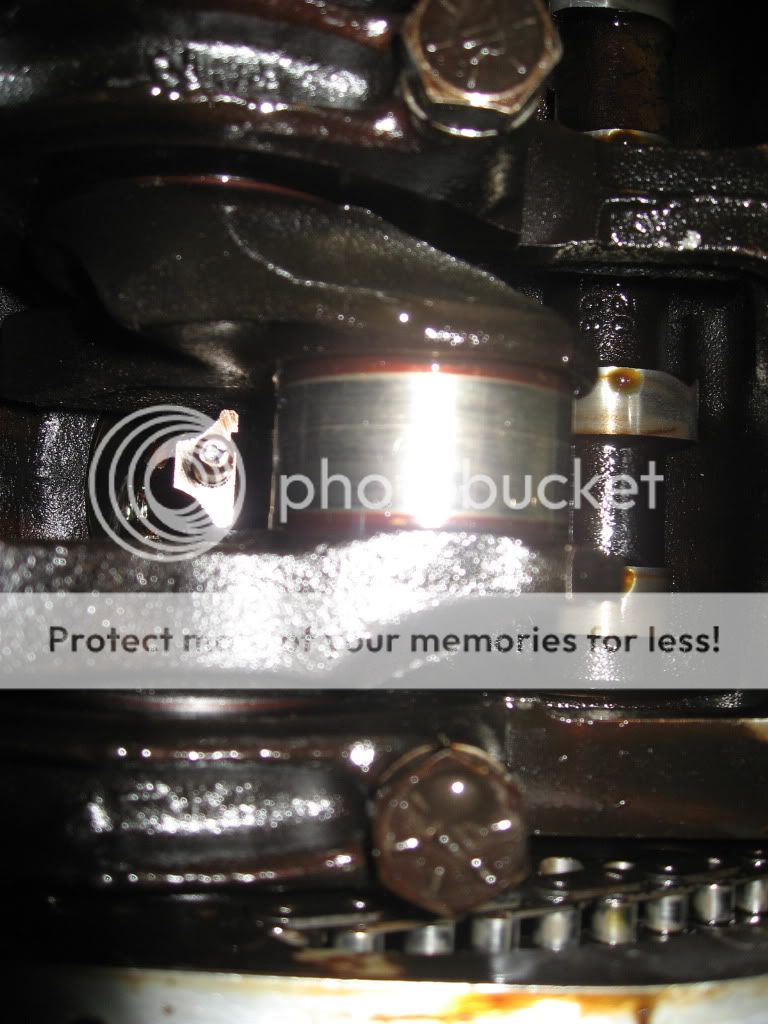
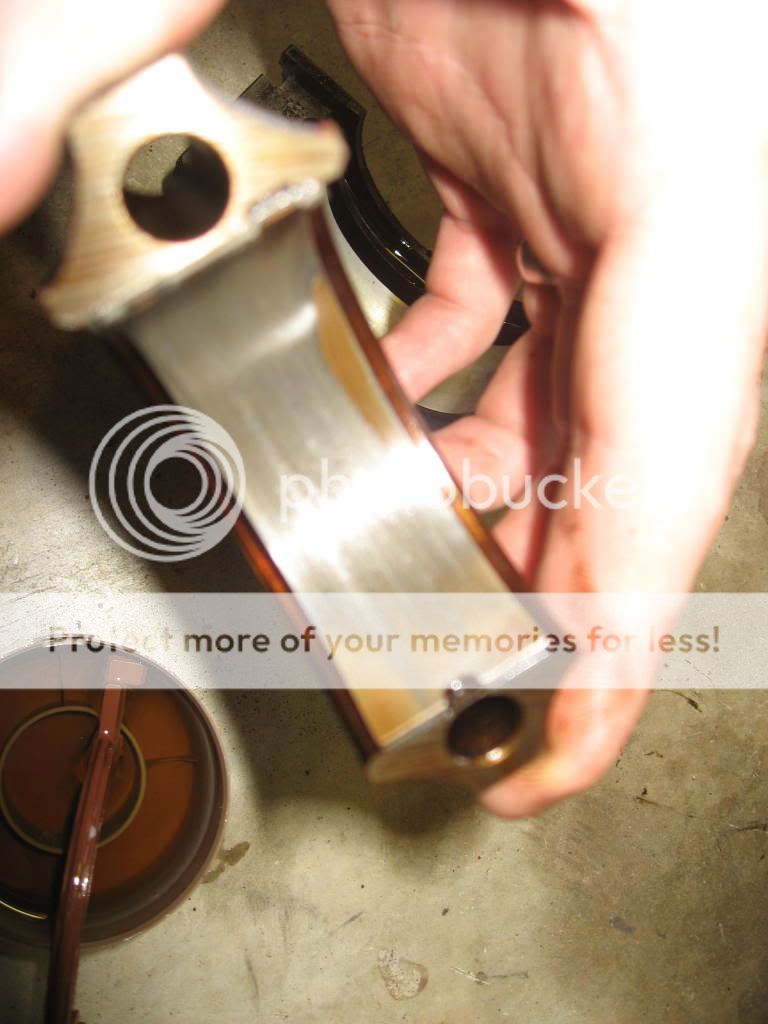
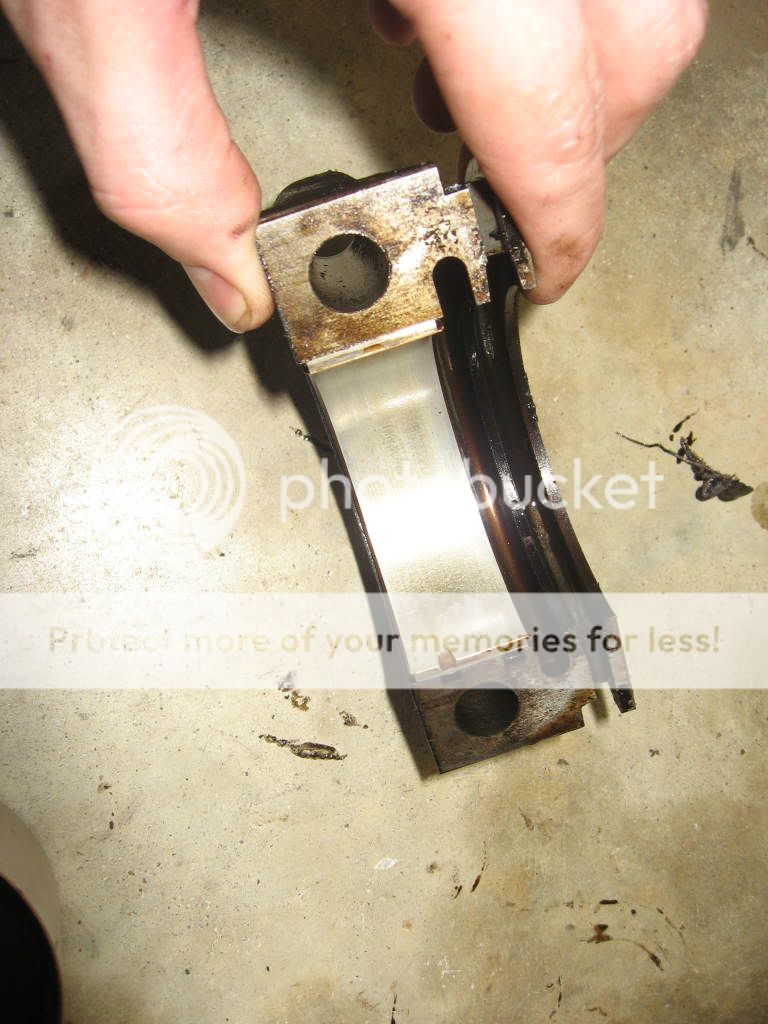
I recently replaced the lifters in my jeep.. because of a lot of lifter noise and clatter.. I also replaced the head with a reman head.. much to my dissatisfaction.. after getting it back together.. the same knock/clatter is still there.. it appears to be the bottom end.. and my oil pressure is lower than ever.. I replaced the rod bearings little while back and the old were were not really that bad.. so I assume I have a main bearing or two that are spun... I REALLY don't want to pull the motor and redo all the crap I've been working on for the last month (head replacment).

Has anyone ever removed the tranmission, then replaced the crank from underneath?
 
If its an auto trans just remove torque converter bolts. then every thing else. Flex plate stays on crank torque converter stas in trans. You will be sorry you did it this way though. Much less time to remove engine and than change crank.
rembember you will have to remove timing chain cover and chain also. Another problem is if your bearings are shot on the crank they are also shot on the camshaft. Replacing main and rod bearings will help but is not a total cure. If at all possible it would be better it find a different engine. I do understand your a student and broke though.
 
Yes. You can even replace the crank without removing the head, but you're going to want help (and it can get cramped down there.) It's easier to pull the head so you can push the pistons out and have a helper hold the crank with a (clean!) bit of rope so his hands aren't in your way.

If you do it without removing the head, remove the plugs so you can push the pistons up as you unbolt the rod caps - and make sure the caps are marked for number and orientation! Once you remove the cap, put on a bit of 5/16" rubber hose (about 6-8" long) over each of the bolts to protect the crankshaft, and push the piston to the top of the bore. Do not pull on the hose to bring the pistons down! It won't hold them - you'll have to reach up and grab the big end of the rod by hand to pull it down.

The biggest headache to replacing a crank without removing the head is having two hands that aren't yours in your way while you're trying to get the front & rear main caps started (do the front & rear, then the #7 to support the centre, then put the rest of them in. Be generous with the assembly lube, and torque to spec - 80 pound-feet, I believe. Use LocTite #242 on assembly.)

You can drop the crank with the flexplate attached without removing the transmission, but it's a lot easier to do if you can move the transmission back a couple of inches. If it's a manual, remove the flywheel first - it's too damned unwieldy otherwise, and you'll probably hit yourself in the head (don't ask how I know... Ouch.)
 
You can't be serious! Do you really think it would be easier to bench press the crank up while trying to manipulate 6 connecting rods without damaging a journal or dropping a bearing with assembly lube dripping on your face while laying on your back on some oil soaked cardboard?

Take the dang engine out. Do it right! It will be easier, faster and safer.

I said it's doable - I didn't say it was easy.

Far easier to remove the cylinder head and take the piston/rod assemblies out. As I said, you'd then have a helper hold the crank up with a clean bit of rope while you get the main caps in place, and then put it all back together.

The engine doesn't have to come out to re-crank it, but it's still going to be a bit of work! I've done it with the head on (and yes, the job does SUCK!,) but it's far easier with the head off.

You will note that I mentioned having help to get the crank up, and how that help can get in the way, no? There are some jobs where I won't work on them with just anyone - there's a very select pool of assistance I'll draw on for them (right now, either of my sons or my wife would be the select pool I have available. They know how I work, I know their reactions, and they know how to follow instruction immediately and ask questions later.)
 
Can I borrow your kids? :repair: I need a hand on my XJ!

Took me a lot of work to get 'em that way (and throwing some of my larger wrenches as well. I think they finally started getting the idea the second or third time my three-foot crescent wrench hit them...)

But, they're a bit far. You don't have kids of your own to start training?:twak::twak::twak::laugh3:
 
Thanks for the help.. yes it as an auto.. didn't think about unbolting the flex plate.. yea.. I'm sure the cam bearings are a little worn.. when I was doing the rod bearings I could see the cam lobes and they looked to be in good shape. Also, the rear mean cap that I removed to replace the RMS just had a tad of copper showing.. I'm suspecting that maybe my rod journals are badly worn.. though they didn't look to be schored or anything...

I know the right thing to do would be to replace the short block..but I don't have the $$... and.. I would have to borrow a engine lift.. and stand.. and also take off the head and intake manifold.. and exhaust header.. I HATE redoing crap.. and yes I'm suffering because I took the cheap way out.. but it was my only option.

Here are a couple pics of my old rod bearings, and the rear main cap bearing.


IMG_0420.jpg


IMG_0417.jpg
 
You can also replace the main bearings with the crank in place by rolling the old bearing out and new back in. It all seems like a lot of work when most of your oil pressure may be blowing by the cam bearings.
 
Well I finally pulled the pan to find the source of the knock. All the rod bearings were completely wiped out (if you've been following along you know that I just replaced the rod bearings not long ago). The #2 rod bearing was beat to crap, this was definitely the one that was knocking. Using a micrometer.. I discovered that all the rod journals are STD sized.. except #2 which is .036 smaller!!! It looks like at some point.. this journal was turned .30.. I assume because of a spun bearing... I had put all STD size bearings in becuase I assumed all were the same size.. big mistake. The crank is totally trashed. What a shame..
 
Well I finally pulled the pan to find the source of the knock. All the rod bearings were completely wiped out (if you've been following along you know that I just replaced the rod bearings not long ago). The #2 rod bearing was beat to crap, this was definitely the one that was knocking. Using a micrometer.. I discovered that all the rod journals are STD sized.. except #2 which is .036 smaller!!! It looks like at some point.. this journal was turned .30.. I assume because of a spun bearing... I had put all STD size bearings in becuase I assumed all were the same size.. big mistake. The crank is totally trashed. What a shame..

That would be strange - because if one of a set of crank journals needs to be ground under (one rod or one main,) then all of that set gets ground under (all rods or all mains) to prevent confusion in bearing placement.

And -.030" is not a "first grind" choice - you can get rod/main bearings (usually) in -.001/.010/.020/.030, and it's fairly common to use one .000" bearing and one -.001" bearing to make up a small clearnce goof at standard size.

I'd be interested in trying to figure out just how that one bearing got wiped out so badly. Would it be too much to ask you to take pictures of that bearing and journal, and the main and rod to either side of it? And the saddle and caps (both rods and mains. I know - I'm asking a lot, but this is an odd issue that seems to warrant investigation...)

Leave them full-size and email them to me here if you decide to do it, please. The main reason for kicking open my NAXJA addy was for Jeep tech and Jeep boards anyhow, and it can handle storing large files until I can get a look at them...
 
Sure that's no problem. I'll do that tomorrow.

What also doesn't make sense is.. I had checked the backs of all the bearings and none of them had a size stamped in them, they all just had a part # and some sort of symbol. My Dad said he has heard of people only grinding the bad journal before, and he said that is the case of his Ford 8n tractor, it has one undersized journal.
I pulled all of the main caps, none of them seem to really be more worn than any of the others. However, journal #2 is the worst, and #1 (from lack of oil pressure) is the 2nd worst. My dad, said that before mic'ing the journals I need to polish the journals with 320 grit emory cloth to remove the bearing material.

The #2 journal has a pretty big wave in it that you can feel with your finger. you can probably get measurements that vary .005 on #2 depending where you measure on it.

The rod journal diameter is supposed to be 2'' .094 to 2'' .095.

On #1 I got measurements from 2'' . 091 to as low as 2'' .87

On #2 I got 2'. 060 and as low as 2''.052....

I'll go ahead and take some pics... the #2 bearing is really smashed, you can see how it is wider on the edges from the medal being squashed out.
 
You can remove the crank, but it's gonna be a PITA. Basically rotate the crank till each piston is at the bottom of it's stroke. remove the cap & push it to the top. rotate & repeat till all 6 are removed. Put some fuel line over the rod bolts so you don't nick the rod jounals.
Remove the spark plugs will make your life much easier.
 
Below are the pics, you can tell the #1 journal by seeing the timing chain in the pic. I also took a pic of my calipers with #1 and #2 diameters.. (can't really take a pic of my micrometer and it make sense) its obvious which measurement goes with which journal. These measurements are on the high side, if I measure in the right place on #1 i can get .087, and if I measure in the right place on #2 I can get .047

IMG_1044.jpg


IMG_1045.jpg


IMG_1047.jpg


IMG_1049.jpg


IMG_1050.jpg


IMG_1052.jpg


IMG_1056.jpg


IMG_1060.jpg
 
Last edited:
Back
Top