• Welcome to the new NAXJA Forum! If your password does not work, please use "Forgot your password?" link on the log-in page. Please feel free to reach out to [email protected] if we can provide any assistance.

MJ on 42 Boggers continued

Made a little progress today. Mounted the winch and bumper.

35985459221_e6250a90fb.jpg
[/url]Untitled by David Nichols, on Flickr[/IMG]

Welded in the mounting hole for the track bar, reamed it back out to 3/4" and welded some 1/4" thick heavy washers on for extra support. Misalignment spacers should be in this week and then that will be done.

36118709665_04d8b76943.jpg
[/url]Untitled by David Nichols, on Flickr[/IMG]

36077372386_6e3c9c0f6e.jpg
[/url]Untitled by David Nichols, on Flickr[/IMG]

Cut off the stripped out forward crossmember mounts. Made some new ones out of 1" x 3/4" on the s.side and 2" x 1" on the c.side. Drilled and tapped them to 3/8"-16, boy do I hate tapping holes in this thick shit!

35310496053_147255f757.jpg
[/url]Untitled by David Nichols, on Flickr[/IMG]

And finished off the day by welding in the new mounts.

36077369306_e2a433dd3d.jpg
[/url]Untitled by David Nichols, on Flickr[/IMG]

36077371666_c9f26a981f.jpg
[/url]Untitled by David Nichols, on Flickr[/IMG]

And I still didn't even come close to finishing the crossmember :doh:. I'm on mandatory OT this week too, so hopefully I can find some time to work on it. The axles for my trailer should be in later in the week or early next week so I really want to finish it up soon.

I'm dying to get this thing in the woods. There's a short rock climb named "Sheetmetal" that I've tried to do a few times with my last truck but never made it past half way up. That will be the test for me. Cant wait!
 
I was able to work on the crossmember for an hour or so tonight. Got the two outside links bent up and welded in. Toyed around with a few different options for the transmission mount but had to call it quits for the night. I'll try to get back to it tomorrow.

35974135032_5f6c1b94f0.jpg
[/url]Untitled by David Nichols, on Flickr[/IMG]
 
Here's what I came up with for the transmission mount.

36166850695_05b6718371.jpg
[/url]Untitled by David Nichols, on Flickr[/IMG]

I'm using (2) poll bushings (Barnes, p/n: B4WK0248-1, $5.72 ea.) in 1.5" x 0.120" DOM. And (4) square shock mount tabs curtesy of the previous owner, SkinnyRidgeMJ.

35329488164_ec2755e804.jpg
[/url]Untitled by David Nichols, on Flickr[/IMG]

36167001285_2fb89691a4.jpg
[/url]Untitled by David Nichols, on Flickr[/IMG]

The connector link supporting these bushings will be 1.5" x 0.250" DOM, this one's just for temporary mock up. I have more DOM coming in Thursday so I will try and finish this section up then. I'll probably add a couple small pieces of 0.120" to tie it all together.

Once thats done, I still have the transfer case mount to make and either re-work the old skid plate which looks like it's been through war. Or just make a new one. I guess I'll make that decision when the time comes.
 
A little more progress tonight, I got the misalignment bushings for the track bar in so I was able to get that finalized. Once I put the tire back of I will check for final adjustment. I also started on the transfer case mount. I cut the mounting tabs out of 1/4" flat stock. And because my freehand plasma cutting abilities leave a lot to be desired they ended up different sizes and shapes. So I tacked them together and ground them into shape to make sure they match. If I thought before I cut them out I would have used a hole saw to drill out the notches, but I didn't so I ended up spending some time with the die grinder to open them up.

36020288152_2fa2c1778e.jpg
[/url]Untitled by David Nichols, on Flickr[/IMG]

35383581253_7acb28bb5b.jpg
[/url]Untitled by David Nichols, on Flickr[/IMG]

35383580863_6c681bdd5b.jpg
[/url]Untitled by David Nichols, on Flickr[/IMG]

Drilled them to 17/32" and mocked them up on the crossmember. I'll have to trim a little bit off the front of the brackets (I have less than 1/8" clearance) but other than that I think they'll do. My plan is to weld the 1 x 1 square tube in between the brackets to support them. Once I have the crossmember off the truck I'll wrap the top & bottom with 3/16" plate.

35352026564_e5550ddc0c.jpg
[/url]Untitled by David Nichols, on Flickr[/IMG]

36146886776_4a19927b48.jpg
[/url]Untitled by David Nichols, on Flickr[/IMG]

36054688521_d82d55aacd.jpg
[/url]Untitled by David Nichols, on Flickr[/IMG]

:arrowr: For anyone who can't view these photos I also have them on my Instagram @ "dmaxpwr"
 
I was finally able to spend a couple uninterrupted hours working on the transmission, transfer case & traction bar mounts for the crossmember and semi-completed it.

35837448580_0ddf6e80bc.jpg
[/url]Untitled by David Nichols, on Flickr[/IMG]
36230326685_db7d415c60.jpg
[/url]Untitled by David Nichols, on Flickr[/IMG]


It will stay this way for a while, at least until I can come up with the skid plate material and time to build it. I'm not sure if I want to build another 3/16" steel skid plate or try to make something out of poly or who knows what kind of material. I'd really like something that will slide over rocks without digging in. I'll do some research before making a decision. Unfortunately cost will have to be a factor.


On a side note, I bought a set of Miller classic TIG welding gloves and the very first bead I laid down (welding overhead) the finger on my left hand caught on fire REALLY WTF!. And yes, I realize that these are TIG welding gloves but we use Tilman deerskin TIG welding gloves for commercial MIG welding every day and they don't burn. And the tilmans are about as cheep as you can get.


35424526323_34e753b7fe.jpg
[/url]Untitled by David Nichols, on Flickr[/IMG]
 
Not much for photos today but I made a lot of progress. I reinstalled the crossmember after final welding, had to tweak it a bit to realign the bolts again. Removed it and cleaned it and painted it black. I then welded the transmission mounts and cleaned them up for paint. While waiting for the paint to dry I figured I'd take care of the leaky wheel seal that I've been avoiding. It went as expected, a dirty greasy mess, but at least it's done.The crossmember bolted in just fine, although it is very heavy now.

36077357262_d019d6356c.jpg
[/url]Untitled by David Nichols, on Flickr[/IMG]

35438824053_1c765abf0d.jpg
[/url]Untitled by David Nichols, on Flickr[/IMG]

I was able to get a bunch of the wiring figured out. I started making a list of what I need for harnesses and plan to make them at work. I got the winch solenoid mounted on the c.side fender and made up some 2ga cables to go to the winch. I hate the idea of using a regular hook on synthetic winch rope so I figured I'd use a 3/4" clevis. It should be big enough to handle most straps, and I'll probably carry more with me anyway. I added a 5/8' eye bolt to the top of the bumper to be able to stow the winch line, looks kind of dumb but serves a purpose.

I started to take the 30 spline drive flanges off and before I even started I realized that I like a friggin idiot, I ordered the wrong drive flanges. I ordered an internal drive flange kit and I need an external bolt on style. I guess I was thinking about the Chevy Dana 60 and totally forgot that it has Dodge hubs. I got them from Low Range Off Road and the options for return are either store credit for full price or 15% re-stock fee. I'll go for the store credit. I ordered the right ones from East Coast Gear Supply P/N D60-SLUG-Dodge, for another F*&$%@g $250.00 WTF :flamemad:. I figured I'd at least tear it apart and get the alloy shafts installed, that way when the right ones come in . I started pulling the s.side apart and just like SkinnyRidgeMJ said, the bearings are bound on the spindle. He thinks the last broken shaft swelled the spindle and I have to agree. I tried to pry it off with no luck, so I 'll have to try and get it into a press and do it that way. Luckily it has the holes in the brake rotor so I'll remove the spindle tomorrow and see what happens.
 
Today I installed the 35 spline alloy shafts. it was pretty strait forward other than the s.side spindle is swelled pretty bad from a previous broken stub shaft. The cut outs in the rotor saved my ass, I was able to remove the whole assembly and get it on the bench to press it out. Once I got the axle puller set up I was able to get them separated. It defiantly took a fair amount of force to press it out though.

35468510253_85251ded30.jpg
[/url]Untitled by David Nichols, on Flickr[/IMG]

35468510253_85251ded30.jpg
[/url]Untitled by David Nichols, on Flickr[/IMG]

The truck came with a spare spindle so I put that in, but Im thinking about having the spindle turned down so I can reuse it. Either way, the truck is ready for when the drive flanges come in.

35441700794_fabe01c8b5.jpg
[/url]Untitled by David Nichols, on Flickr[/IMG]

Once that was done I moved on to the front bumper/grill area. I finished up the winch by installing a marine trolling motor receptacle in the bumper, I have another winch with a 20' or so cable with that end on it so I figured I'd set this up to work with it.

36107513112_85933f49c4.jpg
[/url]Untitled by David Nichols, on Flickr[/IMG]

Installed a couple rock lights under the front bumper and put the nose back on. I figured out the wiring for the front lights so I can hook up the markers and turn signals later on sometime. I put the grill back on for now just so I can see what the front end looks like. It will come back off once I make up wire harnesses, but that can be done later. I thought the eye bolt in the bumper was going to look stupid but I like how it came out, nice and clean. And the winch line should be somewhat protected, hopefully!

36232736556_389c32b7ff.jpg
[/url]Untitled by David Nichols, on Flickr[/IMG]
 
D60 35 spline drive flanges

Finally got the correct external drive flanges. I got them from East Coast Gear Supply (Dana 60 Drive Flanges (35 SPLINE)- ECGS External Hub (p/n: D60-SLUG-Dodge) $250.00 plus shipping). These are identical to the RPM Off-Road drive flanges, right down to the same bolts, O-ring and spiral ring, the only difference is the outer cap.

35504940414_e869a6f819.jpg
[/url]Untitled by David Nichols, on Flickr[/IMG]

36296333116_e9245abc94.jpg
[/url]Untitled by David Nichols, on Flickr[/IMG]
 
Finally decided to tackle the transmission tunnel, the most important function. It must be removable!, and hopefully look cool. I was planning to make it out of 16ga sheetmetal to keep it light but once I started I just had to make sure it was rugged enough. So it ended up being made from 1/8". So now I guess I can call it structural. Of course everything on this truck is custom fabricated around the drivetrain so because of that nothing is straight. There isn't a strait piece of metal on it, and on top of that I was running short on material so I gave it a funky angle on the face of it.

36349235076_a36d53bca9.jpg
[/url]Untitled by David Nichols, on Flickr[/IMG]

35558573604_1746c2b366.jpg
[/url]Untitled by David Nichols, on Flickr[/IMG]

36226121972_688cc59ed3.jpg
[/url]Untitled by David Nichols, on Flickr[/IMG]

35558573584_0c6257759a.jpg
[/url]Untitled by David Nichols, on Flickr[/IMG]

36349235056_0cbca342c5.jpg
[/url]Untitled by David Nichols, on Flickr[/IMG]

36393989555_66ff63ebff.jpg
[/url]Untitled by David Nichols, on Flickr[/IMG]

I plan on making wire harnesses for the truck later sometime. I'll add switches to the cover at that point. I figure I'll probably put a 12 pin or so Deutsch connector under there so it can be easily removed.
 
Added 175 amp quick connect under the hood, it really sucks having to crawl under the truck to jump start it. I'll add another one in the bed too. It will serve two purposes, jump starting and to power the removable winch that will be added at some point.

35586057743_ee7dbdf880.jpg
[/url]Untitled by David Nichols, on Flickr[/IMG]

Pay no attention to the wiring, I know it looks like shit but like I said, new harnesses are in its future. It should be nice and pretty then.

Truck is ready to wheel so tomorrows project will be installing the axles in the trailer I built in 2001. I built it with mobile home axles and while they served a purpose its time for real axles. They will be replaced with 5200 lb Dexter's

36393989625_e69c2b78d2.jpg
[/url]Untitled by David Nichols, on Flickr[/IMG]
 
Picking up the axles at NEURA turned out to be a bit of a pain in the ass. It didn't help that I got there 30 minutes before they closed for the weekend and they had issues with the orders for the two customers in front of me. Apparently we need to learn how to order axles, we called for a price which they gave and when we said we wanted to order them they sent over an order form. Of course we filled out all spaces including the eye to eye measurement for the springs. So when they gave me the price for the axles and u-bolts I almost shit. It was expecting it to be around $550 + u-bolts, but it ended up being almost $700. After a bit of confusion and a conversation with the manager I offered to take them with the springs if he could help me out and discount the springs a bit. He must have just wanted to go home for the weekend because he gave me the package for the original $550. I've got to say I was pretty impressed that they honored the original quote even after I told him that the error was on my part, not theirs. I will defiantly buy from them again! Anyone looking for trailer parts should check them out at www.nueratrailerparts.com

Replacing the trailer axles today was an absolute SUCK job. I was able to remove one nut out of 14, and on that one the bolt head broke while trying to remove it :flamemad:. Ended up cutting the axles out with the plasma cutter just to gain some space to work. All but one bolt broke, three bolts broke on both ends so I got to spend some time drilling them out enough to hammer the leaf eyes out. Got to spend a fair amount of time with the 36" 3/4" drive ratchet and 3/4" drive impact gun which hasn't been used since I stopped doing hydraulic service in 2014, so I guess I should be happy that I can justify holding onto them. The wife had to run for parts for me, but I think she was happy to do so just so she didn't have to listen to the impact gun anymore. While waiting for her I made a spare tire mount. All in all I guess it wasn't that bad, the axles are in and the trailer is ready. For the first time in over 15 years I can be confident that the brakes will work when I need them, especially important since I'm towing with a '14 1500 Silverado With any luck I'll get the trailer registered Wednesday and hopefully be able to get the truck out on its/my maiden voyage next Sunday.
 
Finally covered up the tail light openings tonight, wrapped them with some 16 ga sheetmetal. Doesn't look as bad as it did but still looks like crap, hopefully it will look a little better with lights and paint. I'm trying to get it covered up and at least put the lights in it, they won't be functional but at least they'll be there. I'm planning to go on my first trail run this Sunday and figured just in case we end up on the road for a bit, I'd at least make some attempt to make it look somewhat roadable.

On another note, I started making some of the new wire harnesses at work today. I'll probably make new ones for the whole truck and do the installation later sometime.

36445148666_c21a00029b.jpg
[/url]IMG_4103 by David Nichols, on Flickr[/IMG]

36321654212_5744017de2.jpg
[/url]Untitled by David Nichols, on Flickr[/IMG]

36321652682_2d90ef6608.jpg
[/url]Untitled by David Nichols, on Flickr[/IMG]

36321654052_42c8fd2d7a.jpg
[/url]Untitled by David Nichols, on Flickr[/IMG]
 
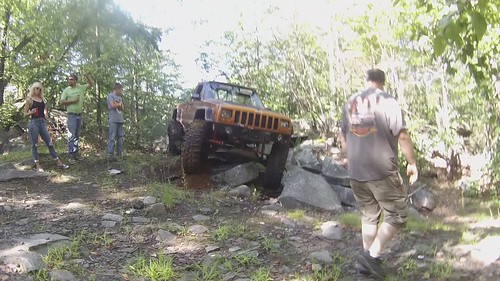
So I was finally able to get this thing out in the woods and it did way better than I could imagine. It is unbelievably stable and climbed like a friggin goat. I was impressed with how it just sticks to whatever I'm trying to go over. Unfortunately I don't have any pics of video yet but will post them as soon as I can. The only problem i had was the fan relay had a thermal event and I started overheating on a mother of a climb. I repurposed a light relay and was back in business pretty quick. The Painless Wiring system will be getting replaced quicker than I initially thought now, they severely under size their wiring causing a lot of head aches.

After this run I see the need for a few modifications and changes. I think the first thing I'm going to do is upgrade the Johnny joints on the front 3 links (they are wiped) to a heavier Ballistic joint. the next thing will be to address the heat in the cab, holly shit is it hot in there. I think I'll probably work on a set of tube doors and I'm thinking about either a sun roof type of thing or just removing the sheetmetal from the roof entirely. I've got to find a way to get the heat out of the cab, because holly F%&$ is it hot in there, especially for those WTF moments.

I haven't figured out how to insert videos but if you want to see them, heres the link to my You Tube page.

https://www.youtube.com/channel/UCTWARJjLDIFzXfMkmyn42DQ?view_as=subscriber
 
Heat inside??

I wrapped my pipe the whole way from the collector to the cat (which is past the cab). Helped a lot, but it also increased CAT temps...I'm always worried about melting the cat.
 
Heat inside??

I wrapped my pipe the whole way from the collector to the cat (which is past the cab). Helped a lot, but it also increased CAT temps...I'm always worried about melting the cat.

Ya, the heat in the cab is a bit excessive. I think removing the doors will make a big difference. And once I do the roof it should be like driving a wrangler with the roof off. I thought about wrapping the exhaust from the header to behind the cab but I think I'll see how this works first.
 
What air pressure do you have in the tires in the video?

Barely see any sidewall flex

Wayyyyy to much psi, I was running around 12psi. I want to go lower but I was worried about blowing a bead. And there isn't anyone in our group running a compressor. It was a good thing too, one of my buddies lost his clutch in the mud so he ended up on my trailer and I drove the Comanche home. It was about a 10 mile drive so not too bad, but it would have sucked with lower psi. I'm seriously thinking about Coyote internal bead locks.
 
Here are a few videos of the Comanche on my nemesis trail. I've tried this three times in the past with a pretty decently modified '86 Blazer and failed miserably, I never made it past the tight section. It turned out much better with the Comanche.


36520820091_cf6a69e537.jpg
[/url]Entering "Sheetmetal" by David Nichols, on Flickr[/IMG]

Bottom of "Sheetmetal" by David Nichols, on Flickr[/URL]

[url=https://flic.kr/p/XAvVSu]Sheetmetal by David Nichols, on Flickr[/URL]

And of course when I got to the top don't I dropped the front axle on a section of ledge and was stopped dead. And then my buddy said that I still didn't complete Sheetmetal. I got back in, turned the wheel a little bit, and just idled out. Man I love this truck


[url=https://flic.kr/p/WBXogK]Getting unstuck at top of "Sheetmetal" by David Nichols, on Flickr[/URL]
 
Finished up a few things before hitting the trail this morning. Bolted up the modified / welded fuel filler. I wasn't able to just weld the holes so I welded 2" or so pass all the way around the filler tube. I know, it looks like ass but it doesn't leak anymore and I can fill it one click below full speed. Much better than trying to fill it as slow as possible and still having it click off every second.


36510532892_eec845acab.jpg
[/url]Untitled by David Nichols, on Flickr[/IMG]


Finished the removable doors also, good thing too. The roll pins on the passengers door were both broken. Once I cut the lower section of the top hinge and drove the piece out the door fell off. I guess that was the only thing holding it on. When I installed the new roll pins I offer them so that the top hinge will contact first, hopefully that helps with putting them back on. I tried to put one of them on but couldn't do it, these things are heavy with the 1/4" plate boat sides. Probably have to use the engine hoist to install them :laugh:


This is the view from my deck, I love it. The wife, not so much.


36284350200_351d7944c6.jpg
[/url]Untitled by David Nichols, on Flickr[/IMG]


36633691186_827952b24a.jpg
[/url]Untitled by David Nichols, on Flickr[/IMG]


Got to do some wheeling today and again, I'm defiantly not disappointed with this truck. Still got a lot of tweaking to do to make it my own but its pretty great already. And no, I wasn't able to climb up that spot, certainly not for the lack of trying though.

36284329770_6edaa134e1.jpg
[/url]Untitled by David Nichols, on Flickr[/IMG]


35870493983_2451bc2992.jpg
[/url]Untitled by David Nichols, on Flickr[/IMG]


36510538322_ee4539e699.jpg
[/url]Untitled by David Nichols, on Flickr[/IMG]


36510560482_de0c1a7f14.jpg
[/url]Untitled by David Nichols, on Flickr[/IMG]


Oh ya, and for the second weekend in a row I "got to be the tow truck". Last week a buddy in a Wrangler on 35s lost his clutch, his was an easy tow out on some class 6 roads. Today a some guy in a Cherokee on 36" x 15"s blew his transfer case. His buddies were going to try to hook two Jeeps together to try and pull him out but weren't sure that they could get him up some of the climbs, so like an idiot, I offered to pull him out. This time I had to pull him out from the end of the power lines. We had to go up some pretty nasty climbs too. The open diff guys struggled pretty bad getting up two of them them and I was amazed that I was able to pull him up them both. It wasn't a cake walk by no means but I was able to get him over them unassisted. I haven't been able to weight the truck yet but I'm guessing its real heavy! Once we got to the point of getting out I found out that we had to go over a stone wall, through some pretty tight woods and back over the stone wall again to the dirt road, all I can say is WTF! Anyway, they took off from there and we headed back in to the power lines and I got to play some more on some pretty cool stuff. I think the best part is that one of my younger buddies, Kevvin said last week "you're going to be the old guy that watches everybody beat the shit out of their rigs trying to go up something and then just crawls right up it". Well today was just that, except for the old guy part, I'm not feeling that old, at least not today LOL. All in all, I love this truck, I can't imagine how it will do when I switch over to 4 link.
 
Back
Top