• Welcome to the new NAXJA Forum! If your password does not work, please use "Forgot your password?" link on the log-in page. Please feel free to reach out to [email protected] if we can provide any assistance.

beater!

Thanks guys. I'm starting on my long list of electrical items so won't have much in the way of pics on that stuff.

The first item is a bypass for the fog light switch so that they can be used with any other lights. I had hoped to wire this into the parking light circuit but I couldn't get enough of the headlight switch wiring exposed to feel comfortable, so I used markw's hack and tapped into the headlight power circuit at the delay timer below the switch. This means the fogs can be used when no other lights are on, but unfortunately means its constant battery power.

Just like the instructions say, I cut the violet/white wire a couple of inches back, then extended the line down with a soldered piece of wire. Once I got to the shutdown timer, I pulled the orange/grey wire out of the socket, folded back part of the tab piece, clamped the new wire in place, and put it all back together.

Fog_Light_Bypass.jpg


I have plans to install a bunch more lights and will change to ignition power when I put in those switches.
 
I switched the drivers door connector to the Amphenol milspec 28-11 set that I had (notes are in the amended writeup)

Amphenol_Connected_In_Door.jpg


I have also started putting the interior together. The "limited country edition" is working out pretty well I think

Limited_Country_Interior_1.jpg


There sure are a lot of shades of gray in there. I may have to Fusion the interior
 
I was experimenting with some under-the-dash speakers to replace teeny little factory 3 inch units but couldn't make anything work. Along the way I'd picked up these 4x6 speakers for $25 from Crutchfield during one of their sales and decided to try and mount them into the kick panels

4x6_kick_speakers_marked.jpg


4x6_kick_speakers_installed.jpg


They sound pretty good and it will be nice to have forward speakers when the doors are off. However it's pretty hard to get all the wires and everything into the kick panels with these things, and some smaller 5.25 or even 6.5 inchers would be a lot easier to deal with. As it stands right now I will probably have to drill new holes in order to get the kick panels screwed down fully.
 
I got around to mounting the switch for the hatch work lights. Basically the plan here was to have it so that whenever the hatch was closed, the work light circuit would be interrupted so that the lights could never come on if the hatch was closed. This is separate (kinda) from the cargo lights in the back, which I want to be able to turn on and off at will. But since the work lights are tied into the cargo light switch, I needed a way to interrupt the circuit to the work lights separately.

More specifically, I wanted the work lights setup so that you would have to explicitly toggle a manual switch to turn them on, so that they would not always be on whenever the hatch was open (this would unnecessarily drain the battery, especially if I go halogen bulbs). However I also wanted an automatic switch that would kill the lights whenever the hatch was closed, even if the manual switch was left on. So basically this is a safety off switch.

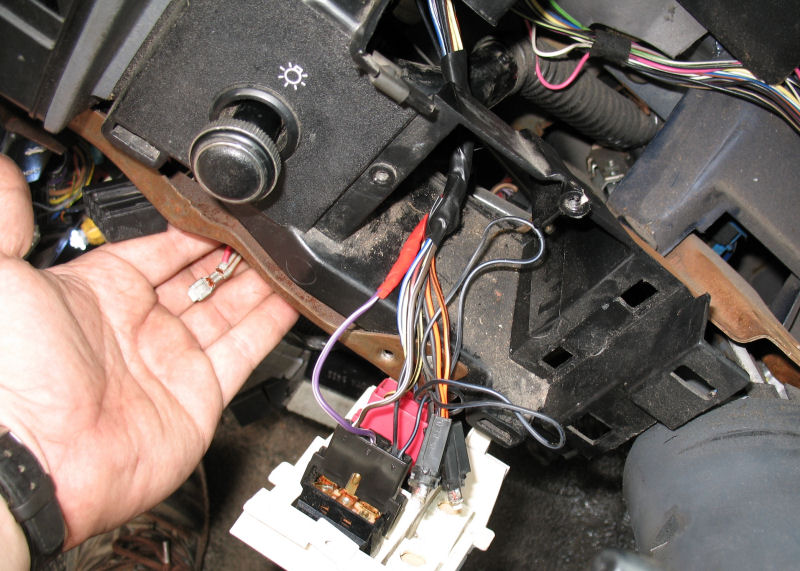
One way to do this would be to use a jamb switch of some kind, but I couldn't find anywhere convenient to mount one. Later on I remembered that I had bought a magnetic reed switch when I was messing with the doorless stuff as a possible replacement for the door jamb switches, so I decided to try using that. Here is a pic of the switch in question. I believe it is item #65985K14 on McMaster-Carr, which is where I bought it, but I'm not 100% on that. It's a $20 switch so that and other details are right. Basically it's a switch with three wires (see below), a magnet, and four nuts that can be used to mount the two pieces.

Magentic_Reed_Switch.jpg


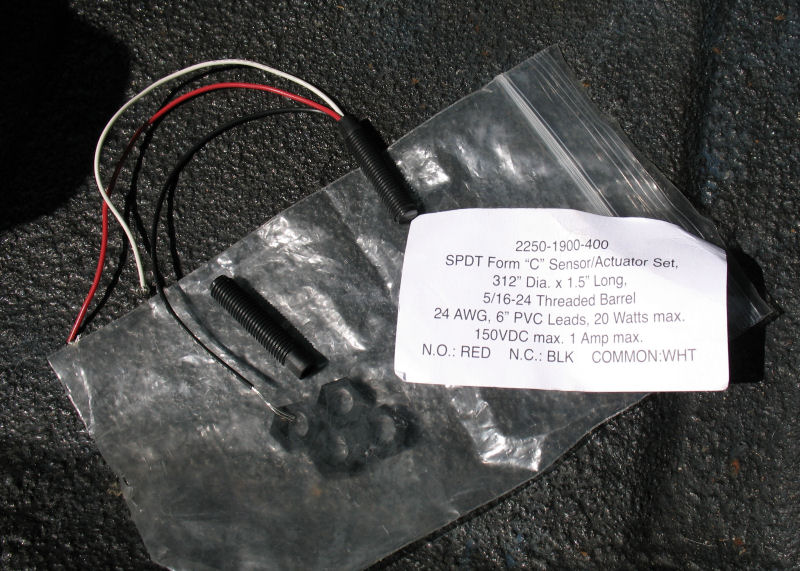
The switch has separate wires for constant (white), normally-open (red), and normally-closed (black). Pass a magnet in front of the tip of the switch, and red goes closed and black goes open. Move the magnet away and the switch goes back to default. I decided to use the black wire, so that a magnet on the hatch would cause the circuit to stay open, and opening the hatch would move the magnet and the black wire would go closed. This was used to drive a coil circuit on a relay, which interrupted the ground wire to the work lights.

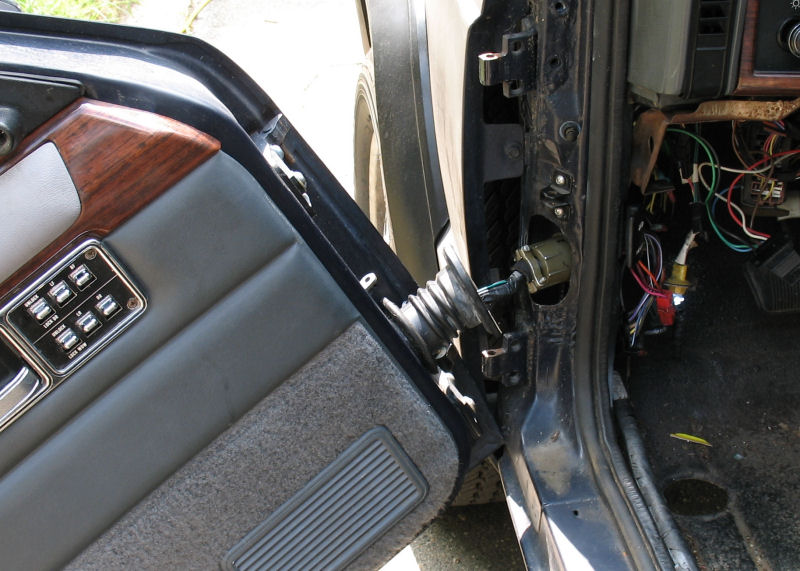
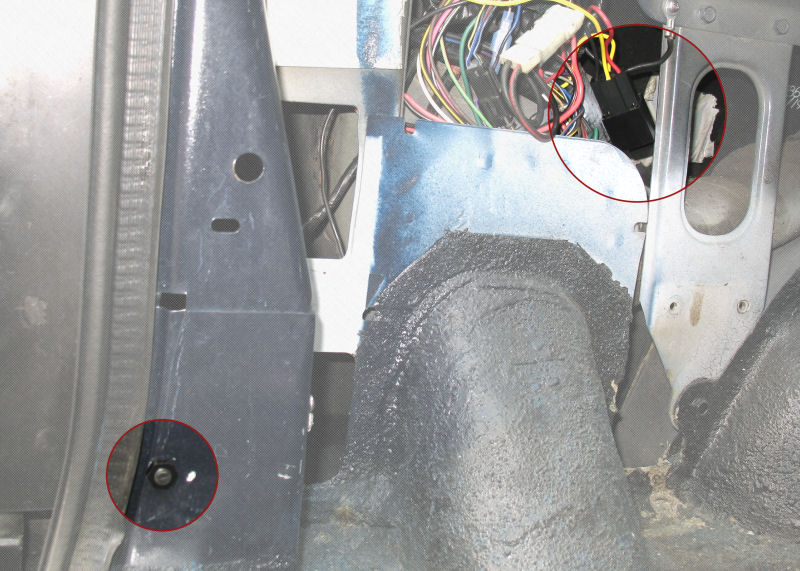
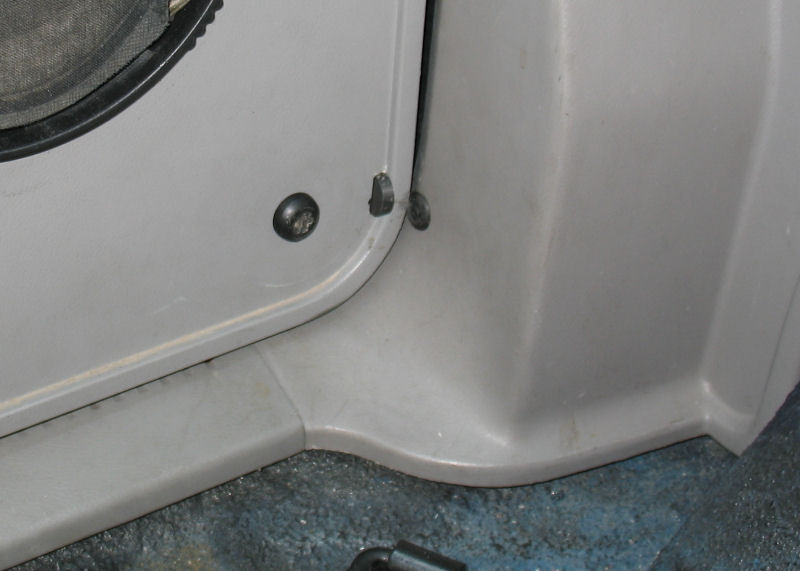
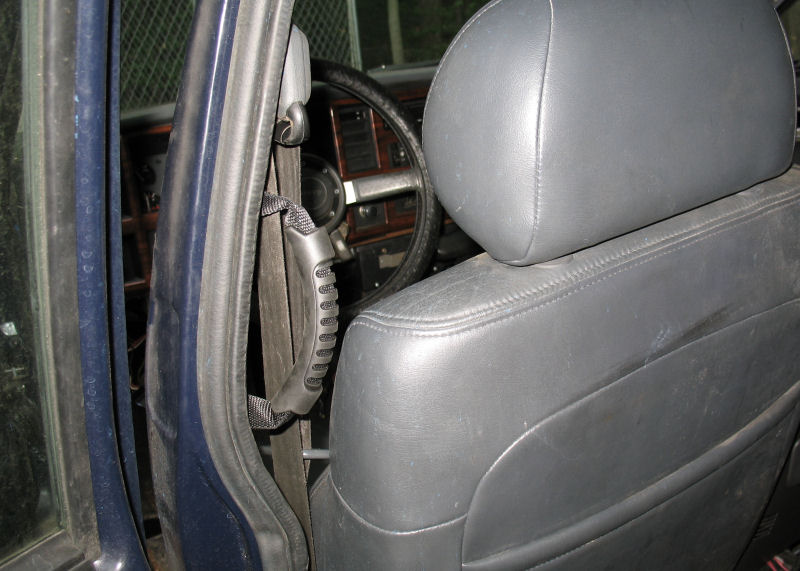
The only part of the hatch that comes inside the jeep is at the very bottom, where the hatch panel meets the scuff panel. There was not enough room under the scuff panel to easily mount the switch so I put it at the bottom of the D-pillar instead. Since this is where all the hatch wiring is terminated in the cabin anyway it made setting up the relay easy too. This pic shows the switch and relay mounted.

Magentic_Switch_Installed.jpg


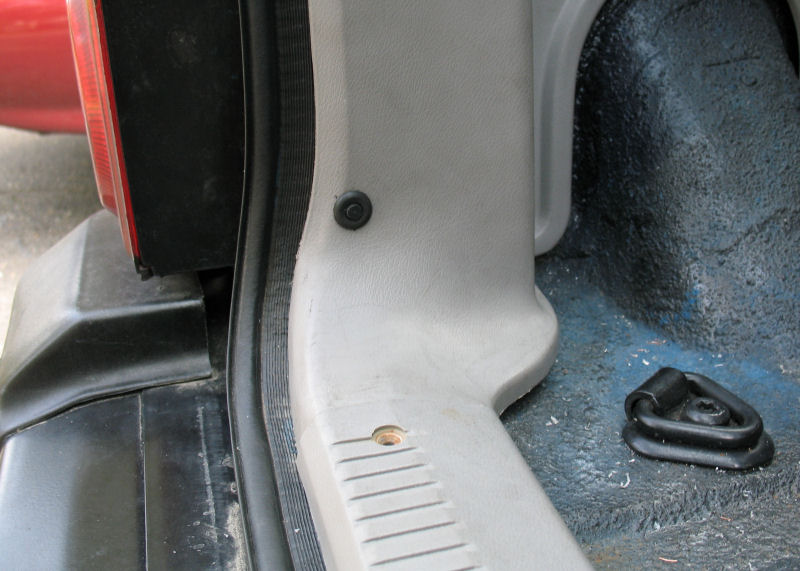
Although the tip of the switch can be mounted almost flush, experimentation showed that the tip needed to come through the panel in order for everything to work reliably. For one thing, the plastic panels down there really interfere with the magnetism. For another, I did not like the idea of the panel banging against the tip of the switch all the time. So I drilled a little hole for the switch tip to stick through and got a rubber grommet to provide some flexibility for the panel and shock insulation for the switch.

Magnetic_Switch_Grommet.jpg


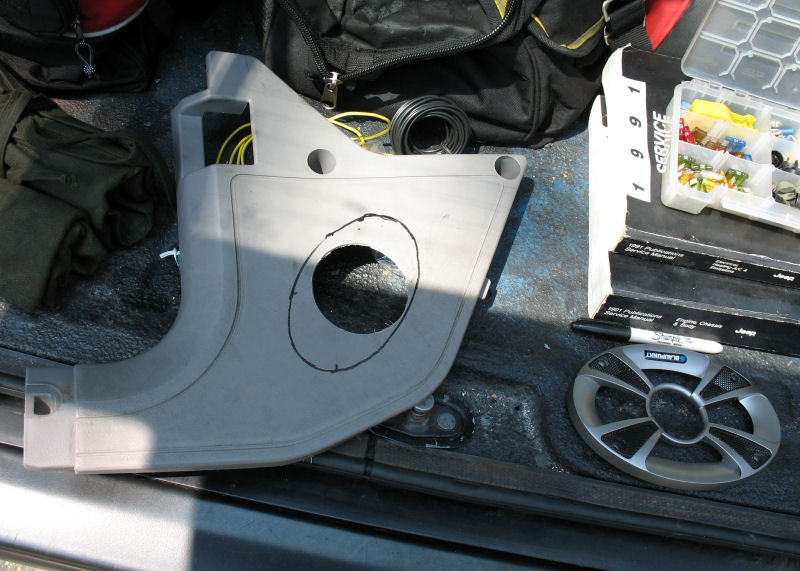
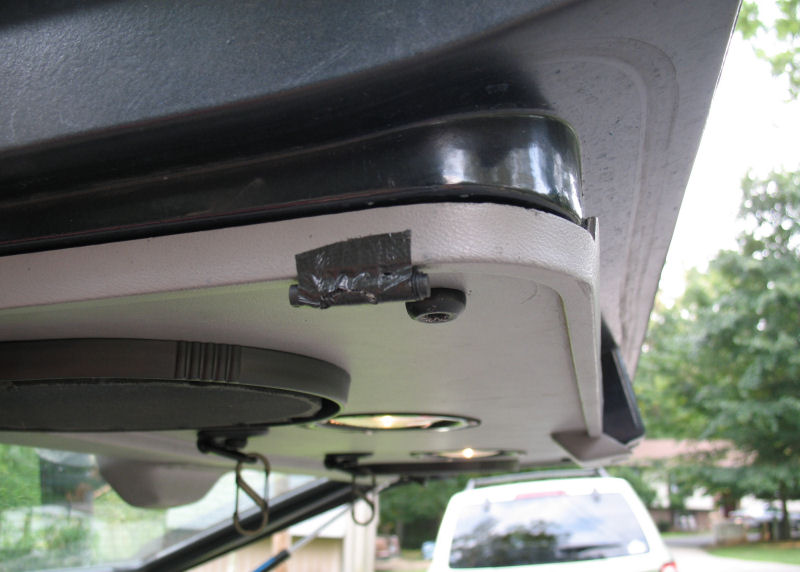
The last part was to mount the magnet. Unfortunately I have not been able to finish this yet due to a couple of problems. However I have temporarily mounted the magnet that came with the switch with some tape, as seen here

Temporary_Magnet.jpg


Although the hatch does come inside at the bottom, it does not come in very far, so the magnet has to stick out the front of the hatch patch in order to pass in front of the switch tip. What I need to do is get a strong magnet that will drive the switch when it gets close to the tip. This works with the magnet in my nut-and-bolt holder, and I have found some small magnets at True Value that appear to be strong enough. Unfortunately I broke my Dremel and so I have not mounted the magnets yet.

With everything put together, it all works as expected. When the hatch is closed, the magnet activates the switch, which prevents the coil circuit on the relay from activating, which in turn prevents the ground circuit on the work lights from activating. When the hatch is open, the magnetic switch reverts to its default position, which closes the coil circuit on the relay, which in turn closes the ground circuit on the work lights. If the manual switch on the cargo lamp is in the right position, current will then flow to the work lights.
 
Last edited:
After considering my options, I decided to mount the True Value magnet behind the lip in the hatch panel. Since I plan to put down sheetmetal and herculiner, the magnet will be fairly well hidden in this location.

Magnet_Test_1.jpg


Although it works here, as you can see the magnet is not directly over the switch, so I will probably relocate one of them later so that the final result is more finished.
 
I've gotten most of the interior pieces reinstalled after making the necessary adaptations for my mods (scuff panels are all that's left and I have to pull the seats for those). They are all in pretty bad shape with cracks and factory dye scratched off, and even some mismatched color pieces. I think I will grab a set of charcoal panels from the junkyard rather than spray bomb these but that will have to wait until the cash is flowing better.

Even now it sure looks better than when I got it. Before

Interior.jpg


And this morning

Limited_Country_Interior_4.jpg


Limited_Country_Interior_2.jpg
 
freakin headliner started falling today.. i'm gonna staple the motherfriendly up there

For a temp solution staples tend to fall out.
Get "bobby" pins from wall mart. They are little hair pins that women use to hold things in their hair. They are straight on one side and rigged on the other.. You can poke them through the back board and it will hold the head liner up without falling out until you get to glue a new piece of fabric up...
 
Last edited:
I have 7 sisters.. those little buggers have been a significant part of many repairs in my house...
 
ehall - your junk is looking pretty darn good. I'm gonna bring my POS up and have you wire some fun stuff in it! :D
 
I've been doing a lot of small stuff like fixing leaks and adjusting brackets which is very time consuming with not much to show for it. However I did get the luggage rack and the old-school ventshades installed, so we can haz pictures of those

Completed_Exterior_Dry.jpg


It's interesting how much that stuff adds to the character of the thing. It's like the way a hat finishes a suit.

BTW here is what it looks like wet, which is how the thing would look if the paint had taken and I'd seen it through to polish

Completed_Exterior_Wet.jpg


I need to get it repainted someday. However I have to strip all the bad stuff off before I do anything there so it will be a while. I kind of like the beat look anyways.

I also have a lot more small-project work to do on it. However the exterior work above were the last major checkoff items so next up will be the suspension work.
 
it looks amazing wet. i cannot believe you went through all that work on that paint and it was f-ed up. kuddos to you i would of lost it and probably burnt it to the ground. hell of a build you have going here. keep it up!
 
What's new?
wavey.gif
Not too much. I started dinkering with the suspension but got sidetracked on fixing the brakes, then went back to the suspension and snapped a breaker bar on one of the rear swaybar nuts :sure: Pissed me off so I wired up power for my radar detector so I could move it between the Jeep and Cadillac, then pulled an autodim mirror from a ZJ and installed that. I got another couple of breaker bars but I think with the miles on this puppy I am going to need to take the jeep and parts to the shop where I did the engine swap and use their resources. That means money which is still tight.

I did some more work to the Cadillac though, since I have been neglecting it. I knocked out about 20 things on that to-do list, so that's good :thumbup:
 
Back
Top