barillms
NAXJA Forum User
- Location
- Eastern Ohio baby!
hey guys, I wanted to post this on here to see what I should do.
I built a beefy long arm crossmember with intentions to build a new Y link radius arm front suspension. Then the guts on pirate talked me into doing a 3 link and I went for it.
My LCAs are 39" long 2" square, and my upper is 31" and I wanted to mount it on the drivers side because there's a bit more room there & also, I built a truss... So I want to use it. There isn't much room to build a bracket on my crossmember because the driveshaft.. and I might be able to squeeze a bracket between the yoke & the transmission, but the transfer case linkage is in the way.. and I really don't want to try to move it.
My solution was a unique one, it was the perfect location for my link geometry.. And it also fit the length of my upper and was clear of any obstructions, so I went with an idea I had... And honestly it tubed out exactly as I visioned.
I build a 1/4 plate that conforms to side of the transmission tunnel, and build a bracket that mounts to this plate & protrudes through a hole in the floor from the cab. This plate is welded to the tunnel and bolts using an inner plate that sandwiches the unibody material between two 1/4" plates.. And bolts with 10 bolts and locknuts on the inside. Here are some pics:
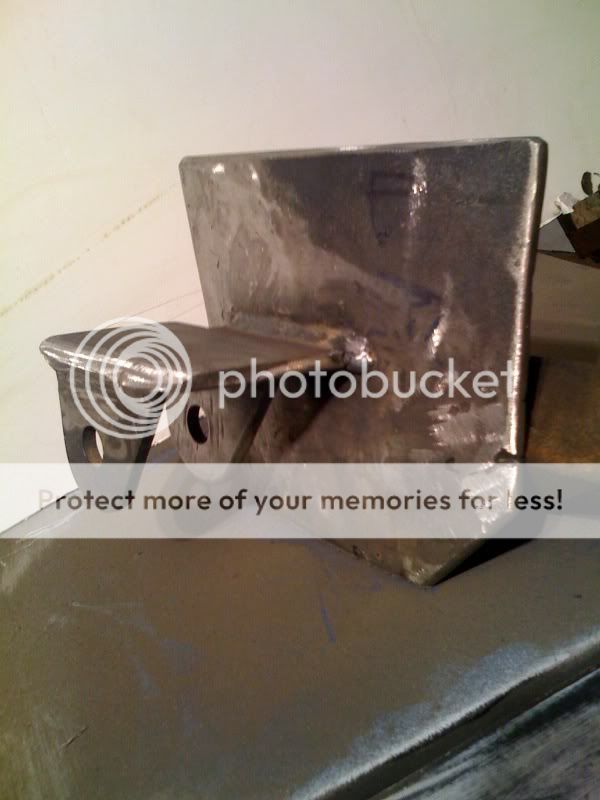
Plate position while building, 8" wide x 6" high:

This is an unfinished pic of the bracket & outer plate, I added two triangular gussets on top the bracket reinforcing the attachment tonthe plate:
The bracket goes through the hole in the tranny tunnel and the plate will be welded with large tacks around the perimeter. There will be 10 1/2" bolt holes also drilled around the edge where the bolts will tighten against an inner plate sandwiching the sheet steel between the two heavy plates:

The inner plate I didnt take a photo of before install.. It's a frame, also 6x8" conforming to the shape of the tranny tunnel with the center cut out so it can slip over the bracket & then tightens down with 10 all steel lock nuts. Remember the outer plate is welded to the floor.. And bolts to this plate. Once tightened down & threadlocked.. It really created a strong & solid bracket mount fir my upper control arm in my 3 link:

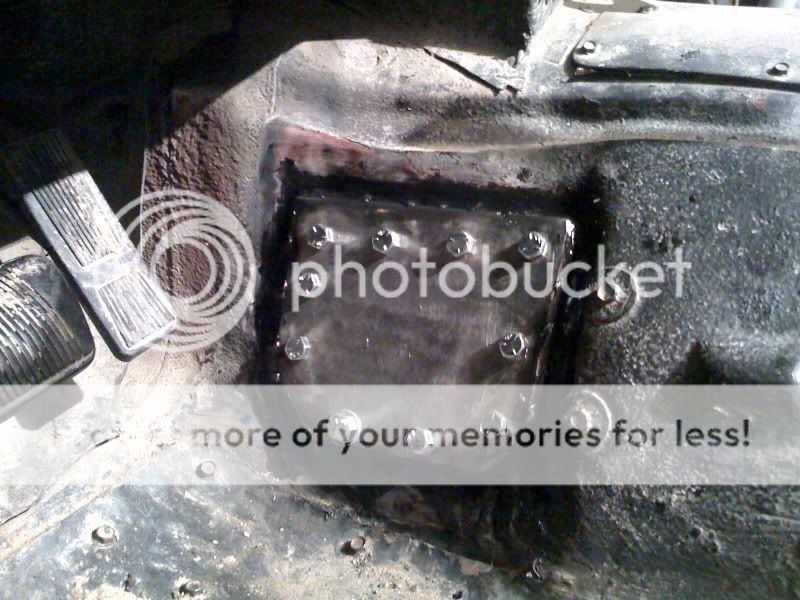
From the front.. You can see the gussets on top the bracket in this pic. I hopped black RTV around the edge to seal it up.. And on the nuts to keep them from vibrating loose:

Here's a final top view. Again I sealed the edge.. This is a permanent fixture, so it will bedlinered over:
The Deal:
I thought this was an ok solution, but in my build thread on Pirate.. It's getting beat up pretty bad. I assure you this mount is very strong and I really want to use it.
People seem to think the unibody will rip apart? They think the floor will tear and be dangerous. The push & pull link forces are parallel with the sheetmetal..
I don't know what to do?
DO YOU guts think this will work?
Please don't put it down... Just let me know some honest feedback and advice. I'm not an engineer. Thanks
I built a beefy long arm crossmember with intentions to build a new Y link radius arm front suspension. Then the guts on pirate talked me into doing a 3 link and I went for it.
My LCAs are 39" long 2" square, and my upper is 31" and I wanted to mount it on the drivers side because there's a bit more room there & also, I built a truss... So I want to use it. There isn't much room to build a bracket on my crossmember because the driveshaft.. and I might be able to squeeze a bracket between the yoke & the transmission, but the transfer case linkage is in the way.. and I really don't want to try to move it.
My solution was a unique one, it was the perfect location for my link geometry.. And it also fit the length of my upper and was clear of any obstructions, so I went with an idea I had... And honestly it tubed out exactly as I visioned.
I build a 1/4 plate that conforms to side of the transmission tunnel, and build a bracket that mounts to this plate & protrudes through a hole in the floor from the cab. This plate is welded to the tunnel and bolts using an inner plate that sandwiches the unibody material between two 1/4" plates.. And bolts with 10 bolts and locknuts on the inside. Here are some pics:
Plate position while building, 8" wide x 6" high:
This is an unfinished pic of the bracket & outer plate, I added two triangular gussets on top the bracket reinforcing the attachment tonthe plate:
The bracket goes through the hole in the tranny tunnel and the plate will be welded with large tacks around the perimeter. There will be 10 1/2" bolt holes also drilled around the edge where the bolts will tighten against an inner plate sandwiching the sheet steel between the two heavy plates:
The inner plate I didnt take a photo of before install.. It's a frame, also 6x8" conforming to the shape of the tranny tunnel with the center cut out so it can slip over the bracket & then tightens down with 10 all steel lock nuts. Remember the outer plate is welded to the floor.. And bolts to this plate. Once tightened down & threadlocked.. It really created a strong & solid bracket mount fir my upper control arm in my 3 link:
From the front.. You can see the gussets on top the bracket in this pic. I hopped black RTV around the edge to seal it up.. And on the nuts to keep them from vibrating loose:
Here's a final top view. Again I sealed the edge.. This is a permanent fixture, so it will bedlinered over:
The Deal:
I thought this was an ok solution, but in my build thread on Pirate.. It's getting beat up pretty bad. I assure you this mount is very strong and I really want to use it.
People seem to think the unibody will rip apart? They think the floor will tear and be dangerous. The push & pull link forces are parallel with the sheetmetal..
I don't know what to do?
DO YOU guts think this will work?
Please don't put it down... Just let me know some honest feedback and advice. I'm not an engineer. Thanks
 member, and have built their own rigs, so you got some experienced comments. If you're really looking for advice, which I think you are, be sure to put more weight in the advice of guys who have fabbed before, and not some random comments from folks on the internet who haven't actually done it before.
")
