- Location
- Foresthill, CA
Problem statement:
The spring pivots on the rear of my junk were giving up the ghost, the outside support was collapsing into the floor, and the blind nuts were both broken off inside the boxed section of chassis. They were junk.
I was originally on a rear 4 link path, but decided against it for two simple reasons. (1), i did not want to cut up the rear body work to do it correctly and (2) the leafs will keep up with any destination I plan to take a full bodied rig with a family on board.
Opportunities:
1) I noted that there was some room for modifying the geometry of the OEM set-up as well as some of the mods I had implemented over the years. The spring pivot had room to move down almost a full inch without affecting ground clearance at all, so I designed that in to the new pivots.
2) The shackle side had been modified by me when I was running a set of cobbled together leaves that were too short. You'll recall that I had built a plate on the bottom of the OEM shackle box and pivoted new shackles on that plate in an attempt to get better feel and articulation from the cobbled together pack. That worked until I bought Paul Sinclair's lightly used Nationals about 4 years ago. They are 1" longer than OEM, and put the modified shackle at too much of an angle, which wreaked havoc with spring rate. Essentially, the rate was soft for most the travel, but got very stiff very quickly as the shackle flattened and forced the spring to try and pull itself apart to get the last 2 inches of up-travel. That's pretty hard on springs! I decided to cut my old shackle hangers out and go back to the OEM shackle mount with a 6" long offset shackle that I built. So with that:
My son Matthew and I refreshed a set of 11 leaf Nationals. These are Fishboys old springs, and they are very good. A nice combination of load carrying and flexibility. Military wrapped, with an extra snail leaf on top to control drive torque. We put in a new center pin and replaced a handful of spring pads:

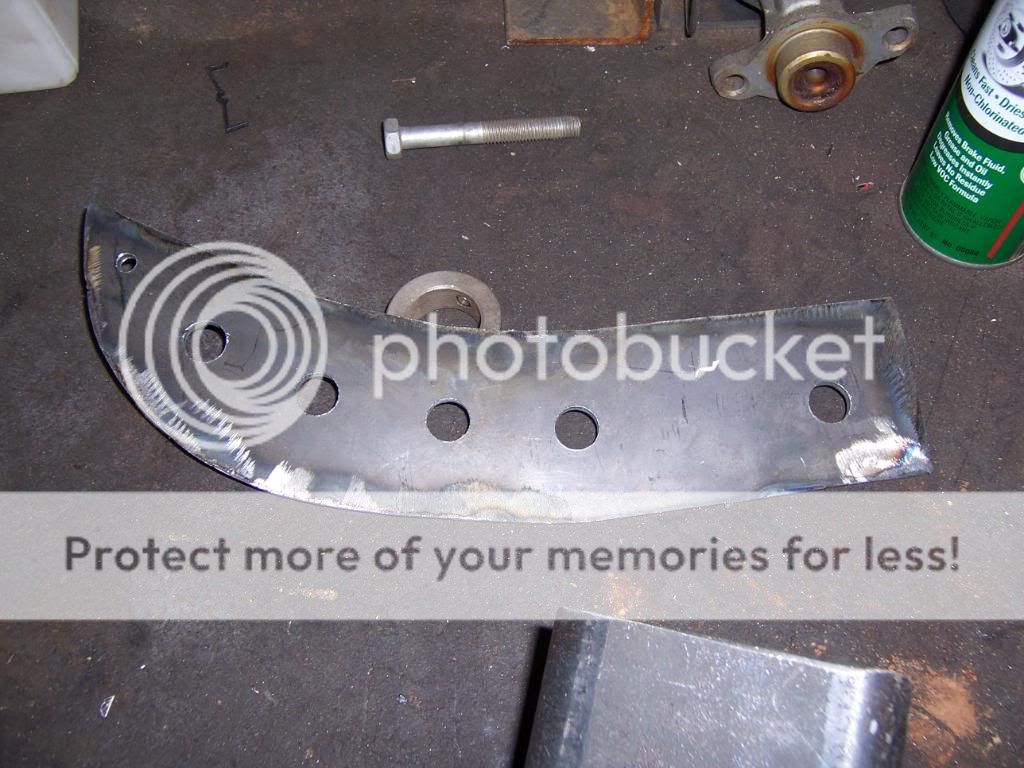
Obviously, I had to build the new hangers necessary to hold the front of these springs. I also took the time to build a reinforcement plate to distribute the load along a greater portion of the rear frame rail :

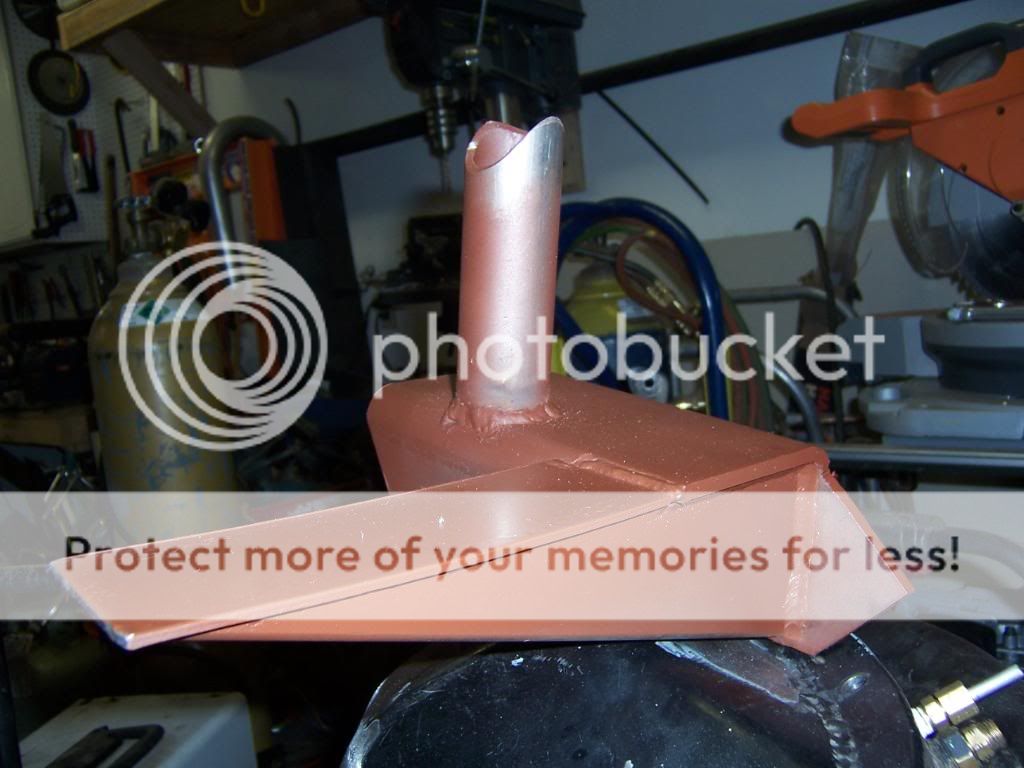
While this was likely plenty of renforcement, I wanted to tie the outside of the spring hanger to something. I decided the best thing to do was to run a vertical tube up into the passenger compartment and build a new tubular crossmember that ran from door sill to door sill. I also wanted to tie it into the 2x6" box I use for a rocker panel. With this in mind, heres the new hanger:

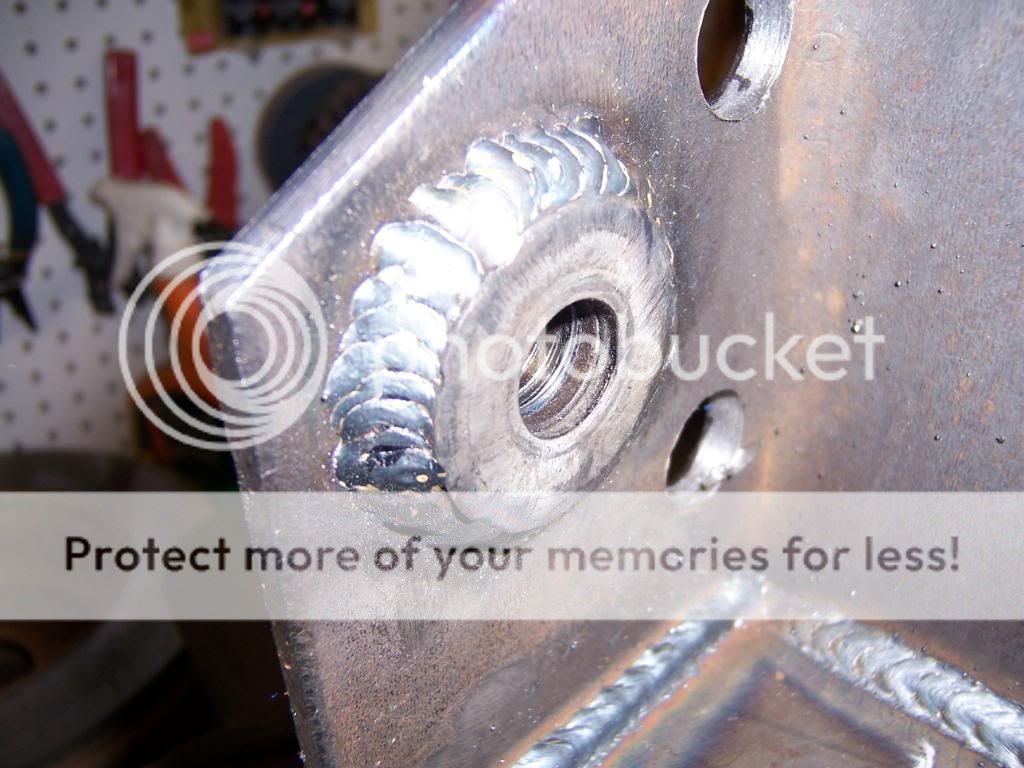
The OEM setup has the spring spaced away from the frame by about 3/4" inch. My reinforcements were about 1/4", so I needed to add a half inch of spacer:
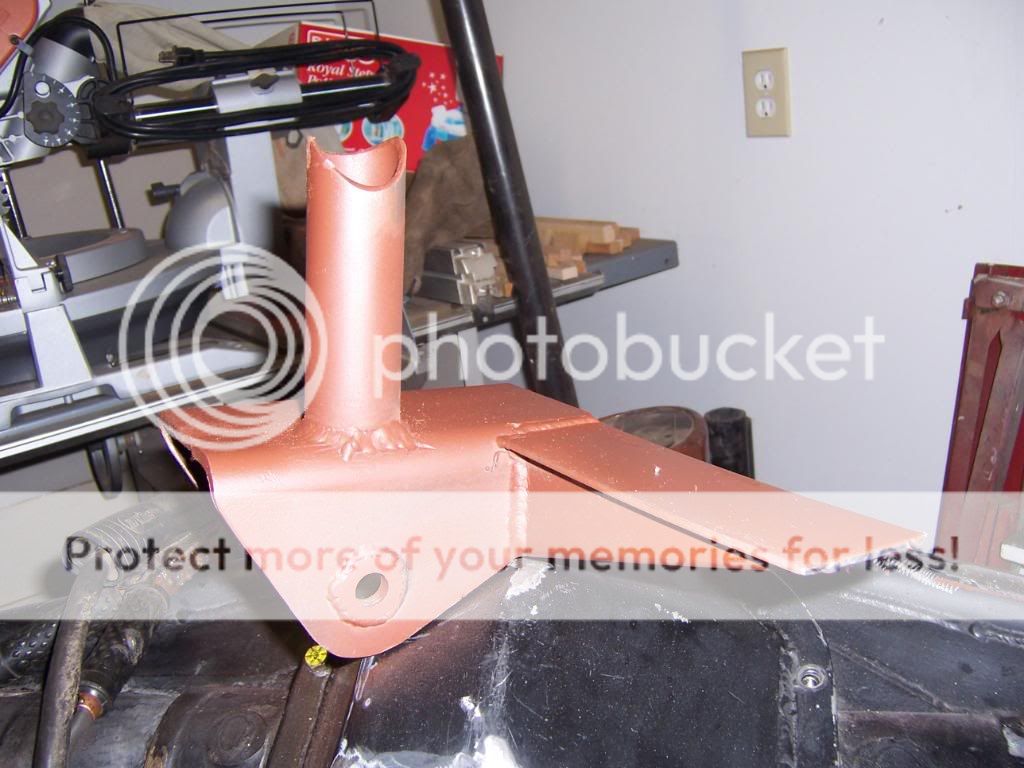

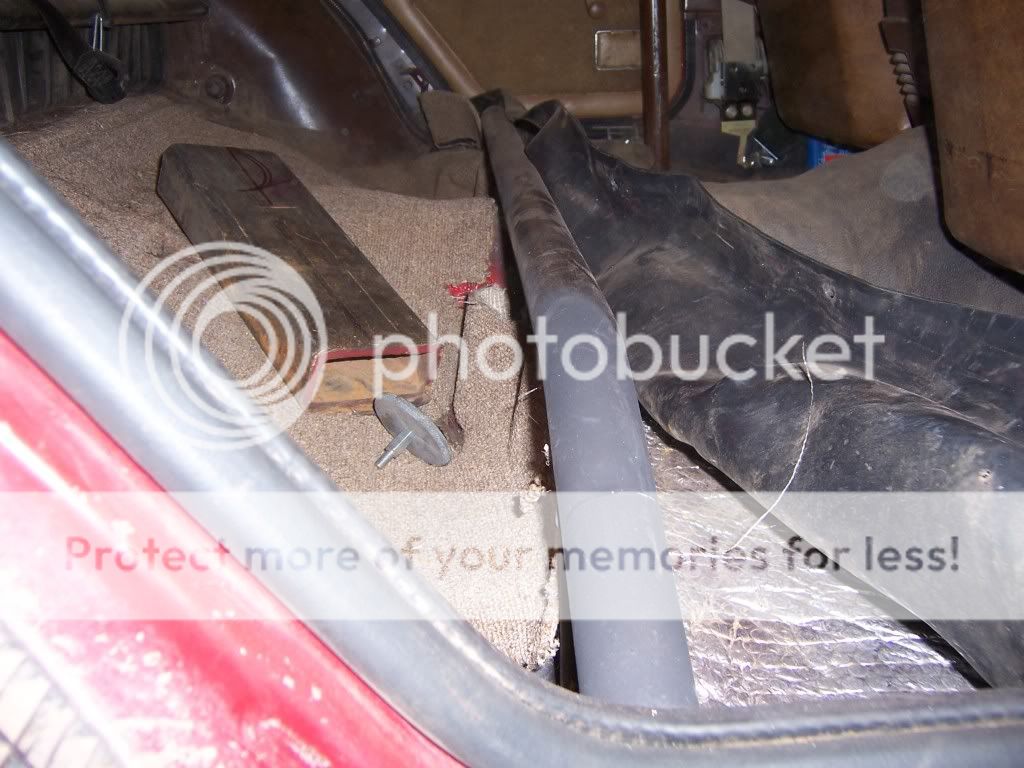
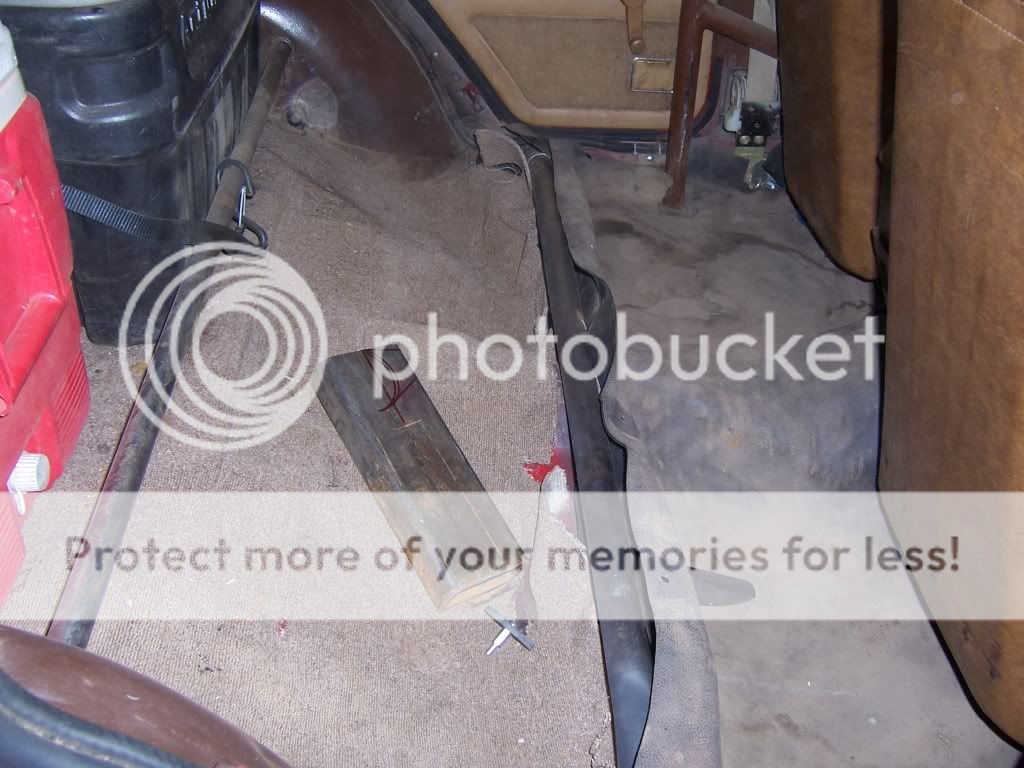
And here is how it ties into the inside. The tube is a 1.5" x .90"wall piece of DOM that is welded to the top of the (trimmed) OEM seat mount/crossmember. The OEM piece has been rewelded to the floor along it's length. My son's (and eventually daughter's) seat will be mounted to the new tube with some sort of tab.

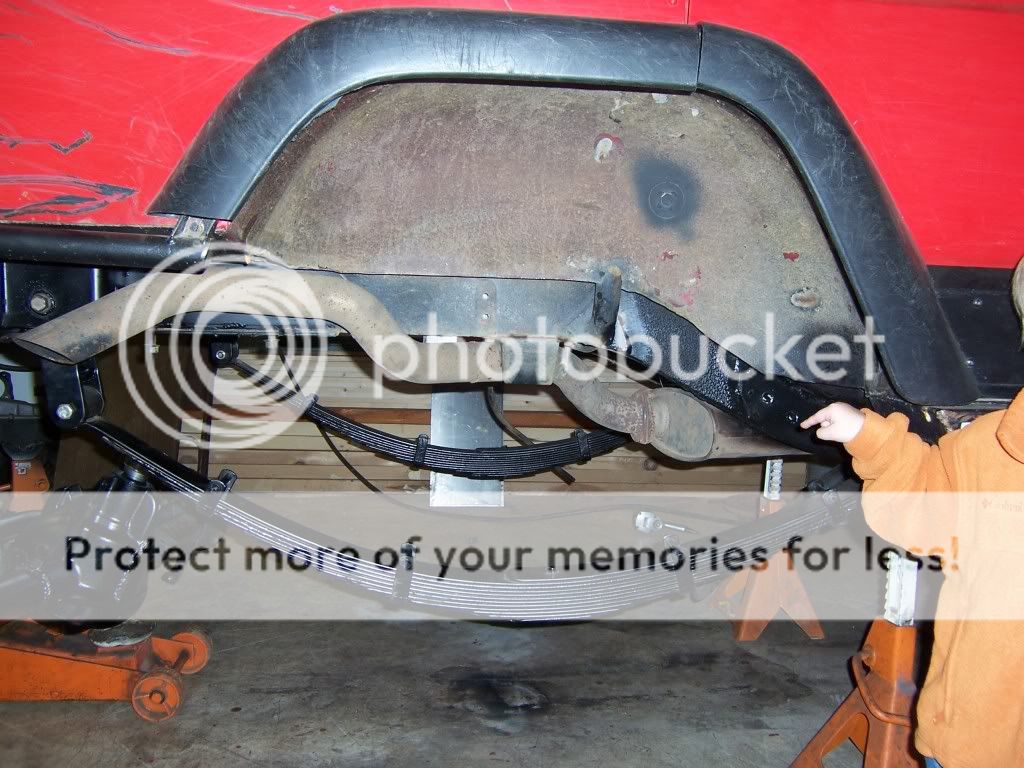
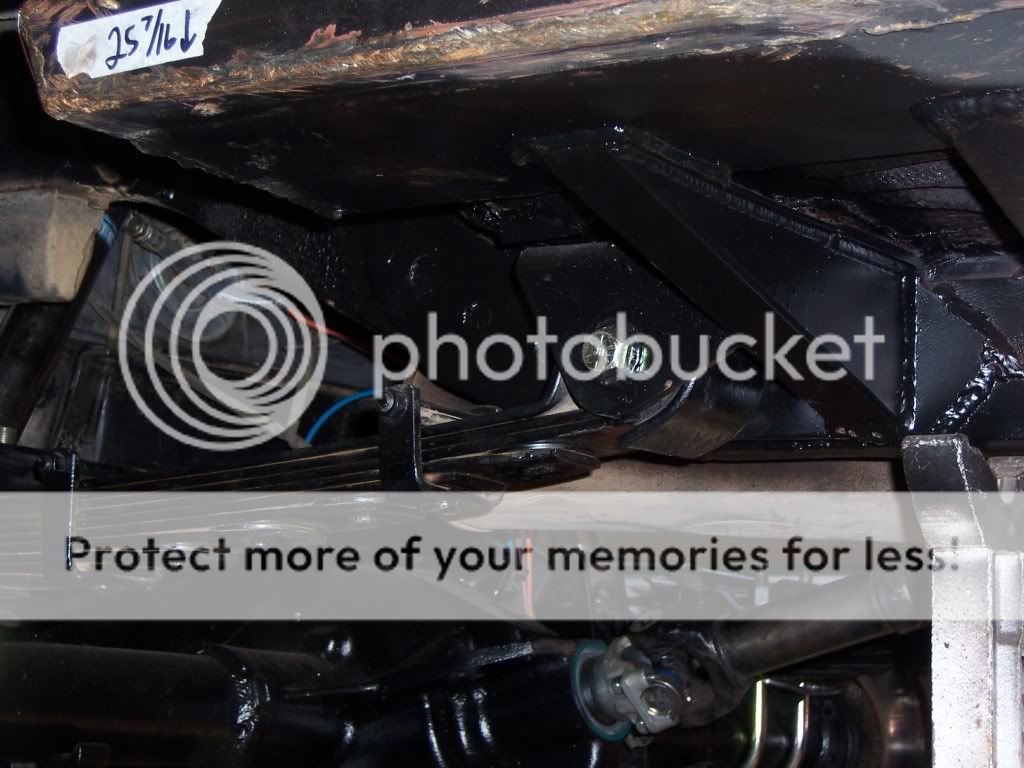
Here they are installed:

The spring pivots on the rear of my junk were giving up the ghost, the outside support was collapsing into the floor, and the blind nuts were both broken off inside the boxed section of chassis. They were junk.
I was originally on a rear 4 link path, but decided against it for two simple reasons. (1), i did not want to cut up the rear body work to do it correctly and (2) the leafs will keep up with any destination I plan to take a full bodied rig with a family on board.
Opportunities:
1) I noted that there was some room for modifying the geometry of the OEM set-up as well as some of the mods I had implemented over the years. The spring pivot had room to move down almost a full inch without affecting ground clearance at all, so I designed that in to the new pivots.
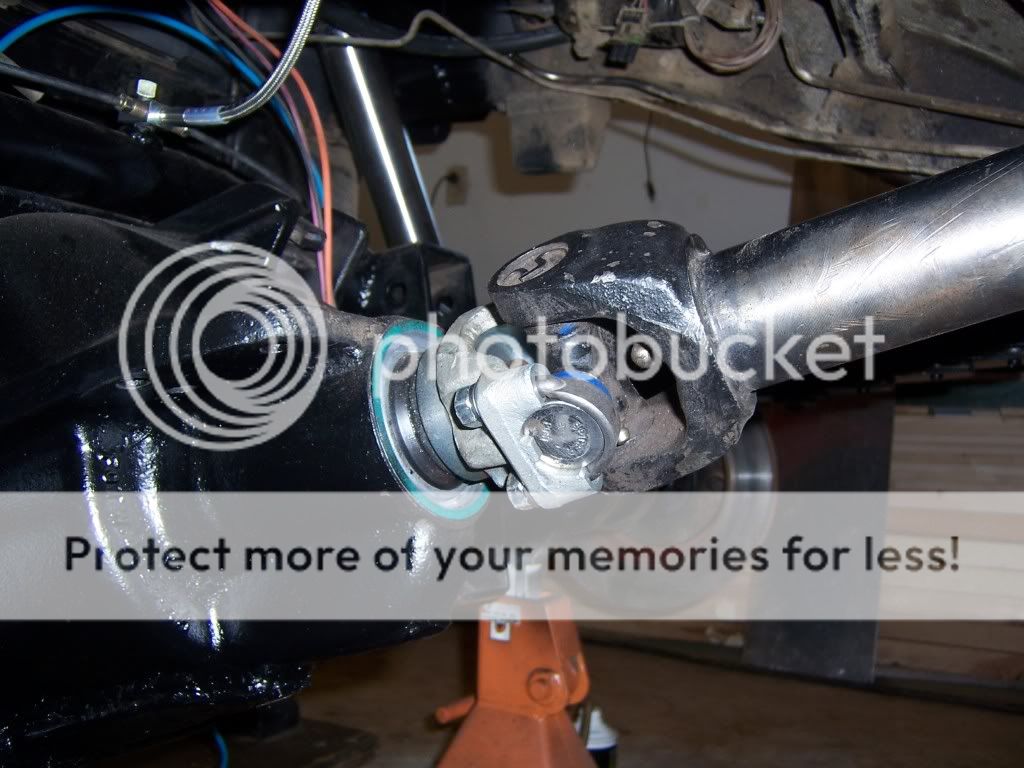
2) The shackle side had been modified by me when I was running a set of cobbled together leaves that were too short. You'll recall that I had built a plate on the bottom of the OEM shackle box and pivoted new shackles on that plate in an attempt to get better feel and articulation from the cobbled together pack. That worked until I bought Paul Sinclair's lightly used Nationals about 4 years ago. They are 1" longer than OEM, and put the modified shackle at too much of an angle, which wreaked havoc with spring rate. Essentially, the rate was soft for most the travel, but got very stiff very quickly as the shackle flattened and forced the spring to try and pull itself apart to get the last 2 inches of up-travel. That's pretty hard on springs! I decided to cut my old shackle hangers out and go back to the OEM shackle mount with a 6" long offset shackle that I built. So with that:
My son Matthew and I refreshed a set of 11 leaf Nationals. These are Fishboys old springs, and they are very good. A nice combination of load carrying and flexibility. Military wrapped, with an extra snail leaf on top to control drive torque. We put in a new center pin and replaced a handful of spring pads:
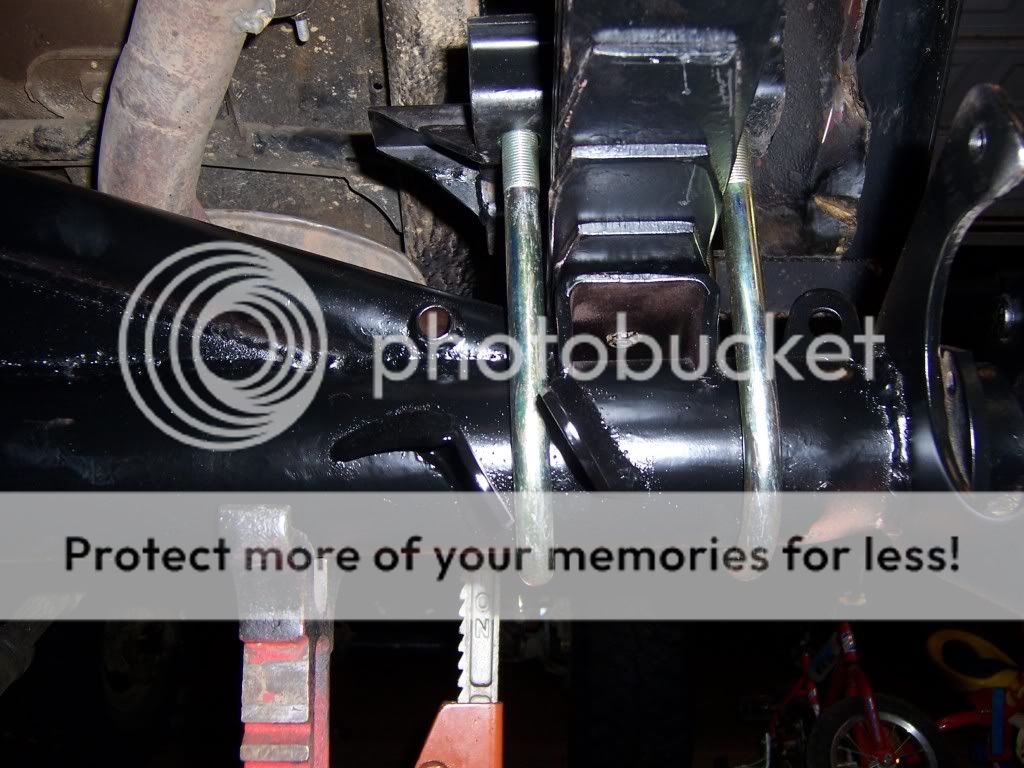
Obviously, I had to build the new hangers necessary to hold the front of these springs. I also took the time to build a reinforcement plate to distribute the load along a greater portion of the rear frame rail :
While this was likely plenty of renforcement, I wanted to tie the outside of the spring hanger to something. I decided the best thing to do was to run a vertical tube up into the passenger compartment and build a new tubular crossmember that ran from door sill to door sill. I also wanted to tie it into the 2x6" box I use for a rocker panel. With this in mind, heres the new hanger:
The OEM setup has the spring spaced away from the frame by about 3/4" inch. My reinforcements were about 1/4", so I needed to add a half inch of spacer:
And here is how it ties into the inside. The tube is a 1.5" x .90"wall piece of DOM that is welded to the top of the (trimmed) OEM seat mount/crossmember. The OEM piece has been rewelded to the floor along it's length. My son's (and eventually daughter's) seat will be mounted to the new tube with some sort of tab.
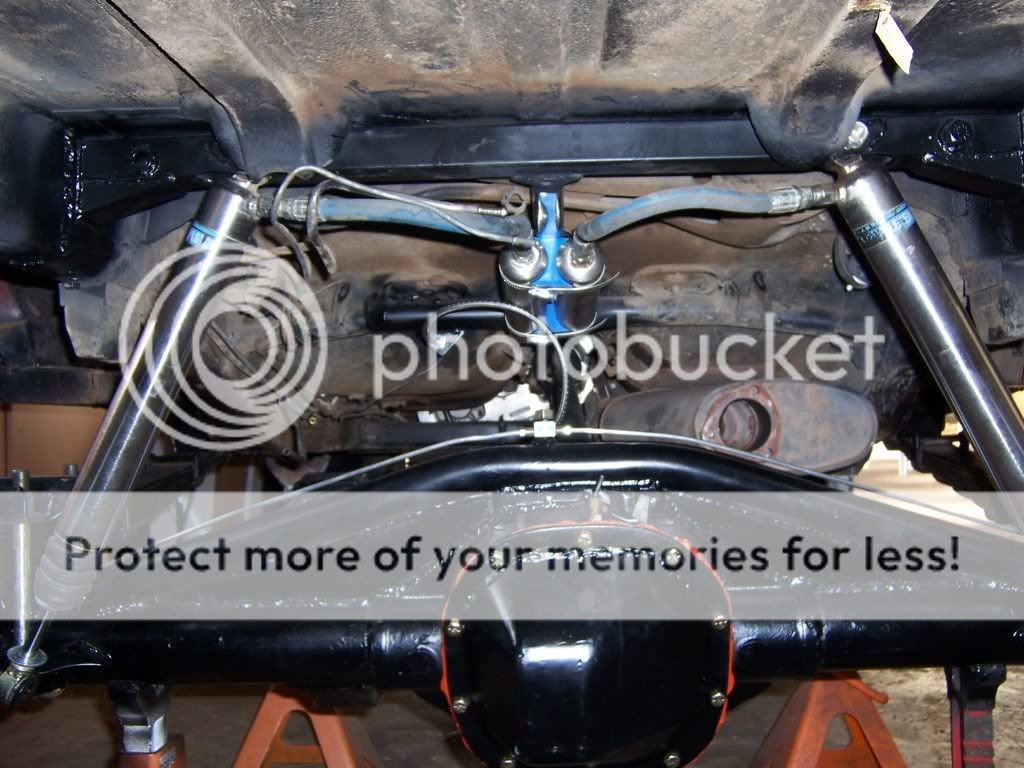
Here they are installed: