• Welcome to the new NAXJA Forum! If your password does not work, please use "Forgot your password?" link on the log-in page. Please feel free to reach out to [email protected] if we can provide any assistance.

York OBA in 88 While keeping A/C?

elaubuch

NAXJA Forum User
Location
Arizona
There are lots of threads about how to install a York in a renix era XJ, but I have not seen a build thread for one that has elected to retain their A/C. I am in the middle of working out this particular dillema, and if there are no others that have accomplished this, I will document it and post my write-up when I am complete. If someone has done it and can offer some tips (I am concerned with mounting it to the ear-mounted factory A/C bracket), I would greatly appreciate it.

Thanks for any help you can provide in advance!
 
Thanks, Sero.

I was wondering if anyone has any dimensioned drawings of a bracket similar to the one used in that article? If not, I will post up my Solidworks drawings when I am done with them.

Cheers,
 
First of all, many thanks to Andreas at MadXJ. It was his bracket that inspired mine. To give you a rough idea, look at the drawings below and pictures and you will understand how to make your very own bracket. The dimensions I provided will get you most of the way there. Depending on what material you use and your welding skills, they may be slightly different. Use a calculator to figure out the fractions from the decimals provided.


BracketDwg_01.jpg


BracketScreenshot_02.jpg


BracketScreenshot_01.jpg


104_1780.jpg


104_1825.jpg


Not the cleanest, but it works for a beta run. If you want one made, I can make more for cost plus shipping when I have time, and you'll need to simply enlarge the bolt holes to fit into your York. Incidentally, the bolts that attach the York to the bracket need to be 3/8"-16 x 1" for the sidemount, and 3/8"-16 x 1.25" for the bottommount. The bolts I used to mount it in the jeep are M10x1.50x150mm for the A/C mount, and M10x1.50x100mm for the alternator bracket. The bolt that goes through the alternator bracket also needs to be a "tap" bolt (threading along the entire length of the shank) due to the threading in the alternator bracket. Or you could just drill out the bracket. Use self locking nuts an flat washers and you are in business. I didn't put the gussets on my OBA bracket because it is very stout using 1/4" plate. I can put them on at your request or you can when you make it yourself.


Any questions, just ask!

Cheers,
 
Last edited:
Sure, see below. It is in the jeep, but I don't have it plumbed yet... On a different note, I have to ask if you looked at Andreas's writeup? It is basically the same mounting arrangement as in his article. Anyway, good luck with your project. The finishing touches (i.e. plumbing and such) has been covered in many other builds/writeups, so I leave it to you to devise your best known mounting method.

Cheers!


104_1829.jpg


104_1830.jpg
 
In that MadXJ article it mentioned that you might not have to modify the a/c lines with enough forethought. Any input on this from your experience?
 
will this work with the stock battery location or do you have to move it? I cant move my battery to the other side because of my airbox/snorkel set-up, but I have been debating a similar setup to this.

~James
 
In that MadXJ article it mentioned that you might not have to modify the a/c lines with enough forethought. Any input on this from your experience?

The only modification I had to make to the A/C was to move the canister (thing that Andreas moved to where the stock battery used to be located) Receiver/dryer(?) 3/4" towards the rear of the jeep. Just drill a new hole in it's mounting bracket and the hoses will reach and not interfere with the belt or mounting location of the York.

Thanks!
 
will this work with the stock battery location or do you have to move it? I cant move my battery to the other side because of my airbox/snorkel set-up, but I have been debating a similar setup to this.

~James


Sorry, I had to move the battery. I did use the original tray, some standoffs, welding wire, and relocate it to the other side fairly cheaply. I am now working on an intake tube similar to the Rusty's tube to replace the factory air box. I will post up the results when it is done. I ran into heater core trouble and have to get that on finished first. Waiting on parts sucks...

Thanks,
 
Nice work! This would look really good in my jeep and it'd be great to have the AC too!!
dn

Thanks and good luck with yours. Any questions, just ask. I will try to remember any tips and post them up as I think of them, but usually it helps to have someone jog the old memory for me...

Thanks again,
 
... and what did the compresser come off of??


Sorry, I neglected the latter part of your question: '84 Volvo 243 is what I pulled mine from.

Cheers,
 
Very nice job. I have a York OBA system on my 98.

The best York compressor is the 210. There is a metal tag on each compressor with the model number.

They can be found on older Volvos and Mercedes. I got mine off of an AMC Eagle.
 
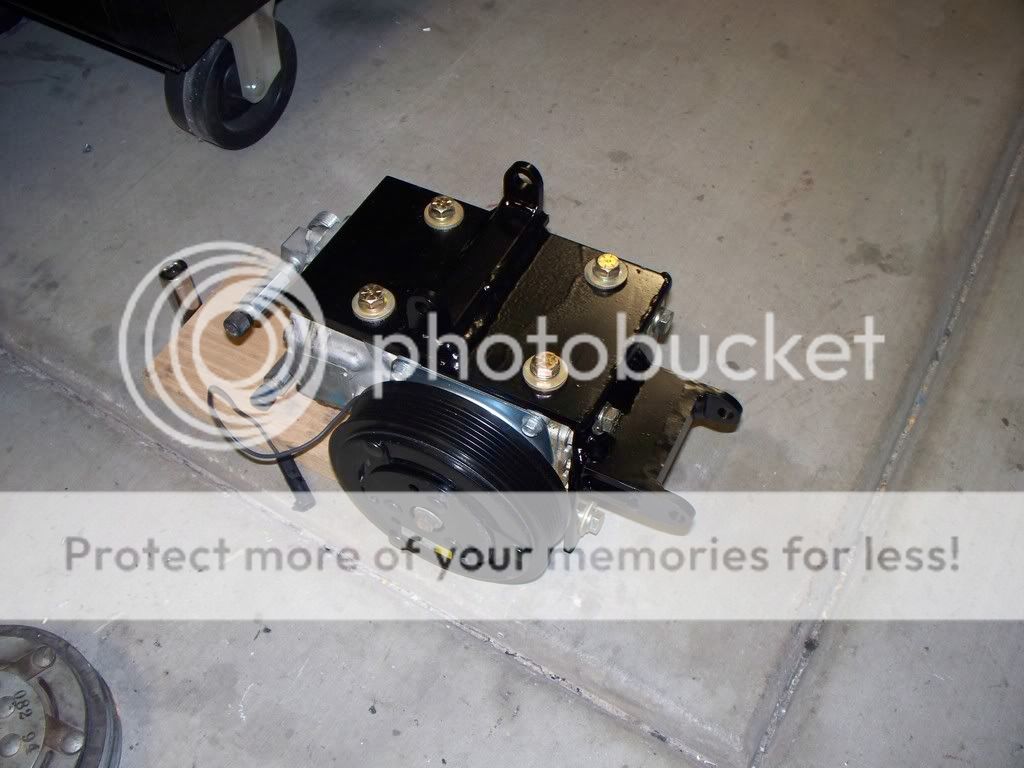
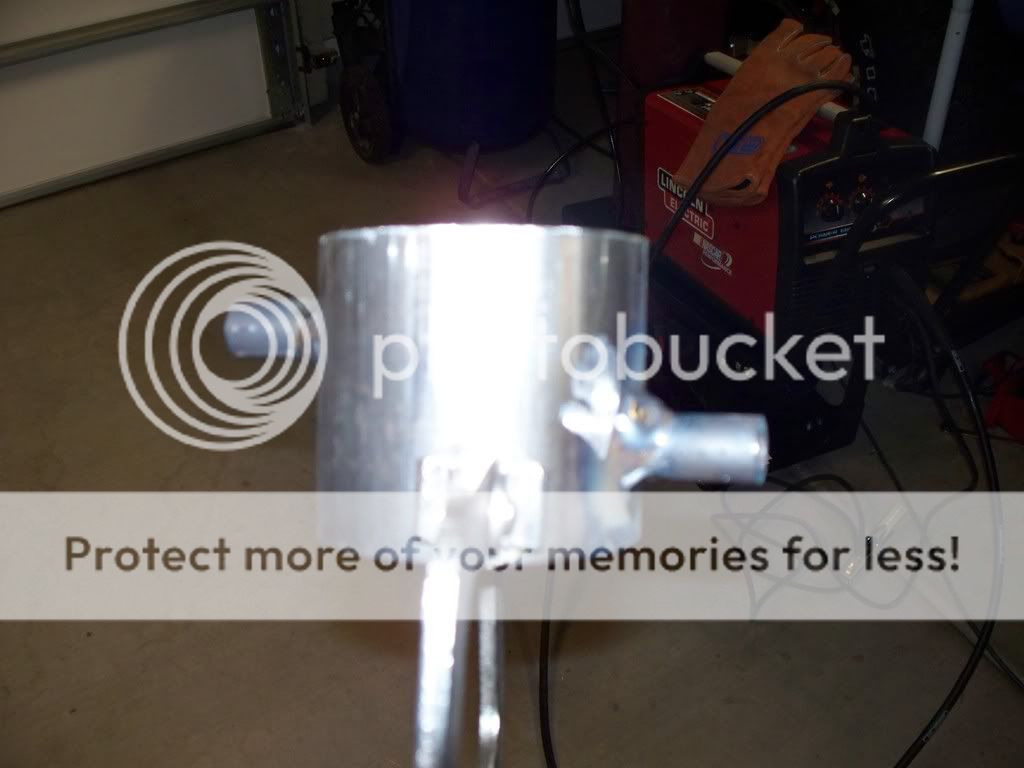
As a solution to the air cleaner problem moving the battery creates, I bought some 3-1/4"ODx.120" and some 5/8"ODx.120" tubing from www.speedymetals.com (found the link on Pirate4x4; great source, fair prices) and used some of the 1/4" plate stock I had lying around to make a custom air filter tube. One thing to note if you are going to do this yourself: you must make sure that the inside of ALL the tubing is COMPLETELY clean of all metal shavings/dust/particles, or you will KILL your engine when you install this and fire up your beast. With that said, here's what I came up with:


Drill (or mill in my case ;); didn't have a drillbit big enough, but that is why I have all those expensive center-cutting endmills in those gargantuan sizes...) two 5/8" holes opposite each other, and offset them leaving enough room for the hose clamps to mount your cone air filter and your intake hose that goes to your TB, and weld the two 1-1/4" long pieces of the 5/8" tubing into them, like this:

104_1842.jpg


Another view:

104_1843.jpg


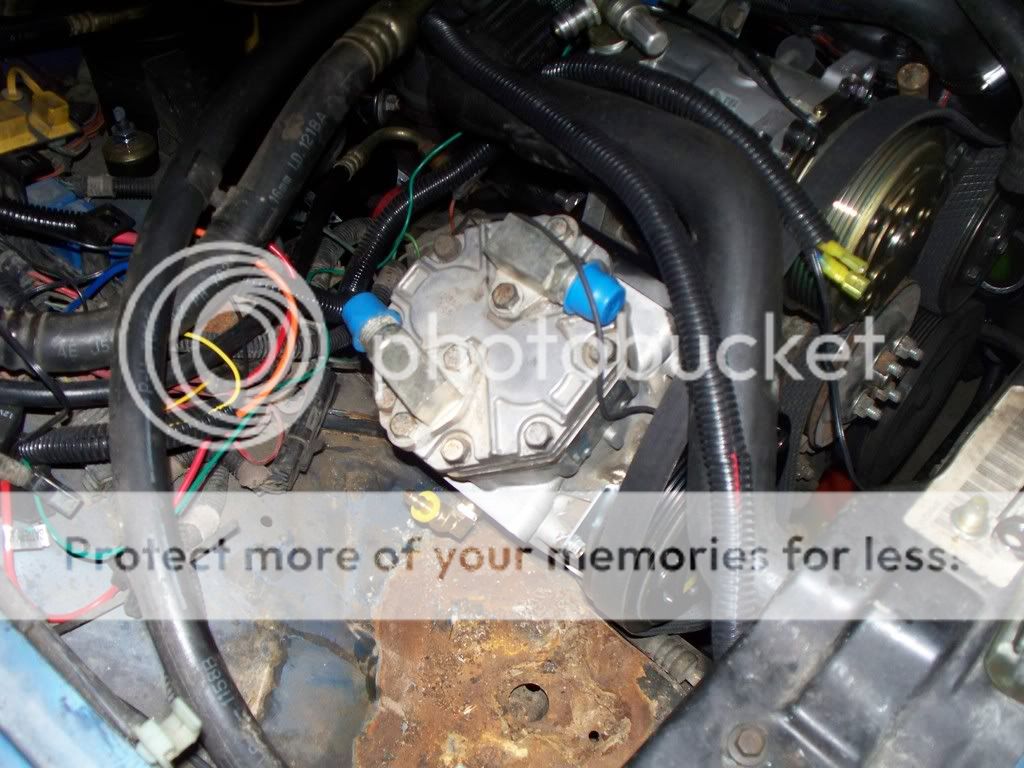
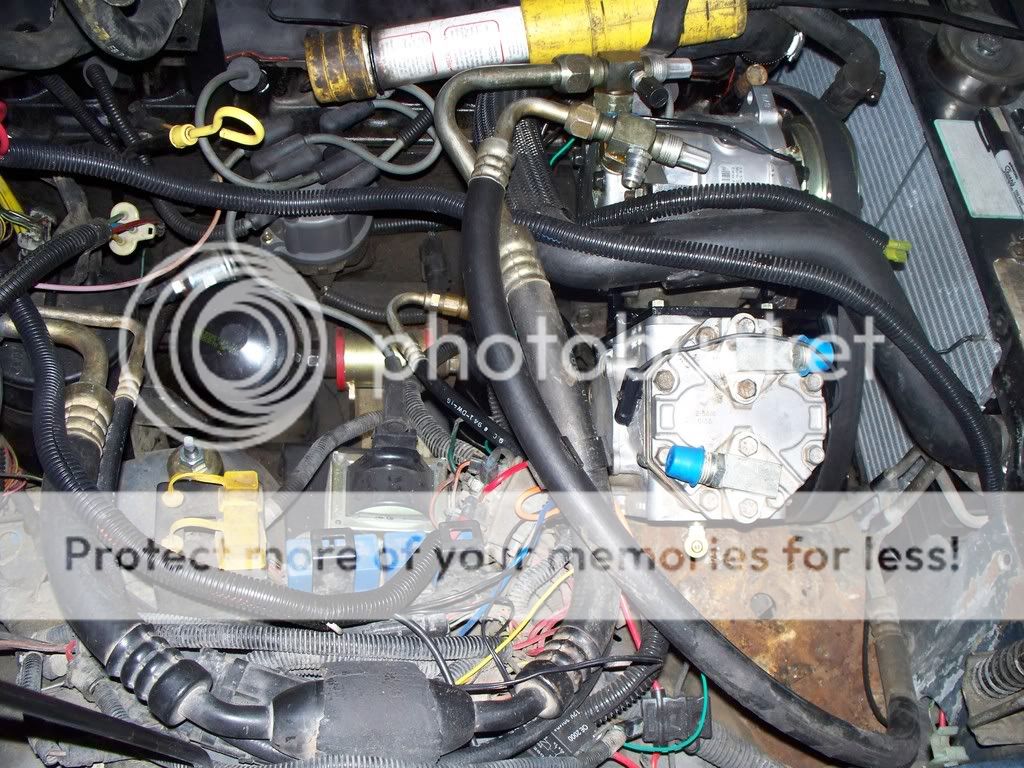
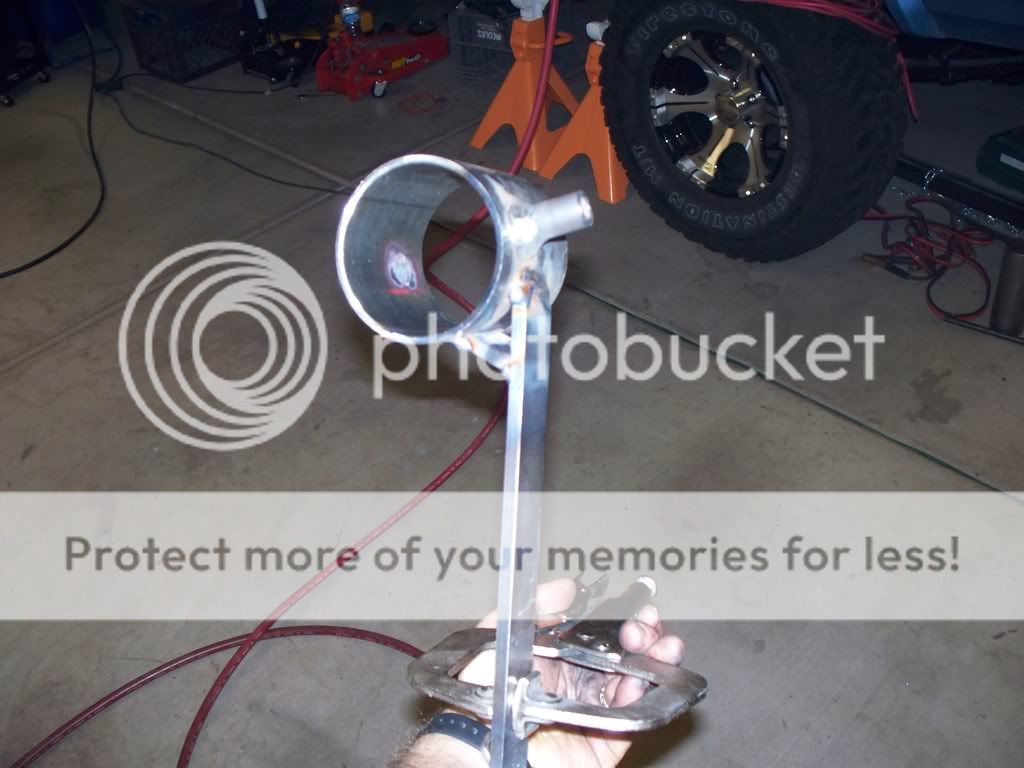
Once cooled, test-fit it in your jeep. The CCV and Charcoal canister lines will be tight, but thats what I was shooting for.

104_1845.jpg


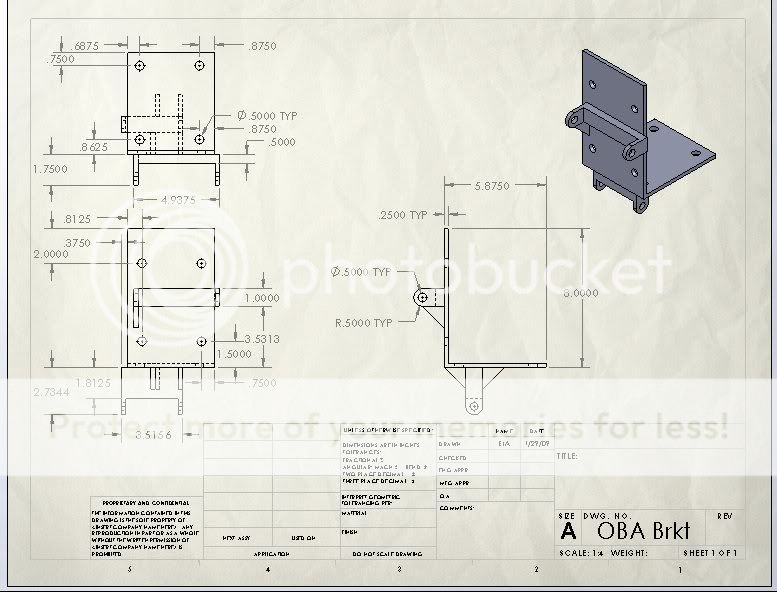
The next thing I did was prefab a mount out of some 1-1/4"x1/4" plate stock in the shape of a "T," and drill a hole in the wider part of the "T" for the mounting location. I didn't take any pics of it, but basically, once its cool enough to handle, put the mount into the jeep with the mounting hole aligned over the stud that the rear of the stock airbox mounted to (you kept that nut, right?) and use a scribe/sharpie to mark where it lines up with your air filter tube and use something to gauge the angle it makes with it (I know it will be tangent to the circumference, just try and estimate it as best you can), or if you think you can tack it without melting all the plastic you have aligned/attached, go for it. Add gusset to strengthen after test fitting/coaxing (read BFH) it into your best alignment after tacking, and you will end up with something like this:

104_1847.jpg


Another view:

104_1846.jpg


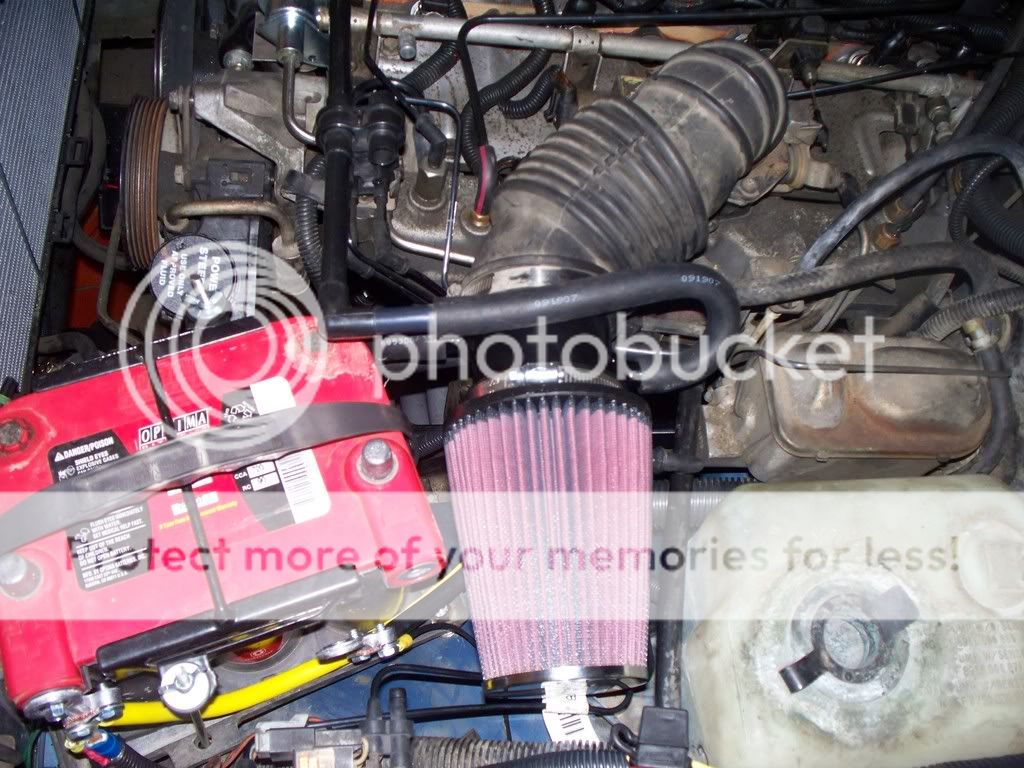
Now just grind your welds to make it purdy, and CLEAN the be-Jesus out of it; NO LOOSE METAL ON ANY PART OF IT OR YOU WILL BE SORRY!!! Add your favorite color paint, and install. You're done.

Enjoy,
 
Very nice job. I have a York OBA system on my 98.

The best York compressor is the 210. There is a metal tag on each compressor with the model number.

They can be found on older Volvos and Mercedes. I got mine off of an AMC Eagle.

Yes, for a complete list, Obi-won's site has a breakdown of every car/truck/van that came with one, and which one they came with (IIRC). Someone else chime in with the link, its not on this computer of mine... They are very widely used, but I believe are becoming harder to find. Fleetpride was my source for the serp pulley (if I forgot to mention that). $81.XX out the door here in AZ; best price I could find it for, new.
 
In case anyone was waiting for finished pics of the air tube, here ya go:

From the top:
104_1870.jpg


From the side:
104_1871.jpg


Have fun out there,
 
Back
Top