• Welcome to the new NAXJA Forum! If your password does not work, please use "Forgot your password?" link on the log-in page. Please feel free to reach out to [email protected] if we can provide any assistance.

#110 Flex-a-lite Install w/LEDS!! 56k :-

Fastdemise

NAXJA Forum User
Location
Beaverton, OR
Well I finally picked up my camera so I can now share the pics and experience I had removing the mechanical fan and upgrading it to a electric fan. The whole process was quite painless and broke me away from my fear of electrical do-dads and gigets. I'll try my best to clearly explain what I did and the end results.

IMG_0343.jpg


This is my engine compartment. This sexy beast is a pretty bone stock 01' Jeep Cherokee Sport. To remove the shroud there are just 2 small bolts located on both sides of the shroud. The bolts also hold the radiator overflow line.
 
The whole process was quite painless and broke me away from my fear of electrical do-dads and gigets.

isnt it great? i couldnt wrap my mind around relays untill i wired up a piggyback headlight harness, then the lightbulb poped on in my head!

i cant imagine what that K&N intake cost you....
are the LED's in the spokes of the fan so they light up like those tennis shoes from the 90's?
 
I accidentally hit the post button 3 min into writing the thread. I just finished writtting up the whole thing with pics of everything and a video of it running just to have a 45min limit on editing my post. So if the admin lets me I can try again to report. THough I'll be honest it will be short and sweet since I just spent a good hour putting the first thing together and having it lost.

and no led on the fan blades.
The K&N cost something like $275 ballpark. I got it last year in June
 
Cool...all that work and I still see a mechanical fan in its stock place in the picture.....or my work computer is not showing me all the pics.


**EDIT** Nevermind....you posted above while I was typing.
 
I figured I would get myself into trouble once I saw that I posted with just a pic of my engine bay. I will get everything else up I promise. For now I can just post the link to watch the really short clip of my starting the car to see how close the engine leans towards the fan. Which ain't much. I still have the stock fan bolts which stick out quite a bit as well.

http://www.youtube.com/watch?v=5zxIl8UzvZ4

On another note just to repeat what has been said in another electric fan install thread that this fan is larger than the radiator(31x11" fan being 12") so you must get creative in making it fit.
 
Last edited:
This is the Flex-a-lite kit #110 comes with all the wires(nice 12 gauge), crimps, screws, and plastic mounts if you can find a way to use them(I didn't)

IMG_0341.jpg


Here is where you grab a 13mm socket. I chose to remove the bolts holding the fan to the clutch so I have enough play to remove the shroud. The shroud came off easily with only 2 little screws holding it. Those 2 screws also are what hold the overflow line in place so don't lose the screws.
IMG_0342.jpg


Here the entire assembly is removed and all is left are the 4 threads holding the pulley in. I did realize shortly later that I need to loosen up my belt before something goes wrong. As of now I still have not gotten around to getting short bolts to replace the stock threads.
IMG_0345.jpg
 
Last edited:
Here I photoshop'd some arrows pointing out where I attached the fan using the holes provided on the fan shroud and stock radiator mounts.
IMG_0346.jpg


Here you can see I had to do a bit of dremeling to lower the entire fan to fit better on the radiator. As I mentioned earlier the radiator measures 31"x11" and this fan is a good 12" tall so I just shaved off a bit and made tabs so that it will actually fit in the lower mounts from the stock fan shroud and the radiator tab is there to actually space out the fan. I found that the blades were rubbing on the bottom so I made the tab to make sure the fan does not get any closer to the radiator. I find that my radiator works best without holes and my fan with all it's blades intact.
IMG_0352.jpg
 
When I wired it all together I used the cable hookup that goes straight from the battery to the main fuse box. 13mm wrench took off the single bolt and I attached my constant 12v+ from that and in this picture here you can see I spliced into a wire. Now don't hate me kill me or call me names for this but I spliced into my fuel pump relay. The blue wire and the brown wire right above it both give a 12V once the vehicle is running so I won't have the fan running unless the engine is actually running so when I listen to music after running the Jeep for a while I won't have the fan running. Since the water pump ain't running I'll just be making noise.
IMG_0349.jpg


Here is where I mounted the control box. It uses good old thermo-probe. The only problem I've had with this so far is that the stock XJ radiator is really thin so there's not alot of contact between the probe and the radiator. Some thermal grease should fix that up. The control box is completely adjustable for the temp you want. It's just a simple nob so you just have to watch your temp gauge and if it cuts on too early just adjust for warmer. I used the main chassis ground for my -12v and realized that where it touches the chassis is painted on so the only real contact for metal to metal came from the little bit of thread that touched. I grabbed my dremel with a wire wheel attachment and fixed that real quick. Then used my dremel with a drill bit and made a small hole in the fender and used the 2 screws that came with the kit to instal it. In the picture it sits a bit high and wasn't letting the hood latch sit all the way but I just removed 1 of the screws and slide it down. No worries with 1 screw it holds just fine.
IMG_0351.jpg

The only problem I've had with this instal was the trick to get 10lb in a 5lb bag sort of thing. It works with a bit of time and effort. I still have a problem with the probe not sensing the right temp from the rad. It's one of the probes that you put through your radiator as close to the inlet hose as possible but like I stated before the rad is really thin so the control box is set to it's lowest seting and it cuts on anywhere between 205-215F and at 215 as stated on my ScanGauge2 my A/C fan kicks on for a short bit.

Here is a pic of my scangauge. It's reading coolant temp-211, my intake-101, and gallons per hour. Nifty lil gadget. Got it just out of curiosity for how hot my intake was and for later upgrades to see if they actually help the intake air get colder.
IMG_0379.jpg


I'll be posting pics of the LED install next
 
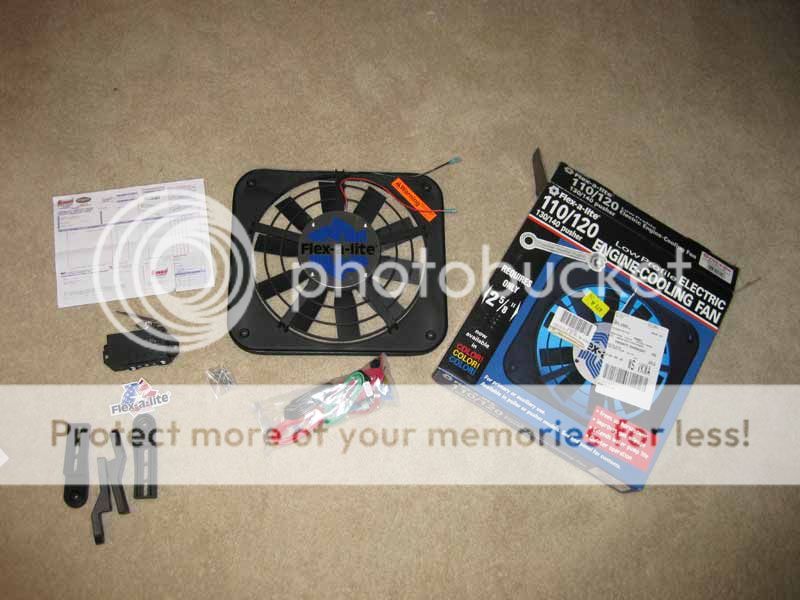
LEDs!! These were purchased at a local gadget shop that cares stuff from old computers to LEDs or about any shape and size. The ones I ended up getting, under advice from my roommate who going to college to be a electrical technician, 2 12V LEDs. Getting LEDs that out of the box work at 12v makes this install almost to easy since there is no dealing wih anything other than running the wires and finding a good spot to mount it.

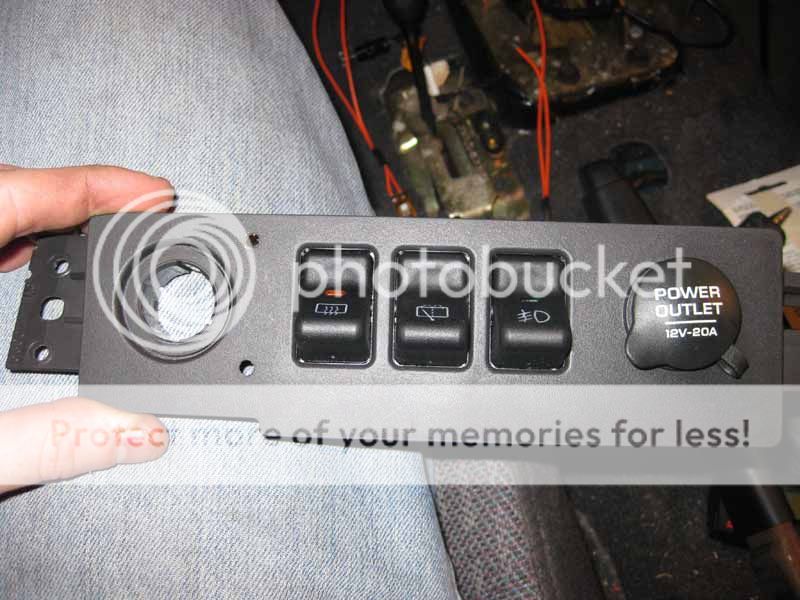
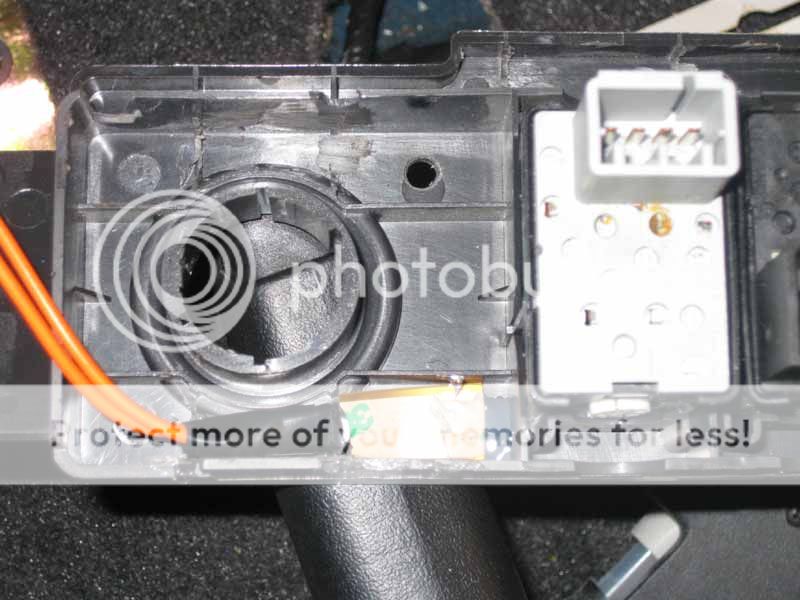
After some debate and having my center console removed to find good ground spots I settled on the faceplate right next to the cig lighter since I just needed enough room to make 2 small holes. and to my surprise when I turned it around it was the perfect space for it. I grabbed my trusty dremel and made the 2 holes and removed all the plastic on the inside that would interfere with the leds and wires, then just made a notch on the top for the wire to run through and I was in business.
IMG_0364.jpg

IMG_0365.jpg

IMG_0366.jpg


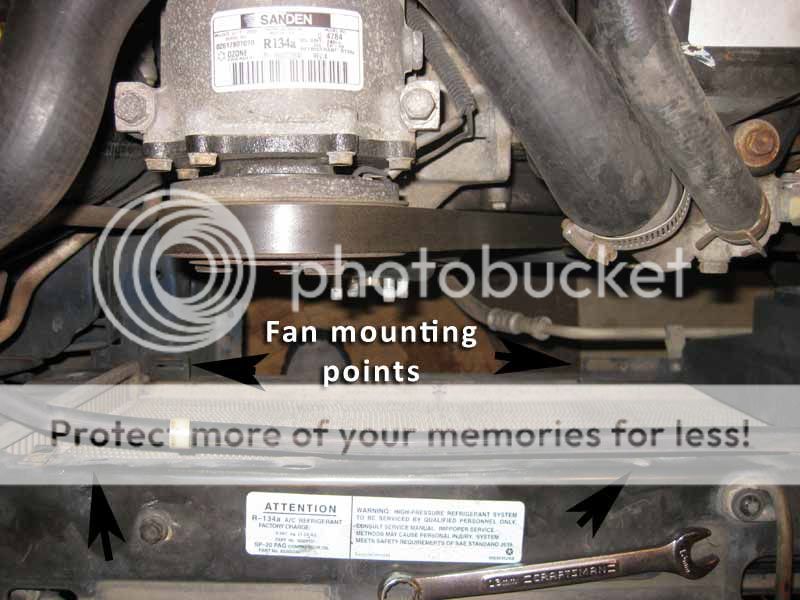
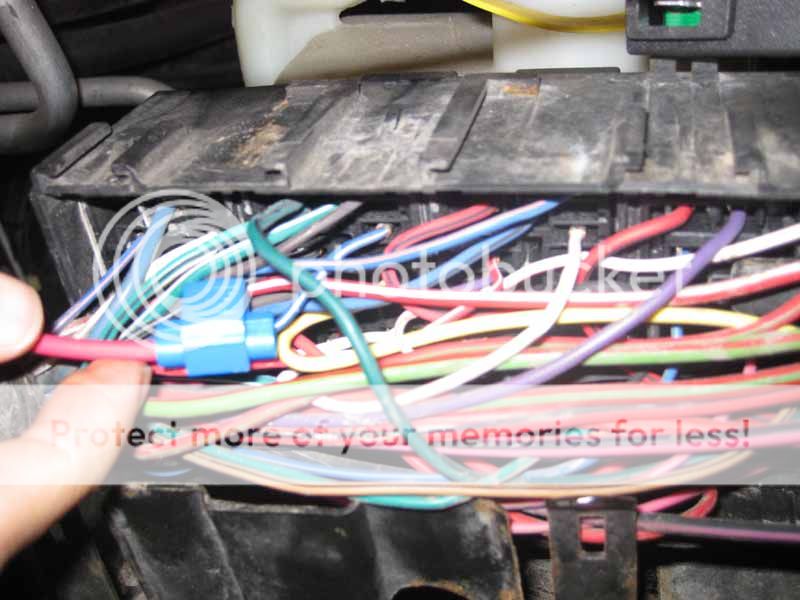
I ended up purchasing from the same gadget store x2 lengths of 12ft cord of wire for the leds and ended up just 4in short(that's what she said) I ran the wire for the flexalite fan on the left side while I ran the wire for the A/C fan on the right. I used the same splicer that I used on the fuel pump relay/control box. Just right off the positive from the fan so there is no mistaking if the fan is running or not

Here is a pic of the LED with the wires soldered.
IMG_0368.jpg


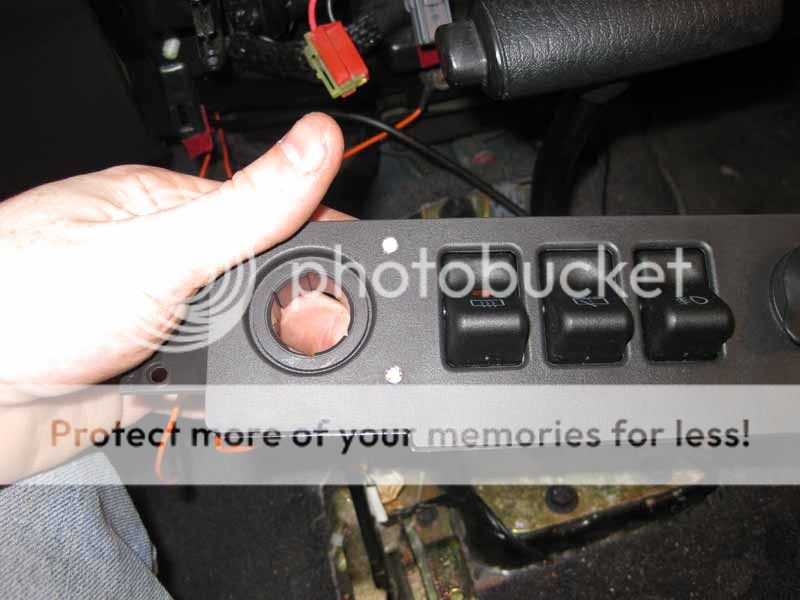
Here I have the LED sitting nice and comfy in it's new home. I used a small hot glue gun since I did not want to have to deal with super glue. I learned my lesson from watching American Pie. Also hot glue would allow me to remove the LEDs should one stop working or not work at all. I put a dab on the plastic cover then pressed on the led then after about 30secs of holding it a liberally applied hot glue to the op to make sure it wasn't going to work itself free later on.
IMG_0369.jpg


With both LEDs installed I then applied a small dab of hot glue to the front of the leds. Sortof as a protective coat and to diffuse the light a bit. That's just sexy!
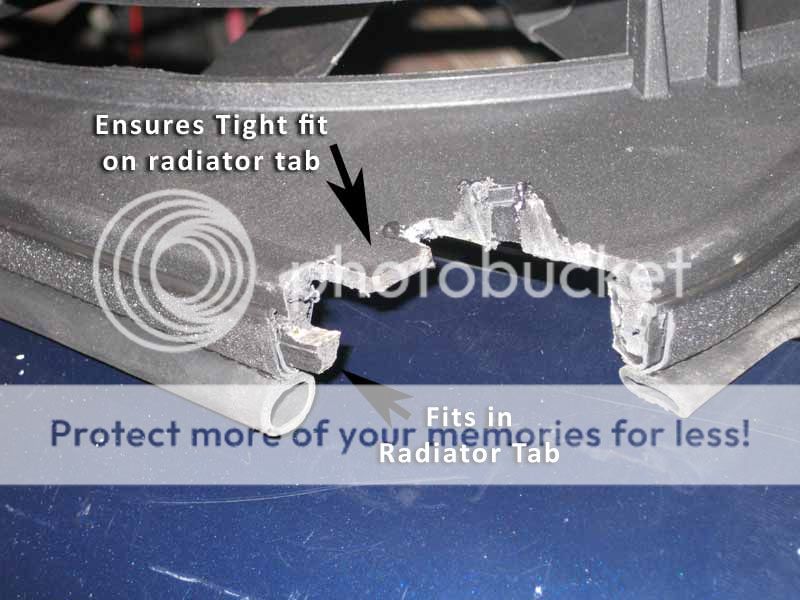
Also in the background you can see the bolt that I used for the ground for the leds. Was really close and a good solid metal metal contact point
IMG_0374.jpg


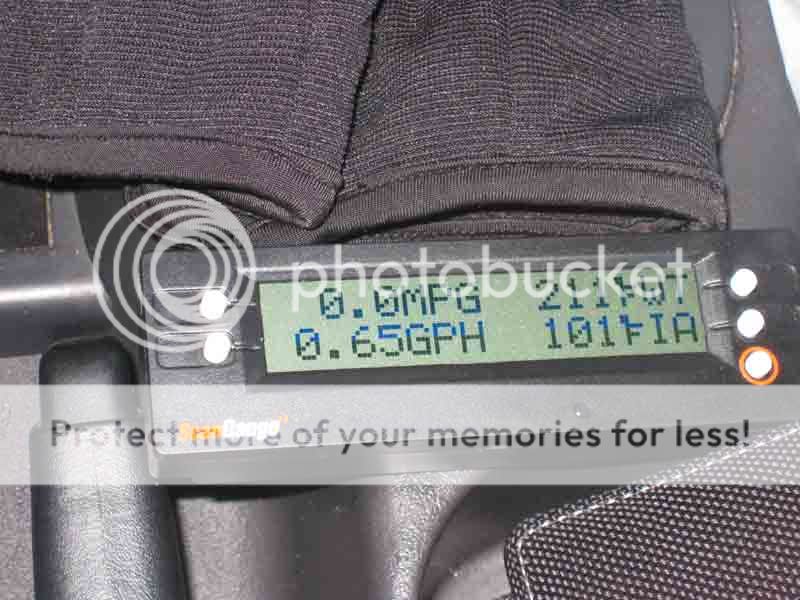
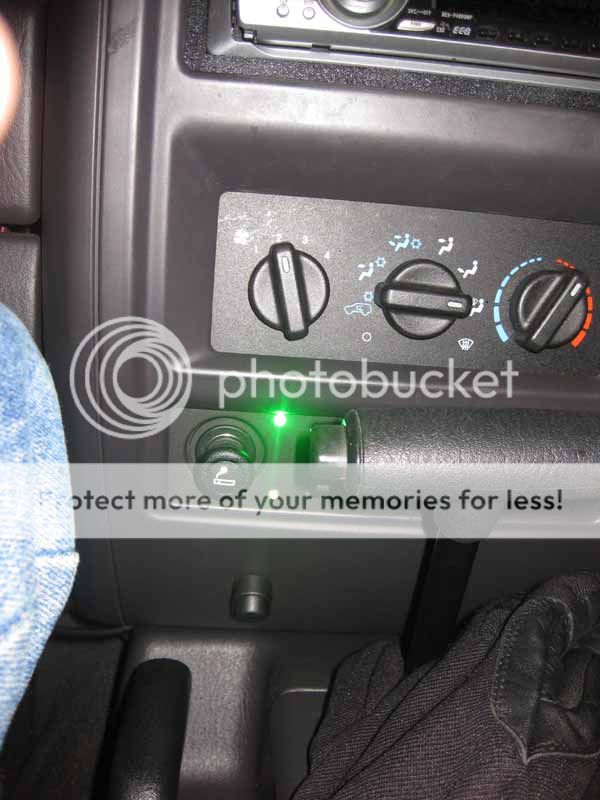
Here is the finished product taken while driving insanely fast in the interstate in the snow.....really, while in park waiting for the engine to heat up it finally cut on so I could take a picture.
IMG_0378.jpg


I'll point out that the top led is the flexalite fan and the bottom fan is for the A/C overheat fan. The bottom one does not cut on and is probably due to when the solder was put on the led it didn't take well. Just a quick fix once I get my buddy to redo it. I'm not that good with a hot pokey thing X_o. That about does it. I've done a few other things to my Jeep so maybe I should make a thread just for my XJ like others here just to post updates on lil things here and there that I do to her. Well hope this helps you guys cuz I know it gave me the confidence now to want to working the electrical side of my Jeep instead of only the mechanical.
~FastDemise~
 
Last edited:
"Get rid of the scotchloc. It iwll cause nothign but problems. Solder the connection."


What connection are you talking about specifically?? Sorry, I have to ask
 
What connection are you talking about specifically?? Sorry, I have to ask

Oh.. its the blue crimp thingy. Quick and easy, but often loses connection easily.
 
Oh.. its the blue crimp thingy. Quick and easy, but often loses connection easily.

Agreed. I had a bunch of those on my jeep that caught on fire. I think they were a contributing factor. Strip the insulation, slide on some shrinkwrap, twist the two together, solder, shrinkwrap, tape, and NEVER worry about it again... Install looks great btw.
 
I should have no worries about a fire since I am only using those crimps on 2 LEDs and a signal wire for the temp control box. Nothing of any considerable amperage so I have no worries of fire. Just that small voice of concern for the fuel pump since I touched the wire. Now since I've done that if anything goes wrong on my vehicle it'll always be because I messed with that wire.
 
Back
Top