DanMan2k06
NAXJA Forum User
- Location
- Damascus, MD
I wanted to throw some higher wattage bulbs in my Hella 500ff's, but after looking at the wiring decided it was waayyy under par to handle some 130-150 watt bulbs. So I took them apart and re-wired the tiny 14 or 16 gauge wires with some hefty 10 gauge. Just thought I would document my littl project if anyone else was wondering about it... Oh it EXTREMELY easy and self explanatory, but I though some people on here aren't very adventurous so this will clear any questioning or doubt up.
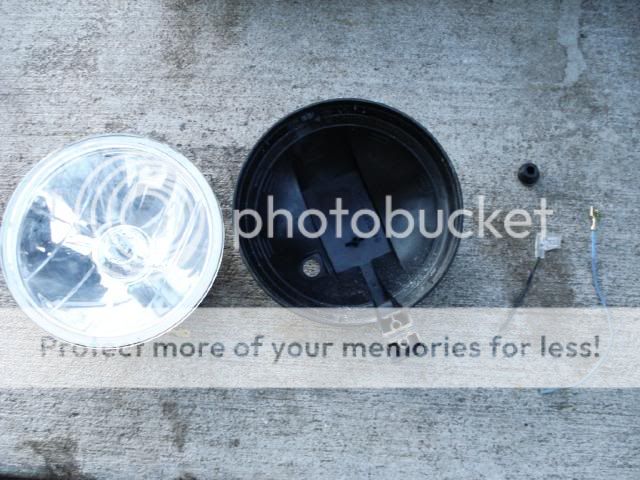
First you have to take the lights completely apart. You'll find the bucket, the actual housing, the bulb, a rubber grommet, and the ground and power leads.
Next you needs to select a wire that is suitable for your application. I chose some high quality 10awg gas/oil resistant speaker cable I had laying around. This made it easier to slide through the grommet because it was joined in parallel. You may have to slice the little wire separator in the middle of the grommet. This makes to little holes into one bigger one.
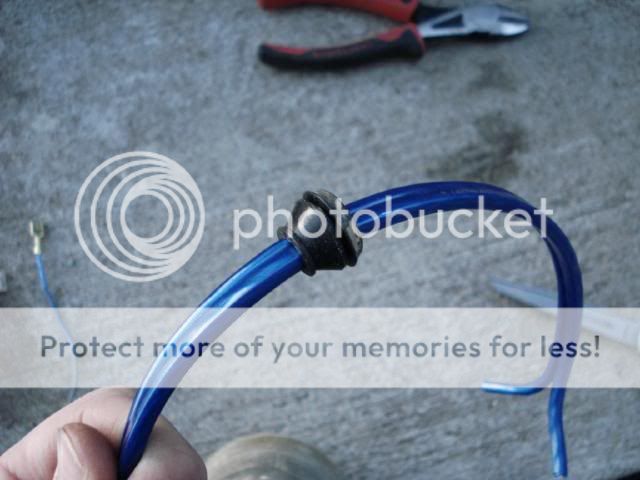
Next is probably the hardest part of the install. You have to get the grommet with the next oversized wires though it back into the bucket. Be careful not to rip it. Some WD40 made this very easy.

Slide any excess wire carefully back out the back of the bucket. With the WD40 on the grommet it should slide like butter. You want about 6-8 inches in front of the grommet to connect your new crimp disconnects.
I used some nice ones from Pep-Boys, about $3 a box. The right angle ones are just like the ones that came on the stock wiring, and have nice plastic shields over them. On the positive lead I used a spade connector just like they had before. Make sure the crimp or solder is done well to prevent any problems down the road. Also note, I kept the stock rubber cover for the power lead as well. Just for kicks.

Now re-install the bulb of you choice and fit the entire housing and new wiring back into the bucket. You may have to wiggle it around a bit to find the best fit, but the wires do fit in the stock location.

Here they are finished... I also recommend putting a water-tight automotive connector on the other end of the new wire. I'm not a fan of crimps when they are going to be exposed to harsh environments.

First you have to take the lights completely apart. You'll find the bucket, the actual housing, the bulb, a rubber grommet, and the ground and power leads.
Next you needs to select a wire that is suitable for your application. I chose some high quality 10awg gas/oil resistant speaker cable I had laying around. This made it easier to slide through the grommet because it was joined in parallel. You may have to slice the little wire separator in the middle of the grommet. This makes to little holes into one bigger one.
Next is probably the hardest part of the install. You have to get the grommet with the next oversized wires though it back into the bucket. Be careful not to rip it. Some WD40 made this very easy.
Slide any excess wire carefully back out the back of the bucket. With the WD40 on the grommet it should slide like butter. You want about 6-8 inches in front of the grommet to connect your new crimp disconnects.
I used some nice ones from Pep-Boys, about $3 a box. The right angle ones are just like the ones that came on the stock wiring, and have nice plastic shields over them. On the positive lead I used a spade connector just like they had before. Make sure the crimp or solder is done well to prevent any problems down the road. Also note, I kept the stock rubber cover for the power lead as well. Just for kicks.
Now re-install the bulb of you choice and fit the entire housing and new wiring back into the bucket. You may have to wiggle it around a bit to find the best fit, but the wires do fit in the stock location.
Here they are finished... I also recommend putting a water-tight automotive connector on the other end of the new wire. I'm not a fan of crimps when they are going to be exposed to harsh environments.
")