• Welcome to the new NAXJA Forum! If your password does not work, please use "Forgot your password?" link on the log-in page. Please feel free to reach out to [email protected] if we can provide any assistance.

Dash Vent Switch Panel

RacecaR

NAXJA Forum User
DSC04568.jpg


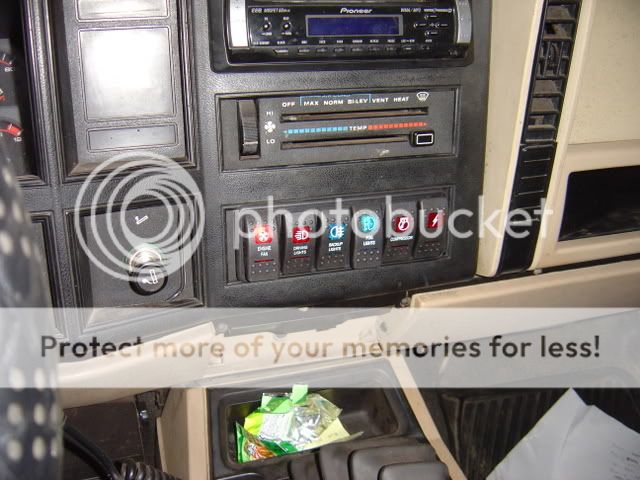
I used a dremmel to expand the air vent hole. I have one + lead from a 12V source. Another + lead wired in parallel with the dash light circuit...I don't remember exactly which # fuse the dash light circuit is, just consult your owners manual. One ground and one CAT-5 cable to the fuse box.

DSC04572.jpg


Dropped in

DSC04576.jpg


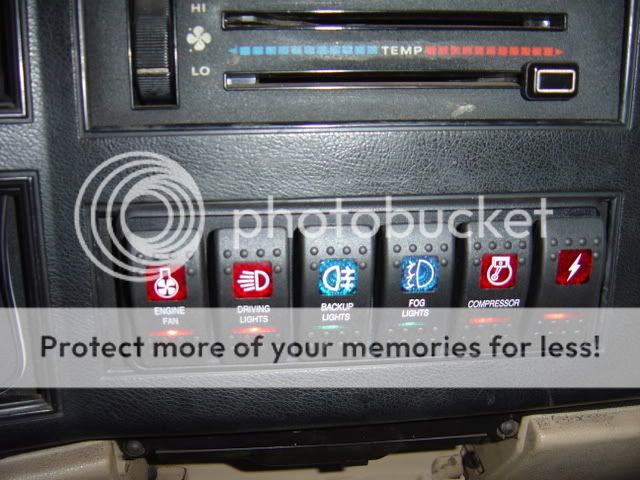
The switches and switch holder are from otrattw.com. Jim was a super cool guy to work with and I'd order again from him anytime. The upper light illuminates when the switches is activated. The lower slit light is illuminated when I turn on the headlights. I would have prefered to have all red switches to match the exterior color of my XJ, but the fog lights and backup lights switches were only avaliable in blue. However, the red-blue-red works because my CD deck has a blue display and the blue switches are directly below that display.
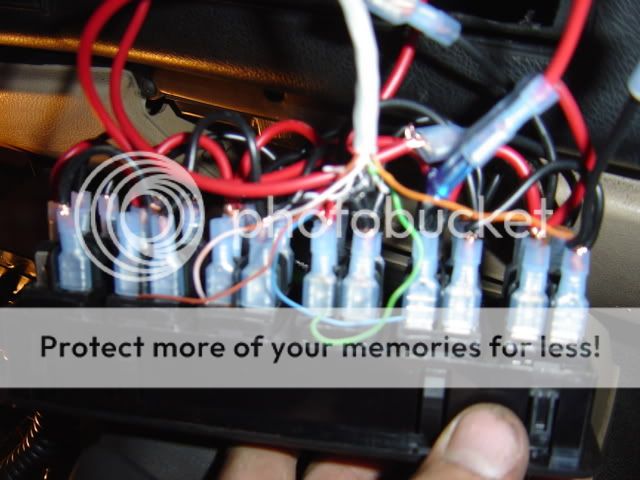
DSC04578.jpg

DSC04581.jpg

DSC04587.jpg


Leftovers anyone?

DSC04593-1.jpg

DSC04582.jpg


This fuse box was built in Tupperware I found in the kitchen and was inspired by FitchVA. The box is only temporary sealed with duct tape because I still need to install my fog lights and long range lights. But currently I have one relay to override the aux fan. One for the stock AC compressor converted into an OBA system. And one for a pair a fog lights I installed inside the rear bumper so the light itself is flush with bumper.

Overall, the install had no unexpected problems. I recommend buying female terminals in bulk...I used a box of 100. Also, the switch panel may look a bit crooked to you, but it's just in comparison with the movable plastic overlay. The hole I cut is indeed horizontal and since the photographs I have adjusted the plastic trim so that it does line up with the switch panel.

:wave1:
 
Last edited:
looks real nice man! keep an eye on that tupperwear. i don't know how well they hold up to hot temps. but looks sharp! :)

Honestly...hot under-hood temps never crossed my mind when I was planning this project. I've had the fusebox / switches installed for about a month now, and I just popped the hood tonight and found no visible signs of melting or warping. But...A low density polyethylene can handle temps around 175*F and a high density polyethylene can handle temps upwards of 250*. The exact strength of my box is indeed in question, so I'm thinking of moving the box inside the cabin (under the backseat, behind a panel ect.) or building a new box that can undoubltly handle 220* + temps. Thanks for the advice.
 
Should be microwave safe so I would think it would stand up to engin heat pretty well as long as it doesnt make contact with anything real hot.
 
Should be microwave safe so I would think it would stand up to engin heat pretty well as long as it doesnt make contact with anything real hot.

:wstupid: , but would def. get a box that wont melt if it bumps up to something really hot. Other than that, the switches and their location look KICK ASS:yelclap:
 
Should be microwave safe so I would think it would stand up to engin heat pretty well as long as it doesnt make contact with anything real hot.

No, microwaves excite water molecules, which plastic does not have in large quantities.

Better analogy would be, plastic is not OVEN safe. Not only will it melt, it will also catch fire and burn the rest of the jeep.
 
Back
Top