• Welcome to the new NAXJA Forum! If your password does not work, please use "Forgot your password?" link on the log-in page. Please feel free to reach out to [email protected] if we can provide any assistance.

SYE + Driveshaft...under $100.00 (not 56k friendly)

Dave41079

NAXJA Forum User
Location
Nashville, TN
So a few weeks ago I was searching for the CV yoke that Six States Driveline carries. The 3103-27CV that gojeep used on his website for a hack and tap solution. In my searching I found it was the same as a TH350 transmission yoke. I happened upon one at a driveshaft shop for $35.00. Here is the thread where I found it. http://www.naxja.org/forum/showthread.php?t=956611&highlight=th350

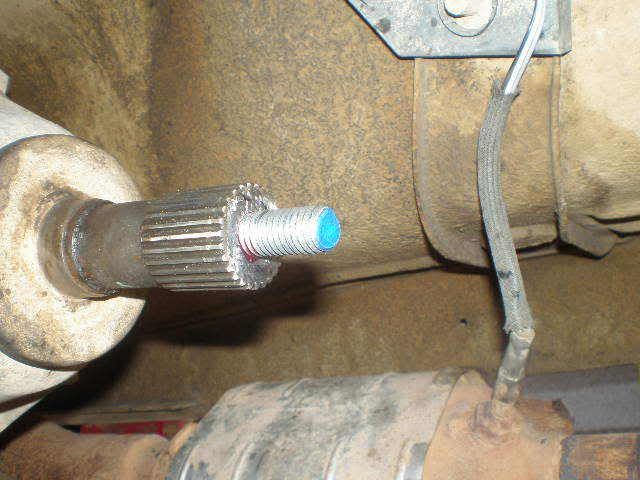
Well I got around to installing it today. I had a spot of trouble when the tap broke inside the output shaft, but aside from that, things went well. I found at Lowe's a Kobalt drill bit/tap combo for 1/2"-13 for $8.98, 1/2"-13 allthread for $4.27, 1/2" star washer for $1.15, 1/2" flat washer for $1.04, and a 1/2" nut for $1.04. I picked up a driveshaft at the local you pull it yard for $12.00 also. That brings my total on this to $63.48. Not bad at all. I'm going to bypass some of the simpler steps like removing the driveshaft etc. Here we go.

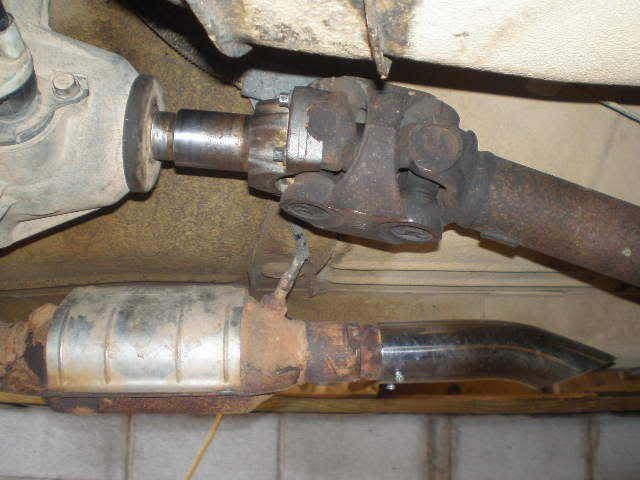
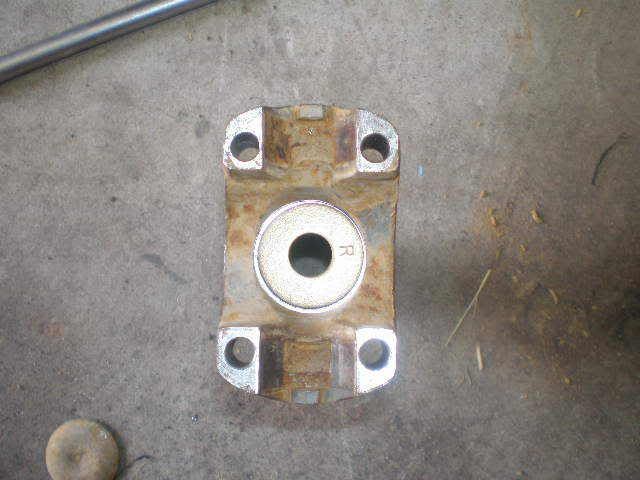
First I popped the plug out of the end of the yoke. Stuck a bar down through it and gave it a couple good pops with a hammer and it came right out. This was to give me plenty of clearance for the nut under the u-joint. I also didn't want it popping out at an inopportune time.
SYE006.jpg


Here is the washer sitting flat in the recess where the plug was.
SYE007.jpg


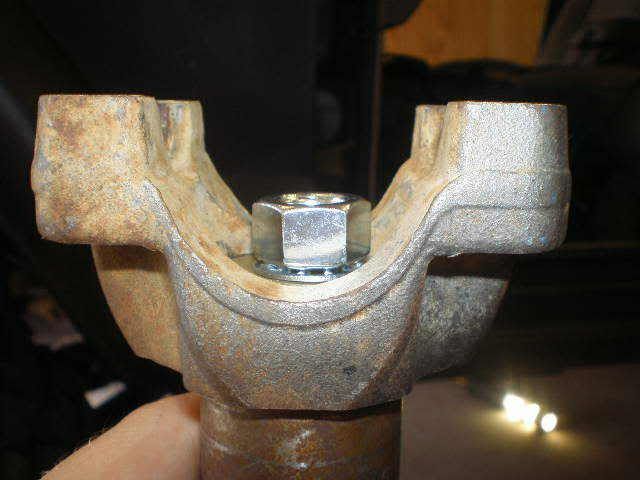
Flat washer, lock washer, and nut all stacked up to check clearance.
SYE008.jpg


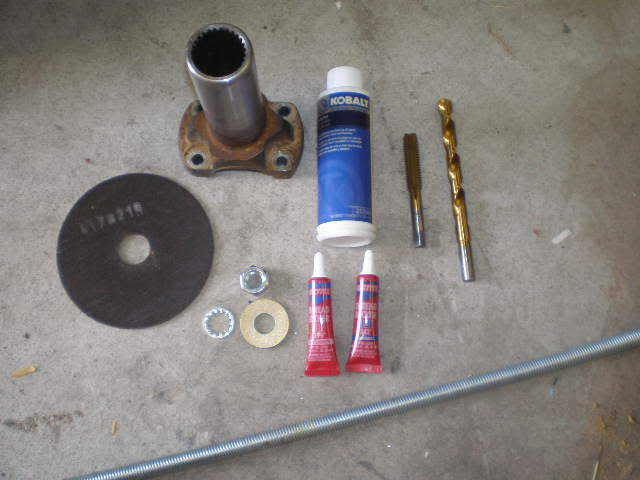
Everything all laid out.
SYE009.jpg


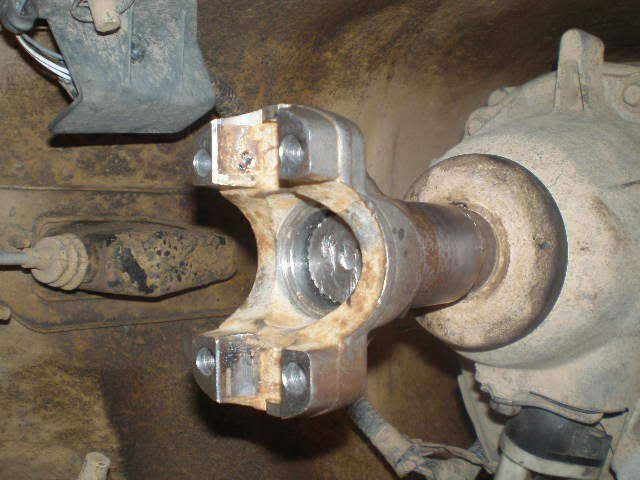
I cut 2 inches off of the yoke and the output shaft. This left me with 1.25" of spline engagement. Here it is taped off and ready to cut.
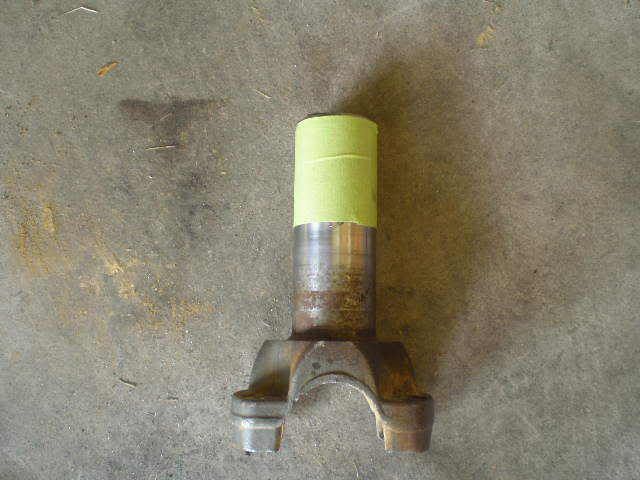
SYE010.jpg


And cut.
SYE011.jpg


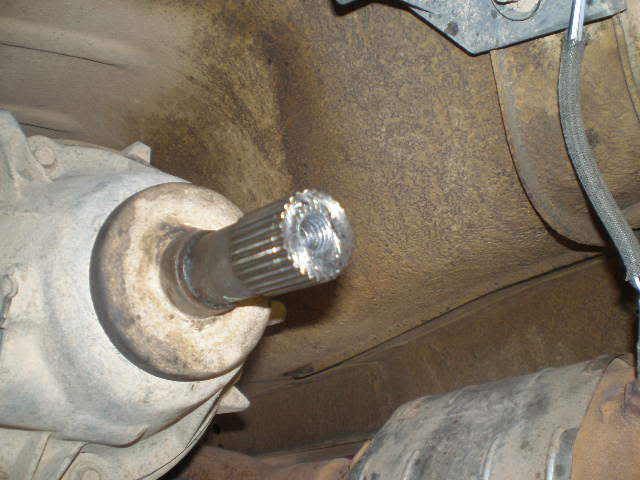
Output shaft taped off.
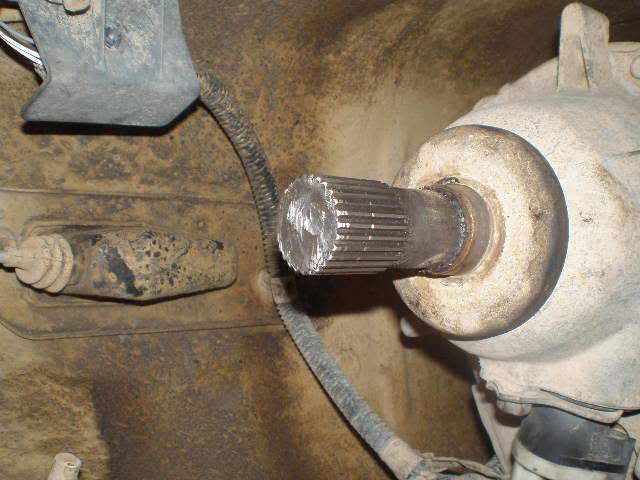
SYE012.jpg


And cut.
SYE013.jpg
 
Test fit the yoke.
SYE014.jpg


Hole drilled in output shaft.
SYE015.jpg


Threads tapped.
SYE017.jpg


I went about this a little differently and made a stud out of allthread. I figured this would hold tighter than a bolt and I could keep things from backing off. I put the stud in with some red Loctite so it's pretty solid.
SYE018.jpg


Everything bolted up.
SYE019.jpg


Side view.
SYE020.jpg


And with the front driveshaft connected.
SYE021.jpg


It looks so much better without the transfer case drop on there. Feels good so far, no noticeable vibrations but I only got up to around 50mph. My pinion looks like it's a little low, but I'm hopefully going to have my 8.8 in within a couple weeks so I'll deal with vibes until then if I have to. Any questions or comments, feel free.
 
Nice work! I love the fab job. I would have never thought to do something like that. I don't know if you came up with that yourself or what, but it's very original.
 
A little looking around...mostly at http://www.go.jeep-xj.info/HowtoSYEconversion.htm I found that the output yoke was the same as a TH350 and went from there. I prefer the idea of a stud and nut over just a bolt because it loads on both sides. Same reason people buy all those fancy stud kits from ARP. I used all grade 5 stuff because it's only purpose is to hold the yoke tight on the output shaft. After I tightened everything up, using a liberal amount of red loctite on the stud inside the output shaft, and blue loctite on the nut, along with a star washer to lock it all down, I gave it all a few pretty good whacks with a BFH and nothing moved.
 
It appears he used all hardware store low grade fastners, right down to the star washer. Kinda fits with the chrome turn down right after the cat.

Hardware grade hardware, especially "all thread" has the hardness of a wet noodle and as easy to break in either shear or pull.
I recomend upgrading the hardware for dependability, all the way up to grade 8, then torquing to a figure appropriate to the bolt he is using.

Go Jeep has a good write up and frankly, I like his engineering; it is well thought out.

What vehicle was the yoke from? You mentioned TH350, and since that is only the transmission that GM used for atleast 70% of it's applications, including the VEGA, that's not that helpful.
 
Last edited:
Zuki-Ron said:
It appears he used all hardware store low grade fastners, right down to the star washer. Kinda fits with the chrome turn down right after the cat.

Hardware grade hardware, especially "all thread" has the hardness of a wet noodle and as easy to break in either shear or pull.
I recomend upgrading the hardware for dependability, all the way up to grade 8, then torquing to a figure appropriate to the bolt he is using.

Go Jeep has a good write up and frankly, I like his engineering; it is well thought out.

What vehicle was the yoke from? You mentioned TH350, and since that is only the transmission that GM used for atleast 70% of it's applications, including the VEGA, that's not that helpful.

I agree that all-thread = scary. However, you can pick up grade 8 and 10.9 from pretty much any Ace hardware in the country. I also have to wonder how much force is actually being exerted on the hardware. The downward pressure is alleviated by the splined shaft. The pulling pressure is accomodated by the slip in the driveshaft. I wouldn't do it myself, but he just may have a problem free outcome.

No comment on the exhaust.
 
What keeps the yoke from pushing or moving up the putput shaft? Is the washer held in place some way that Im missing?
 
The washer sits in the recess where the plug use to be. Look at pics 1 & 2. The inside diameter is smaller. This is an awesome idea for a hack n tap. Only thing that might concern me would be the strength of it. Let us know how its holding up!
 
Dave41079 said:
I used all grade 5 stuff because it's only purpose is to hold the yoke tight on the output shaft.


Looks like grade 5 would be fine for this application, what are y'all wining about? Gread 8 isn't needed on every bolt. Allthread comes in different grades, it isn't all grade 2.

Also, he used 1/2" allthread. Gojeep used 3/8." 1/2" is over twice as strong as 3/8"
 
You're absolutely right, it is all low grade. I did that for two reasons. It will stretch before it will shear unlike harder metals, and it's only purpose is to keep the yoke snug against the output shaft. It does nothing else. Show me some form of a lock washer that works better than a star washer also. Split washers lose their temper/spring over time and loosen up. If someone wants to do this, they can use any hardware they feel comfortable with.

The yoke was from a shelf, at a driveshaft shop, as referenced in the first paragraph with the link to my other thread.

As for the turndown, when I replaced my transmission I had to cut my exhaust to get it apart to get the tranny out. I didn't get a chance to weld the muffler back on, kind of liked the tone of it, so I put the turn down on it in order to keep the heat off the floorboard. If anyone is wondering how it affects performance...it didn't at all. I still get 16.5mpg average on 33s with stock 3.55s, and acceleration wasn't changed a bit.
 
srimes said:
Looks like grade 5 would be fine for this application, what are y'all wining about? Gread 8 isn't needed on every bolt. Allthread comes in different grades, it isn't all grade 2.

Also, he used 1/2" allthread. Gojeep used 3/8." 1/2" is over twice as strong as 3/8"

I'm also not using a bolt, I'm using a stud and a nut. Glad some people get the premise of this.
 
PornstaR said:
Looks good but like above stated the "harware" is nill. Also what year of rig and what TC? I see your cut on your yoke wasnt really all that straight and wouldnt have been stronger if you would have let the yoke go "all" the way down the output shaft?

96, so it's the sealed output 231. If you look at the later pictures, I straightened up the cut on the yoke. I had to cut it with my grinder because my chop saw is being used by a friend. The yoke is all the way down. The only way it could go down further would be to machine the splines out of the back end of the yoke. That ridge on the tcase side of the output shaft is larger than the splines, so that's what it is pressed against.
 
Last edited:
Reasons I was stating that is because when Marcus (GoJeep) and John did both of theirs they were using the yoke to push against the bearing and in turn was pullin on the shaft to lock it into the oil pump. Figured it was out of the upper years from the pics of the sealed shaft. Dont work on nothing that new and fancy so.......... LOL


Was going to go the same route a while back but comming up on a yoke just really wasnt that cost affective. Where Marucs got his from the price pretty much trippled between now and then.
 
dmbxj05 said:
The washer sits in the recess where the plug use to be. Look at pics 1 & 2. The inside diameter is smaller. This is an awesome idea for a hack n tap. Only thing that might concern me would be the strength of it. Let us know how its holding up!

If its recessed, how do you get the washer in there. On a H&T, theres a shoulder behind the washer that keep the yoke from sliding off the output shaft, AND there a snaprig that goes in front of the washer to keep the yoke from sliding further onto the shaft. Follow?
What takes the place of the snaprig in this setup?

EDIT: Nevermind, I missed where you had already answered it
 
Last edited:
ECKSJAY said:
$100 is going to turn to a lot more when the t-case gets replaced and he realizes he should have done it right to begin with.

:twak:
I think Im with you.
I could be wrong but without the far end of the yoke being supported by splines, I think over time, that thing's going to loosen up and get the wobbles.
 
Back
Top