I decided I wanted to free up some space under the hood and run a bigger battery so I decided to relocate, this turned out to be more expensive and some what of a hassle from time to time. I went with 2 gauge wire.
First the parts you need.
Battery relocate kit
15' of pos wire
15' of neg wire
3 ft' of neg wire
6 or more butt connectors
Solder, soldering iron
Heat shrink wrap
Kill switch (if preferred)
And all sorts of odds and ends
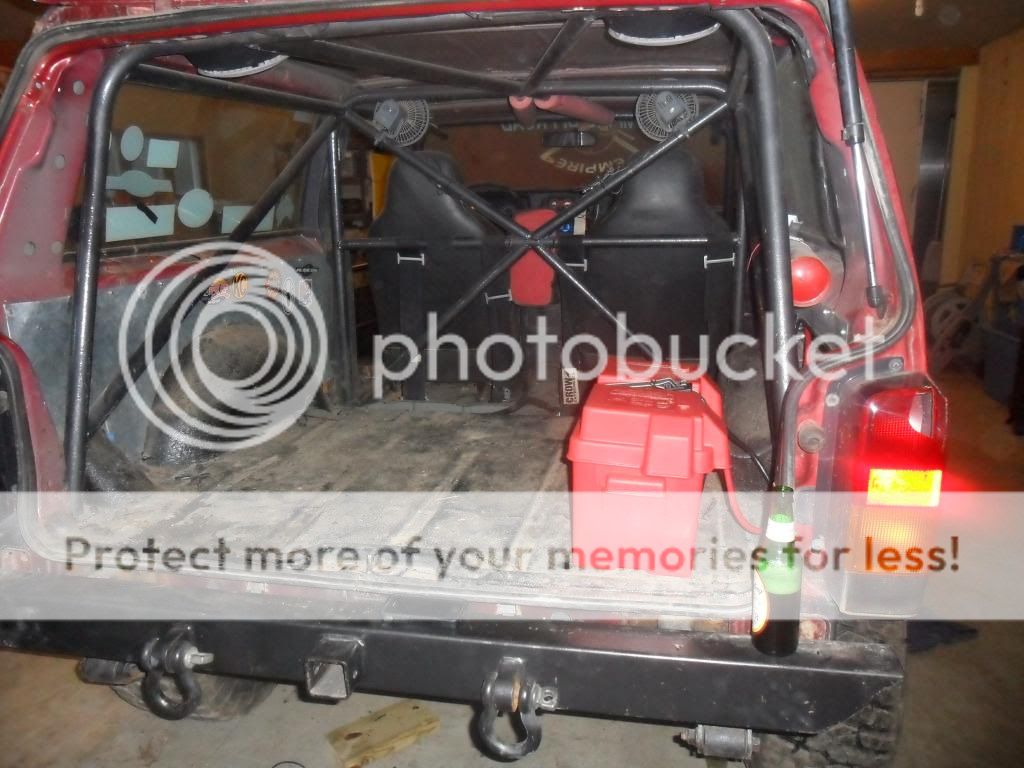
First you want to pick a good spot for the battery box and where your j hooks can safely go through floor without hitting tank.
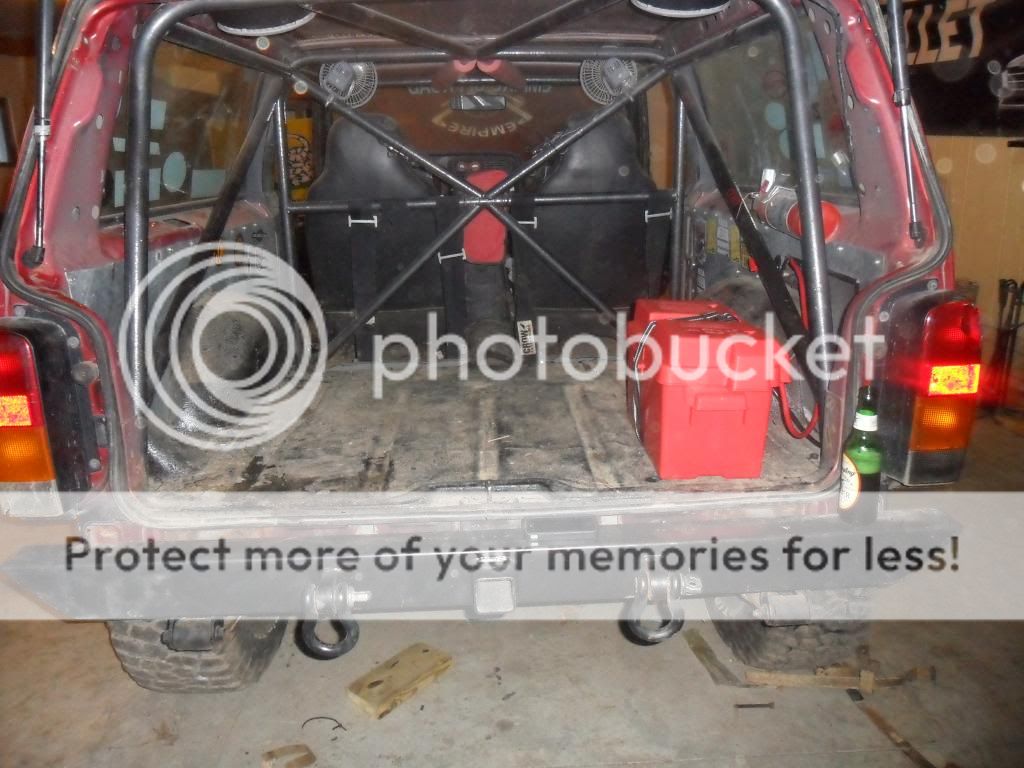
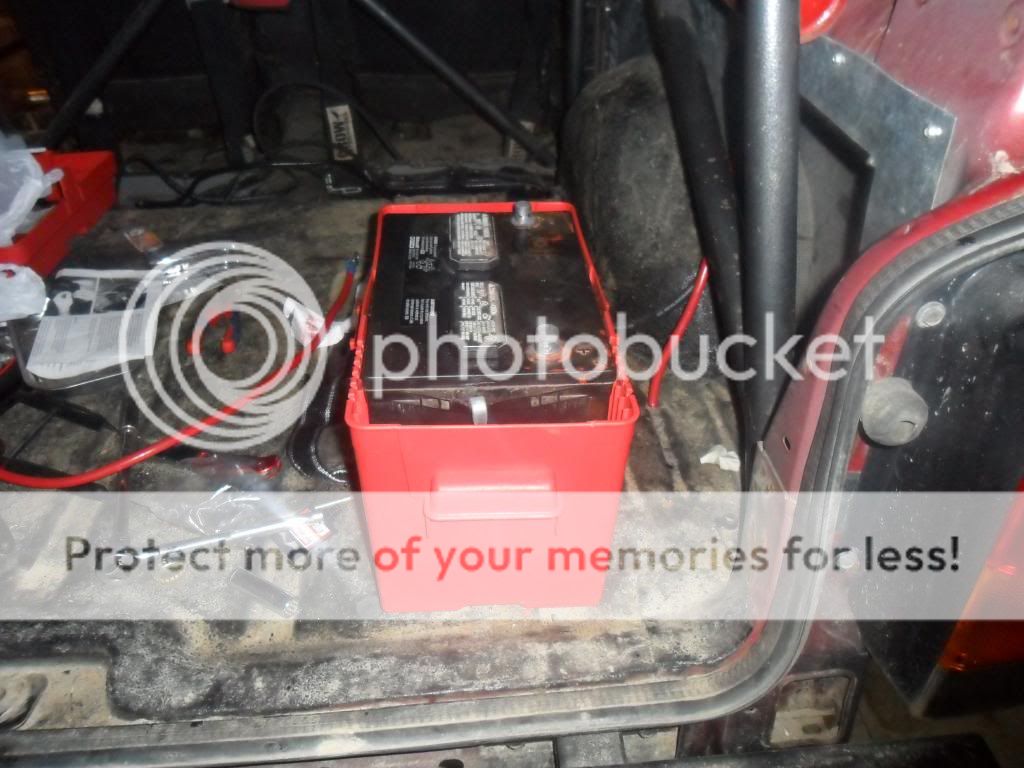
Install j hooks and make sure battery and box is secure
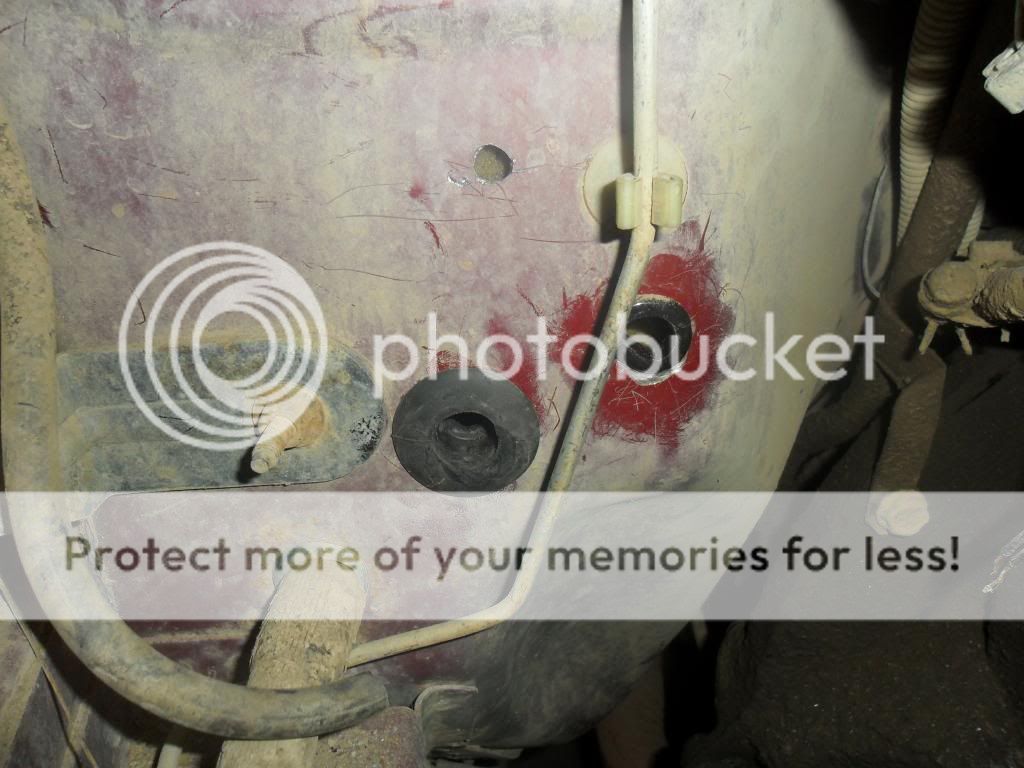
Then decide where and how you will run the 2 wires from rear to the front. I went through the rear passenger side wall and then under plastic trim on floor and then through the fire wall. One hole that I used through the fire wall was the rear washer sprayer line, didn't use it so I pulled that stuff out and put in a grommet. I then drilled a similar size hole next to and added a grommet. You must have these grommets so the lines do not get frayed or cut!
I then pushed the lines through, a friend is helpful in this process, while one person pushed the other pulls, soap helps.

I then also ran a second ground, from the battery to my wall.

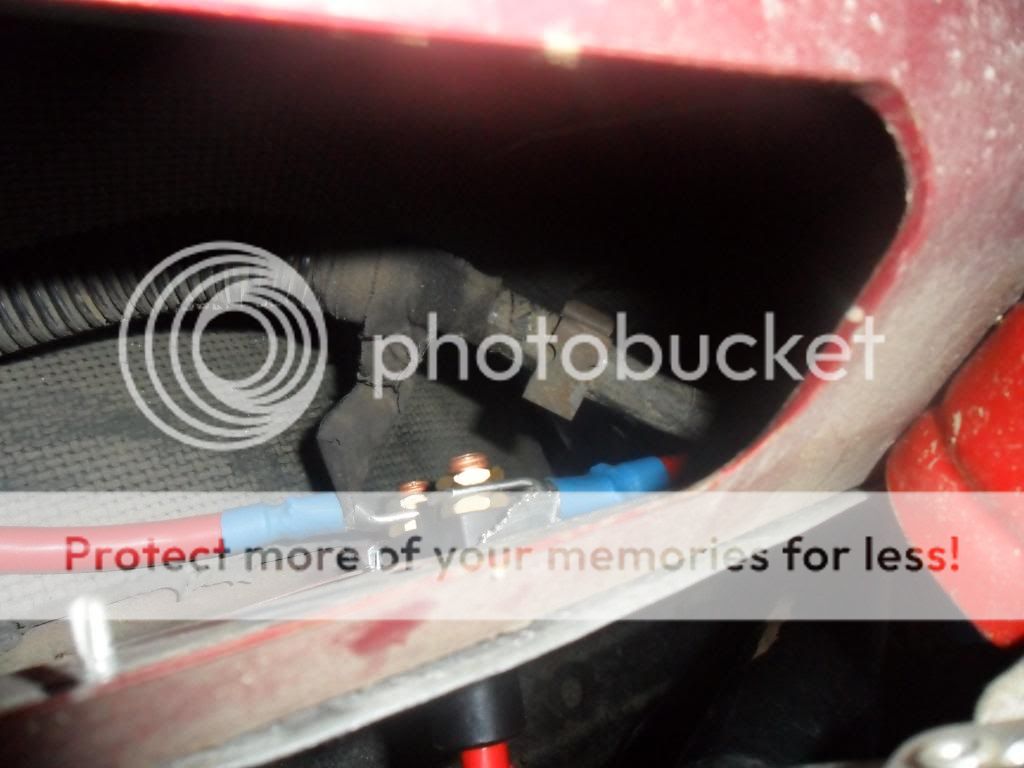
Make sure you have the right amount of lines where you want them before you cut and add butt connectors, move the lines around and decide where you want them to ground and junction. For the negative line I had just put them all on a bolt on the inside fender.

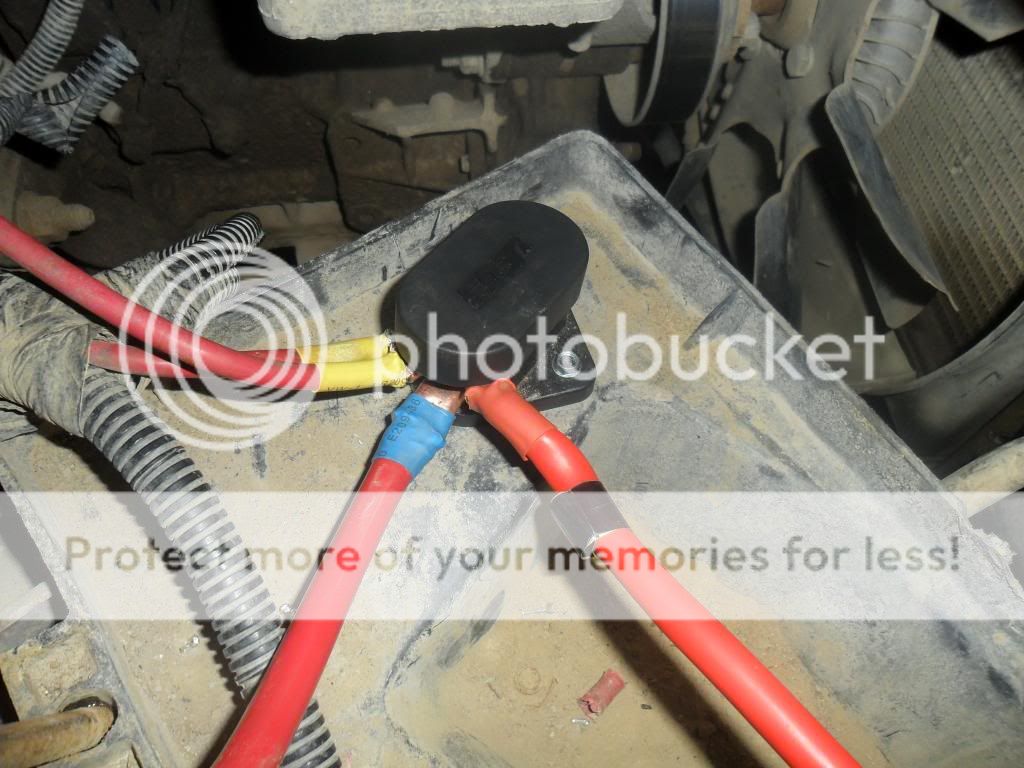
For the positive lines, I got a terminal block from Jegs for $13.

Decide where you want to mount, again test fit everything before cutting.

For the battery kill switch cut, splice, add butt connectors to positive lines and mount switch where ever.


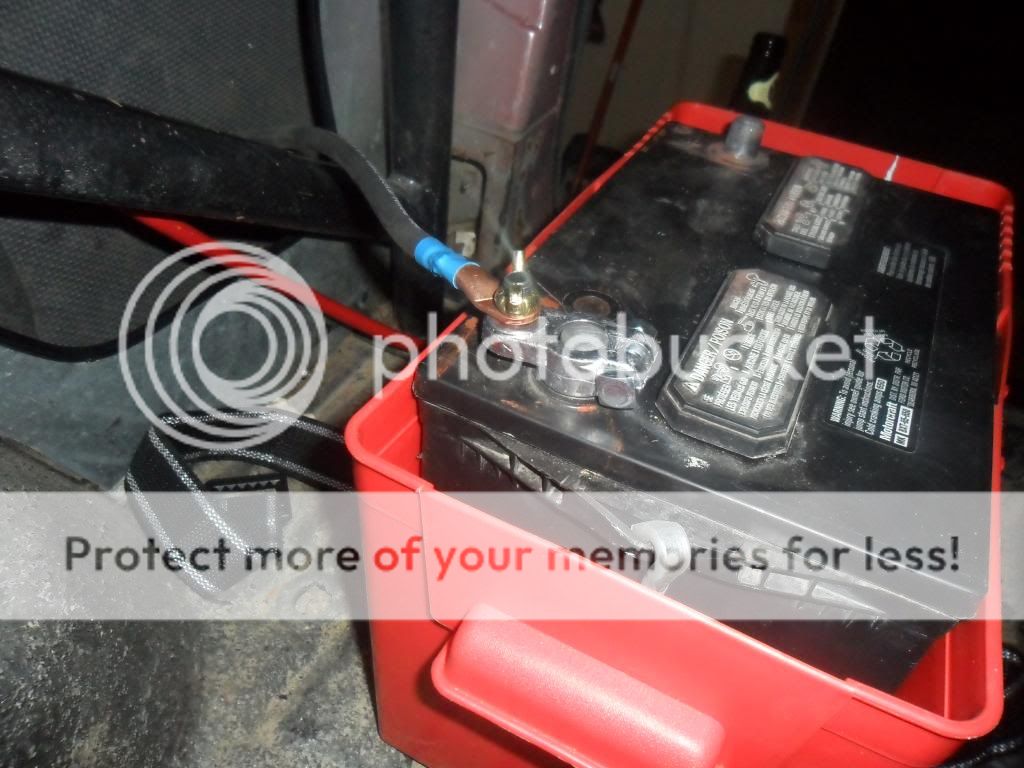
Add terminals for battery. Remember to heat shrink wrap every splice.

So far I love it! Especially the battery kill switch. Great for parasitic draws and the computer doesn't have to relearn every time.
First the parts you need.
Battery relocate kit
15' of pos wire
15' of neg wire
3 ft' of neg wire
6 or more butt connectors
Solder, soldering iron
Heat shrink wrap
Kill switch (if preferred)
And all sorts of odds and ends
First you want to pick a good spot for the battery box and where your j hooks can safely go through floor without hitting tank.
Install j hooks and make sure battery and box is secure
Then decide where and how you will run the 2 wires from rear to the front. I went through the rear passenger side wall and then under plastic trim on floor and then through the fire wall. One hole that I used through the fire wall was the rear washer sprayer line, didn't use it so I pulled that stuff out and put in a grommet. I then drilled a similar size hole next to and added a grommet. You must have these grommets so the lines do not get frayed or cut!
I then pushed the lines through, a friend is helpful in this process, while one person pushed the other pulls, soap helps.
I then also ran a second ground, from the battery to my wall.
Make sure you have the right amount of lines where you want them before you cut and add butt connectors, move the lines around and decide where you want them to ground and junction. For the negative line I had just put them all on a bolt on the inside fender.
For the positive lines, I got a terminal block from Jegs for $13.
Decide where you want to mount, again test fit everything before cutting.
For the battery kill switch cut, splice, add butt connectors to positive lines and mount switch where ever.
Add terminals for battery. Remember to heat shrink wrap every splice.
So far I love it! Especially the battery kill switch. Great for parasitic draws and the computer doesn't have to relearn every time.
Last edited: