• Welcome to the new NAXJA Forum! If your password does not work, please use "Forgot your password?" link on the log-in page. Please feel free to reach out to [email protected] if we can provide any assistance.

Quadratec HD leaf install tips - Jeep is in the air...soaking in the PB

Jonner

NAXJA Forum User
Location
Charlotte, NC
I've been piecing together an upcountry style replacement lift for my 98 Cherokee Sport (4dr, AW4, 4.0 w/194,000k) for the last year and a half while I worked on other issues with my wife and I's cars. I finally have some vacation time at work and am ready to tackle this. I have all of the right tools (excluding impact, air, or welder which would make things easier). I live in Ohio so rust is inevitable. I wanted something more like a write-up because some of the links I saved for this had X's for pictures.

I'm looking for some last minute pointers on some of the research I've been doing. I've done a suspension/broken bolts on a Honda and have dealt with rust, and replaced most of the steering and front suspension on the Jeep.

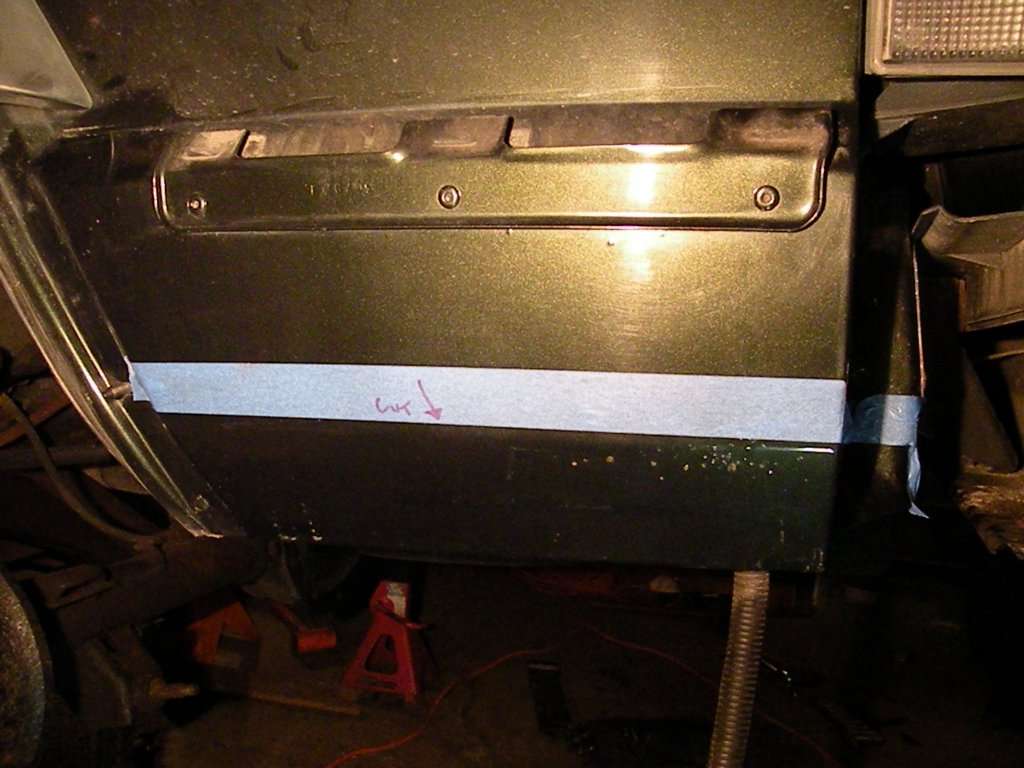
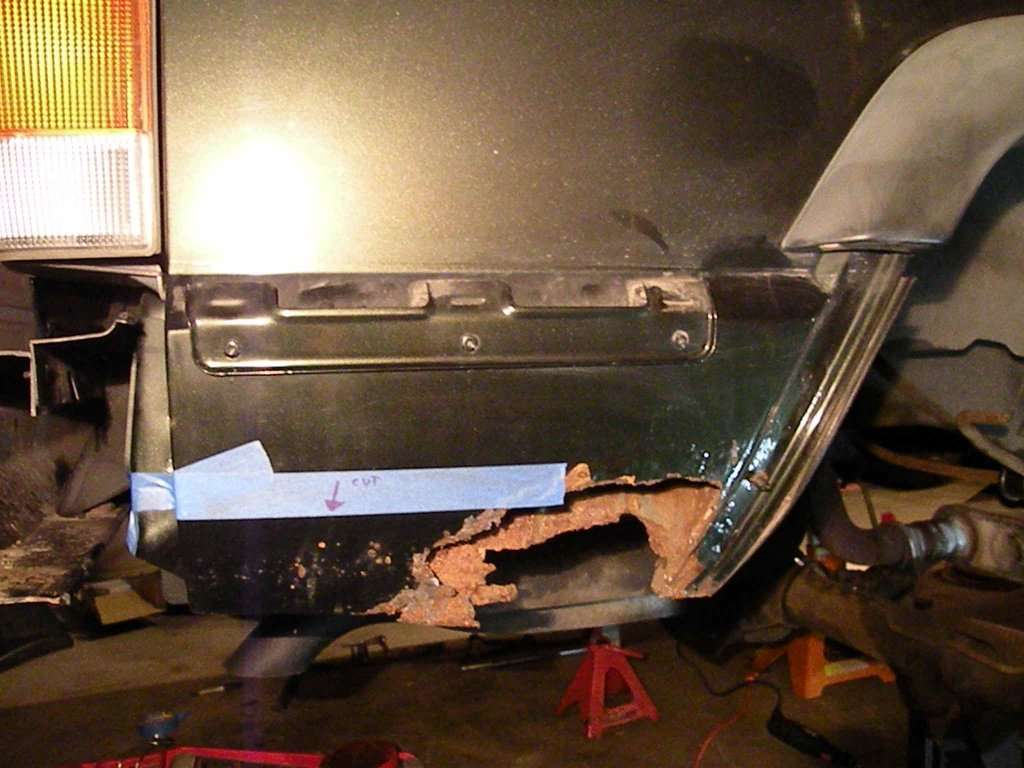
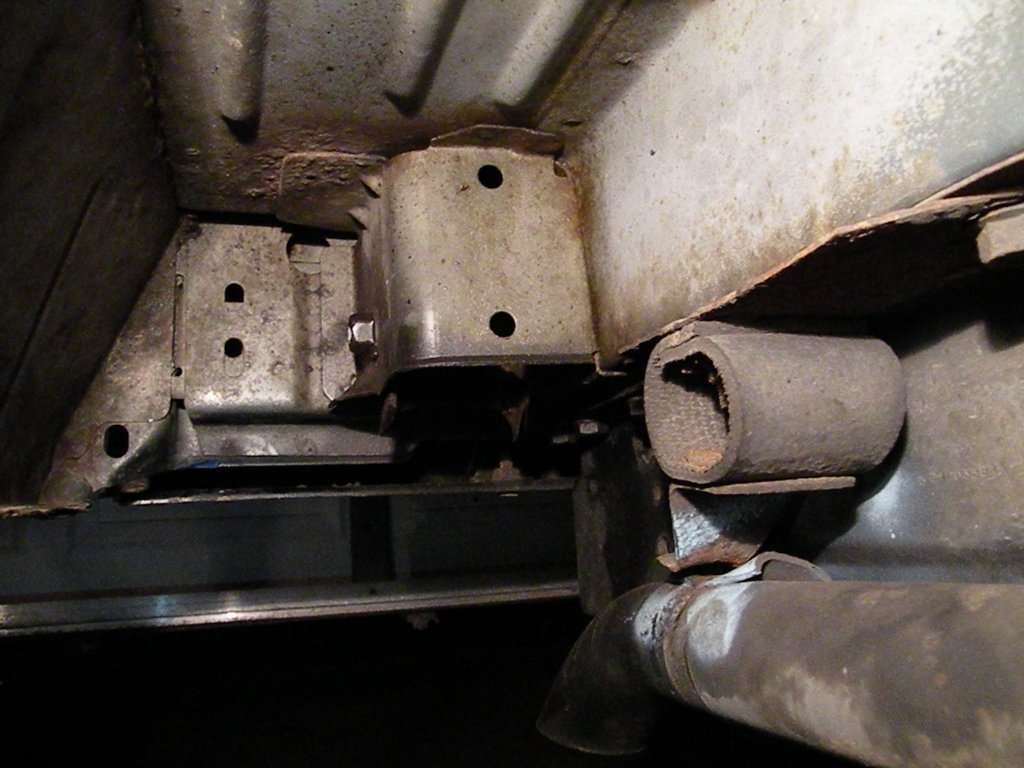
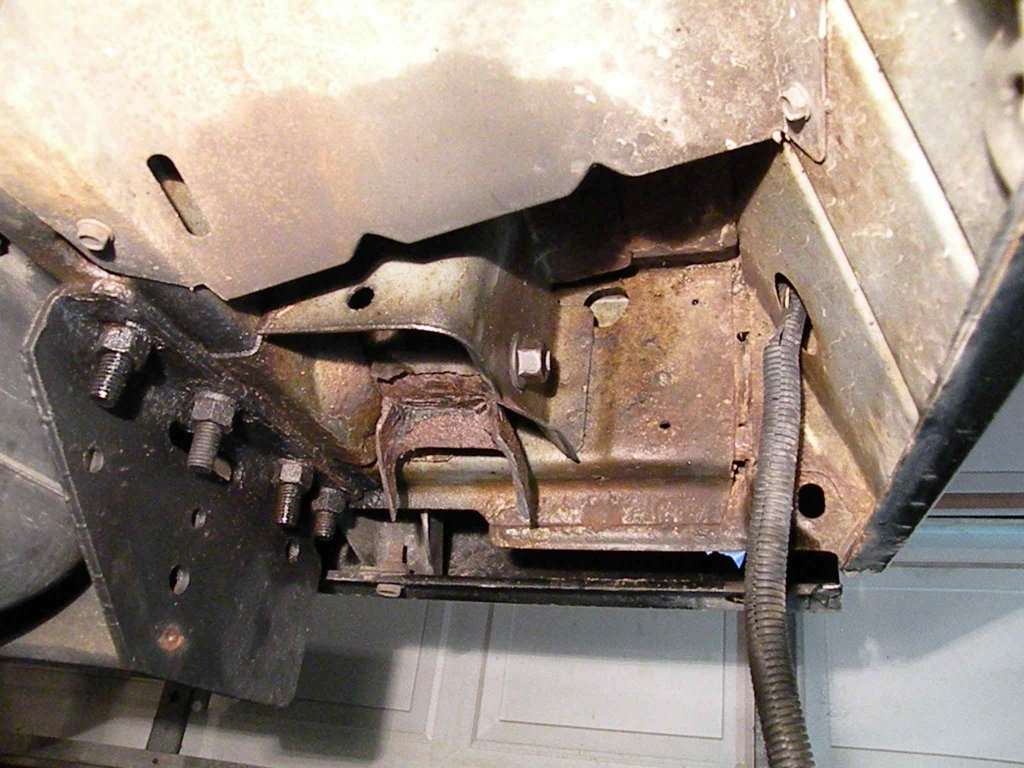
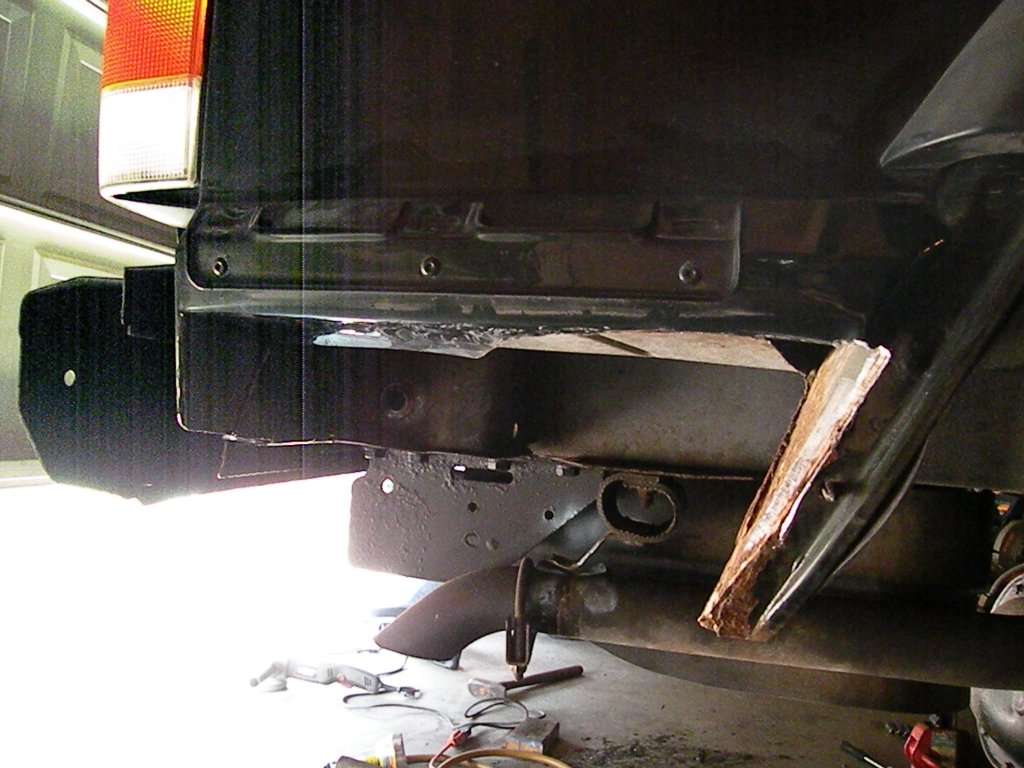
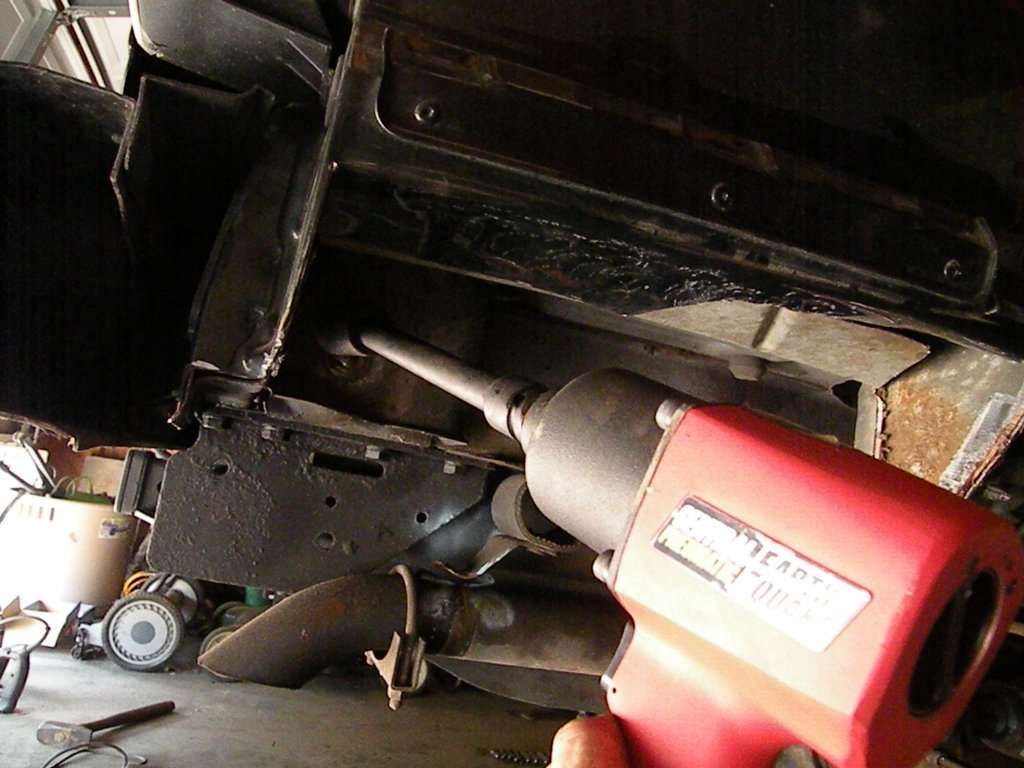
I have fasteners to replace all 6 bolts for the shackles/leafs. What can't I immediately sawzall off the leafs? It looks like both the upper shackle mount and front leaf spring mount have a weldnut in the frame rail. I'm prepared to cut the body to access the weldnut if fate has things going that way. I'm interested in speed...everything is worn out 194k and going in the trash (have a sawzall, 4" grinder with cut off wheel, and dremel with hd cutoff wheels.)

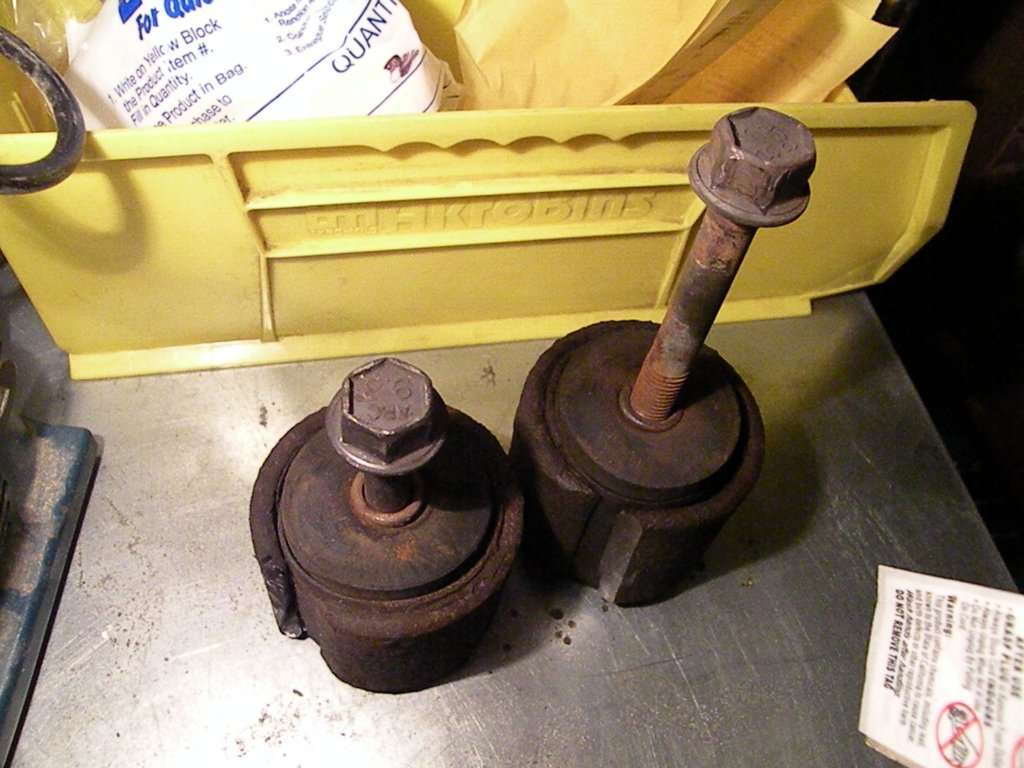
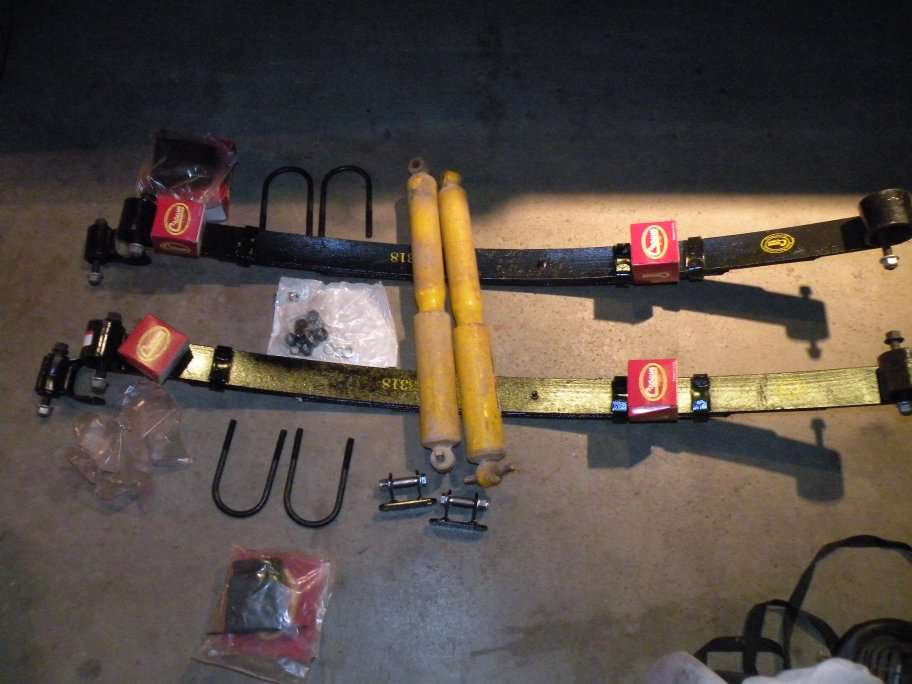
For the top bolts on the rear shock mounts, what size do I want to retap for if I inevitably break them? (I have taps, good drill, drill doctor, and drill bits.) The only thing I don't have is replacement bolts for the top rear shock mounts. Pictures below.

Kit:

Front
-Teraflex 3/4" spacers
-Bar Bin Eliminators (brand escapes me)
-Old Man Emu shocks (second hand from Dirk at DPG)
-Day star polyurethane extended bump stops

Rear
-Quadratec (Crown) HD leaf spring packs
-6 New bolts, washers, nuts for leaf spring attachment points
-OE style (Crown) shackles
-OE style (Crown) body & shackle replacement bushings
-New u-bolts, nuts, and washers
-Longer OE style (Crown) bump stops
-Bar Bin Eliminators (brand escapes me)
-Old Man Emu shocks (second hand from Dirk at DPG)

dscn0357i.jpg

http://img694.imageshack.us/img694/1706/dscn0366j.jpg
http://img823.imageshack.us/img823/8629/dscn0365c.jpg
http://img18.imageshack.us/img18/5011/dscn0362rw.jpg
http://img51.imageshack.us/img51/978/dscn0361v.jpg
http://img513.imageshack.us/img513/5209/dscn0360i.jpg
http://img72.imageshack.us/img72/8835/dscn0359k.jpg
http://img846.imageshack.us/img846/2263/dscn0356rk.jpg
http://img687.imageshack.us/img687/922/dscn0355p.jpg

dscn0366j.jpg
 
Last edited:
You really need an impact, otherwise you will be cursing and moving very slow. Borrow a neighbors compressor and pick up an impact from Walmart along with a 21mm impact socket.

Plan on replacing the front lower shock bolts/nuts at the axle as well. They simply bolt through the bracketry so no need for a tap.

Use a torch to heat up stubborn nuts or bolts. Don't be shy with the heat.

I would also try and keep one end of the Jeep on the ground. It would be another story if it was on a lift, but I have never felt safe under a rig supported only by jack stands.
 
Alright... I tried an impact but it didn't do the trick alone. I need to pick up a torch to use heat. Any suggestions for something entry level but hot enough to do the job on 21 mm leaf spring bolts?

My patience is telling me to cut through the floor boards.

Thanks for the advice... you were right.
 
Go to your local hardware store and buy a torch that uses a small propane cylinder for fuel. Around here they go for $20-$50 with fuel. Try to find one with minimal plastic and a long nozzle. Will make getting into tight places easier.
 
It it worth it to buy MAPP gas instead? Cheapest kit is about $40-50 more than a simple propane kit.

Will propane get the 21 mm bolts hot enough to do anything?
Should I heat/cool, heat/cool a few times?

Acetylene is too much money right now, and might not be a good idea on the shackles...which are close to the gas tank.
 
Propane should be fine. Heat the bolt, and quench the threads with PB, it helps to break the bond, and draw the PB in
 
Ive used a breaker bar,extension 21mm socket held up with a small jack stand. On the breaker bar a 6 foot cheater pipe. The problem is the bolt is rusted to the sleeve. An impact that will break it loose has to be a 3/4 or 1 inch drive. It will take alot even with the 6 foot cheater. Coat it heavily with anti seize when you put it back together.the bolt will be a pain to get out once its loose. Ive had to cut the end of the spring off in 2 spots then remove the bushing and grind the sleeve off the bolt.
Ron
 
All I did was spray the :):):):) out of everything with PB the day before, then grabbed a 21mm wrench and a 21mm socket (1/2") and my 4' cheater bar. put the wrench on the inside where it will jam against something, use the ratchet w/ socket and cheater bar and enjoy the spoils of extreme leverage.
FYI - don't try this with a 3/8" ratchet, it likely won't survive the first attempt.
Make sure the XJ is good and supported as you may need to put all your weight into it. My suspension was far rustier than yours and she came apart without too many issues at the springs.
Worst case break out the grinder and remove a side of the nut, until you see bolt (only start at one spot and keep going) then pop the ratchet on her and she'll spin right off (don't do it with your hand as you'll get burned ... yes, I know, I know, it was a blonde moment for me).
Had to do this for the exhaust side, trick is to grind through but leave enough for the socket to grab.
rememebr when twisting things off by hand is to 'feel' the turn ... it takes some patience but you'll be able to feel when a bolt is twisting as opposed to unscrewing. In some cases it's not an issue ... but in others it a friggin nightmare.
For those upper shock mounts in the rear ... just twist away and pound the weld nuts out afterwards. Then use a little tape to help hold a bolt or nut in a wrench and fish it up into the hole. I put my bolts (10mm) in through the top and a normal 13mm wrench was long enough to reach without out much swearing at all.
 
i just did my rears 6 weeks ago. HEAT, HEAT & HEAT!!!:firedevil

I used a propane torch and GT85 ptfe lubricant spray (canot get PB over here)
The secret is patience ...and a lot of it.

With the inner nut in the frame at the front shackle, I was able to spray the nut - in fact, soak the nut in GT85, through a factory hole in the frame. Then just applied heat to the bolt, turn anti-clockwise, then turn clockwise, turn anti-clockwise, spray more GT85 then apply more heat to the bolt and repeat the process, and so on

For the rear shackle I did basically the same, BUT, you are able to see the bolt through the frame if you remove the rear bumper. Spray it down through the gap in the frame (behind the bumper where the nutserts are that hold the towbar &/or fuel tank skid/) you should be able to get a propane torch in there as well that will really help to HOT things up

That's how did mine. I took alot of advice from other posts on NAXJA and it worked a treat for me.
Just copper grease the bolts and nuts before re-installing.

One more thing, you might find the bolt has 'welded' itself to the inside of the bushing. Others had come across this in the past, I just used heat on the bushing as it was being replaced anyway.

Good luck, always feels good when you can do it yourself:cheers:
_______________________________________________
1988 Cherokee Laredo 4WD 4.0litre Auto Californian import
 
Thanks for the help everyone, I'm trying a combination of most things everyone is saying here.

I cut the shackle in the middle and cut the front leaf right before the eye. The axle is clean... just need to get out the remaining leaf and shackle eye bolts.

I have the passenger side front leaf body bolt out. The upper rear shackle-body bolts and driver's front leaf body bolt have been torched once with a propane torch for about 8 minutes per bolt until rubber and paint started steadily smoking. I hit it with the impact wrench but the other 3 aren't moving yet. I'm quenching everything with PB blaster and am spraying it through the body holes to get the weldnuts.

I'll try 2 more rounds of the torch/impact/PB blaster (3 total rounds).

If that doesn't work, the floor boards are going to get access panels cut and it's time to start cutting some bolts with the sawzall. I really don't want to cut out hardened bolts.
 
Last edited:
Thank you... I was staring at the inside of the rear lower quarter panel thinking about which way I was going to cut an access hole in it. The bottom is rotting out from rust. I just bought a 2 1/8" hole saw, but also could use a 3" air grinder, or 4.5" angle grinder both with cut-off wheels.

To get to the rear quarter panel do I just remove the 10mm bolt/nut from the plastic endcap where it attaches to the bumper? I've got it soaking in PB, but I'll cut the 10mm if it gives me trouble. I'm gonna glance at the FSM.

This is a daily driver, so I'd like to get the endcaps back on when I'm finished.

I've got both the front eye bolts out without any damage! The rear shackle mounts are clicking in the body, but an impact worked on the other 2 that were doing the same thing up front.:thumbup::thumbup::thumbup: Working it back and forth with the impact, unseized the bolt from the bushing and broke up the rust. I had to torch 1 more time to get to this point.
 
For anyone else reading this near Ohio, to break the rust loose required this sequence:

1) Torch (21mm bolt for 8 min)
2) Air Impact driver (21 mm on wobble extensions/yokes)
3) Quench with PB Blaster (smoking hot quench)
4) Attempt with 3/4" breaker bar w/2 ft cheater

Repeat up to 3 times. Use the impact driver to loosen and tighten once the bolt starts moving to unseize from bushing/nut.
 
So I've been checking out the cut and fold method:
http://www.jeepforum.com/forum/f11/cut-fold-rear-lower-quarter-panels-right-way-1007865/
and
http://www.ajsoffroadarmor.com/pages.php?pageid=12
I'll need to use the cut and fold to be able to get an impact on there at a straight angle.

I want to keep my stock end caps. This is a daily driver and I will have a stock bumper for at least 2 years. I wonder if I can do a cut and fold that is a little lower on the outside skin of the quarter panel. I'm trying to keep the end cap bracket underneath intact without tweaking the metal it sits on too much.

This is what I have laid out to cut tomorrow:
dscn0393go.jpg


dscn0392c.jpg


dscn0391ie.jpg


dscn0389eq.jpg

Success with the front eye bolts...it felt good to be halfway there.
dscn0398a.jpg


dscn0397m.jpg


dscn0395qa.jpg


What's left on the shackles
dscn0396zg.jpg


dscn0394l.jpg
 
This is what I'm going for to get access to the upper shackle mount. I will be keeping the endcaps and the endcap slider bracket, o my cut and fold will have to be a little lower than most of the write-ups. I'm a bit nervous but I'll take my time today.

RearBumper003.jpg
 
So mine aren't as clean as the purple XJ in the picture above, but I cut and fold the rear quarters. Since its a daily driver I kept the slider brackets for the end caps, and the metal inside the wheel well so I could retain my splash guards.

I heated the 21 mm upper shackle bolt once more, cranked the impact up to 150 psi and both came loose without damage! :clap:

Now calling around for a local shop to press in the bushings. I tried the 1/2" threaded rod with plumbing floor flashings but the bushings would not go in straight. All the rear bolts are out!:party:
 
Just fair warning... don't be surprised if those leafs from quadratec(crown) sag real fast. I got the same ones you did and the front springs to match and they well to put it lightly, SUCK. And I have no weight in the back. The front is no better then it was when I had the old ones in there and same with the rear. It bottoms out real easy too.
 
Well... I've read good and bad on the Crown springs, maybe more bad than good. I'm hoping you're wrong, but have a sinking feeling I'll be doing this again in 2-3 yrs.

There's not many options for a factory style HD replacement. I looked at the OME's but the HD's can give up to 3" of lift ($$$ SYE, longer brake lines, etc, etc).

On the bright side, the bushings are pressed in the leafs and the old leaf springs are completely out.
 
Back
Top