DanMan2k06
NAXJA Forum User
- Location
- Damascus, MD
If you've ever taken out your rear axle you'll quickly realize this thread fall into the "-for dummies" category. However, if you're thinking of, or have never taken your rear suspension apart this thread may offer some tips to make life easier. This thread can also be used as a reference for add-a-leafs, but I'm not doing that here.
I got around to installing my full length 2.5" leaf liners that Dukie564 so kindly provided. For how cheap they were it was definitely worth the time to install them. I believe I gave him 32 doll hairs, and I'm sure he wasn't losing any money on that trade, so it's a worthwhile investment if you can find some. And yes, I did this in my driveway instead of at work because, well, work is still work. I like to be there as little as possible even if I am working on my rig.
Right off the bat a few things need to be said:
- If your rig is lifted, you'll need some diesel-ass jack stands. Your standard Harry the Homeowner versions probably won't be tall enough so keep this in mind. This site if full of backyard ingenuity, so I'm sure if tall stands aren't available you guys can find something that is.
- Make sure your u-bolts are long enough for the extra thickness the liners add. It's not much, but if your nuts are already near the top of the bolts like mine were the 1/4" or so the liners add may put you over the edge.
- Get new center pins!! Re-using them is a joke for what they cost. At my local advance auto they were $5.99 a pair. The product inside the box was a joke, so I opted to go another route, which I'll explain further in.
Now, onto the fun stuff.
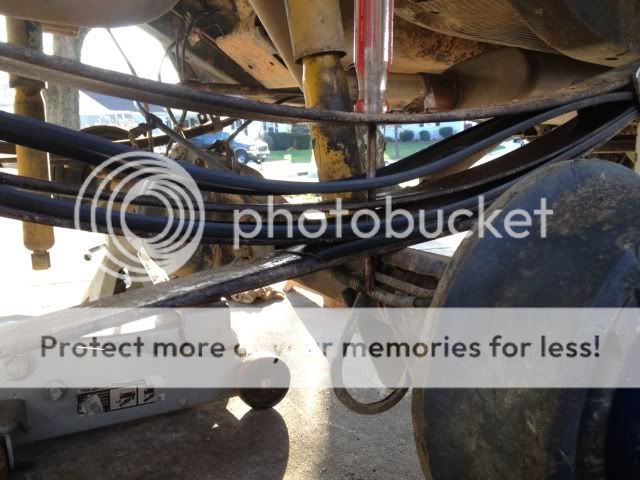
First thing you need to do is remove your shocks (from the lower studs). Do this on the ground while they're in a "neutral" state and not bottom out when your axles is drooped. If you please, you can also remove the driveshaft at the rear yoke. I didn't do this, but it did make re-aligning everything a little trickier.
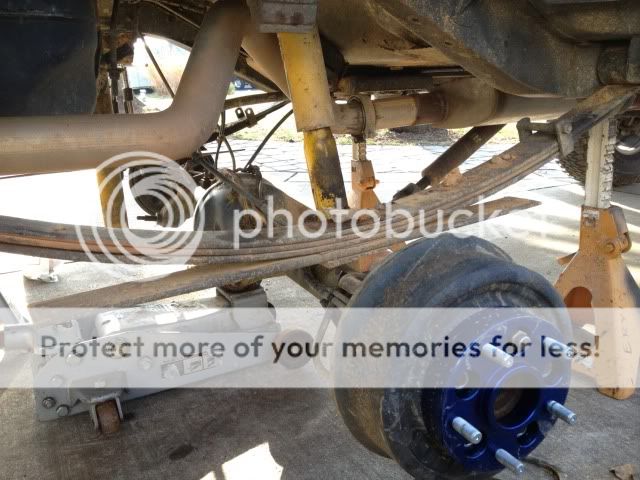
Next jack up the car so that the axle will be allowed to fully droop. I jacked mine up nice and high by the diff and then supported it with my 10 foot tall Harbor Freight special stands. Leave the jack under the diff so when you remove the u-bolts the whole thing doesn't come crashing down.
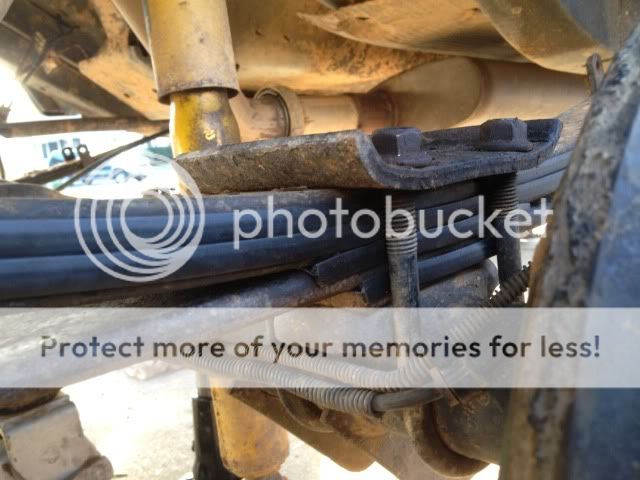
Now, remove your u-bolts and spring plates.
Once the axle is loose and free to move about, lower it down a few inches so you can access the bottom of the center pin. if you have ABS, WATCH YOUR SPEED SENSOR LINES!!! It's very easy to drop the jack too far and now the entire weight of your axle is resting on a few strands of insulated wire. 2 people makes maneuvering the axle easier, but with the driveshaft still attached I was able to do everything myself. If you're uncomfortable, put a block of wood or a jack stand under one side of the axle, and just do a side at a time.
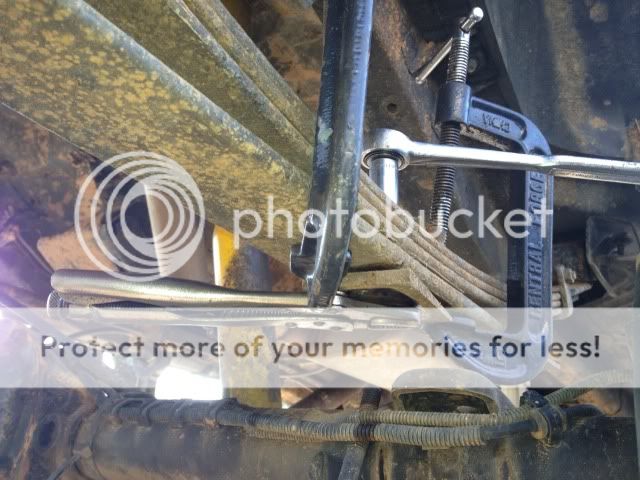
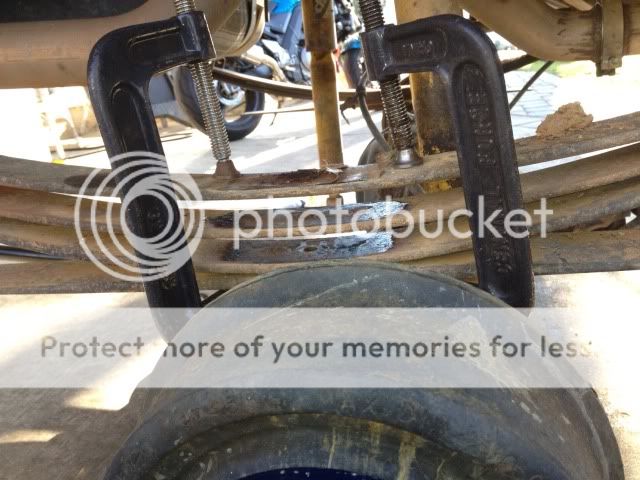
Next it's time to take out the center pins. Clamp the leafs on either side of the pin with C-clamps. They don't have to be Hulk Hogan tight, snug will do. Now using a (14mm in my case) ratchet and some vise grips, loosen the center pin. Mine have been removed before so they were a breeze, but this is where you may run into trouble. They can strip, bend, or snap if rusted enough, leaving you stranded. So as I said before, just get some new ones.
At this point, if you have springs clamps, they need to come off. With the center pin out, they can cause the leaves to bind and not fully unload. If this happens and you take them out later, everything explodes in your face. Mine were hella rusted so I just cut the bolt and sleeves.

Now slowly loosen up both clamps and let the leafs de-load.
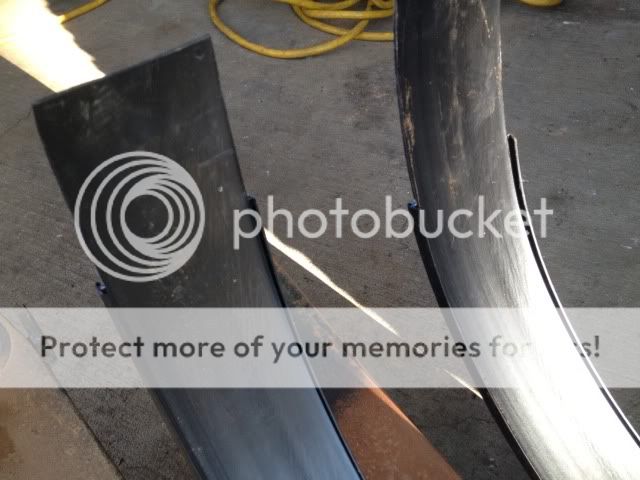
One you take the clamps off, the leafs are going to fall into your lap. Now you need to mark them so you remember which side goes forward, and which side goes towards the rear. I'm not certain if some of them matter which direction they face, but I sure as hell wasn't about to find out once everything was back in place. I used my angle grinder with a cutting blade to put a small nick in the front of the leafs. Easy, permanent, no mix ups.
Once all your leafs are marked and taken apart, remove anything that may still be on them. I had some factory plastic slide pads at each end, and a rectangular one in the middle. These are not going to be re-used, so don't cry if they break.

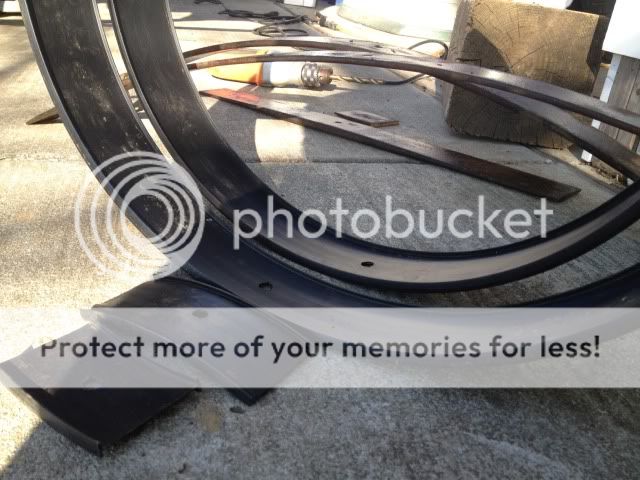
Now, roll out your leaf liner and cut your pieces to length. The entire length of the top of each leaf. The only one I cut shorter was the overload leaf, because it only touches in the very middle. This is also a good time to give the leafs a decent cleaning. Remove any diry, mud, surface rust etc and wipe them clean. I went a step further, and after cleaning mine I rubbed them down with a rag soaked in motor oil. I figured it would help displace moisture, protect again corrosion, and maybe even reduce friction.

Two of the liners are sandwiched in between leafs that are retained within the spring clamps. The liner wouldn't fit in between the clamps because of it's lipped edge. Here I took a pair of scissors and simply cut away the "I" portion of the liner all the way to the end. Worked great.
Don't forget to drill your holes for the center pin to go through.
On to the center pins. I have previously stripped these very easily by re-using and over-tightening old ones so I bought new ones before the entire project started. The ones they had at Advance Auto felt like a joke. The nut was so loose on the pin it felt like it would strip out at 10ft/lbs. I bought them naively, and after pulling out of the parking lot thought it was a bad idea. I went down the street to the local Tractor Supply Co. and bought some grade 8, 3/8-24 x 2.5" bolts. Along with a lock washer and two grade 8 nuts to boot.
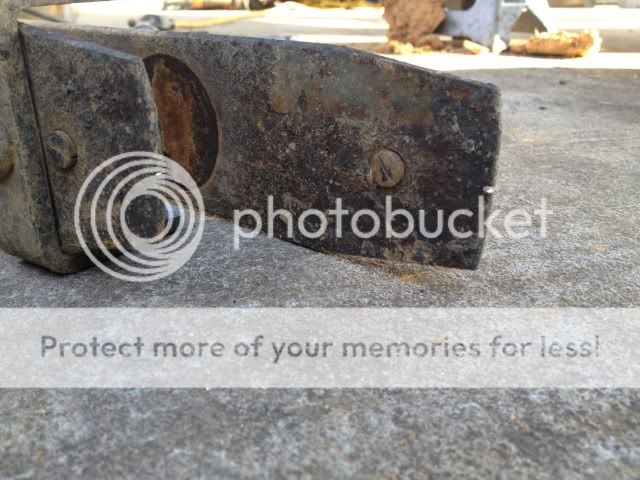
Carefully grind down the hex head into a circle using a bench grinder/angle grinder/die grinder etc. Using the axle perch as a guide, only grind away enough material until the bolt head will fit into the center pin hole. Too much and it won't have enough surface area to properly hold the springs. Here is what mine looked liked after completion. The two on the left are my homebrew pins, the one in the middle is a stripped out original, and the one on the right is an Advance Auto Chiwanese special.

Now it's time to throw everything back together. Again, here is where 2 people makes life easier, but I was able to manage by myself. Put the liner on top of their respective leafs, and stack them all back together. Take a long screwdriver and place it in the center pin hole to keep everything lined up. Using your two C-clamps again, start tightening the pack together. Only tighten them enough to where you can get your actual center pin through. If you snug them all the way against each other, you won't be able to wiggle the leafs around to get the pin through.
Once you've got your pin in the pack, tighten them all the way snug and put your nut and washer on the pin. Torque them to 40 or 50 ft/lbs depending on whether or not you lubed them (grade 8). I put copper ant-seize on my pins so I only took them to 40ft/lbs. If they're dry, go all the way to 50. I used an actual torque wrench just because I never want to think about them again.

Remove the clamps, and start putting everything back together. Jack the axle back up against the leafs, and get the pins set in their spring perch holes. I had to use a separate bottle jack at the front of the diff to keep it from nose-diving on me and preventing the pins from centering. Once the springs are set and centered, snug up your u-bolts. Not Vin Diesel tight just yet, but enough so that the perch won't separate from the leafs.
Now put your wheels back on and remove all jack stands and set the vehicle back on the ground. Bounce up and down on the rear bumper a few times to get everything to settle. At this point you can fully torque your u-bolts down. MAKE SURE your u-bolts are square, or they won't fully tighten. Or they can cause your leafs to twist as we saw in a recent thread. Mine are toast. They been re-used about 4 times, are bent, and felt like they were going to snap when I was tightening them so I was forced to upgrade. RuffStuff's u-bolts are amazing.
Throw your shocks back on, and the rear driveshaft if you chose to remove it. Here's what the finished product looks like (minus my new u-bolts)
Overall impressions: There seems to be a difference in ride quality, although this may just be a placebo affect. Where I was really impressed with these, is the noise reduction. No more squeaking, creaking, or moaning over bumps. Mine was most noticeable over speed bumps. They also seem to have greatly improved to amount of droop the pack has, I assume due to reduced friction between each leaf. The axle will now fall about 4" below my fully extended shocks. I definitely suggest this mod if you have the time.
I got around to installing my full length 2.5" leaf liners that Dukie564 so kindly provided. For how cheap they were it was definitely worth the time to install them. I believe I gave him 32 doll hairs, and I'm sure he wasn't losing any money on that trade, so it's a worthwhile investment if you can find some. And yes, I did this in my driveway instead of at work because, well, work is still work. I like to be there as little as possible even if I am working on my rig.
Right off the bat a few things need to be said:
- If your rig is lifted, you'll need some diesel-ass jack stands. Your standard Harry the Homeowner versions probably won't be tall enough so keep this in mind. This site if full of backyard ingenuity, so I'm sure if tall stands aren't available you guys can find something that is.
- Make sure your u-bolts are long enough for the extra thickness the liners add. It's not much, but if your nuts are already near the top of the bolts like mine were the 1/4" or so the liners add may put you over the edge.
- Get new center pins!! Re-using them is a joke for what they cost. At my local advance auto they were $5.99 a pair. The product inside the box was a joke, so I opted to go another route, which I'll explain further in.
Now, onto the fun stuff.
First thing you need to do is remove your shocks (from the lower studs). Do this on the ground while they're in a "neutral" state and not bottom out when your axles is drooped. If you please, you can also remove the driveshaft at the rear yoke. I didn't do this, but it did make re-aligning everything a little trickier.
Next jack up the car so that the axle will be allowed to fully droop. I jacked mine up nice and high by the diff and then supported it with my 10 foot tall Harbor Freight special stands. Leave the jack under the diff so when you remove the u-bolts the whole thing doesn't come crashing down.
Now, remove your u-bolts and spring plates.
Once the axle is loose and free to move about, lower it down a few inches so you can access the bottom of the center pin. if you have ABS, WATCH YOUR SPEED SENSOR LINES!!! It's very easy to drop the jack too far and now the entire weight of your axle is resting on a few strands of insulated wire. 2 people makes maneuvering the axle easier, but with the driveshaft still attached I was able to do everything myself. If you're uncomfortable, put a block of wood or a jack stand under one side of the axle, and just do a side at a time.
Next it's time to take out the center pins. Clamp the leafs on either side of the pin with C-clamps. They don't have to be Hulk Hogan tight, snug will do. Now using a (14mm in my case) ratchet and some vise grips, loosen the center pin. Mine have been removed before so they were a breeze, but this is where you may run into trouble. They can strip, bend, or snap if rusted enough, leaving you stranded. So as I said before, just get some new ones.
At this point, if you have springs clamps, they need to come off. With the center pin out, they can cause the leaves to bind and not fully unload. If this happens and you take them out later, everything explodes in your face. Mine were hella rusted so I just cut the bolt and sleeves.
Now slowly loosen up both clamps and let the leafs de-load.
One you take the clamps off, the leafs are going to fall into your lap. Now you need to mark them so you remember which side goes forward, and which side goes towards the rear. I'm not certain if some of them matter which direction they face, but I sure as hell wasn't about to find out once everything was back in place. I used my angle grinder with a cutting blade to put a small nick in the front of the leafs. Easy, permanent, no mix ups.
Once all your leafs are marked and taken apart, remove anything that may still be on them. I had some factory plastic slide pads at each end, and a rectangular one in the middle. These are not going to be re-used, so don't cry if they break.
Now, roll out your leaf liner and cut your pieces to length. The entire length of the top of each leaf. The only one I cut shorter was the overload leaf, because it only touches in the very middle. This is also a good time to give the leafs a decent cleaning. Remove any diry, mud, surface rust etc and wipe them clean. I went a step further, and after cleaning mine I rubbed them down with a rag soaked in motor oil. I figured it would help displace moisture, protect again corrosion, and maybe even reduce friction.
Two of the liners are sandwiched in between leafs that are retained within the spring clamps. The liner wouldn't fit in between the clamps because of it's lipped edge. Here I took a pair of scissors and simply cut away the "I" portion of the liner all the way to the end. Worked great.
Don't forget to drill your holes for the center pin to go through.
On to the center pins. I have previously stripped these very easily by re-using and over-tightening old ones so I bought new ones before the entire project started. The ones they had at Advance Auto felt like a joke. The nut was so loose on the pin it felt like it would strip out at 10ft/lbs. I bought them naively, and after pulling out of the parking lot thought it was a bad idea. I went down the street to the local Tractor Supply Co. and bought some grade 8, 3/8-24 x 2.5" bolts. Along with a lock washer and two grade 8 nuts to boot.
Carefully grind down the hex head into a circle using a bench grinder/angle grinder/die grinder etc. Using the axle perch as a guide, only grind away enough material until the bolt head will fit into the center pin hole. Too much and it won't have enough surface area to properly hold the springs. Here is what mine looked liked after completion. The two on the left are my homebrew pins, the one in the middle is a stripped out original, and the one on the right is an Advance Auto Chiwanese special.
Now it's time to throw everything back together. Again, here is where 2 people makes life easier, but I was able to manage by myself. Put the liner on top of their respective leafs, and stack them all back together. Take a long screwdriver and place it in the center pin hole to keep everything lined up. Using your two C-clamps again, start tightening the pack together. Only tighten them enough to where you can get your actual center pin through. If you snug them all the way against each other, you won't be able to wiggle the leafs around to get the pin through.
Once you've got your pin in the pack, tighten them all the way snug and put your nut and washer on the pin. Torque them to 40 or 50 ft/lbs depending on whether or not you lubed them (grade 8). I put copper ant-seize on my pins so I only took them to 40ft/lbs. If they're dry, go all the way to 50. I used an actual torque wrench just because I never want to think about them again.
Remove the clamps, and start putting everything back together. Jack the axle back up against the leafs, and get the pins set in their spring perch holes. I had to use a separate bottle jack at the front of the diff to keep it from nose-diving on me and preventing the pins from centering. Once the springs are set and centered, snug up your u-bolts. Not Vin Diesel tight just yet, but enough so that the perch won't separate from the leafs.
Now put your wheels back on and remove all jack stands and set the vehicle back on the ground. Bounce up and down on the rear bumper a few times to get everything to settle. At this point you can fully torque your u-bolts down. MAKE SURE your u-bolts are square, or they won't fully tighten. Or they can cause your leafs to twist as we saw in a recent thread. Mine are toast. They been re-used about 4 times, are bent, and felt like they were going to snap when I was tightening them so I was forced to upgrade. RuffStuff's u-bolts are amazing.
Throw your shocks back on, and the rear driveshaft if you chose to remove it. Here's what the finished product looks like (minus my new u-bolts)
Overall impressions: There seems to be a difference in ride quality, although this may just be a placebo affect. Where I was really impressed with these, is the noise reduction. No more squeaking, creaking, or moaning over bumps. Mine was most noticeable over speed bumps. They also seem to have greatly improved to amount of droop the pack has, I assume due to reduced friction between each leaf. The axle will now fall about 4" below my fully extended shocks. I definitely suggest this mod if you have the time.
Last edited: