• Welcome to the new NAXJA Forum! If your password does not work, please use "Forgot your password?" link on the log-in page. Please feel free to reach out to [email protected] if we can provide any assistance.

How To: The mildest fender chop you've ever seen.

DanMan2k06

NAXJA Forum User
Location
Damascus, MD
After debating more lift, bushwackers, homebrewed flat flares, no flares, and just about every other possibility, I came to the conclusion - I needed to cut. Because I run JK wheels, I already have adapters. Which means I can't add additional spacers that would be needed to fill in the HUGE aftermarket flares.

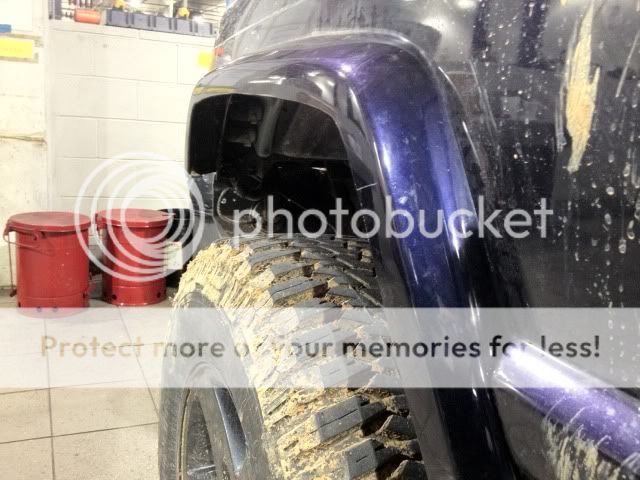
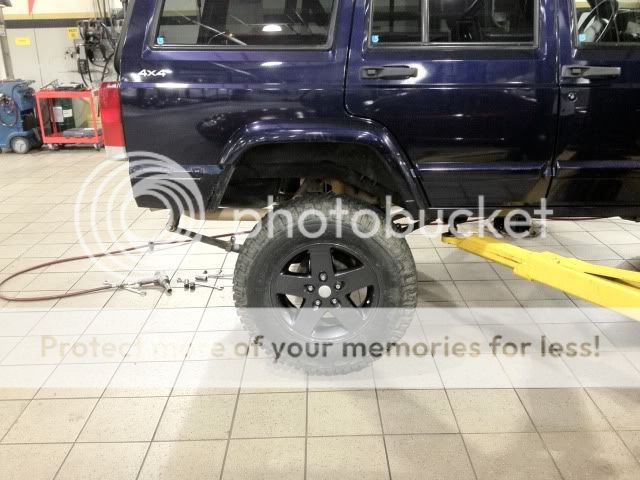
53guy's write up was pretty nice, and this will look strangely familiar, but there are some differences. I retained the ENTIRE length of the flare, while keeping it in the stock location. The flare itself is cut, and the fender inside is also cut. This is for people who want a mild cut, but don't need tons of clearance. If you are trying to clear your 35's, this is not for you. Anyone can take a sawzall and cut a giant hole in their fender for some boggers. This simply add about 1.5-2" of clearance on either side of the tire so it won't rub your fenders during full stuff, while still looking good enough drive your gf's parents around in. I run 255/75/17 treadwright MTG's that measure a TRUE 32" and they clear just fine now :greensmok

It got dark on me so I'll have to take some pictures of left out details tomorrow, as well as a better pic of the finished product. But for now, onto the goods.

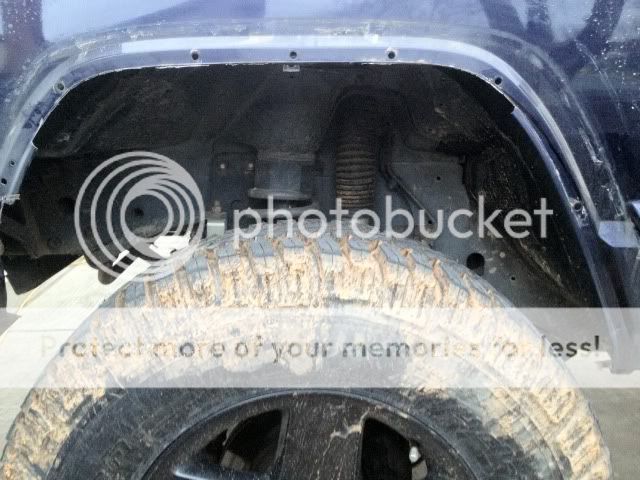
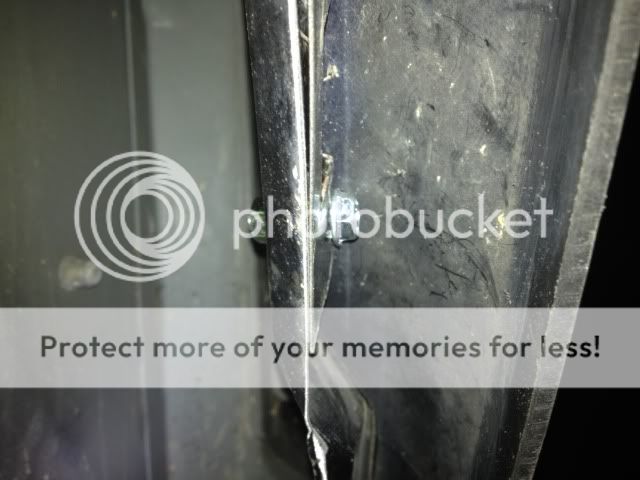
First thing you need to do, is take the fender liner out:

- The liner is held in with little plastic "christmas tree" clips in various places around the inner fender. Remove all of these.
- Next, there are some metal discs that hold the remainder of the liner up against the fender opening. These are easily removed with a pair of dykes. Once these are removed, the entire liner should fall out. I was suprised how stiff and sturdy this thing was.

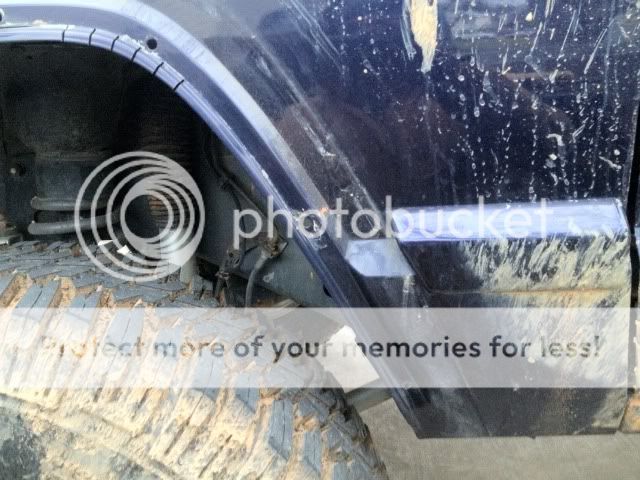
Next remove the fender flares themselves:

- They are held by (7) 10mm studs around the fender edge, and (1) 10mm self tapping screw on the body right at the corner of the front doors. Be careful with these 10's. If you body is old, they will most likely snap the studs off which leaves you with 2 options - buy new brackets, or grind down the riveted stud and just use a regular bolt.
photo001.jpg


- Once the nuts and screw are removed the flare and brackets should pull away from the body in one piece. My nuts were not frozen so I was able to re-use all my hardware. If you are as fortunate BE SURE to put some anti-seize on them before re-installation.

- Remove the two brackets from the flare itself.

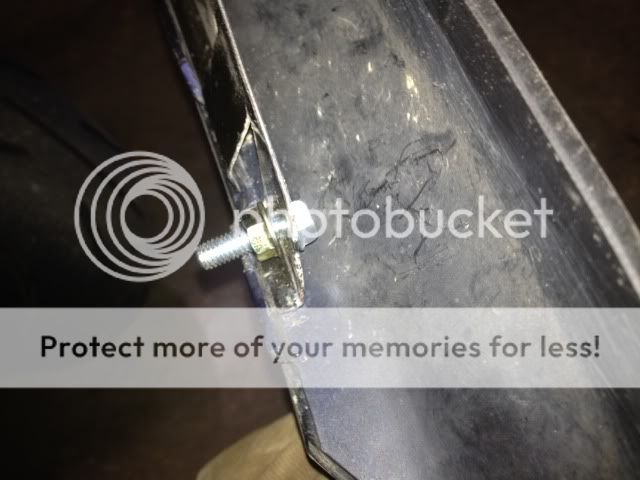
Now it's time to cut the flares:

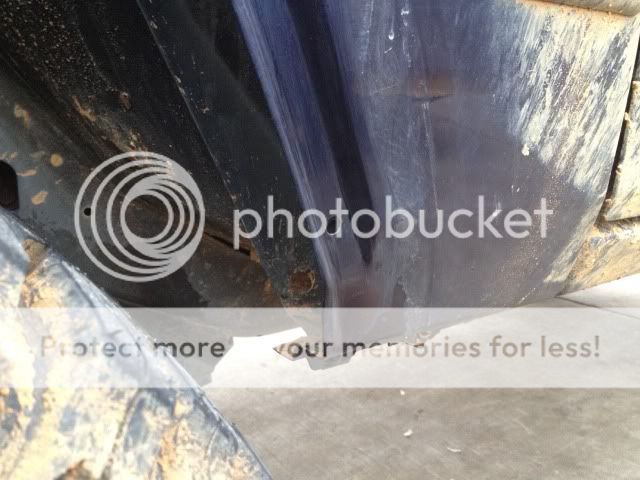
- On the backside of the flare you'll see a seam that runs the entire length of the flare. This is the seam you'll be cutting along. In two places it terminate into the edge, just keep cutting past this so the entire flare is proportional.

- I used an air powered bodysaw which made quick work of the soft plastic, but I've also used a jigsaw, dremel, angle grinder, and sharp tin-snips in the past.
photo01.jpg


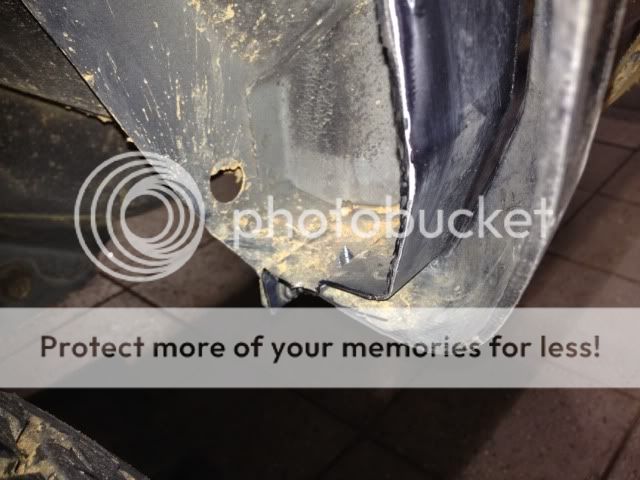
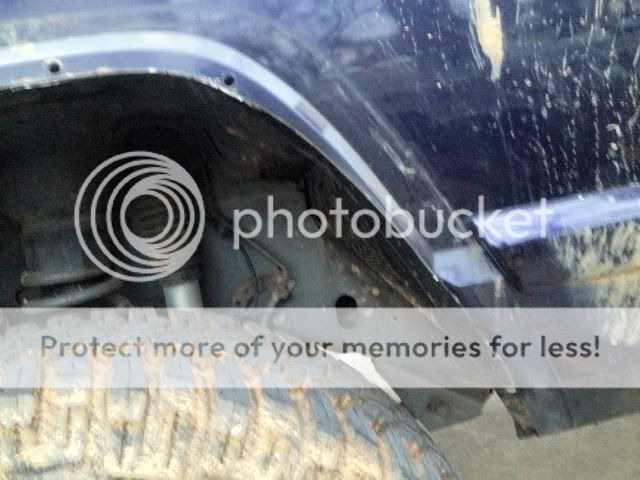
- This is what the flare will look like when cut. Here it is re-installed on the fender without having cut any sheemetal yet. You can see how vulnerable the sheet metal is now, and why it will need to be trimmed back.
photo02.jpg
 
Now that you've cut the flare, it's time to address the fender itself. in this picture you can see there's an inner pinch seem in the well, and how the fender overhangs way past it. This will easily get snagged on your tires and tear them to shreds.
photo-5.jpg


What you want to do it cut along the bottom of the fender, while still leaving the mounting holes intact. Use the first "valley" as a guide, and cut vertical slits around the bends to make the cuts easier. I used an angle grinder, which is IMPOSSIBLE to turn once you've gone a certain depth into the material. By making lots of vertical relief cuts I was able to barely score the surface, and then simply bend the pieces back and forth until they fell off.
photo2.jpg

photo3.jpg


Here is where you'll need to stop, and cut along a different route.
photo4.jpg


Along the back (where the most clearance is needed) you will cut further out from the mounting holes, eliminating two of them. The last stud hole at the bottom, and the hole that once held the self-tapping screw. Draw a line to the second ridge of the fender, and follow all the way around the bottom of the flare.
photo5.jpg


DO NOT cut the fender mounting bolt at the bottom off. When most people do radical trims, they completely eliminate this bolt. Leave it be or you won't be able to re-mount your flares. Cut close to it, but be sure to leave 1/8" or so in front of the bolt. The inner pinch seam is a good guide for how much to cut here.
photo7.jpg


Here's what the fender will look like after your new line is cut.
photo6.jpg


Now, throw a fine-grit flap disc on your grinder and clean up the entire edge. The angle grinder did an amazing job getting the whole length smooth and even.
photo8.jpg
 
After I trimmed the fender I mocked up the entire flare, and saw that it was still a little too large for the new opening I had created in the fenderwell. It did quite match. I marked the fender flare again, and removed a bit more material at the bottom so everything flowed nicely. Here you can see where it stuck out a little too much.
photo17.jpg


Now it's time to cut the rear bracket of the two. If you line it back up with the original holes, you'll see that it's too big and now overhangs the fender. Take a sharpie and mark along your new cut, where the bracket will be flush. YOU WILL CUT OFF ONE OF THE STUDS. We're going to relocate that in just a minute.
photo9.jpg

photo10.jpg


Cut the bracket, and place it back in the mounting holes to ensure everything lines up.
photo11.jpg


Since one of the studs was removed, we have to secure the bottom area of the bracket again somehow. Similar to 53guy, I drilled a hole at the bottom corner of the bracket, and placed a bolt through it instead of a stud. Drill you hole in the bracket first, then line it up on the fender, mark the hole, remove the bracket, and continue to drill the new hole in the fender.
photo14.jpg

photo12.jpg

photo13.jpg


Because the last stud was cut off of the mounting bracket, the newly drilled mounting hole won't sit perfectly flush against the fender. You'll see when you mock it up there's a gap between the bracket and the body panel. I was able to simply thread a nut on the bolt to act as a "spacer" and allow the bracket to be tightened down properly.
photo16.jpg


Here is what the new flare will look like with mounting brackets attached.
photo15.jpg


And here is what the newly drilled mounting point will look like. On the left is the fender, the right is the bracket. Sandwiched between the two is the "spacer"(nut).
photo18.jpg


Attach the remaining nuts around the inner fender. One detail I forgot to address is the self tapping screw at the bottom. A new hole was drilled into the flare, and then into the bottom of the fender, I'll get pictures of that tomorrow when it's light.

And that's about it! You'll want to prime/paint any bare steel that you might have uncovered so bust out the masking tape and newspaper. Also get some automotive door trim and run it around the outside of the flare. This really gives it a finished touch. I found if you cut your length, and toss it in the oven for a few minutes (200 degrees, 5 minutes) it softens the plastic, and the adhesive enough to easily bend around the sharper corners.

Here are some garbage pictures of the comparison. Sorry it was extremely dark lol.

Before, about 2" of clearance between the tire and the flare (and fender).
photo19.jpg


And after, now over 3.5" of clearance.
photo20.jpg


And an overall.
photo21.jpg


I'm also going to make a custom fender liner so mud won't go flinging into my door jambs, so stay tuned.
 
thanks, this is exactly what i need to do to my jeep, im at 3.5" now with 31's and i just got online to have a look at what it would take trimming wise to fit some 32s's..

how much lift are you running?
 
I have cut off 2" the entire way around my front wells and still have the factory splash guard in place... I used the wear marks in the clear coat from my factory flares as my guide to cut them off

What I did was every 6 inches or so in my cuts I would leave a notch (tab) of the fender still in tact, maybe 7 or so on each side. After cutting my fenders I established where the factory guard needed to be cut with a nice sharp razor blade and cut it, tucked it up in the fender, then used a ball peen hammer to bend the tabs up and tapped them flush with the cut line... You wouldnt know the tabs were there unless you looked underneath

You obviously cant use this idea without welding a tab of sheet metal back on. But maybe it will help someone else doing this that wants the mud guards? Hope this helps
 
GREAT WRITE UP & CLEAN WORK!... makes me wanna re-install my factory flares... any plans for the rear?

definitely post up some side shots... i REALLY like the 17" Rubis... you're only running the adapters?.. still have plans for 285's?
 
Based on the "dirty" method (also seen in the FSM) my front is at 4.75", and my rear exactly at 4".

I have 1.25" adapters, yes. I love the JK moabs too, I just wish they had a little less backspacing lol. I spent about 10 total hours per wheel painting them, so they'll be around for a while unless I'm offered the right price.

And yes, still planning on 285/75's when these wear out :) Although I may have to look into custom spacers when the time comes. The company that was recommended to me makes up to 2.3" spacers.

I have some HD shackle relocators in the front seat right now. They should raise the back ~1" give or take. That might be enough that I can leave the rear alone and adjust the bumpstops instead. We'll see what happens.
 
If you deleted your inner fenders, I'd find a way to put them back in. The stock ones work well. You don't gain much from deleting them and it will keep mud/salt/sand... from getting to and hiding in places that will cause problems. The stock ones cover the back of the turn signals, the washer motors, the upper fender and of course, the door hinges. Nothing like the sound of sand in your door hinges to remind you of why those inner fenders are there ;)

I also didn't see where you used any rust preventative on the cut fender. I see lots of these mods where people cut the metal, then hide it figuring it's all good. A year or two later and it looks like a mess. Best to treat the edge with a rust preventative and paint it to prevent rust now.

A 10 ft view would give a better pix on how it turned out, but so far it looks good :)
 
Last edited:
^^^
I'm also going to make a custom fender liner so mud won't go flinging into my door jambs, so stay tuned.
And that's about it! You'll want to prime/paint any bare steel that you might have uncovered so bust out the masking tape and newspaper.
It got dark on me so I'll have to take some pictures of left out details tomorrow, as well as a better pic of the finished product.

A few pics of the self tapping screw that I relocated.

photo-9.jpg


photo-10.jpg


And some more of the "finished" cut. (I still have to install the trim on the flare, make the inner liner, and weatherproof all bare areas)

photo-7.jpg


photo-8.jpg


photo-6.jpg


photo-12.jpg


Also note, my axle is NOT centered in the wheel well. I'm in dire need of some adjustable control arms. My bottoms are RE Superflex's(fixed) and the top it stock. I'm hoping the control arm drop brackets will help push the axle forward until I can get some adjustables.
 
Last edited:
photo-12.jpg


Also note, my axle is NOT centered in the wheel well. I'm in dire need of some adjustable control arms. My bottoms are RE Superflex's(fixed) and the top it stock. I'm hoping the control arm drop brackets will help push the axle forward until I can get some adjustables.

yeeeaa, those rims are HOT!... & with the midnight blue (?) paint... looks like you took your times with em *HIGH FIVE*... it is too bad they dont have less backspacing... hopefully you dont run into too many issues, & too often, with that amount of spacing/adapter

i was curious where the fender/flare trim would leave the wheels in the wheel well, & yea, axle still needs to be stretched forward some (mine too)... i've got the same lowers (yours 16" too?) & drop brackets awaiting adjustable uppers... i've read stock length 15 3/4" arms should be used with drop brackets on ~4.5" lift... hoping the 16" fixed, adjustable uppers, drop brackets, & trim will leave the wheel/axle looking centered
 
That is about the look I want to go with. Can't wait to do this myself. Did you do anything with the back, or just left it alone? I originally was looking at only doing the front since thats primarily the problem area with rubbing, but if you could do some trimming on the back and make it look that clean, that would be pretty cool. Once again, great write up, and great looking XJ!

-Eric
 
I re-installed stock front flares in the rear of mine after cutting up to the pinch seam and attached the front half to the rear doors (bushwacker style)

(granted mine is the older body style but maybe the same process would work for the newer style too)

381670_10150354292507957_556537956_8289540_973436771_n.jpg

I have a '95, so I'm assuming we are both in the same category. I really like the way that looks, real clean looking jeep ya got there. I'm pretty stoked about this now, the only thing that kept me from trimming it so far was that I didn't want it to look like I started hacking it up and making it look more of a heap than it already is, lol.

-Eric
 
Fought I'd update this, got my shackle relocation brackets and control arm drop brackets in tonight, made a hugeee difference in the centering of the front axle. Now there's even more room, which I'm thrilled about.
 
Man, that is looking good. Very noticable difference in the before and after pictures.

-Eric

Really? I can't tell at all. No offense to OP but I can only see a car washing difference in the before and after pics.
 
If you look, you can see a bolt and a hole that were behind the tire in the before. And yeah, maybe it would be deminished a bit if the before was a washed picture also, lol. Regardless, I like it, and I plan on keeping my Jeep looking nice until its no longer my DD, then I can hack it up and really beat the snot out of it.

-Eric
 
Back
Top