BIGSLVRXJ
NAXJA Forum User
- Location
- Des Moines, Iowa
Hey guys,
I just installed a set of Rough Country's Shackle Relocation Brackets and wanted to do a quick write-up and review on them. They were going on my girlfriend Kaitlin's 1999 Cherokee Sport. It had a 4.5" lift in the front and 3.5" in the back and was on 33"s with flares. The shackle angle was terrible and the rear needed more height.
When I was in the market for the brackets I first looked at HD Engineering's product. I love their design, but at that point (pre V2), it wasn't a bolt-on. Since I don't have a welder and I don't enjoy paying other people do work on my rig, I thought I would give Rough Country's product a try. I have had great luck with Rough Country products in the past, and their customer service is top notch. Since their design is purely bolt-on and doesn't require any massaging of the shackle box, I thought it was something even I could install.
Here is what I received from Rough Country

Now in this write-up, I do stray from Rough Country's instructions a bit. I did one side at a time while their instructions say to let the whole rear of the axle drop. I think the install can be accomplished successfully either way.
I started by jacking the axle up and removing the passenger side tire. At this point I also put a jackstand under the frame rail in front of the leaf spring.

If your shackle bolts have never been tampered with, be prepared for one of three things (or all) to happen.
-1st:the bolt will be extremely tight and could possibly break the welded nut in the frame
-2nd:the bolt will be seized to the sleeve which runs through the bushing
-3rd and most likely, the bolt's threads will be somewhat rounded as it comes out and will be a pain to put back in.
To get the shackle bolt out, I used a breaker bar with a jack handle slipped over the end of it.
Luckily, this Jeep came from Southern Missouri where they don't use the road salt Iowa does; the shackle bolt came out without too much fighting.
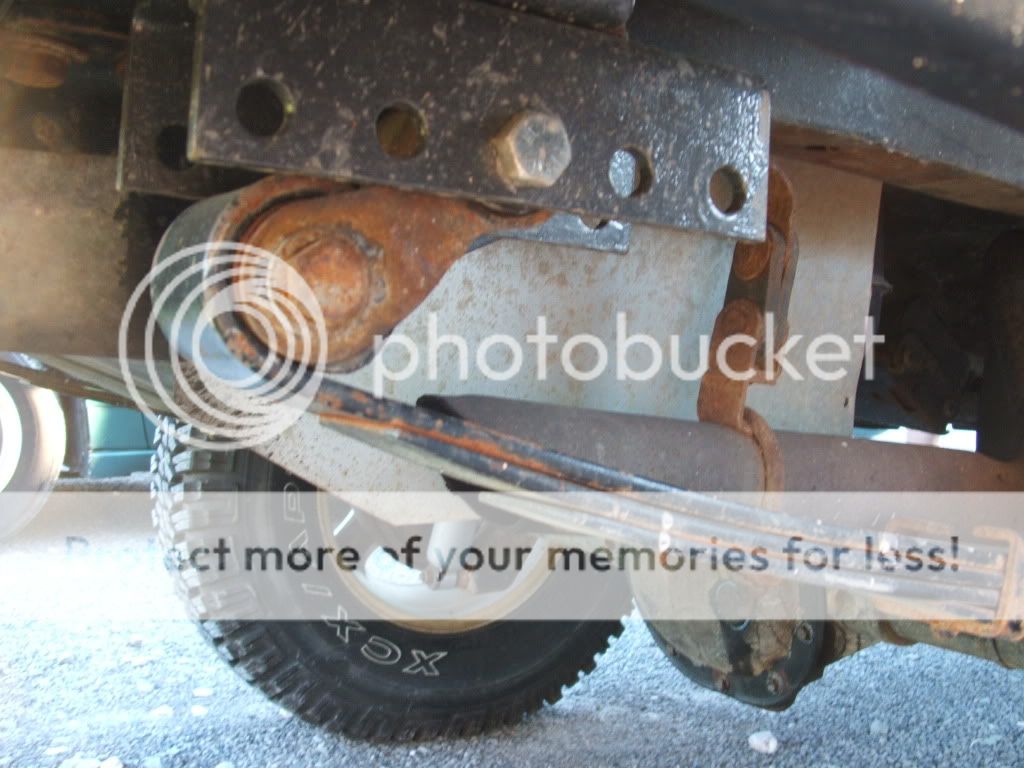
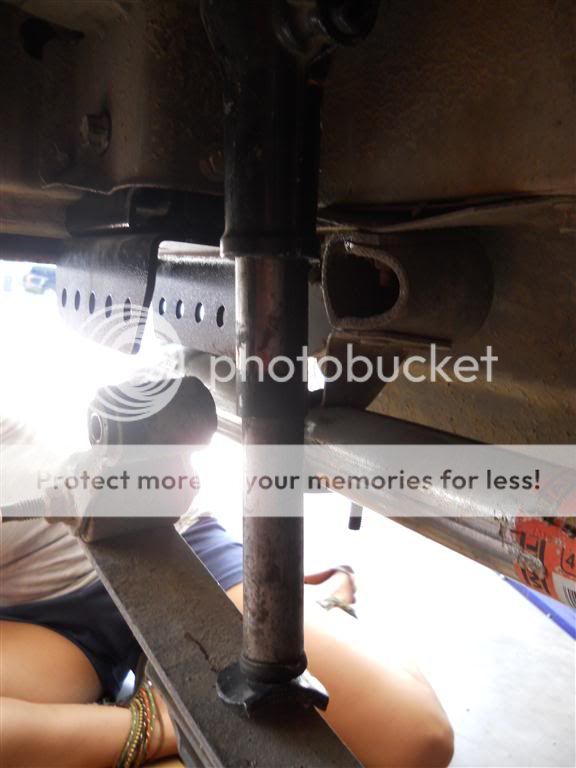
Once the shackle bolt is removed, the shackle will likely be pushing against the box, the axle needs to be lowered to get the shackle/spring out of the way.
I had to use a stock XJ bottle jack to push the spring down enough to slip the relocation box in the shackle housing. This can be accomplished many ways, most are probably safer than this
Another point at which I strayed from Rough Country's directions...I left the shackle attached to the spring. While this method makes the area you have to work somewhat tighter, I feel it still shaves a few minutes off install...to each their own.
Once the shackle is down low enough, the relocation box can be slipped into the old shackle housing.

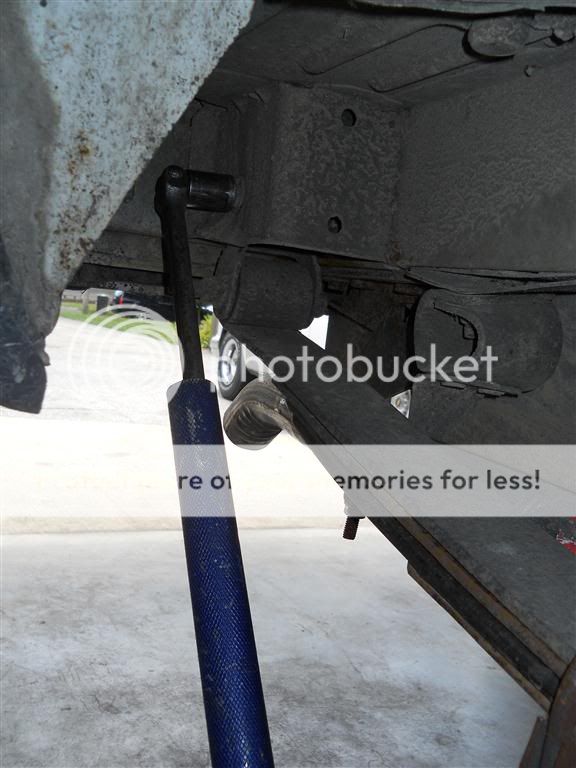
The original bolt can be reinserted, or Rough Country also provides new ones. The next step is to insert the nutstrip (flag nut) into the front of the shackle housing to add provisions for the two new 7/16" Grade 8 bolts that will secure the relocation bracket.
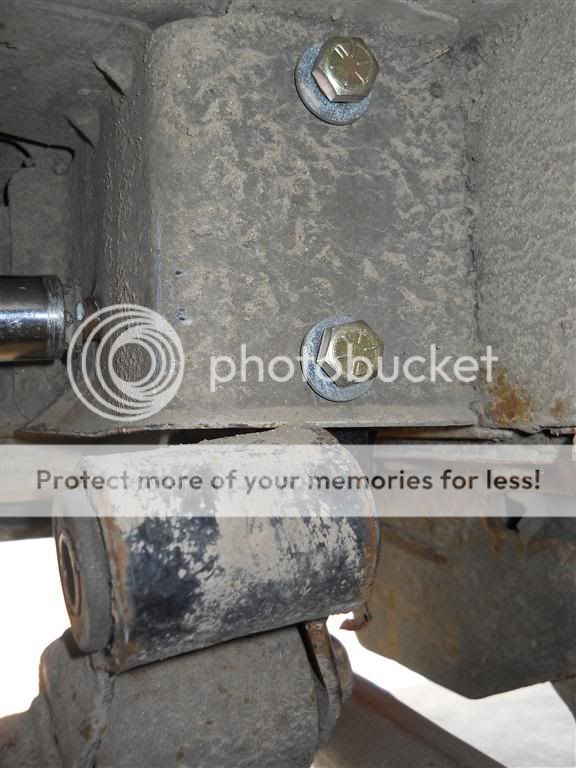
Once those are bolted in, the three bolts can be torqued.
After the relocation box is bolted in, the next step is to add the adjustable piece that the shackle bolts to. It is held to the relocation bracket by (2) 1/2" Grade 8 bolts and washers.
The long side should go towards the front of the Jeep. After these bolts are torqued, the only thing left to do is determine proper shackle placement. This Jeep had stock shackles, but as I said, was lifted around 3.5". I used the middle hole since the directions showed that as the one being used and it gave an almost perfect shackle angle.

The placement will differ depending on many different factors of each XJ.
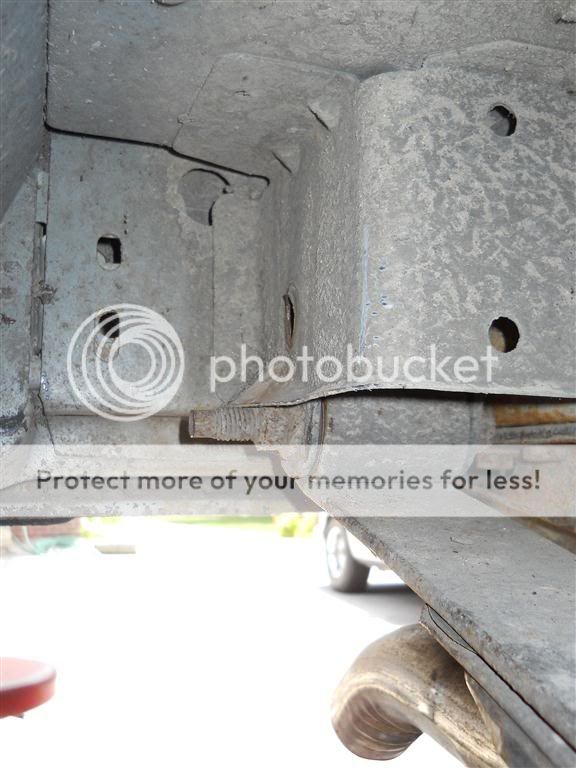
The driver's side install was very similar to the passenger except the fuel filler hose shield needs to be removed. Be prepared for pounds of dirt to come out as it is removed.
On the driver's side I also had an issue with the bolt threads being slightly rounded. The bolt wasn't crossthreaded, the threads just weren't as sharp as they originally were. This provided a bit of a problem as I went to reinstall because the threads in the welded nut were also somewhat distorted. I was able to put enough inward pressure on the ratchet as I was tightening the bolt to get it to finally grab the threads, but it took a lot of force. Again, Rough Country provides a new bolt that can be used for the stock location if desired.
I had two major expectations out of this product.
-To lift somewhere between the advertised 1" and 1.5"
-To improve shackle angle
This is the end result
The relocation brackets fulfilled both of my expectations. Overall I am extremely happy with the install. This Jeep went from having a terrible shackle angle to an almost optimal one in an afternoon. Rough Country has once again put out a great product to complement their great customer service. Thanks guys!
If anyone has any questions on the product or the install, let me know.
-Collin
I just installed a set of Rough Country's Shackle Relocation Brackets and wanted to do a quick write-up and review on them. They were going on my girlfriend Kaitlin's 1999 Cherokee Sport. It had a 4.5" lift in the front and 3.5" in the back and was on 33"s with flares. The shackle angle was terrible and the rear needed more height.
When I was in the market for the brackets I first looked at HD Engineering's product. I love their design, but at that point (pre V2), it wasn't a bolt-on. Since I don't have a welder and I don't enjoy paying other people do work on my rig, I thought I would give Rough Country's product a try. I have had great luck with Rough Country products in the past, and their customer service is top notch. Since their design is purely bolt-on and doesn't require any massaging of the shackle box, I thought it was something even I could install.
Here is what I received from Rough Country
Now in this write-up, I do stray from Rough Country's instructions a bit. I did one side at a time while their instructions say to let the whole rear of the axle drop. I think the install can be accomplished successfully either way.
I started by jacking the axle up and removing the passenger side tire. At this point I also put a jackstand under the frame rail in front of the leaf spring.
If your shackle bolts have never been tampered with, be prepared for one of three things (or all) to happen.
-1st:the bolt will be extremely tight and could possibly break the welded nut in the frame
-2nd:the bolt will be seized to the sleeve which runs through the bushing
-3rd and most likely, the bolt's threads will be somewhat rounded as it comes out and will be a pain to put back in.
To get the shackle bolt out, I used a breaker bar with a jack handle slipped over the end of it.
Luckily, this Jeep came from Southern Missouri where they don't use the road salt Iowa does; the shackle bolt came out without too much fighting.
Once the shackle bolt is removed, the shackle will likely be pushing against the box, the axle needs to be lowered to get the shackle/spring out of the way.
I had to use a stock XJ bottle jack to push the spring down enough to slip the relocation box in the shackle housing. This can be accomplished many ways, most are probably safer than this
Another point at which I strayed from Rough Country's directions...I left the shackle attached to the spring. While this method makes the area you have to work somewhat tighter, I feel it still shaves a few minutes off install...to each their own.
Once the shackle is down low enough, the relocation box can be slipped into the old shackle housing.
The original bolt can be reinserted, or Rough Country also provides new ones. The next step is to insert the nutstrip (flag nut) into the front of the shackle housing to add provisions for the two new 7/16" Grade 8 bolts that will secure the relocation bracket.
Once those are bolted in, the three bolts can be torqued.
After the relocation box is bolted in, the next step is to add the adjustable piece that the shackle bolts to. It is held to the relocation bracket by (2) 1/2" Grade 8 bolts and washers.
The long side should go towards the front of the Jeep. After these bolts are torqued, the only thing left to do is determine proper shackle placement. This Jeep had stock shackles, but as I said, was lifted around 3.5". I used the middle hole since the directions showed that as the one being used and it gave an almost perfect shackle angle.
The placement will differ depending on many different factors of each XJ.
The driver's side install was very similar to the passenger except the fuel filler hose shield needs to be removed. Be prepared for pounds of dirt to come out as it is removed.
On the driver's side I also had an issue with the bolt threads being slightly rounded. The bolt wasn't crossthreaded, the threads just weren't as sharp as they originally were. This provided a bit of a problem as I went to reinstall because the threads in the welded nut were also somewhat distorted. I was able to put enough inward pressure on the ratchet as I was tightening the bolt to get it to finally grab the threads, but it took a lot of force. Again, Rough Country provides a new bolt that can be used for the stock location if desired.
I had two major expectations out of this product.
-To lift somewhere between the advertised 1" and 1.5"
-To improve shackle angle
This is the end result
The relocation brackets fulfilled both of my expectations. Overall I am extremely happy with the install. This Jeep went from having a terrible shackle angle to an almost optimal one in an afternoon. Rough Country has once again put out a great product to complement their great customer service. Thanks guys!
If anyone has any questions on the product or the install, let me know.
-Collin
Last edited: