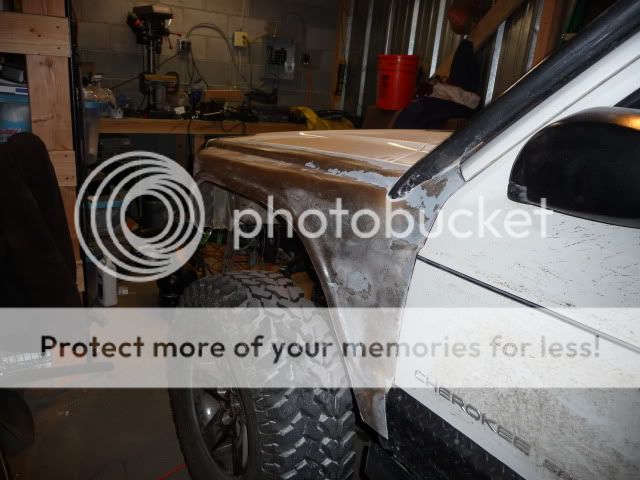
I decided this winter that I wanted to replace my fenders. After looking around at replacement stock ones, I thought I would look into a set of baja style flared ones. I couldn't justify the cost of those, I decided to give building my own a whirl.
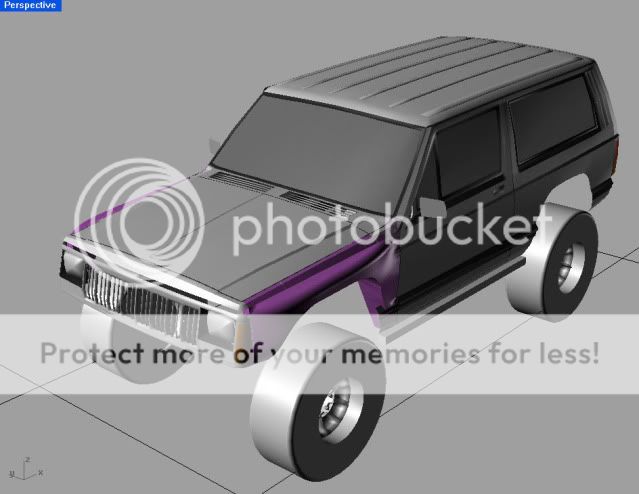
I started with drawing up what I wanted in 3d cad. I have a good .3ds file of a pre '97 XJ that I used for working on my bumpers and cage, so I used that as a starting point. I have a '99, so I knew I would need to add some radius to the top edge to match the newer front clip. For the drawing, I used Rhino, and got the .stl file ready to mill in Magics. I decided to tackle the driver's side first.
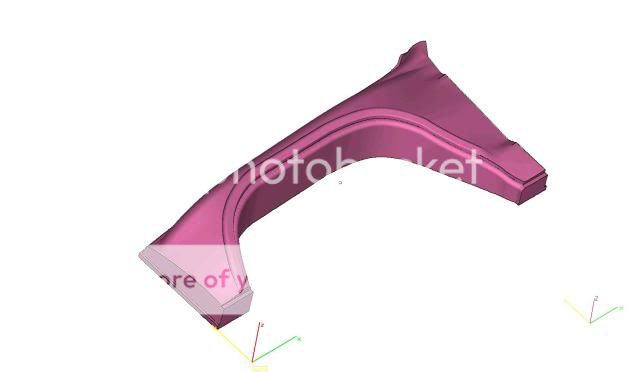
Here's some shots of the Rhino drawing:


Here's what the mill ready file looked like:
Fortunately we have a large 4'x8' CNC router at work with a 16" z axis. I started with a 24"x48"x8" block of a lightweight foam. (as I eventually found, too lightweight and I plan to use 10lb urethane on the next one).
Here's what it looked like after I finished the roughing pass and just as it was starting the finish pass:

Here is what the foam plug looked like after I Pulled it off the mill:
The foam was a little soft, so I started by spraying a coat of epoxy on it to give it a shell:

Once I had the foam plug shaped out, I spent some time using bondo and body filler to smooth it out and get the final shape dialed in. The hardest part (which I don't have pics of) was making the connection points so it would bolt up to the stock locations. I used some plaster cloth to make an impression of the stock metal fender mounts. Once I had the plaster pieces, I filled them with bondo. I then cut and glued those connections onto the plug. I had to do it this way since the mill can't do undercuts, and it would have taken me way longer to try and draw these up in 3d cad.
Somewhere I have picks of what the final plug looked like, but I will have to post them later.
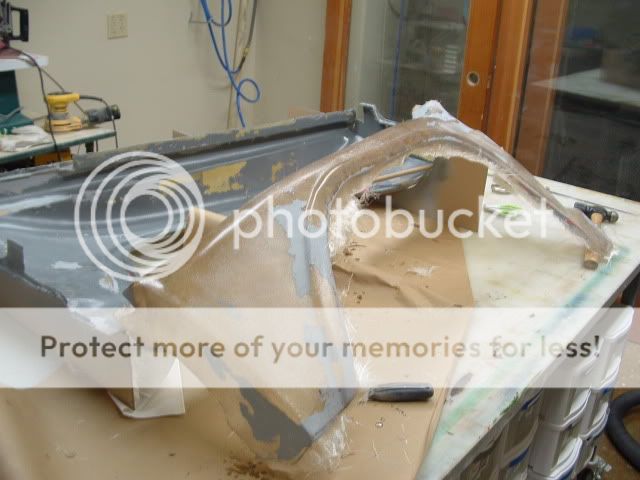
Once the plug was ready, I coated it in mold release wax and started laying on resin and pieces of fiberglass matte. I had read up on how to fiberglass and had a good understanding of how it works, but this was my first time using it on any project of significant size. Here is a picture of what the mold looked like:
Once the mold was done, I was able to lay in the glass and resin for the final part. I used a polyester resin called "Impact Resin." Supposed to be strong and pretty user friendly. I started by laying in a sheet of cloth, then adding matte to thicken things up. I wasn't sure how many layers to add, so I didn't go crazy. I figured some flex to the final part will be OK and maybe make it more forgiving to impacts.
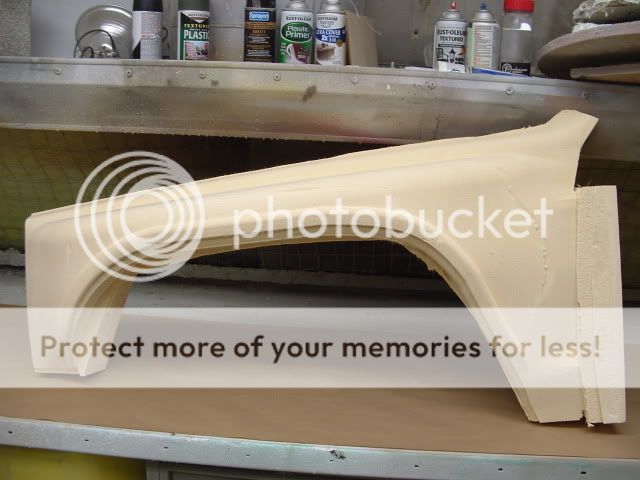
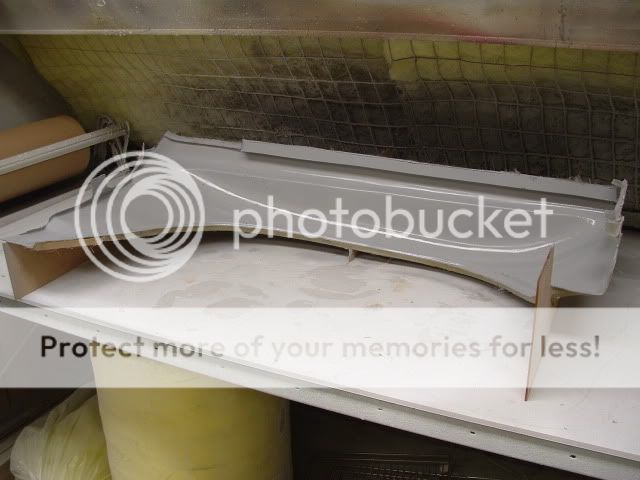
I pulled the part from the mold yesterday:
I ran into one small problem. The resin seemed to react to the paint I had used int he mold, so it pulled up some of the color. That accounts for the gray splotches on the final part. I am not worried though since I will need to sand and do some final filling on it anyway. Here is what my fender looks like next to the stock one:


I started with drawing up what I wanted in 3d cad. I have a good .3ds file of a pre '97 XJ that I used for working on my bumpers and cage, so I used that as a starting point. I have a '99, so I knew I would need to add some radius to the top edge to match the newer front clip. For the drawing, I used Rhino, and got the .stl file ready to mill in Magics. I decided to tackle the driver's side first.
Here's some shots of the Rhino drawing:
Here's what the mill ready file looked like:
Fortunately we have a large 4'x8' CNC router at work with a 16" z axis. I started with a 24"x48"x8" block of a lightweight foam. (as I eventually found, too lightweight and I plan to use 10lb urethane on the next one).
Here's what it looked like after I finished the roughing pass and just as it was starting the finish pass:
Here is what the foam plug looked like after I Pulled it off the mill:
The foam was a little soft, so I started by spraying a coat of epoxy on it to give it a shell:
Once I had the foam plug shaped out, I spent some time using bondo and body filler to smooth it out and get the final shape dialed in. The hardest part (which I don't have pics of) was making the connection points so it would bolt up to the stock locations. I used some plaster cloth to make an impression of the stock metal fender mounts. Once I had the plaster pieces, I filled them with bondo. I then cut and glued those connections onto the plug. I had to do it this way since the mill can't do undercuts, and it would have taken me way longer to try and draw these up in 3d cad.
Somewhere I have picks of what the final plug looked like, but I will have to post them later.
Once the plug was ready, I coated it in mold release wax and started laying on resin and pieces of fiberglass matte. I had read up on how to fiberglass and had a good understanding of how it works, but this was my first time using it on any project of significant size. Here is a picture of what the mold looked like:
Once the mold was done, I was able to lay in the glass and resin for the final part. I used a polyester resin called "Impact Resin." Supposed to be strong and pretty user friendly. I started by laying in a sheet of cloth, then adding matte to thicken things up. I wasn't sure how many layers to add, so I didn't go crazy. I figured some flex to the final part will be OK and maybe make it more forgiving to impacts.
I pulled the part from the mold yesterday:
I ran into one small problem. The resin seemed to react to the paint I had used int he mold, so it pulled up some of the color. That accounts for the gray splotches on the final part. I am not worried though since I will need to sand and do some final filling on it anyway. Here is what my fender looks like next to the stock one: