Last fall, I decided that I was either going to ditch my exo cage or turn it into a hybrid cage. I liked having the exo, but the only down side was the added weight. Since it was my first cage too, I decided I didn't like the D-pillar on it, but fixing that meant reworking a bunch of other things too. So I took on converting my full exo to a Hybrid cage this winter.
My hope was to build a solid basic cage using my existing top halo, but to make it stiffer, tighter and lighten it up a bit. I also wanted to make it removable, mostly for the sake of repairng things later.
Here's what my cage looked like.

Fortunately I originally made it removable too, so pulling the top portion off was pretty easy.

I cut it up and pulled off all of the exterior parts.
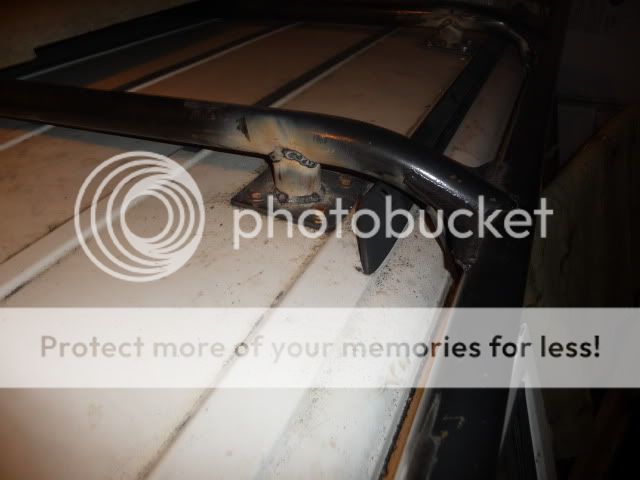
First order was to change how the top halo mounted. I had been using some gutter mounts (to be redundant), but the "sleeve" design was a pain to get the mount parts in and out. I switched to some JCR mounts and welded them up to the existing halo cross members. There are a total of six of them (B, C, D pillars)
Plus, with having the top halo mounted first, it was easier to connect things to it.
As I said, I wanted to make the cage "bolt in." I decided to use 4"x4" x 3/16" thick plates on the roof tube mounts. Each connection has a plate above and below the sheet metal for a "sandwich." (The floor plates are 4"x5") I used 3/8" grade 8 hardware with lock nuts everywhere.
I have decided to leave out an internal D pillar. My main concern is the the passenger compartment. For the C pillar, I mounted plates to the two rear wheel wells (using the sandwich) and welded in a straight spreader bar near the floor. I still use the Jeep to haul stuff, so I did not want to invade the cargo compartment too much. I ran the C pillar straight up to connect with the halo (via the 4"x4" plate sandwich previously mentioned).

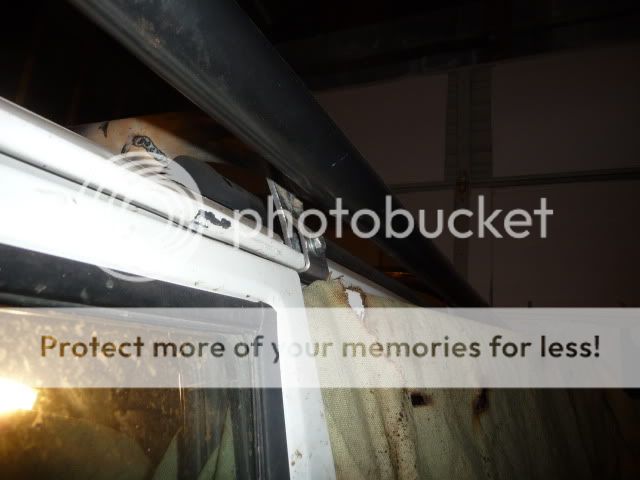
For the B pillar verticals, I bent the tubes so they would connect to my existing B pillar halo. I had to trim some of the stock sheet metal supports to fit my plate in. Here is a shot of the roof side mount:
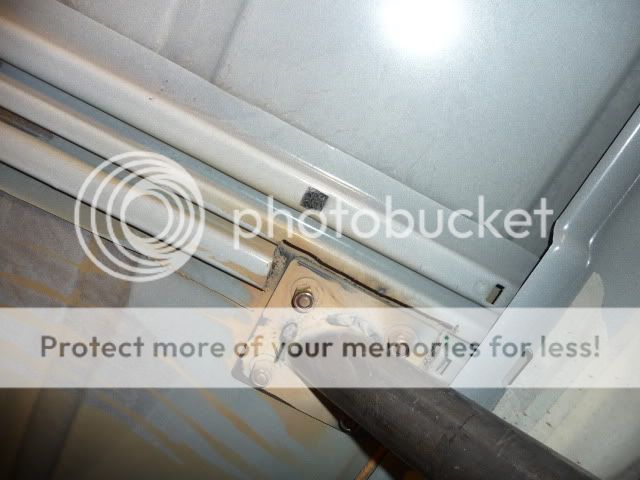
Here is the floor mount which is the 4"x5" plate:

There is sandwich plate on the other side of the floor as well, and a tube that goes between the plate and a horizontal tube that connects between my sliders and plated frame rails.

I put in a spreader bar between the two B pillars. Since the picture was taken, it has been welded in and I added a 90 degree gusset on the top side.

My hope was to build a solid basic cage using my existing top halo, but to make it stiffer, tighter and lighten it up a bit. I also wanted to make it removable, mostly for the sake of repairng things later.
Here's what my cage looked like.
Fortunately I originally made it removable too, so pulling the top portion off was pretty easy.
I cut it up and pulled off all of the exterior parts.
First order was to change how the top halo mounted. I had been using some gutter mounts (to be redundant), but the "sleeve" design was a pain to get the mount parts in and out. I switched to some JCR mounts and welded them up to the existing halo cross members. There are a total of six of them (B, C, D pillars)
Plus, with having the top halo mounted first, it was easier to connect things to it.
As I said, I wanted to make the cage "bolt in." I decided to use 4"x4" x 3/16" thick plates on the roof tube mounts. Each connection has a plate above and below the sheet metal for a "sandwich." (The floor plates are 4"x5") I used 3/8" grade 8 hardware with lock nuts everywhere.
I have decided to leave out an internal D pillar. My main concern is the the passenger compartment. For the C pillar, I mounted plates to the two rear wheel wells (using the sandwich) and welded in a straight spreader bar near the floor. I still use the Jeep to haul stuff, so I did not want to invade the cargo compartment too much. I ran the C pillar straight up to connect with the halo (via the 4"x4" plate sandwich previously mentioned).
For the B pillar verticals, I bent the tubes so they would connect to my existing B pillar halo. I had to trim some of the stock sheet metal supports to fit my plate in. Here is a shot of the roof side mount:
Here is the floor mount which is the 4"x5" plate:
There is sandwich plate on the other side of the floor as well, and a tube that goes between the plate and a horizontal tube that connects between my sliders and plated frame rails.
I put in a spreader bar between the two B pillars. Since the picture was taken, it has been welded in and I added a 90 degree gusset on the top side.
Last edited: