xj_mike
NAXJA Forum User
- Location
- San Diego, CA
Well, for the most part, there hasn't been a lot being done outside of regular maintenance but over the couple months I finally got a coupe things done. Still have more to do, namely build my roof rack and then all the projects that come with that. Here are some pics of the couple things I have done.
First up, I removed my fab'ed bumper to install an ARB I got a deal on. Was a good deal but not a great deal but I had always wanted one and had been wanting to put a winch on. Got the winch from BIGDaddy. :victory:
One thing I never liked about ARB bumpers is the lack of real recovery points. I found a REALLY beefy setup made to add to ARB (or any plate bumper) but for the life of me cannot find the info of where I bought them from. (Sorry).
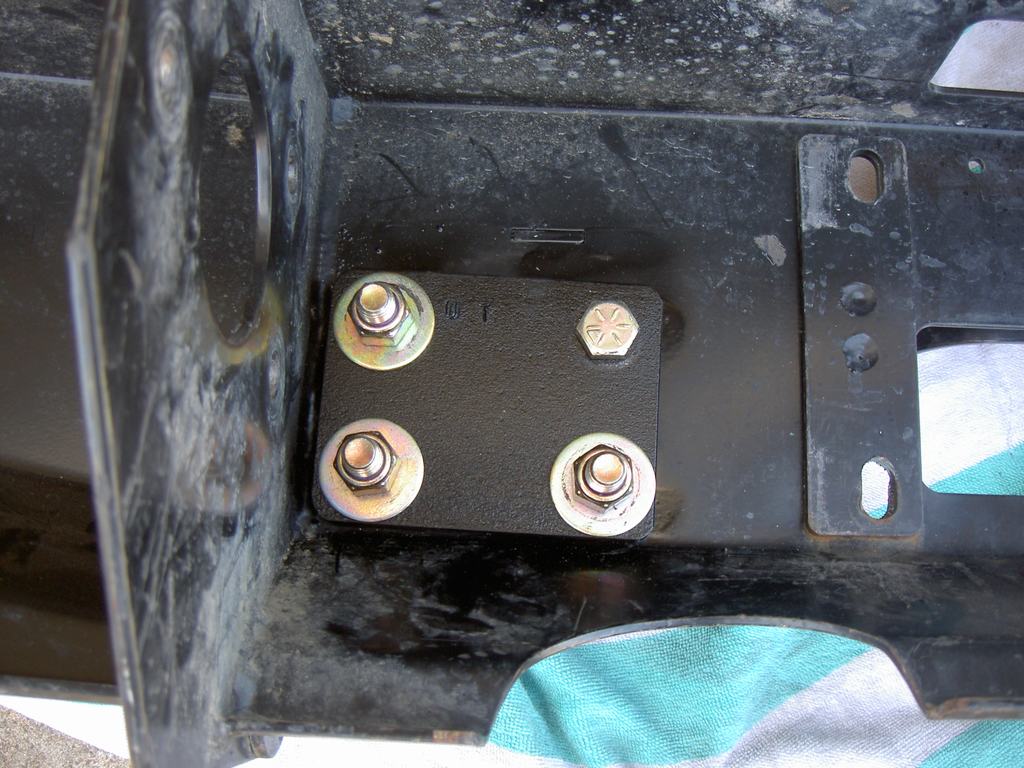
The backside "backup" plate. I had to turn the one bolt outward to clear the winch.
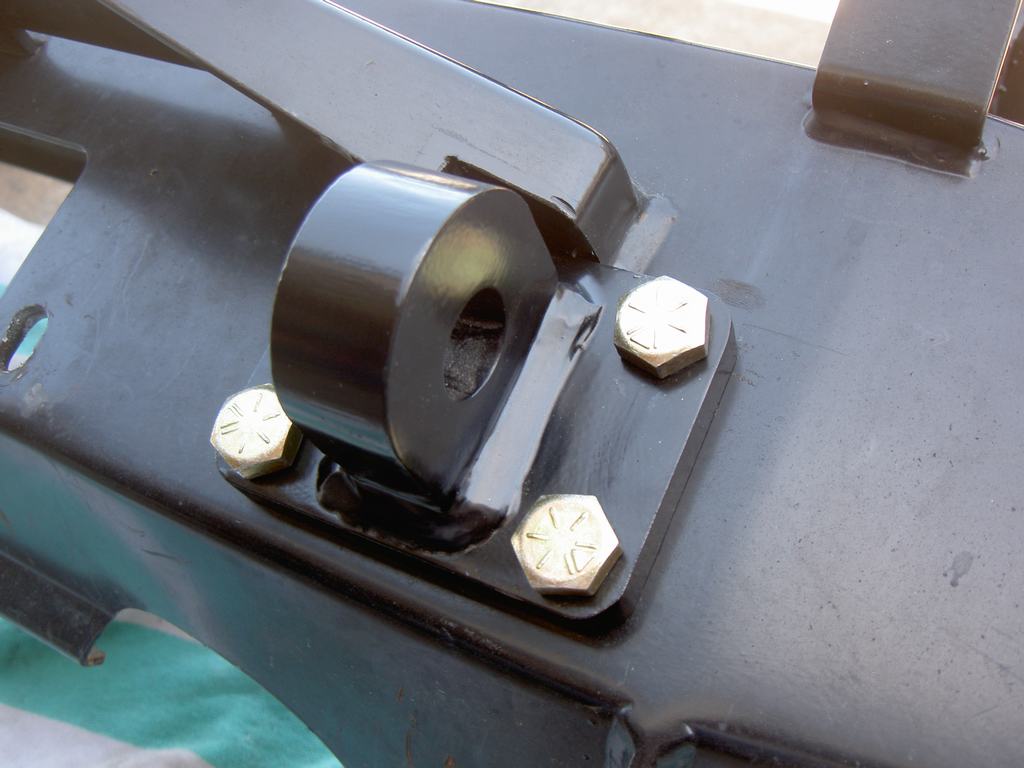
The front tie point. Serious beef!!! Had to notch the fairlead plate to clear them.
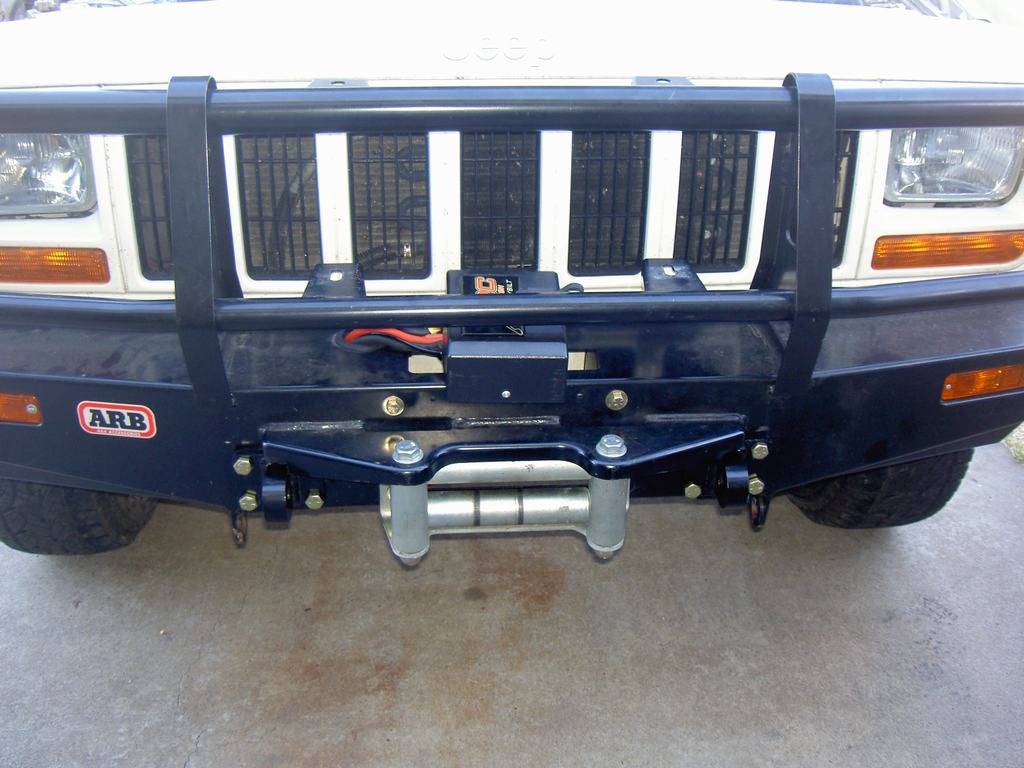
Everything mounted up but before the Master Pull syn. line was installed.
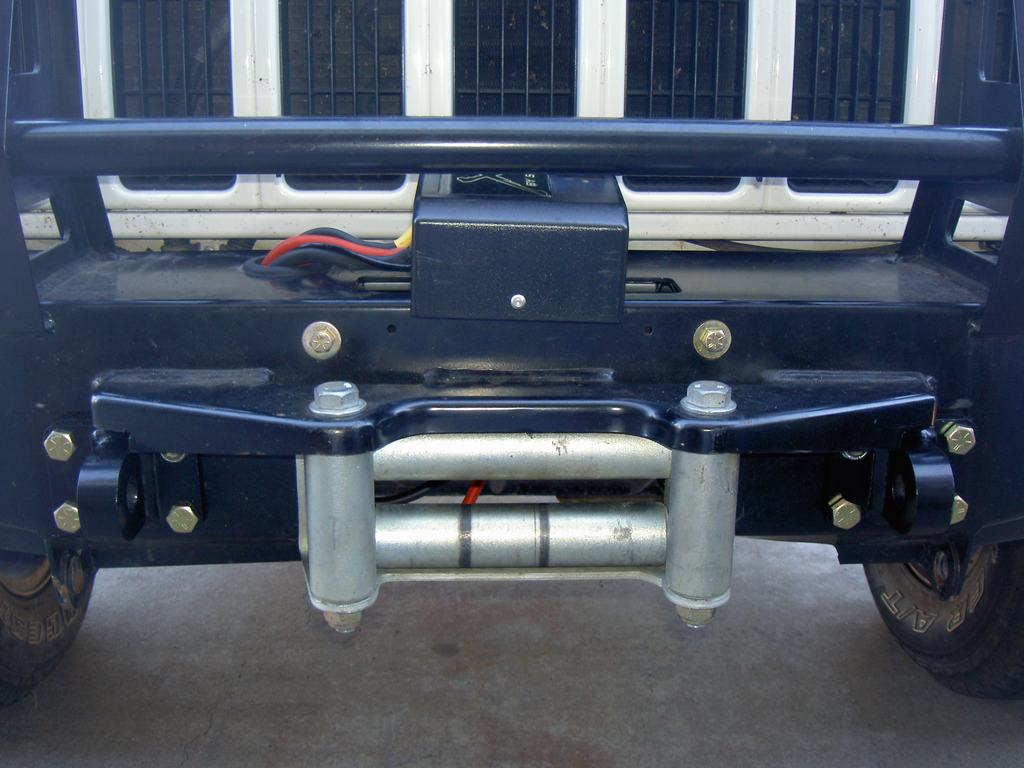
Little better pic. Tie points right next and in line with the frame plates.
Well with the additional weight (even with the syn. line) the front end was sitting lower by about 1.5-2". Knowing this was likely to happen, I had about some JKS ACOS to allow me to dial in the front height. Finally got some time to do this install. Overall when well and took me about 3 hours.
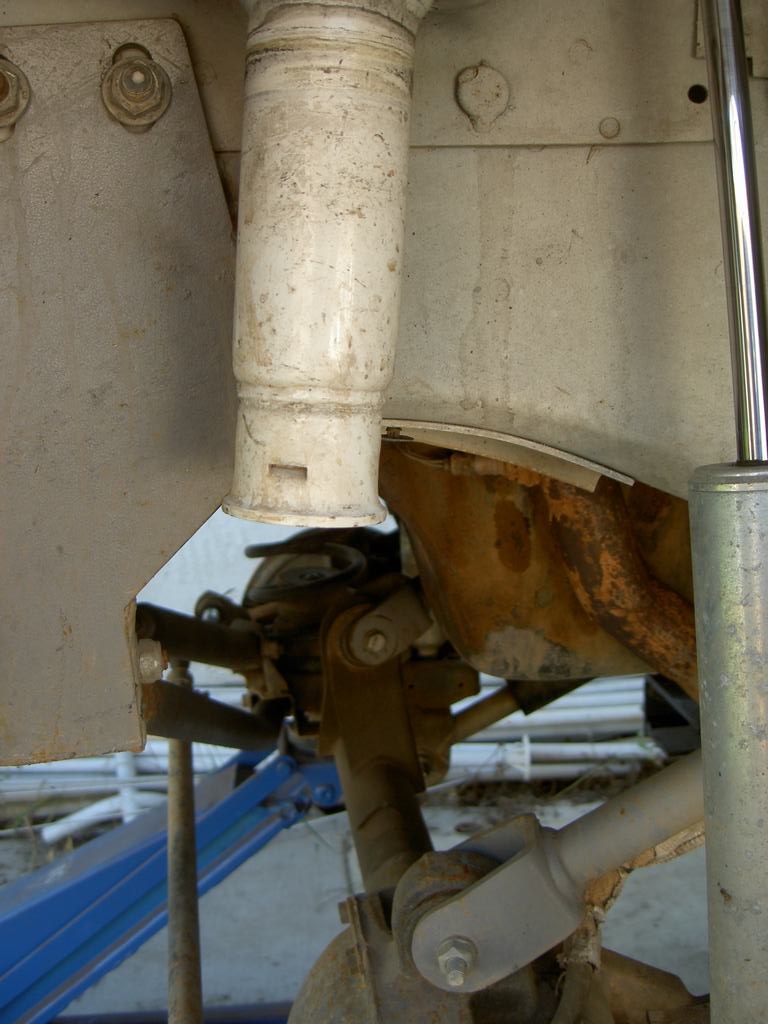
As it sat before replacing parts.

Spring and bump stop removed.
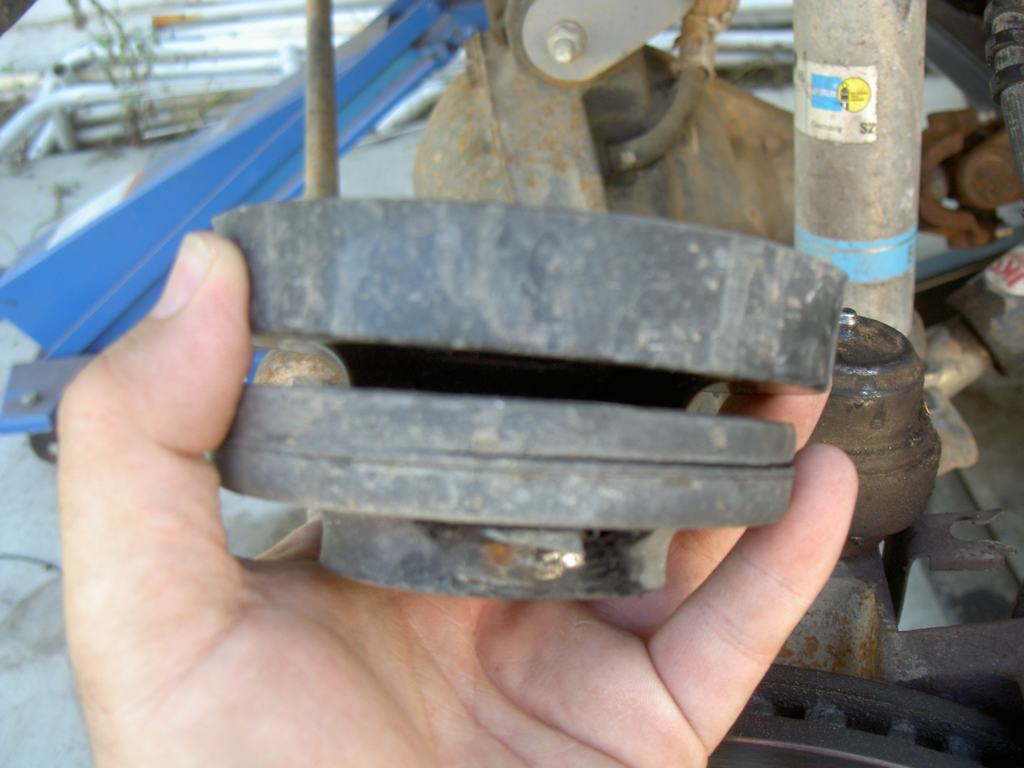
Removed the original isolator and 3/4" spacer.
You have to cut off the stock bump stop retainer and tap the hole left at the bottom. No pics of the tap, was busy at that time...

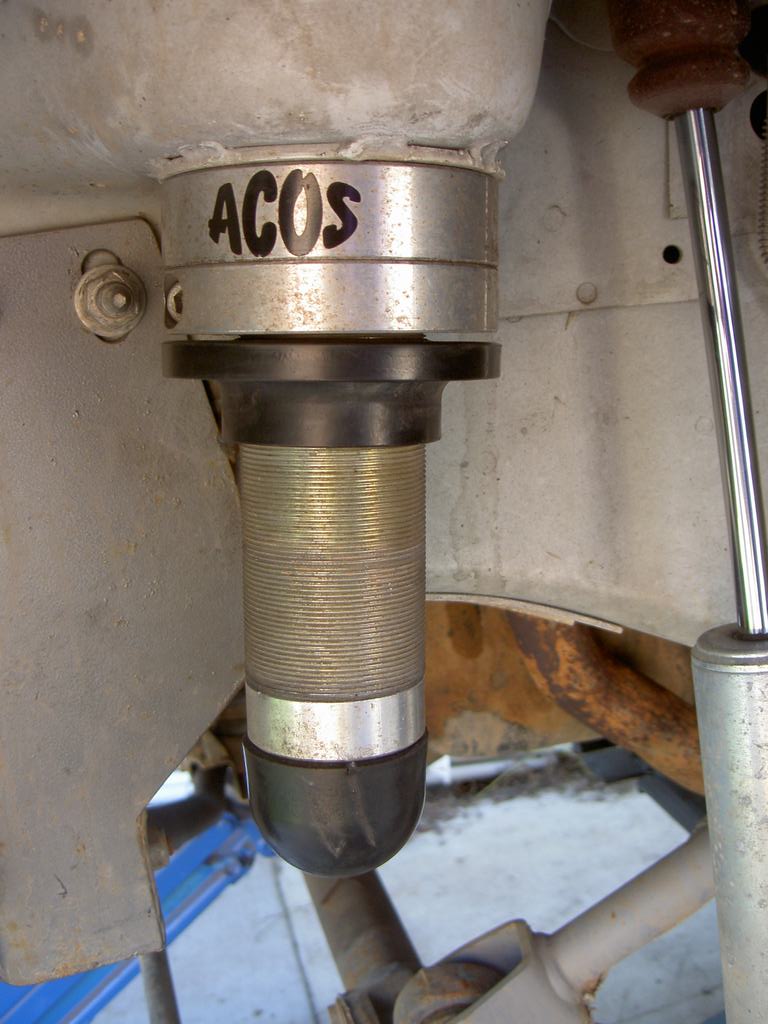
ACOS installed but prior to adjustment. New bump stop screws in from below, into the hole I tapped.
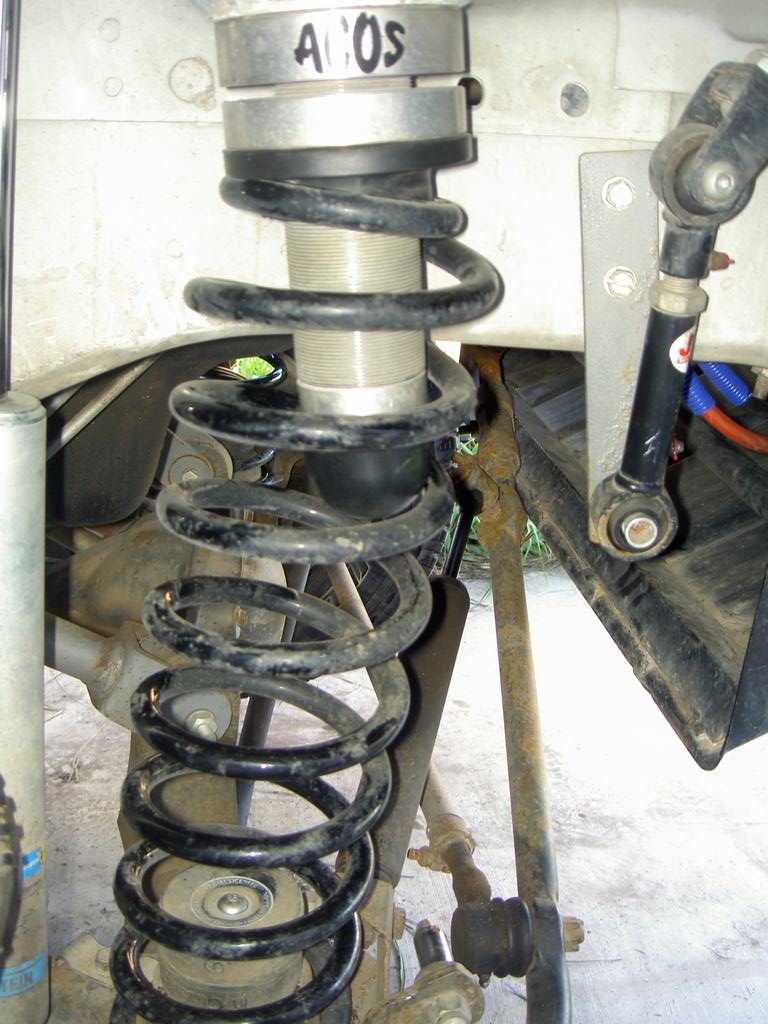
Everything installed and adjusted. Axle is still off the ground, hence the weird curve in the spring. It goes straight at right height.
Well, that's about it for this time. Future projects still pending but need to do that after Thanksgiving. Enjoy.
First up, I removed my fab'ed bumper to install an ARB I got a deal on. Was a good deal but not a great deal but I had always wanted one and had been wanting to put a winch on. Got the winch from BIGDaddy. :victory:
One thing I never liked about ARB bumpers is the lack of real recovery points. I found a REALLY beefy setup made to add to ARB (or any plate bumper) but for the life of me cannot find the info of where I bought them from. (Sorry).
The backside "backup" plate. I had to turn the one bolt outward to clear the winch.
The front tie point. Serious beef!!! Had to notch the fairlead plate to clear them.
Everything mounted up but before the Master Pull syn. line was installed.
Little better pic. Tie points right next and in line with the frame plates.
Well with the additional weight (even with the syn. line) the front end was sitting lower by about 1.5-2". Knowing this was likely to happen, I had about some JKS ACOS to allow me to dial in the front height. Finally got some time to do this install. Overall when well and took me about 3 hours.
As it sat before replacing parts.
Spring and bump stop removed.
Removed the original isolator and 3/4" spacer.
You have to cut off the stock bump stop retainer and tap the hole left at the bottom. No pics of the tap, was busy at that time...
ACOS installed but prior to adjustment. New bump stop screws in from below, into the hole I tapped.
Everything installed and adjusted. Axle is still off the ground, hence the weird curve in the spring. It goes straight at right height.
Well, that's about it for this time. Future projects still pending but need to do that after Thanksgiving. Enjoy.