CaliGold
NAXJA Forum User
- Location
- Granada Hills, CA
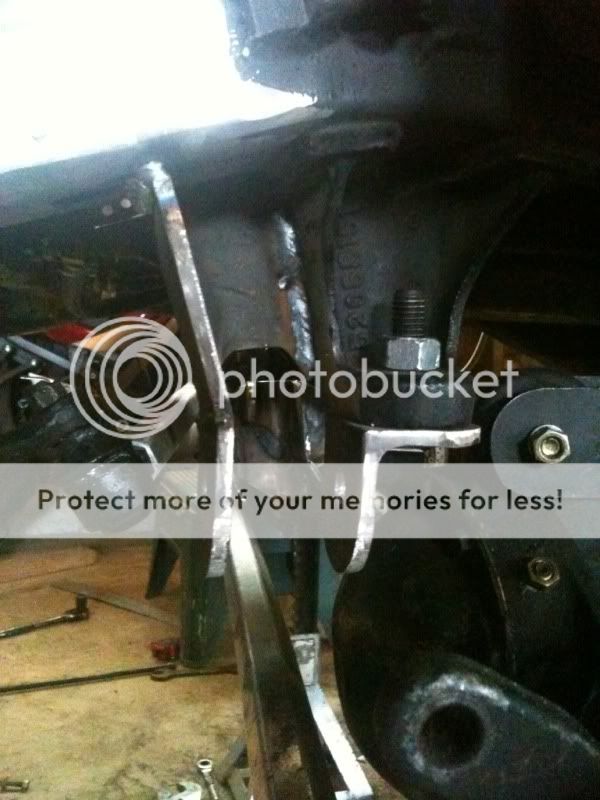
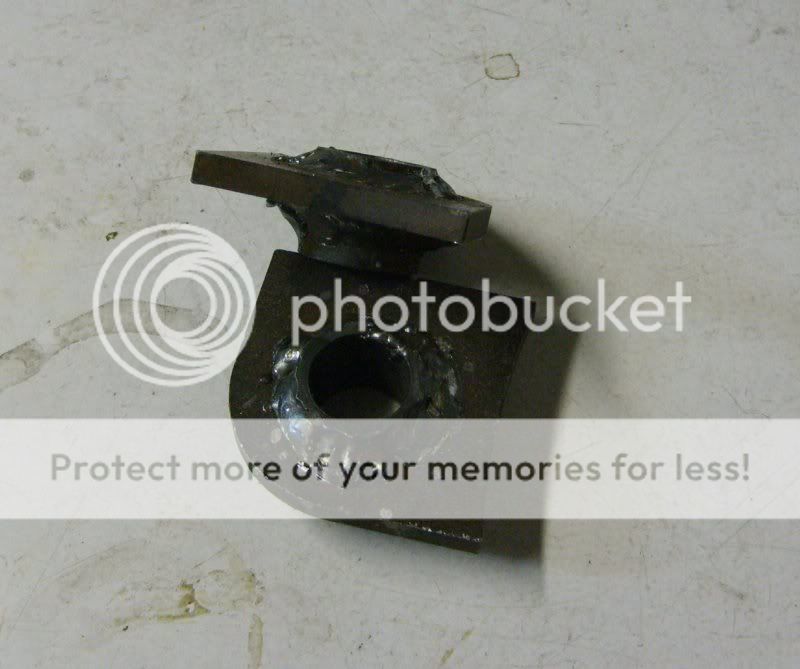
I’ve never been completely happy with the Rubicon Express RE1600 Track Bar because it’s mounted at the frame bracket in single shear. This upgrade has been on my mind for a while, but finally have some time to work on it. Here’s how the RE1600 is normally mounted to the stock bracket:

The RE1600 takes a standard 3/4” heim with 3/4-16 Left Hand thread. Although I could have re-used the RE heim, I had a brand new one lying around although it’s not teflon lined like the RE heim. I decided not to use the misalignment spacers which allowed me to use a 3/4” dia bolt. Mmmm Beefy.
My first step was to do a layout in CAD. The flat parts will be made from 1/4” plate with 2 sleeves for the mounting bolt. The sleeves will be welded to the side plates and allow more surface area for the bolt - none of that wallowed out mounting hole crap here. The sleeves are 1” OD and 3/4” ID.

Here’s a pic in exploded view:

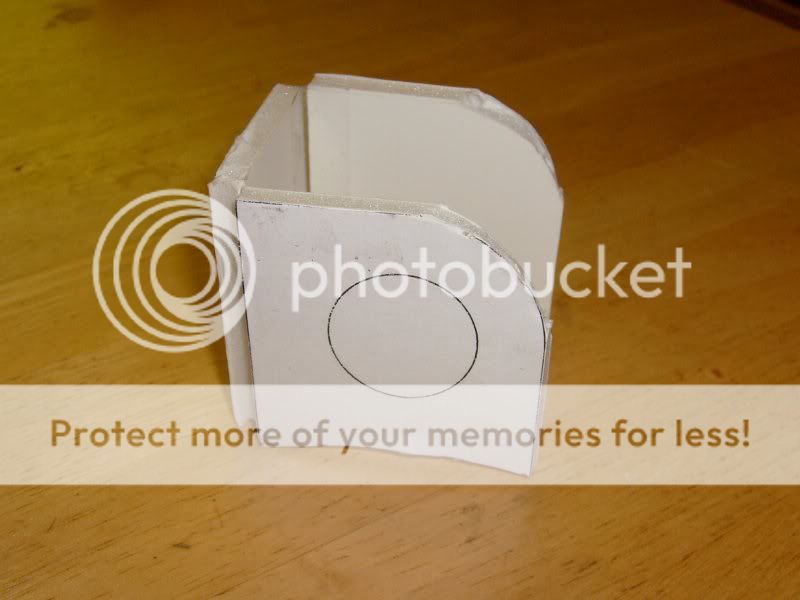
Once I had this designed, I wanted to make a foam core mockup to make sure everything was kosher.
I generated DXF files and made a 1:1 plot which I glued to 1/4” foam core and verified the design.
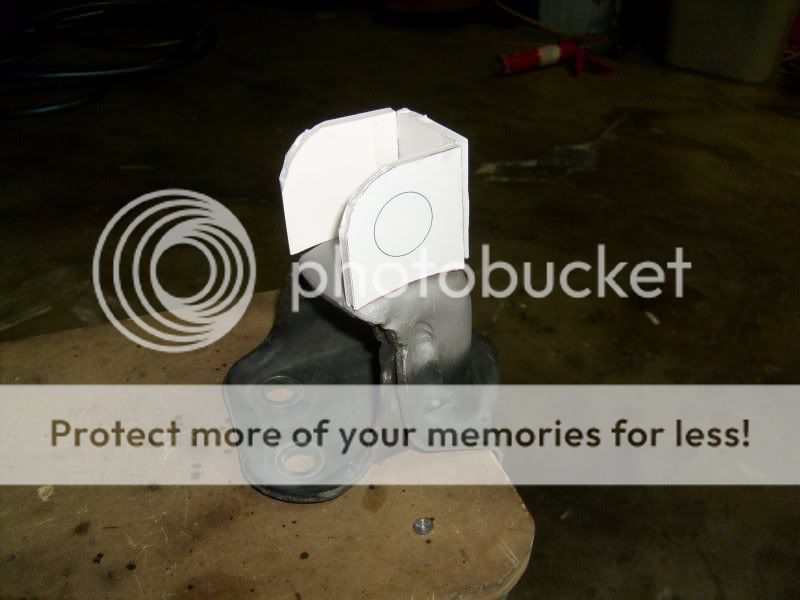
Here’s a pic with the foam core mockup on a stock TB bracket. BTW, I don’t think you can do better than a stock TB bracket as far as rigidity. It’s stamped from 3/16” with a 3D shape and double walled. I’m not sure anything made from sheet steel like the majority of aftermarket brackets can compare, but that’s just my opinion, so don’t flame me.
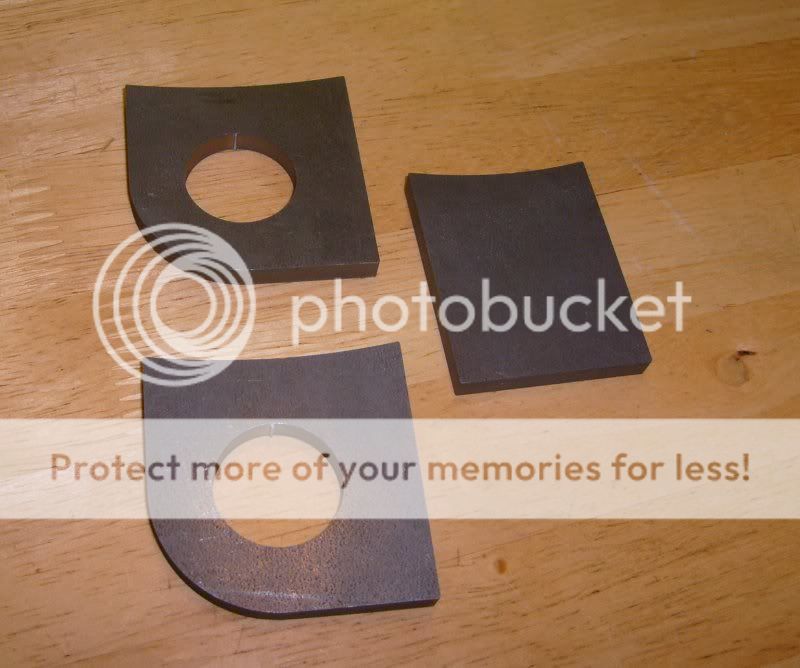
Once I verified fitment, I used the same DXF files to cut the 3 steel plates. I happened to use a wire EDM machine just because I had access to one, but obviously, the accuracy is way overkill. A laser cutter, CNC plasma or water-jet cutting would have made more sense, but what the heck. Here are the metal plates I cut:
I don’t have pics of the sleeves I cut them on a lathe to .875” lengths which were welded to the side plates. Don’t laugh at my welding. I can produce strong welds, but don’t have enough practice to make them pretty. I guess I should keep my day job since welding is obviously not in my skill set.
Here are a pic of it completely welded up.
Next was to apply a coat of paint to deter from my bad welding:

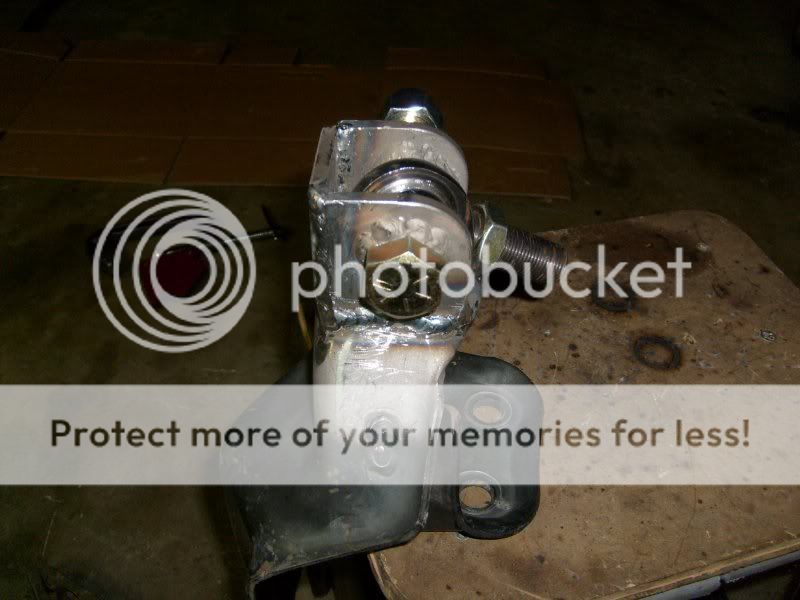
And here it is installed:

Voila!
:clap:
The RE1600 takes a standard 3/4” heim with 3/4-16 Left Hand thread. Although I could have re-used the RE heim, I had a brand new one lying around although it’s not teflon lined like the RE heim. I decided not to use the misalignment spacers which allowed me to use a 3/4” dia bolt. Mmmm Beefy.
My first step was to do a layout in CAD. The flat parts will be made from 1/4” plate with 2 sleeves for the mounting bolt. The sleeves will be welded to the side plates and allow more surface area for the bolt - none of that wallowed out mounting hole crap here. The sleeves are 1” OD and 3/4” ID.
Here’s a pic in exploded view:
Once I had this designed, I wanted to make a foam core mockup to make sure everything was kosher.
I generated DXF files and made a 1:1 plot which I glued to 1/4” foam core and verified the design.
Here’s a pic with the foam core mockup on a stock TB bracket. BTW, I don’t think you can do better than a stock TB bracket as far as rigidity. It’s stamped from 3/16” with a 3D shape and double walled. I’m not sure anything made from sheet steel like the majority of aftermarket brackets can compare, but that’s just my opinion, so don’t flame me.
Once I verified fitment, I used the same DXF files to cut the 3 steel plates. I happened to use a wire EDM machine just because I had access to one, but obviously, the accuracy is way overkill. A laser cutter, CNC plasma or water-jet cutting would have made more sense, but what the heck. Here are the metal plates I cut:
I don’t have pics of the sleeves I cut them on a lathe to .875” lengths which were welded to the side plates. Don’t laugh at my welding. I can produce strong welds, but don’t have enough practice to make them pretty. I guess I should keep my day job since welding is obviously not in my skill set.
Here are a pic of it completely welded up.
Next was to apply a coat of paint to deter from my bad welding:
And here it is installed:
Voila!
:clap:
Last edited: