• Welcome to the new NAXJA Forum! If your password does not work, please use "Forgot your password?" link on the log-in page. Please feel free to reach out to [email protected] if we can provide any assistance.

grab handles

ehall

NAXJA Member
NAXJA Member
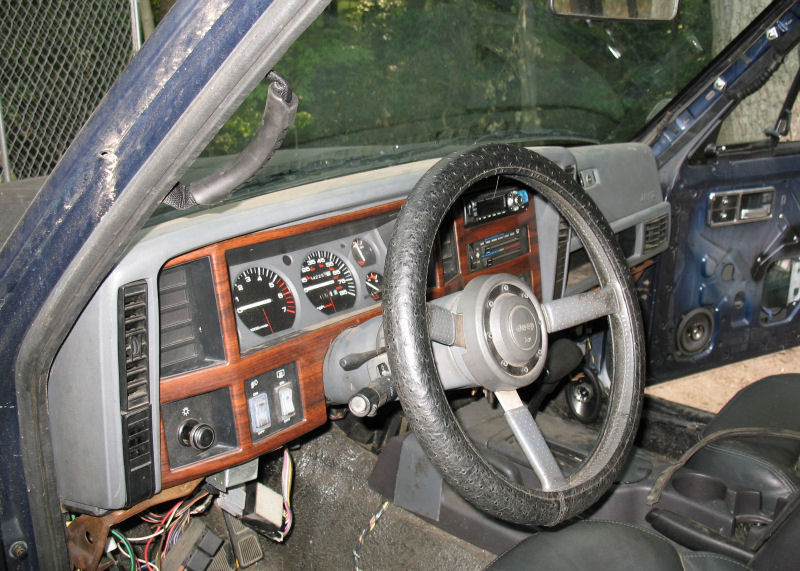
My XJ has oh-shit handles above the passenger doors, but those are useless for getting in and out. While looking around at other stuff, I ran across these kayak handles which are apparently popular with some of the Wrongler owners, and decided they were cheap enough to experiment with for my beater too.

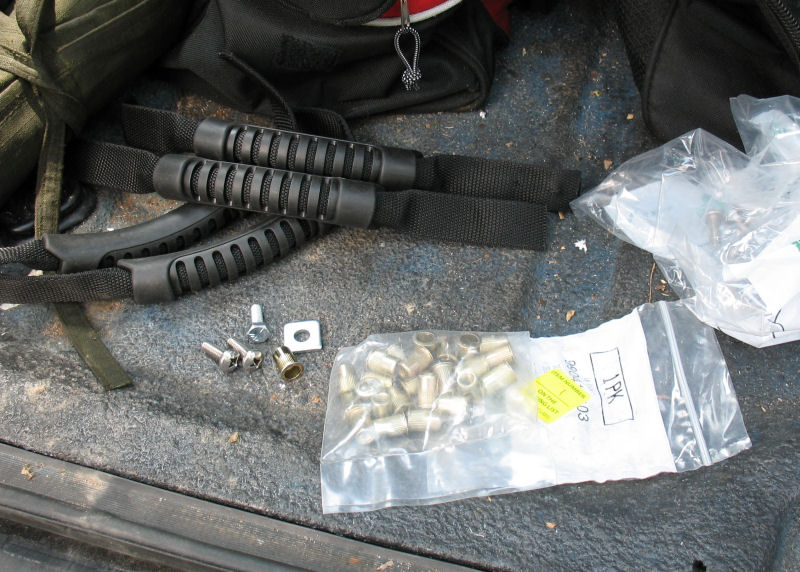
Here are the parts: (4) grab handles, (10) .25" x .75" screws, (10) .75" square washers, (xx) .25" nutserts, and (1) .25" x .5" bolt

Starting_parts.jpg


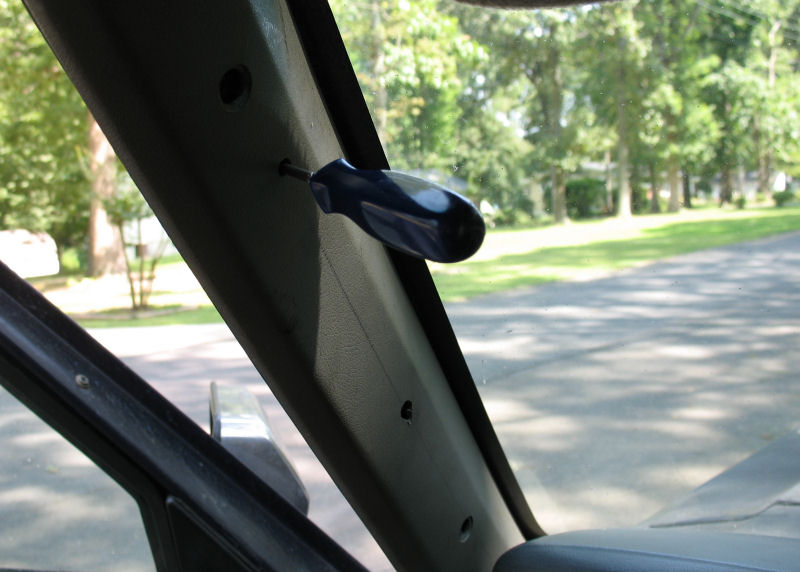
First was to measure, drill and pop in the nutserts. I used the A-pillar trim panel as a guide to find a suitable spot, then drilled into the A-pillar where it looked good. The holes turned out to be exactly 6" apart.

Right_A_Pillar_Nutserts.jpg


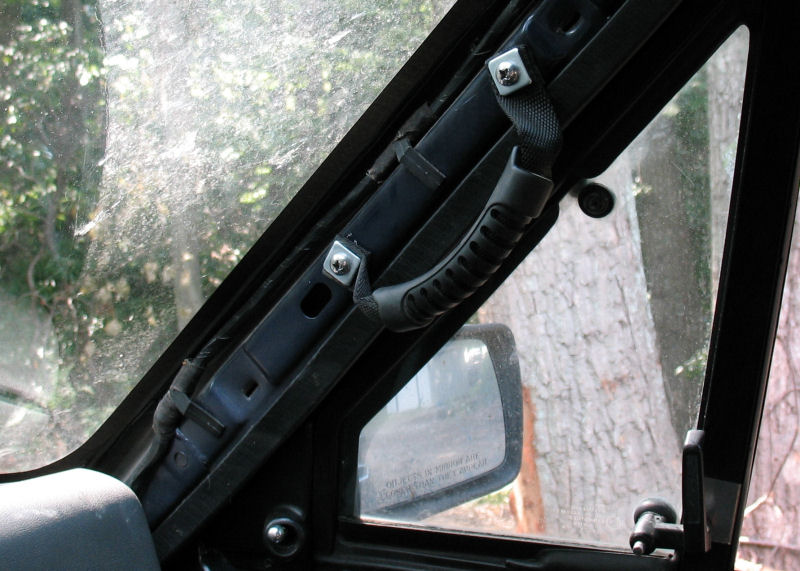
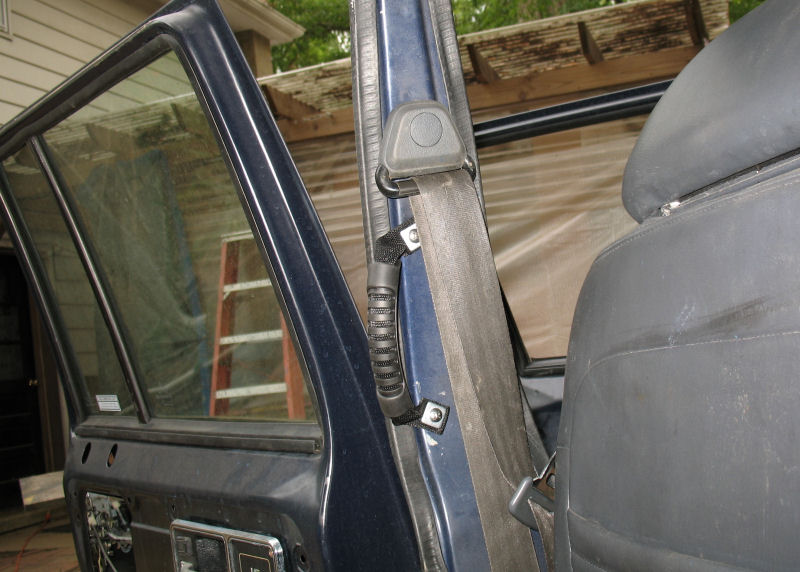
Then I folded and punched the edges of the handle, and used the square washers to pinch the folds against the A-pillar with the screw

Right_A_Pillar_Handle.jpg


Same for the left side

Left_A_Pillar_Handle.jpg


Outside_A_Pillar.jpg


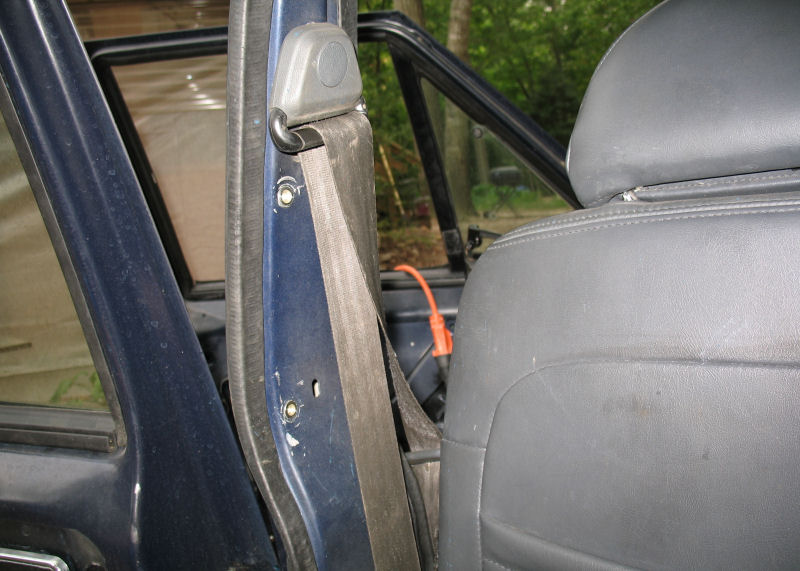
For the back, I followed the same basic steps of using the trim to find a good area, then measuring, drilling, and driving in the nutserts. These were also 6" apart, but I put them .5" from the back of the B-pillar because I did not want them under the seat belt.

Left_B_Pillar_Nutserts.jpg


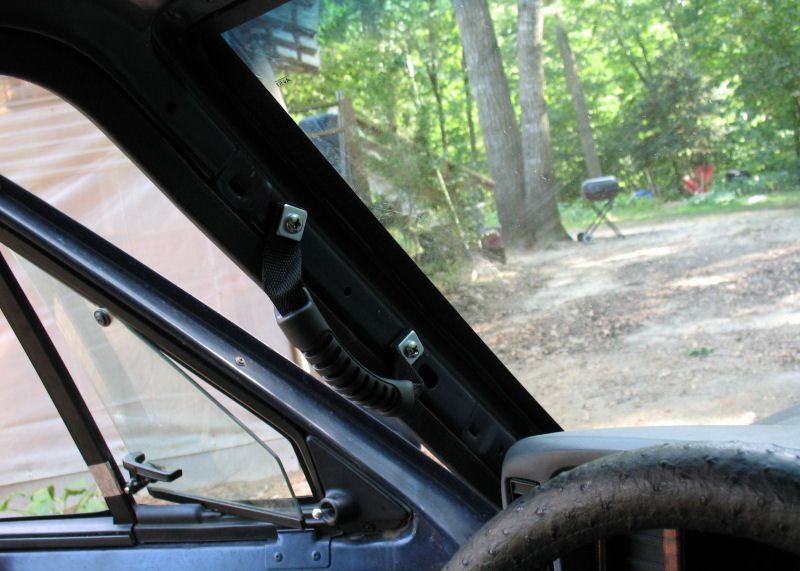
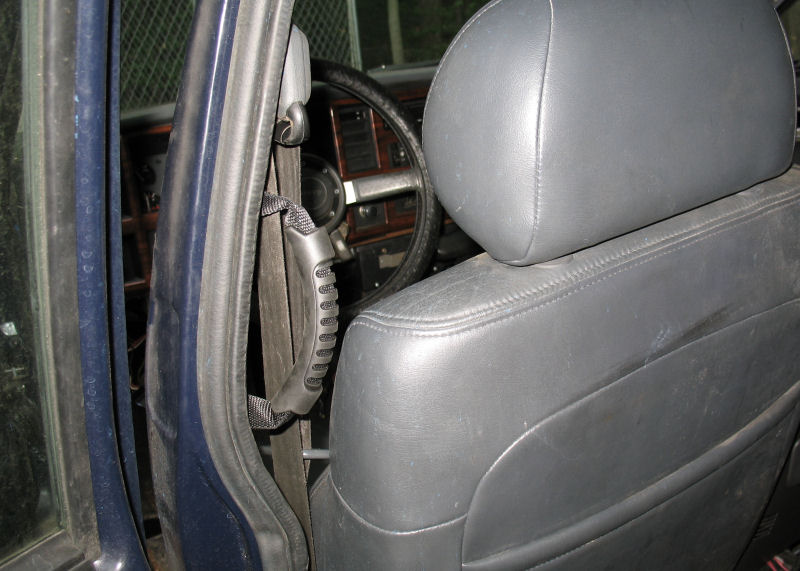
Couple of finish shots

Left_B_Pillar_Handle.jpg


Outside_B_Pillar.jpg


Although it's functional I've got a couple more things to do here. First, for safety purposes I tested my whole weight on the handles without any kind of obvious slipping (and I'm +200 lb) but I am going to tack weld the nutserts to the pillars now that they are all in place. Also the square nuts mean that the cloth is not going to come off however I'm worried that it might fray enough to eventually pull off, so I'm going to heat up the material where I punched it to fuse it and make it hopefully make it stronger. The other thing I have to do is make notches in the trim pieces for the handles to stick through, which is going to require a bunch of measuring.

Overall I'm pleased with it. The only thing I'm not 100% happy about is that the handles are kind of close to the pillars so you can't really stick your whole mitt into them, and can really only slip your fingers through. OTOH that will probably prevent people from trying to swing from them, so it's probably a good thing.
 
Last edited by a moderator:
Those look like aluminum rivnuts. They are meant to be installed with a tool that looks kinda like a rivet tool but has a threaded rod to grip the threads in the insert. You can also take a bolt and a couple of washers, thread the nut and two washers onto the bolt then thread the bolt into the insert until the threads are fully engaged then hold the head of the bolt and run the nut down against the washers until the insert collapses behind the panel and grips firmly in place. Be careful not to overtighten it or you can strip the threads. This method works with aluminum or steel inserts.
 
The nutserts and square washers were ordered from McMaster-Carr

95105A143 -- nutserts
99041A103 -- square washers

I bought the stainless steel phillips screws from the local True Value but I think it would be better to get Torx screws -- 96710A737 on McMaster

BTW I had an error in the first post, the screws and bolt were 3/4" long not 1/2" long
 
this is sweet. I have been thinking about doing this kind of thing for a while. I had hoped to come across some ford/chevy/dodge grab handle bars at the jy some day but I think I like these more. Great job. My ex developed a way to get herself into the car using the upper handle but that was her, tiny chick. The real problem is getting into the rear (4door) when its more that 5" lifted. I kindof enjoyed watching ppl struggle.
 
I did two things today, first was tack the nutserts into place, and the other was to install grommets where I had punched the handles

Grommets.jpg


In retrospect, I think welding it is unnecessary, and can make some problems. Just for starters I got spatter on the inside of my windshield while tacking the A-pillar nutserts. Also the bumps have to be cleaned and dressed or else they will cause problems for the handles.

As for the grommets, I'm sure they are better than having just the cloth alone, and it should reduce fraying. I think that's the smart play. You can buy kits at most hardware stores that will include a punch and the other stuff you need. I bought a 3/8th inch set from McMaster Carr along with some other items I was buying, which is a good size for the 1/4 inch screw.
 
I did the trim cutout today. First thing was to mark the holes. The slots where the trim panel screws down mean that it is impossible to measure straight distance between the holes (there is no hole, only a slot), however it is possible to measure the difference between the sets of axis. By marking straight lines between the slots and then the nutserts, I determined that the holes in the trim panel would have to be 1/4" higher than the screw holes in the panel. Next I used a small 90* angle and a paint marker to mark the location of the nutserts on the weatherstripping, then used those marks and the 1/4" offset to mark feeler holes in the panel.

Next step was to drill small 1/8" holes in the trim panel at the marker, and then use a small awl to find the nutsert through the feeler hole. From there I was able to drill incrementally larger holes, until I ended up with a 1/2" hole directly over the nutsert.

Left_A_Pillar_Trim_Drilled.jpg


After that it was all pretty straightforward. The handle folds down about 1/2" from the center of the hole, so I marked lines where appropriate, and then used a cutting bit to pull a small line in the trim. Then I used a large square file to make a rectangular opening that was wide enough for the handle to fit through. The lines reflect where the handle wants to sit naturally when weight is put on it. The bottom slot is parallel with the A-pillar itself, while the top slot is parallel with the ground.

Right_A_Pillar_Trim.jpg


It's much tighter fit behind the trim panel than I expected. I had thought the screws would be behind the panel, but since I have bumps on the nutserts from the weld, I did not even have enough room to keep the square washers. Instead I added a round grade 8 washer to the back to keep the material off the welds, and the stainless steel screw holds the front down. I'm pretty confident with this setup considering the grommets although I'd rather have the square washers.

One other thing, I believe it would actually be easier to mark and drill the initial holes with the trim panel installed. Then you wouldn't have to do all the reverse measurements.
 
i dig it! nice work man
 
Very cool, but what was wrong with the factory handles?

I have had a couple mounting screws strip out, but went back with a bigger one (1/4" maybe?) and they seem to be holding up fine now.

Robert
 
They're useless for getting in

Yeah, I saw that in your first post. :D

So it's a matter of location, then?

Just askin'... My girlfriend (who's almost as wide as she is tall) manages to hoist herself into my rig (5" and 35s) using the factory handle. So it seems to work for us.

I do like yours, though.

Robert
 
So it's a matter of location, then?
That and comfort. I noticed my dad's F150 had handles on the A-pillar and that they were 10x more useful than the overhead handles for getting in and out, although the overheads were more useful for bouncy rides. Either way the driver's side of teh XJ does not have an overhead handle and I wanted to add at least one there. Finally putting my own handles on the A-pillar meant getting to choose the handles I wanted. I thought about the factory hard boys but then saw these and thought they would work better, and they do.
 
Not to drag up an old thread, but how do they seem to have lasted? I'm considering doing something similar and was wondering how they worked out long term.
 
Back
Top